Baby shower gifts

I went to a baby shower this weekend for a dear friend and tried to give her something cute and something practical, but also cute.

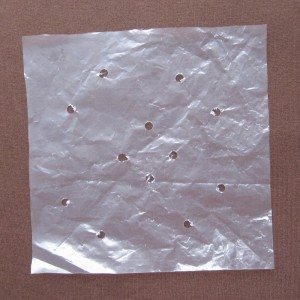
The first was a crinkle square. I don’t actually have a photo. I ruined the one that I made for the occasion, and had to draw on a backup. I do have an innovation to share, though: crinkle squares shouldn’t be a suffocation hazard to begin with, considering their small size and the fabric layer preventing a seal from forming, but for an additional point of reassurance you can hole-punch the plastic.

hole punched plastic for a crinkle square

I tried something new for the rest of the gift: burp cloths made by backing cloth diapers with flannel. The diapers are quite absorbent and the flannel clings to your clothes, preventing the burp cloth from slithering down off your shoulder mid-spit-up. This was not my idea originally but apparently I did not bookmark the site I found it on (which was also not the origin of the idea, so I don’t feel too guilty). I got a package of 10 diapers by Gerber and washed them all twice (the first time their edges were quite crumply and I thought that might indicate they were mid-shrink – sure enough a second wash smoothed them out a bit). They seemed rather thin so I doubled them up.

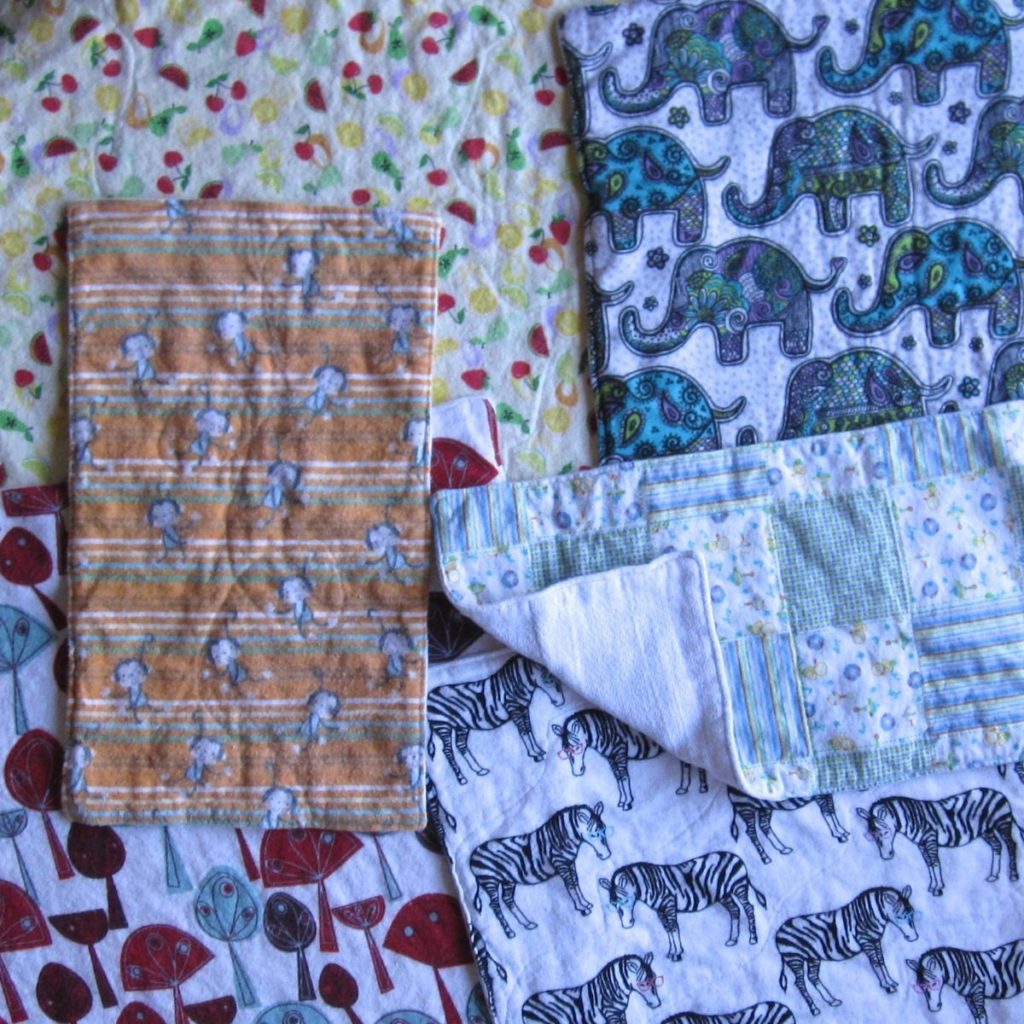
The first three burp cloths were large: fabric cut 16″x18″, sewn face down to a pair of diapers at 3/8″ (i.e., presser foot at the edge of the fabric but needle ticked over to the left) with an opening for turning, then diapers trimmed around the edge and the whole thing turned right-side-out. After a good press I topstitched around the edge and did a little quilting to keep the diapers from sagging on the flannel. For the mushroomy one and the elephants I outlined parts of the design, and for the fruit I made some jagged lines. I had a lot of trouble with catching strands of the diaper cloth and shoving them down into the bobbin housing instead of piercing them, even with a brand new fine needle. Fortunately nothing was ruined.

cloth diaper and flannel burp cloths

After I made those three I put one on my shoulder and found it was rather large for its use (though the parents to be are both taller than I am and might not find them quite as overlarge), so with the remaining four diapers I made smaller cloths. Two of them had shrunk enough in the wash that they didn’t have a 16″x18″ flat region anyway, so theirs would have had to be reduced. I ended up making two with fabric that was 9.5″x16″ (out of the two diapers that hadn’t shrunk as much) and one with 15″x15″ fabric (out of the smaller pair). Their quilting was simple: for the checkerboard one, a sort of zigzag the long way, outlining the boxes, for the zebras wavy diagonal lines, and for the monkeys a single continuous stitch line from top to bottom that looped around the monkeys nearest its path.

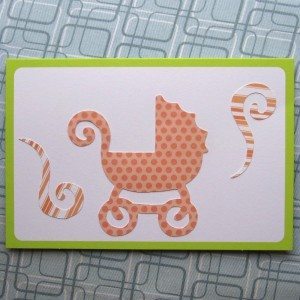
I tried one other new thing as well: making my own card. I have a Cricut die-cutting machine that mostly sits on a shelf, and it was time to start really using it. The card took an unreasonable length of time given its simplicity (three die cuts on a purchased blank card with a colored border), but most of it was set-up. I’m pretty happy with how it came out.
baby shower card

First Friday

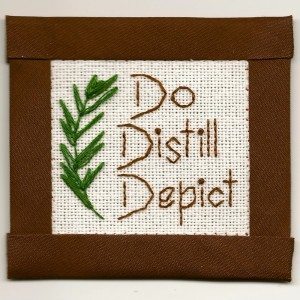
Do Distill Depict stitching

This month we start my ambitious First Friday efforts with art journaling. “Art journal” is a difficult idea to pin down (read: search for), and can mean a lot of things:

  • A record of art projects (dates, materials, patterns, etc)
  • A book in which to try out artistic techniques and materials
  • A book-scale version of a vision board, or an active meditation
  • A diary in which words are augmented by or replaced with images

All but the first are typically included in blogs and advice sites about art journaling. The last idea is the one I want to focus on, though with “diary” meaning any remembrance or meditation on your life – so the third version is intertwined with it. The important bits are that it is personal, drawn from and expressing your thoughts and experiences, and visual, in addition to or in place of being verbal. This allows you to engage with your feelings in a different way, or express the parts of your life that just don’t want to be put into words. It will almost certainly also be distilled or abstracted; instead of a story of all the details of the day, experiences will be presented figuratively, or individual pieces drawn out and given special prominence.

I feel safe saying that most people who art journal do so with drawing, painting, or collage. The fiber arts seem likely to be adopted only by people who feel a special connection to them. One such person is Susan of Plays with Needles, the inspiration for this month’s topic. I was fortunate to happen across her blog about the time of her first post about her Scotland travel journal. It is a work in progress, and I get excited whenever a Gaelic title shows up in my feed reader, knowing she’s sharing another part of her trip or her book. She’s given me permission to share photos.

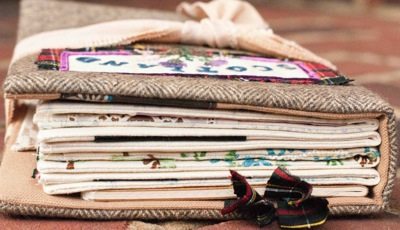
scotland book top

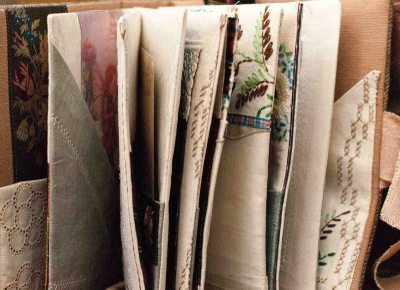
scotland book open

The book itself has Scotland-themed fabric pages with pockets, places for needles, scissors, and floss, and a paper notebook tucked in the back. She made it in advance of her trip, to collect ideas and materials specifically for needlework, and is now turning it into a memento of the trip.

The photos come from a post preceding her trip where she describes her intent, and one since her return in which she also talks about how she made it – click through for many more views. Susan is also posting about “fiber tourism,” we might call it, including an antique needlework exhibit and Harris Tweed. You can see them all here.

Although it is nothing like a book, Melanie Testa’s project to journal via embroidering her clothing and bags is closely related; a shirt in that article has embroidery related to a trip she took, and on her personal journal she follows up with many posts about small bags she’s embroidering with skylines she sees, a profile of her cat, and other personal images.

I’m a slow embroiderer, but I love it, and now that I’ve discovered the joys of non-cross-stitch embroidery on evenweave I could see undertaking a project like Susan’s or Melanie’s. Or something smaller scale, like Jennifer Hunold’s daily journal embroidery on a single piece of fabric.

Thinking about fiber journaling reminded me of a daily quilting project I read about over a year ago. After a lot of frustrated searching (where is that website?!?), I determined it was “Quilting Day by Day,” an article by Nancy Halpern in the May 1997 issue of Threads magazine. I no longer have the magazine and the article is not available online (the part of me that never wants to get rid of anything began cackling triumphantly at this point), but I know she made a square every single day for a year, even if it was nothing more than a piece of appropriate fabric. I remember in particular a pieced airplane, tilted slightly upward, that she made several times for days taken up in travel, in different orientations to represent the direction. At the end she sewed the squares into a large irregularly-shaped sheet. It inspired me to think about doing such a thing for myself – but what a commitment! I didn’t even start. You can find other people inspired by Nancy, though, such as Laura West Kong (all posts about that quilt are here), Karen of Hat on Top, Coat Below, and Carla Louise of Oh Sew Addicted.

Fiber art journals are a difficult topic to search for, and the only other book-formed journal I found besides Susan’s is monthly paired mini-crazy quilts and embroidered journal panels from Million Little Stitches. In that vein, Doughty Designs made nine months of monthly journal mini-quilts, all separate. The embroiderers are in on the monthly journal projects as well, with a Flickr group begun by The Floss Box.

Of course many art journalers incorporate fiber into their paintings and collages, but I would be interested in seeing more work entirely in fiber art. The larger time commitment means some immediacy is lost, but also can make for a more thorough meditation on the topic. Have you journaled with fiber?


The stitching at the top is mine, presented to you courtesy my scanner (!) in this gloomy weather we’ve been having. “There’s rosemary, that’s for remembrance; pray, love, remember…” But if it looks like pine, well, that’s fine; pine symbolizes creativity.

Stitching vistas

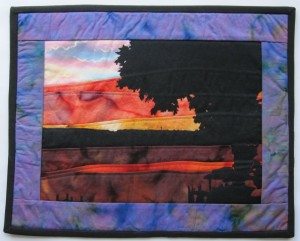
Through the Sew-Op, I had the chance to take a two-part course from one of my fellow teachers, Sally Munro, on landscape quilting. We used the method in the book Accidental Landscapes, by Karen Eckmeier. I chose a photo of sunset as seen from my grandparent’s backyard when I was growing up (appearing in speckly scan form below). See what you think of the interpretation:

Williams Bay sunset finished landscape quilt

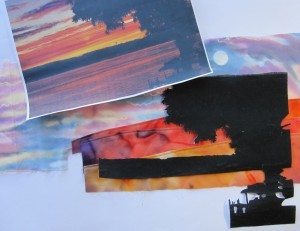
I took a few progress photos to give you a sense of how it went together.

landscape materials

The sky and water were made from pieced fabric, through a technique called texturing where you cut a slightly wavy edge, press it down a quarter inch, and topstitch it to the layer above. After trimming the lower layer to a quarter inch below the stitching, you can add the next one. Cutting a wavy edge rather than a straight one gives a more organic feeling to the piece. The perfect colors miraculously came out of Sally’s fabric stash.

The tree was black fabric on Steam-A-Seam cut out by hand with a previous copy of the photo on top of the fabric. It is on top of the sky but extends below the top edge of the water, for extra security.

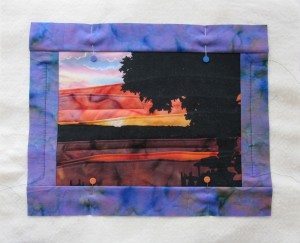
landscape unbound

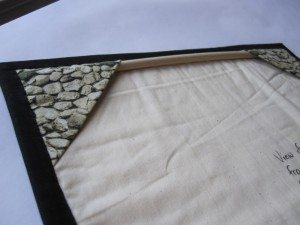
The binding is one continuous strip, joined into a loop after being sewn on three sides and a couple of inches into the fourth on each side. It is turned to the back and hand-sewn down. I used corner pockets for a hanging rod; the binding is what’s called a French twist and is supposed to create its own rod casing, but the fabric I used was too narrow to accommodate anything but the tiniest of dowels, with virtually no overhang at the ends.

landscape quilt back

Unfortunately I basted by machine, which was not Sally’s intent, and couldn’t get the needle marks out. It’s a good thing I had basted with the direction of the design! I will know better next time. It was a wonderful learning experience, though, and I am more than happy with the way it came out.