It’s been a while since my last blog post, and that mostly had to do with my sewing room (which is also my photography studio) being tied up. I’ve liberated it and am here to show you what was keeping it occupied: stuff.
The Sew-op is having a fundraiser/awareness-raiser sale the Friday before Thanksgiving, and we’re all pitching in to make items to put in it. Most of the fabric for my contributions came from the Sew-op, supplemented with my own stash when I couldn’t find enough that went together or were of the right kind.
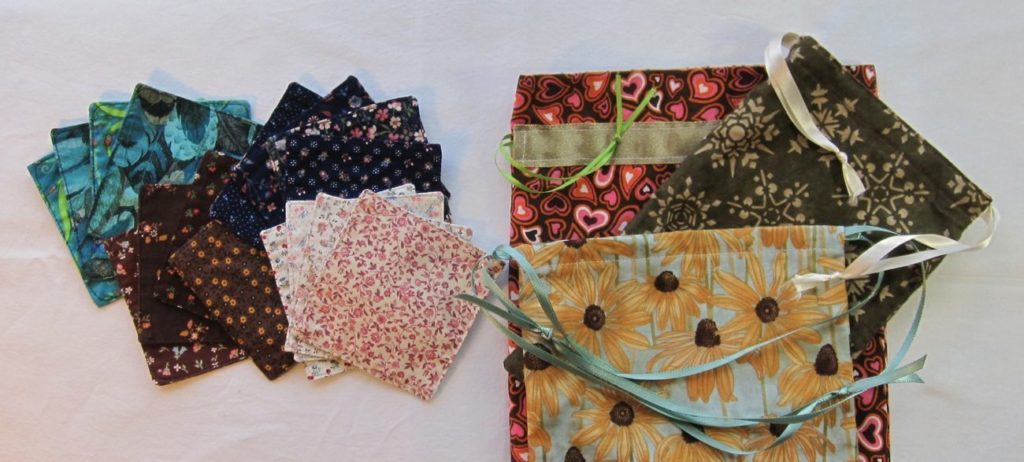
The old standby, fabric coasters, was the first thing I tackled in earnest. I’ve also got a selection of drawstring bags, some reversible, some lined, some with zig-zagged seam allowances inside.

The new item was what I call “baby crinkle squares.” They are quite easy: cut a 7″x7″ square from each of two differently-textured fabrics, and cut a 7″x7″ piece of a plastic cereal bag. I usually have a flannel and a quilting cotton. Cut 12 lengths of different ribbons, twill tapes, hem tapes, rickracks, and laces, each in the neighborhood of 5″ long and in a variety of colors and widths. Avoid anything that has bits that could come off, and if the square is for a gift or sale, anything that looks like it has bits that could come off, regardless of how well attached they are in reality. I’d also avoid elastic trims.
Iron your fabrics well because this is the last chance you’ll have to do so. Pin the plastic to the wrong side of one fabric; I usually use the lighter-weight one for this. Bend each trim into a U shape, adjust lengths as desired (remembering you will lose 1/2″ off the open end of the U), put ends adjacent or overlapping, and pin 3 Us to each edge of the remaining piece of fabric. Put the trim on the right side of the fabric with the bend of the U toward the center and the cut edges of the trim lined up with the edge of the fabric. Try to space them fairly evenly but leave at least an inch between the outside trims and the corner of the fabric. Stitch all the way around each piece of fabric at 3/8″ to secure plastic and trims. If you have narrow or net trims you may want to backstitch across them at this step, for security.
At this point it’s just like the coasters, with some easier bits and some harder. Choose the edge to leave open for turning based on your trims: solid, flat trims are best for the open edge. Place your two fabric squares right sides together and match and pin corners. Pin the sides next. Stitch at 1/2″ most of the way around, leaving the center of one side open but covering all the corners, and backstitch at both ends of your stitching. Trim the corner seam allowances and turn right side out. Through a combination of tugging the ribbon loops and pushing the corners out from the inside (a chopstick is great for this), get your edges as pushed out as possible. With the open edge turned under 1/2″, pin closed, and topstitch all the way around. I typically start and end by going all the way across the open edge, but don’t backstitch, and I cut the corners with a shallow curve. I also usually tug the ribbons out as I approach and stitch over them on the three closed sides.
The part where these are more difficult than coasters is the bulk of the ribbons making it more difficult to line the fabric pieces up. Sometimes the plastic makes problems under the presser foot, as well. The easier part is when you are topstitching; since it is more substantial and you have ribbon loops you can tug for guidance, turning the corners is much easier.
To my delight, these can be machine washed (cold or warm) and tumble dried, and they stay nice and crinkly. I don’t think my dryer is particularly hot, though, so if yours is, you may want to dry them on a low heat setting. Don’t iron the plastic part, but if the ribbons get crumply in the wash you can iron them as much as you ever could.