^ Learn Crochet index page – Previous: Before You Begin + Next: Anatomy Lessons
In this page: yarn terms, slip knot, chain stitch, slip stitch, square knot, twist bracelet pattern, garland pattern, chained chain pattern, chain counting, crochet abbreviations, four leaf clover pattern, flower pattern, teddy bear pattern.
The chain stitch is the fundamental stitch of crochet. I have literally never seen a crochet pattern that did not use chain stitch. Unfortunately, “chain” is used to describe both the individual stitch and a series of such stitches; hopefully the intended meaning will always be clear. I will also use “link” to mean an individual chain.
Vocabulary: The working end of the yarn is the one attached to the skein; the other is the cut or loose end. Front always means closer to you, and back further away. To yarn over is to wrap the yarn over the top of the hook from back to front. Lefty and righty yarn overs are shown on the For Dummies site. [More about yarn over versus the opposite grab of the yarn, yarn under, at PlanetJune and Tapestry Crochet. Both are probably best saved for coming back to later!]
We start with a slip knot (pictured below): hold the cut end in your left hand, and loop the working end on top of it, as if drawing a cursive e. Pinch the crossover point with your left hand and reach down through the loop. Pull up a new loop and tighten the original one by pulling the cut end. You now have a slip knot with a loop sticking out, and the size of the loop is controlled by the working end of the yarn. Slide the loop onto your hook and tighten it until it skims the outside of the hook. It should not be visibly loose, but it should not be so tight the yarn is stretching. A similar method for making a slip knot is shown in the midst of a Knit Simple Magazine page on all the early skills; Annie’s Attic shows how to make a slip knot with a hook (rather than making it and then putting it on the hook). A different description and set of photos from me may be seen here.
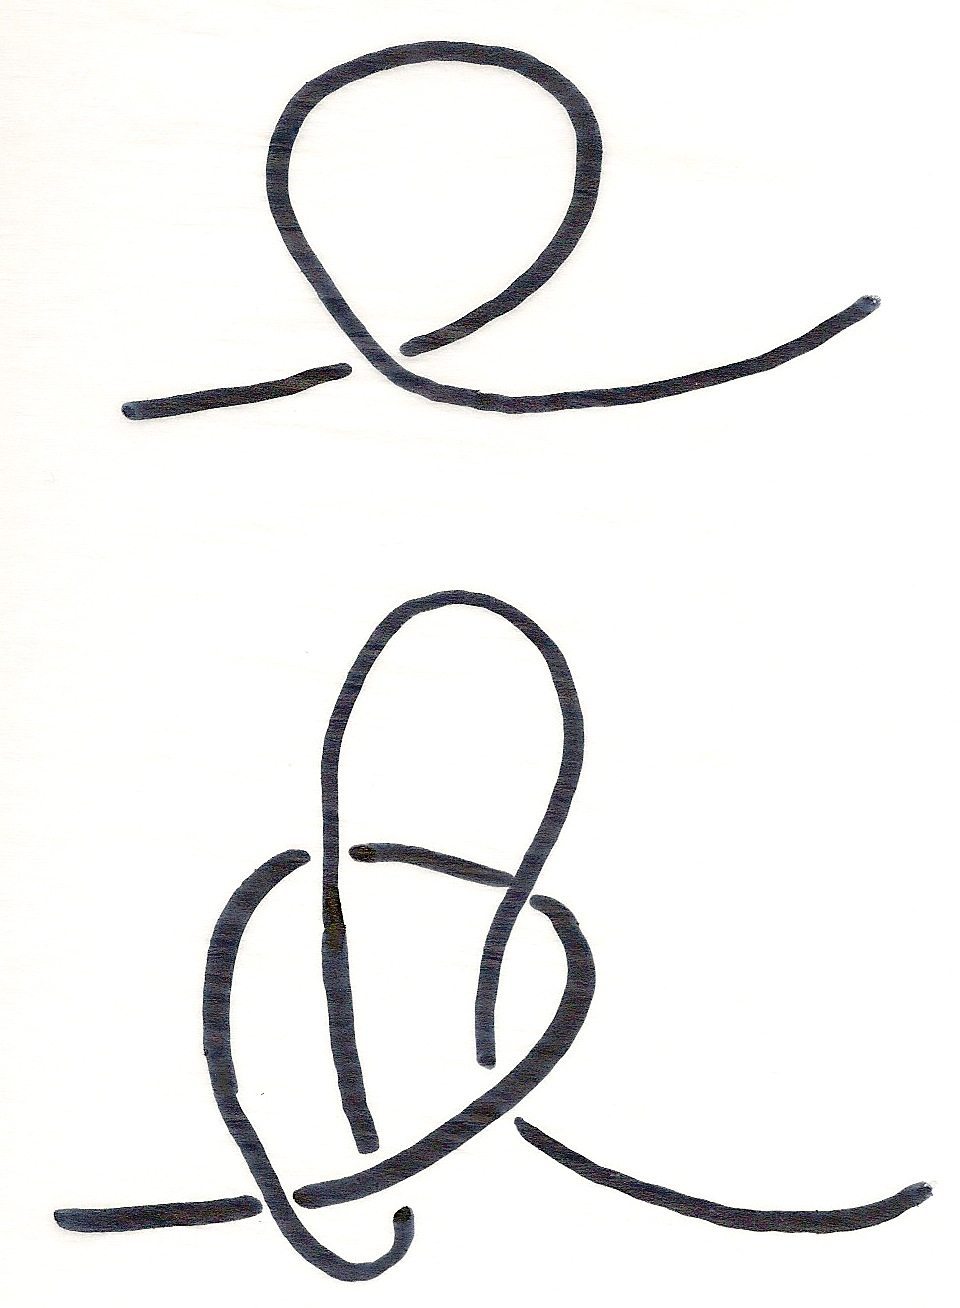
To make a chain, yarn over and pull that yarn through the loop on the hook. You will have a new loop on the hook and the previous one is now a chain. Additional pictures to the diagram below are at the bottom of the Knit Simple Magazine page from above; For Dummies has chain stitch with all lefty pictures.
The second-best way to learn stitches is to watch them being made (or best, among the ways to do it solo). Tamara Kelly has a right-hander video and Art of Crochet by Teresa has a lefty video. The former also discusses tightness of yarn on hook and holding the hook; the latter includes slow motion.
The hook should be used as a guide for how snug to pull the yarn. You want the yarn to be fitted to the hook, but not tight – it should wrap the hook like a fitted sweater on a person, outlining the person’s contours but with enough give to wear a shirt underneath. Ideally every chain you make with a given yarn and hook will be the same size, but that is likely not to be the case at first.
You may find you are snagging the chain your hook was inserted into when you go to pull the yarn through. That can be alleviated by turning your hook downward as you pull so its mouth is not aimed at a strand of yarn.
Stay loose! Once the chain is off the hook try not to tighten it down. If your chain looks like a V instead of a teardrop, it is too tight.
The simplest item that is certainly worthy of the title “pattern” is a chain bracelet. Make a chain long enough to go around your wrist easily, add a couple of links, and join the ends with a slip stitch. The slip stitch is just like a chain except you start by inserting your hook into a loop. Then you yarn over and pull that loop through both strands on the hook. In this case the loop you insert your hook into is the very first chain you made. Here are pictures: right handed from Lion Brand Yarn, and left handed from For Dummies. For now those are really the best thing to look at for slip stitch; when you use it in later contexts you may want to look at pictures and video from Annie’s Attic as well as videos from The Art of Crochet by Teresa and Tamara Kelly. There is no Art of Crochet lefty version, but the slip stitch can be seen in a video about attaching new yarn.
When you have finished any project, leave several inches of yarn, cut it, and pull the tail of the yarn through the last stitch made. For now, to finish a plain chain, tighten the last chain down into a knot and trim the end, leaving a short tail. To finish a chain you’ve slip stitched into a loop, tie the two yarn ends in a square knot, pull tight, and trim the ends, leaving a short tail on each.
You likely know the square knot, but here are brief instructions: cross right over left and loop through; pull tight. Cross left over right and loop through; pull tight.
In the next section we will discuss the various ways you can insert your hook into a chain, and their pluses and minuses. For now, the main distinction is between stitching into the chain (inserting your hook between the strands) and around the chain (inserting your hook between the chain and some stitches it floats above, or into a ring made of chains). In the latter case the chain itself acts as your loop; make sure when you are slip stitching around a chain ring that, after yarning over, you pull the loop up to the outside edge of the ring before pulling it through the loop on your hook. When you are asked to do this midway through a project it is called stitching in the chain space, but that is not a common term for stitching around a ring of chains.
Here are some projects you can do with what you know so far.
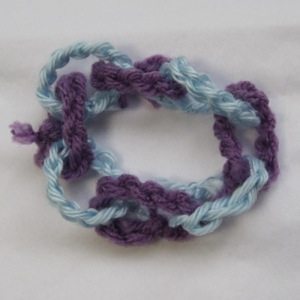
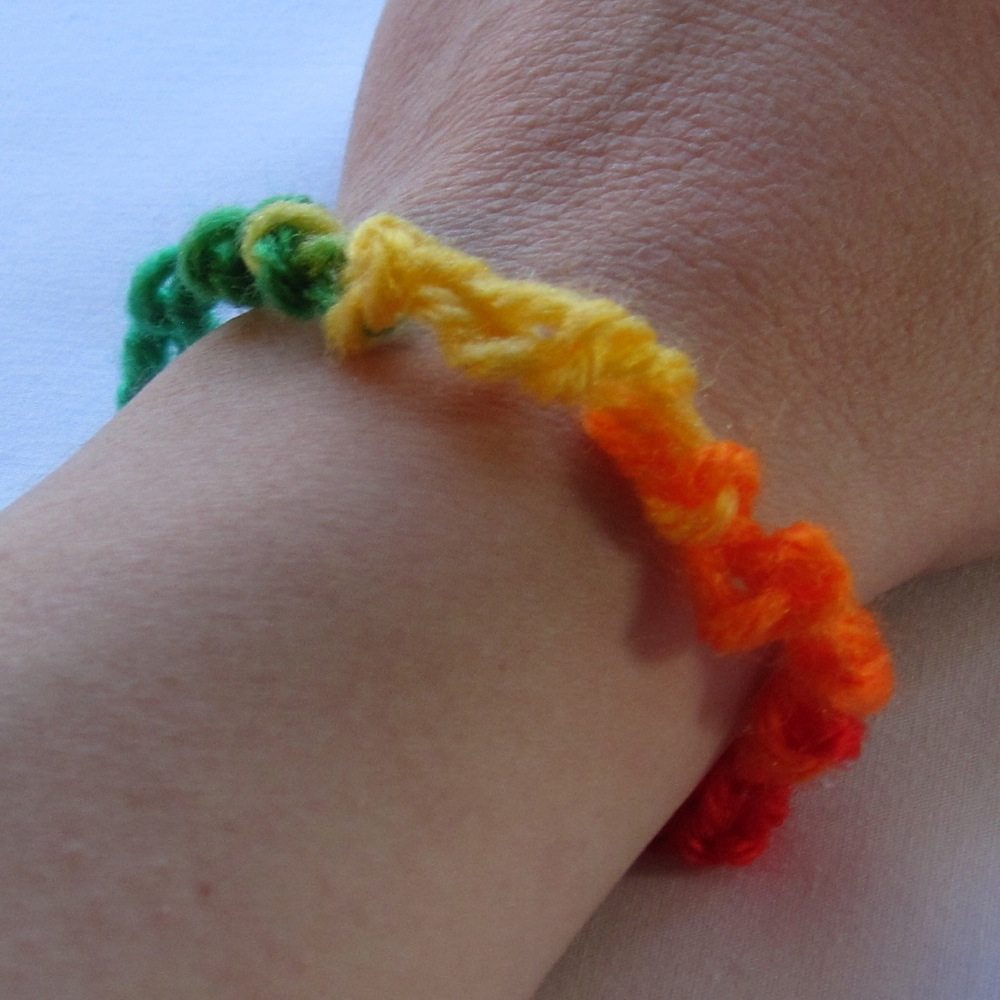 Twist bracelet (at left): Make a chain long enough to wrap around your wrist, then add three more chains. Twist the bracelet like the end of a candy wrapper until it is quite coiled up, and then slip stitch into the first chain. Tug it into a loop and wear.
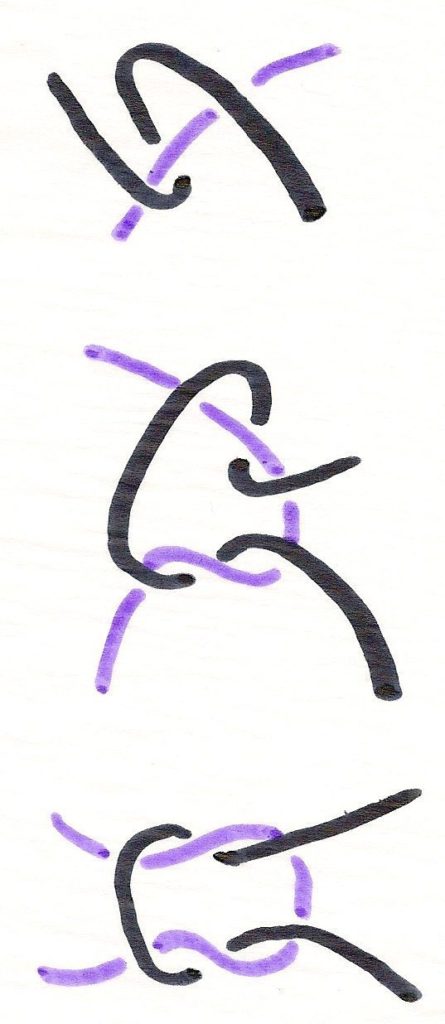
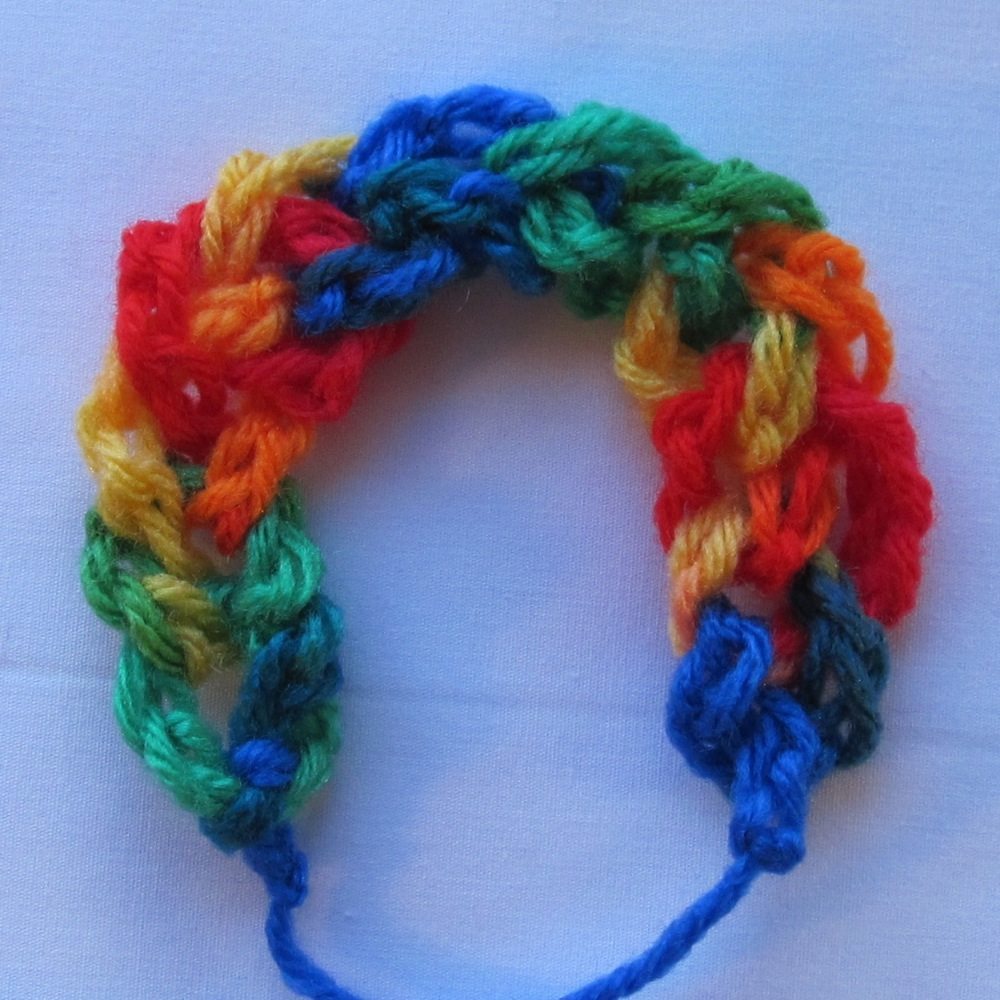
Garland (below left): Make a chain of 10 links and join to the first chain with a slip stitch to make a ring. Make another chain of ten links, but before joining with a slip stitch, pass the tail of the yarn through the first ring so the new ring is joined to it. Continue, joining each new ring to the previous one, until the garland is as long as you like. To close it into a loop, pass the last chain through the first and last rings both before joining.
Variation: alternate between loops of different sizes, such as 8-chain and 16-chain loops; use different yarn for different rings.
Chained Chain (above right): This makes a good “hippie headband” or cuff bracelet (in the latter case, you want to use a sturdy yarn such as cotton and a smaller hook, such as F/5 (3.75mm)). Start by making a chain four times as long as the final item: long enough to wrap around your head four times, plus a little, or four times around your wrist, plus about an inch. Tighten down the last chain.
Next you’ll use the chain as though it is yarn itself, and chain it a second time. This time it will be by hand, which is called finger crocheting or even sometimes finger knitting. Make a slip knot near the end. Reach through the loop and pull up a loop of the chain; by tugging on it, tighten the first loop a little. Repeat this process, pulling a new loop through the previous and using it to tighten the previous loop, until you are about to the end of the chain. Then pull the end of the chain all the way through and tighten the last loop down. Tie the ends together and wear.
Mrs. Micawber has a post about creating a long chain and turning it into a scarf in various ways. One more chain-only scarf is at Delia Creates.
For a more interesting bracelet or lanyard, the magic chain draws from embroidery to alternate colors.
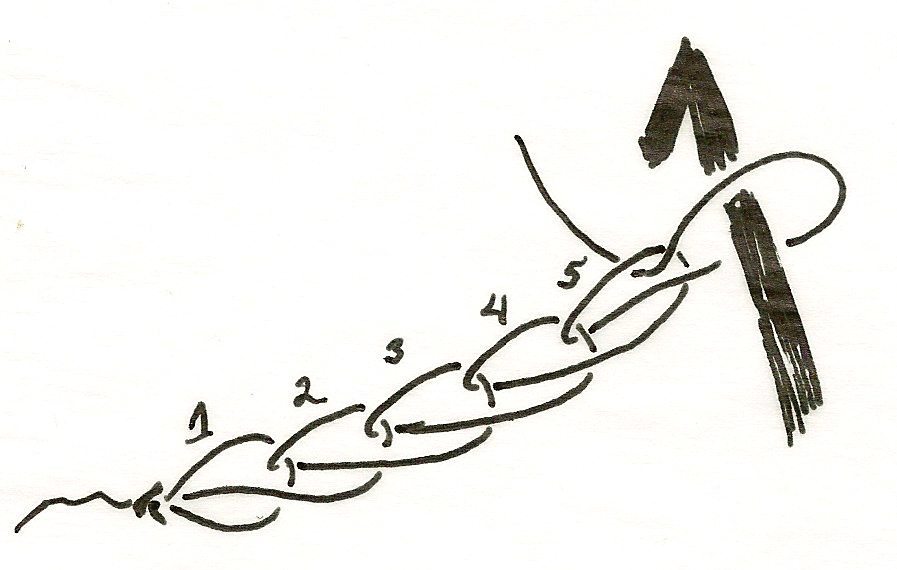
To continue, stitch counting becomes a vital skill. The important thing is that neither the loop on the hook nor the slip knot are counted (in bulkier and/or more slippery yarn the slip knot can be large enough to be mistaken for a chain if you’re not looking closely). In the picture below, five chains have been made. They are numbered in order of creation, but typically identified in a pattern by distance from the hook. The chain marked 5 is the first chain from the hook, 4 is the second chain from the hook, and so forth.
You can probably guess that more complicated projects such as sweaters do not have their instructions written out longhand. There are a collection of standard abbreviations and conventions that greatly reduce the amount of paper necessary to print a pattern. The abbreviations for what we know so far are as follows:
chain ch
hook hk
finish off FO
knot kn
loop lp
slip sl (seen in sl kn and sl st)
space sp (seen in ch sp; may be ch-X sp when the number X of chs is useful information)
stitch st
yarn over YO
There are further pattern conventions to abbreviate things and give guidance. Stitch sequences which will be repeated are enclosed in asterisks, as in *…* or **…**; we’ll see more later.
One side note about the slip stitch: unlike the stitches we’ll learn later, the slip stitch does not enclose the strand(s) of the previous stitch into which it has been made. This has at least two noticeable consequences: one is that the stitch wants to roll to the front, to sit directly on top of the opening the hook was inserted into. The other is that if you try to make two slip stitches in the same spot, the first one will turn itself into a chain.
Here are a few more patterns to practice with. The first is given both longhand and shorthand, to ease you into reading the abbreviations.
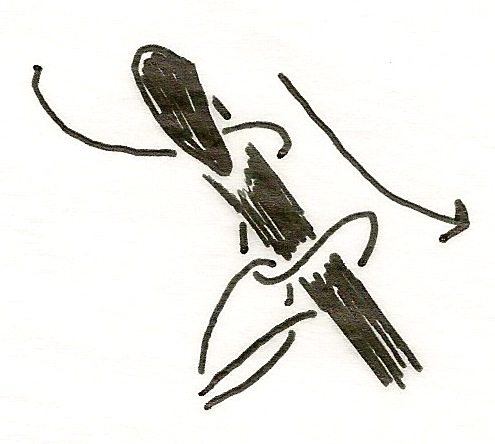
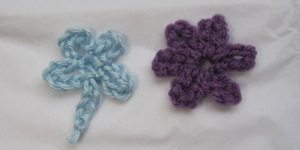
Four-leaf clover long form (below left):
Chain 7 and slip stitch in the 7th chain from the hook (the first chain you made).
Chain 6 and slip stitch in the 7th chain from the hook (the one you slip stitched into previously).
Repeat the line above two more times, so that you have a total of four loops.
Chain 5 and finish off (cut the yarn, pull it through, and tighten down the final chain).
Short form:
Ch 7, sl st in 7th ch from hk (1st ch made).
*Ch 6, sl st in 7th ch from hk (same st as initial sl st).* Repeat *…* twice more for a total of four loops.
Ch 5, FO.
Flower (below middle): Start as for four-leaf clover, but perform *…* a total of 5 times, making 6 loops, and FO without chaining more.
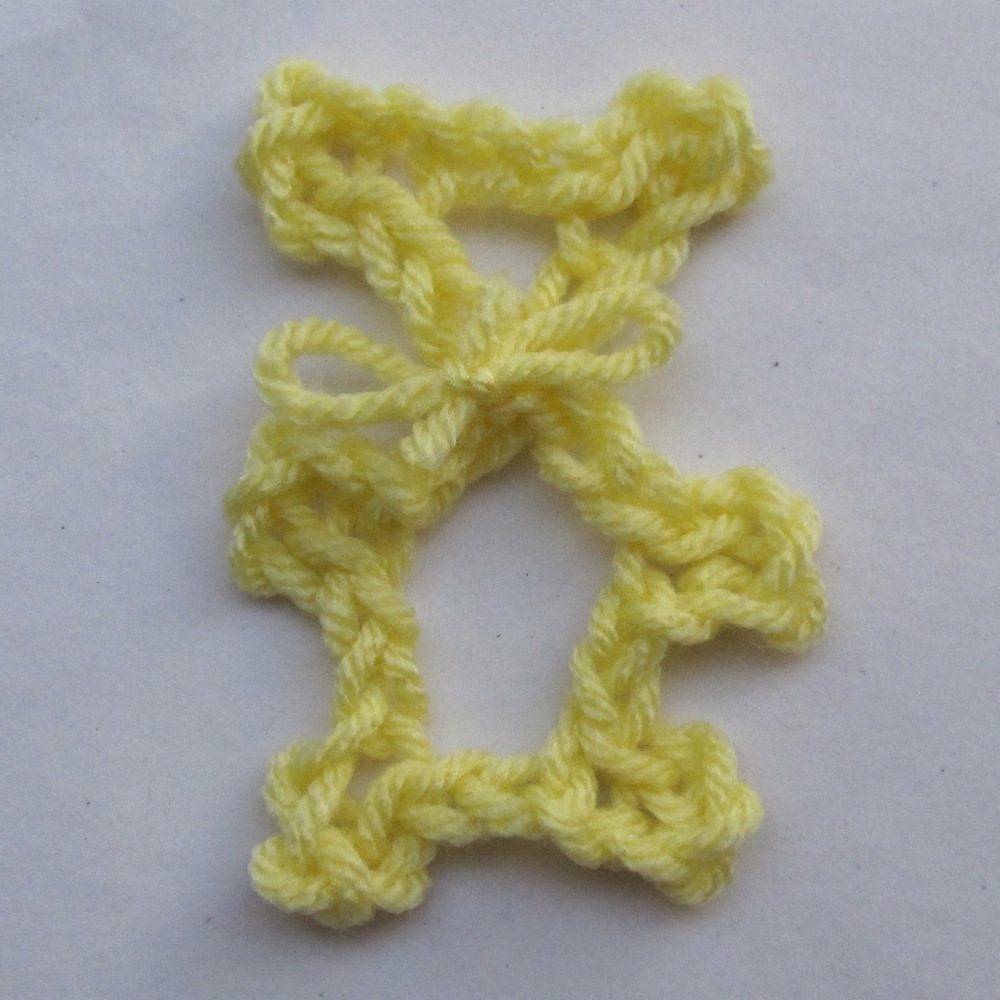
Teddy bear (above right):
*Ch 6, sl st in 4th ch from hk (3rd ch made of the 6)*.
Repeat *…*.
**Ch 2, sl st in ch next to sl kn (very first ch made)**.
Do *…* four times and then repeat **…**.
FO. This pattern starts and ends at the bear’s neck, so after tying off the yarn ends you can wrap one around the neck and tie a bow.
At this point, if you like, you can skip all the way to the end and try your hand at slip stitch crochet, though you should look at chain anatomy first.
^ Learn Crochet index page – Previous: Before You Begin + Next: Anatomy Lessons