Blackwork map: halfway!

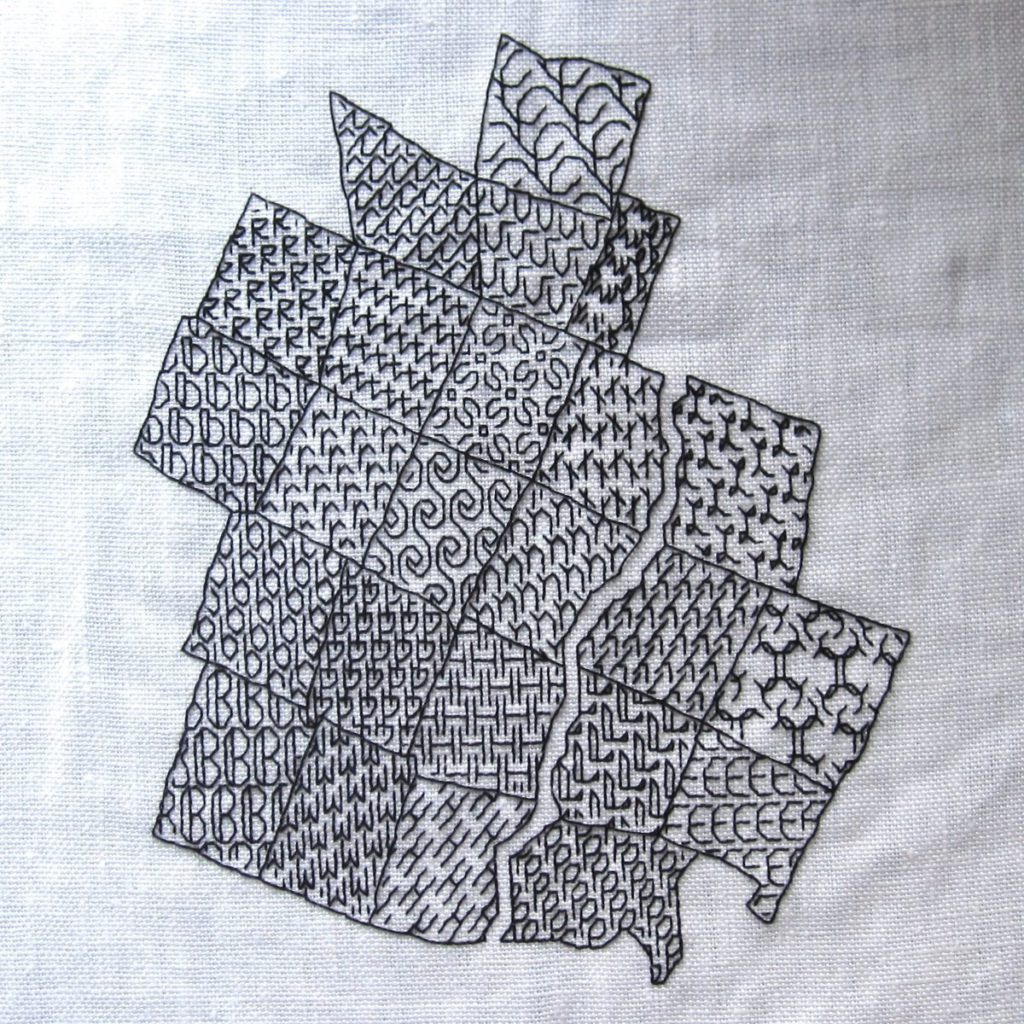
Actually, more than halfway, even by the numbers but definitely by area. I ran out of thread shortly before finishing town #24 (West Fairlee, the skinny tall one near the top) and left it so I could make an update now without unnecessarily starting and stopping a thread, but after it there are only 22 towns left. Three of them are like-size to West Fairlee, and three of the towns in the easternmost “column” are also small (that won’t help me finish faster, though, since I’m rationing my stitching).

blackwork map, halfway stitched

This time I sewed a little casing into the bottom of the fabric before washing it. I used warm water and dish soap instead of laundry soap to be sure to cut through any oils from my fingers. When I hung it to dry (via large binder clips around the top of a metal deck chair) I slid a dowel into the casing for weight and even stretch. I think that helped get more of the embroidery hoop marks out, compared to the previous update. The dowel came in handy later as well – rain was threatening, so after the fabric was mostly dry I brought it in and hung it between two chairs inside via the protruding ends of the dowel.

Onward and upward! Well, some upward, but more rightward and then downward. You’ll see this again at the 3/4 mark, in a month or so.

(V-)necking.

After I tracked down the shirt to remodel for July’s Craft Challenge, which was hiding in the “remodel or eliminate” bag in the closet (clever), I had to decide what to do with it. It was just about the right size (if boxy, and with that unpleasantly small neck opening) so I couldn’t do anything that required extra fabric (I had thought at first that I could perhaps turn it into a swimsuit coverup, but it didn’t have enough coverage). I trolled through Pinterest boards and other compendia linked from Sewing Tidbits and came across a tutorial on turning a crew neck t-shirt into a V-neck.

That sounded like a good place to start. Actually, changing the color sounded like a better place to start – I figured if I ever planned to dye it, it would be better to do so at the beginning. I don’t have a before-before picture, but you can imagine the standard t-shirt heather gray.

shirt, dyed but unaltered new v-neck on shirt

To obtain material for the new collar, I shortened the shirt, which helped with fit as well. The plan was to change the collar and then reassess fit before re-hemming the bottom, and as I expected the v-neck helped the fit substantially – so much so that all I did afterward was re-hem. I took 4.25″ off the bottom, in addition to the 1.5″ or so that came off when I removed the hem to make the collar.

For the collar attachment I used a narrow, short zigzag, but I topstitched with a straight stitch. For the hem I dug out my trusty double needle. The end product looks a little boxy on the hanger, but loose and comfortable on me.

new hem on shirt shirt, finished

Remake your T-shirts

t-shirt My blogging partner has chosen the theme for July’s craft challenge on our local fibercraft blog: Tee Shirt Rehab. As you’ll recall, last time it was a motif; this time it’s a material. I still have a t-shirt or three that need something done with them, despite making one into an apron recently.

The post on UVFC has several links for each of four possible approaches: altering, decorating, making into a new garment, or making into a non-garment. You’ll see my project (or projects?) here as the month goes on but please feel welcome to play along – even if you’re not local.