The edges I am thinking of here are in particular the binding for the quilted potholders I make.
I’m in the process of making an embroidery sampler for the class I’m hoping to teach in the fall, so I’ll work from the blanket stitch panel of that. There are four stitches I’ve used for potholder binding: blanket stitch, closed blanket stitch, up and down blanket stitch, and Cretan stitch. That last is usually classed with the feather stitches but it also has the feel of a blanket stitch family member.
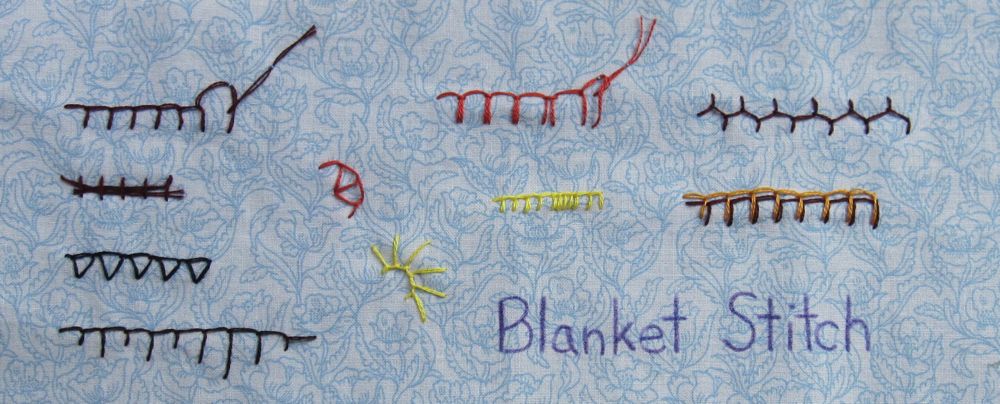
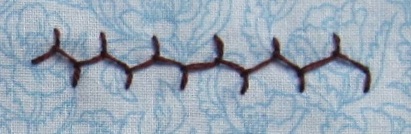
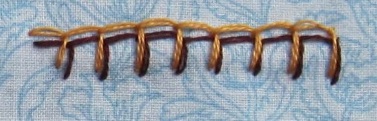
In the upper left corner we have a front and back view of standard blanket stitch. The right end of the stitching is intended to help clarify the making of the stitch: come up through the fabric on the line you would like thread to run along (the edge if you are edging a blanket or stitching down binding). This is the northwest corner of a square. Stitch down through the fabric at the southeast corner, and before you tighten the thread, come up at the northeast corner and under the thread. When you tighten the stitch you should get two sides of a square. You’re now at the northwest corner of a new square.
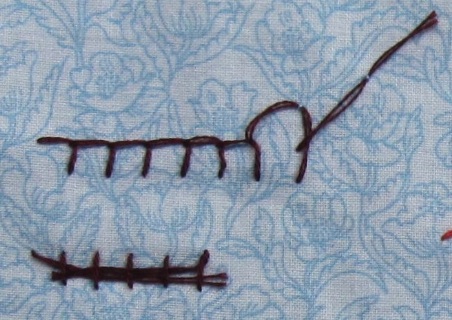
I’m not a very good judge of lefty/righty business, since I make my stitches upside-down pretty regularly and, though nominally left-handed, stitch preferentially with my right hand, though my left will come into play if the space is too awkward for my right. However, it is easiest to stitch toward your stitching hand with this (it allows you to pull toward the next stitch and give resistance to the caught thread right at the corner), so if you are left-handed, either turn this over and stitch with the straight line on the bottom, or stitch up northeast, down southwest, and up northwest.
I’ve used this on a number of potholders, but none I’ve blogged about. You can imagine it, I’m sure.
To start a new thread, at the last corner of a square make a tiny stitch over the caught thread (this is also how I finish the whole thing) and knot or otherwise finish your initial thread. Take the new thread up where the final upward stitch of the previous thread had been (i.e., catching the thread a second time) and continue.
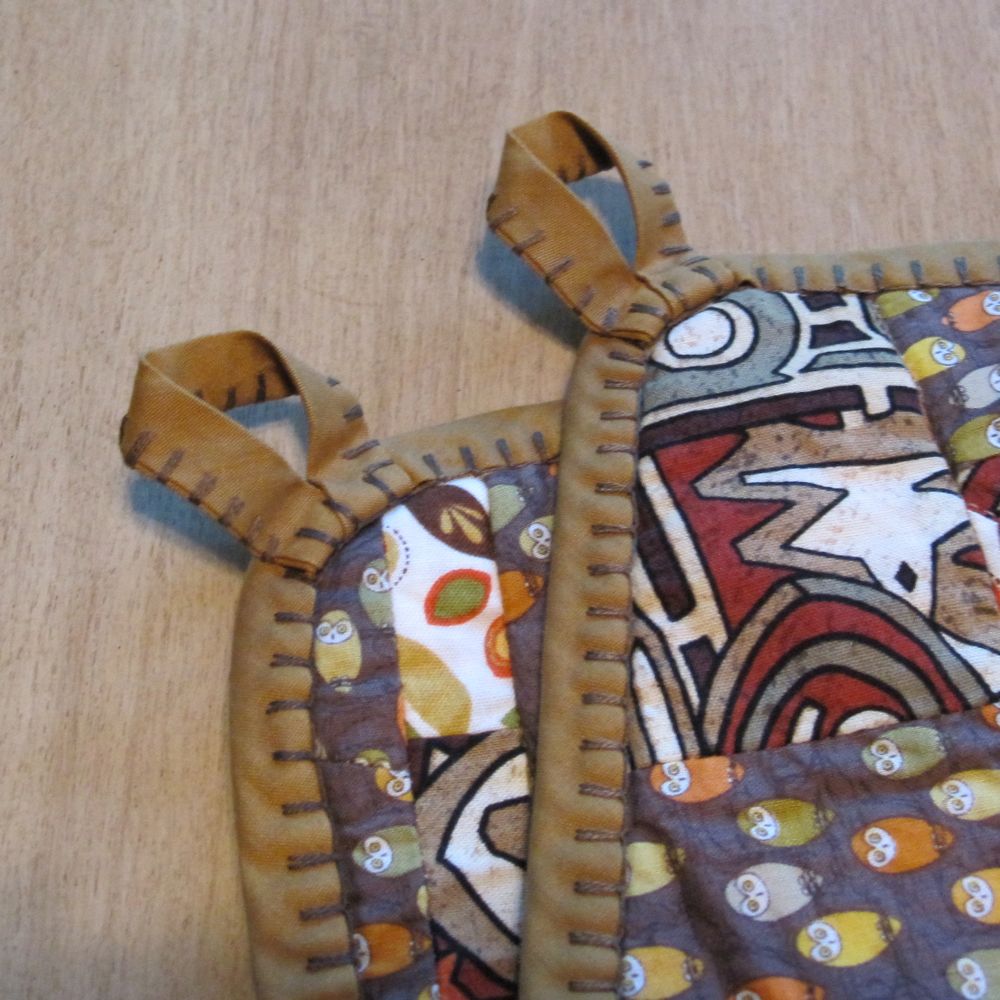
Ordinary blanket is convenient because it looks the same on the front and the back provided you are working at an edge, so you can continue the same stitch around your potholder loop.
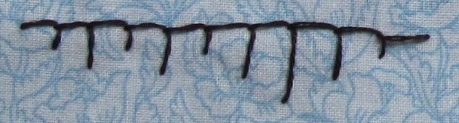
Closed blanket stitch is very similar. It alternates a stitch with a short crossbar and a vertical that pushes out to the right further with a stitch with a long crossbar and a vertical that pushes out to the left, meeting the vertical of the previous stitch. It too looks the same on the back, and stops and starts the same way as standard blanket stitch.
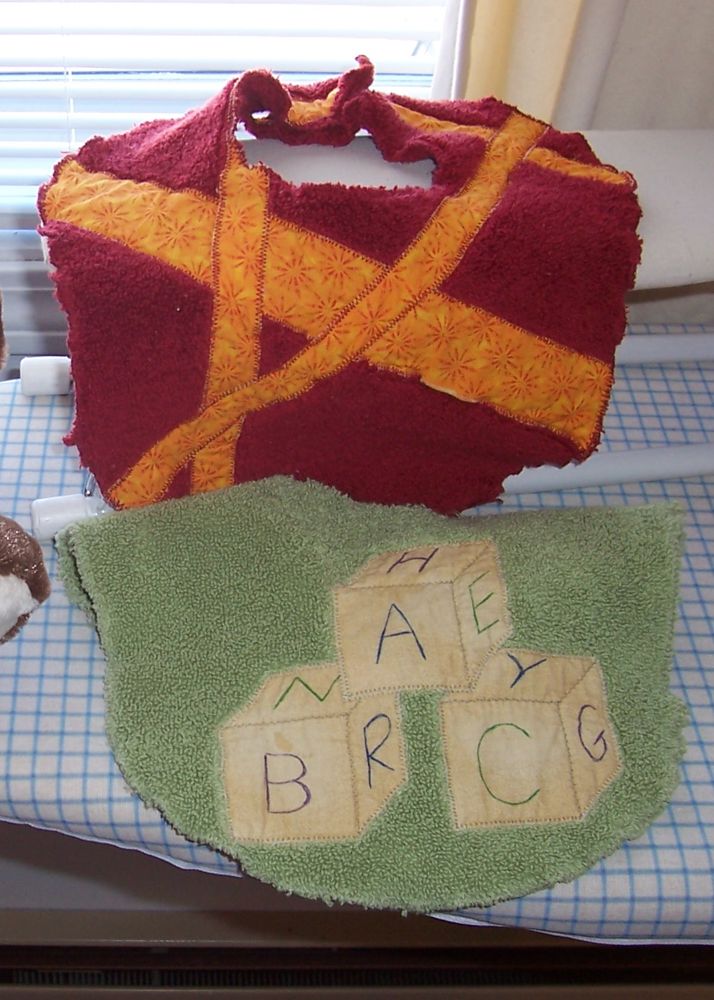
I used closed blanket stitch on the butterfly potholders.
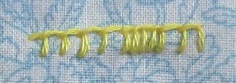
I started getting somewhat bored with blanket stitch and more recently tried a fancier version called up and down blanket stitch. You can see the finished potholders for this and Cretan stitch in the potholder tutorial entry. This has two steps, and the closeup spreads out the legs of the stitch before trying to show the construction:

Up and down blanket starts exactly like standard blanket, but instead of progressing to a new stitch immediately you take the needle down through the fabric next to where it has just come up, and bring it up next to the bottom end of the previous vertical. Catch the thread before tightening the stitch, and you’ll get a doubled vertical with a little holding stitch making the corners with the crossbars to the left and right.
To start a new thread it is best to finish after the standard blanket stitch portion. Start a new thread as for blanket, and make the second half of the current stitch.
Unfortunately, although up and down blanket is almost the same on the back, the verticals are further apart (at least mine are). You can either simply deal with that and use it on the potholder loop, or you can do what I did, which was to make paired whipstitches where the thread joining the pairs to each other went between the layers of bias tape. This was kind of laborious, though the look was good.
The process: after coming up, wrap around the edge of the tape, come up through one layer, slide the needle between the layers about a quarter inch over and then come up through the second layer. Repeat.
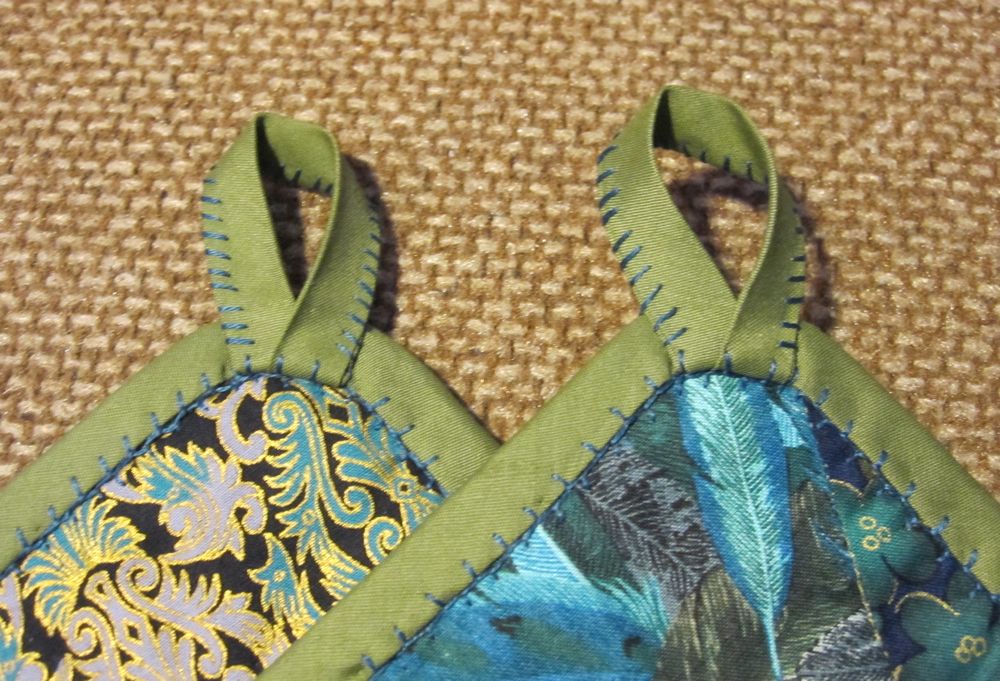
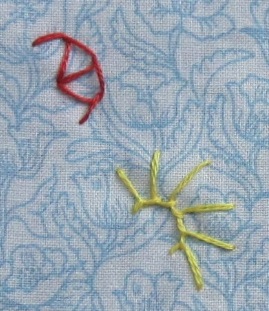
Finally, I tried Cretan stitch, which isn’t called a blanket stitch typically, but resembles a blanket stitch with the verticals alternating between going upward and downward from the crossbar. It didn’t feel as sturdy though it shouldn’t have enough stress on it in the context of potholder binding to matter.
To do this one, well, you could start exactly as you do for blanket stitch. When you come up at the northeast corner, it is now the southwest corner of the next square. Put your needle down at the new northeast corner and up through the southeast corner, catching the thread. You’re ready for the next stitch, at the northwest corner of the next square. The closeup starts halfway through that process and does the standard blanket second, and has the more-proper Cretan trait of not putting the northeast (for blanket) and southeast (for the flipped blanket) corners on the same horizontal line, but having four distinct lines of stitching.
To edge the potholder loop on this pair I just did a short whipstitch, matching the length of the verticals of the Cretan stitch.
And since I have them, an explanation of the remaining stitches:
Long and short blanket stitch is anything you create by varying the lengths of the verticals.
Double blanket stitch is simply two separate rows of blanket, the second made slightly above and trailing the first.
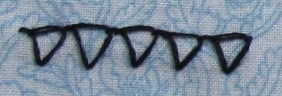
Buttonhole stitch is blanket stitch made very close and tight together, even slightly tighter than the middle section of this example.
And finally, if you put blanket stitch on a curve it can be used for motifs rather than just edging. You can see you get a very different look depending on whether the crossbar is on the outside or the inside of the curve.