Giant curtains… of doom

I haven’t done much of my own sewing recently, and it’s because (as I have mentioned offhand) I am sewing curtains for a client. Big curtains. Big, thick curtains. They are insulated, with a layer of fabric toward the window, some padding, a layer of mylar, some more padding, and a layer of fabric toward the room. Fortunately all but the last layer of fabric come already attached together, but the whole shebang is still incredibly heavy and awkward. With just my regular machine-in-cabinet, I can’t do them at all. My trusty 1984 Singer can sew them, but there’s no chance of a straight seam with the curtain flopping around dragging itself all crookedly. They’re big enough that rolling them up out of the way on the side only increases the problems fore and aft, and there’s no way to roll them up in both directions simultaneously.

My solution, after crying, was to move a drop-leaf table behind my sewing machine and a filing cabinet to the left in front of it. I also have an end table/plant stand in front of the filing cabinet; it is significantly shorter but still a lot taller than a chair, and while something taller than it would be better, it is still an improvement over just the filing cabinet. The filing cabinet, end table, and I hold the curtain before it goes through the machine, and the table catches it as it comes out the back.
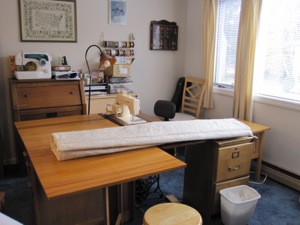
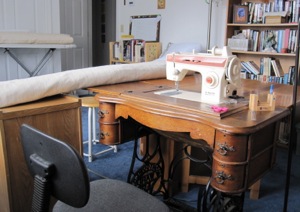
from the door from the machine

This improved the situation immensely. I also had to lower the thread and presser foot tensions to avoid skipped stitches and make the curtains feed more smoothly.

I later talked to a quilter and she told me she has a table behind her machine and a table to the left of her machine. If I hadn’t exhausted all the appropriate-height furniture in the house (well, there’s the dining table, but that won’t fit in the sewing room now), I would be extending my support system more to the left. Which would leave no floor space on which to work, but you can’t have everything. I do feel somewhat like an executive behind a big desk.

Anyway, I’m just sharing in case anyone out there has to sew big, heavy items, and was looking for others’ experience. I’m looking forward to having space in my sewing room again, and catching up on my own sewing projects!
Tidbits, Supplemental

I have for you another installment of material related to the Sewing Tidbits page. Mostly a few pictures.

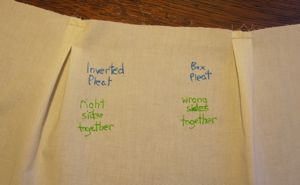
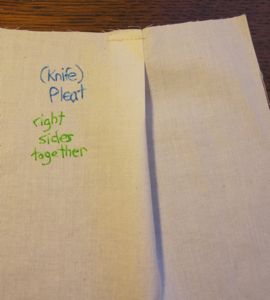
I love box pleats. And inverted pleats, which are box pleats on the back. I think it is because I like symmetry. Below we also have a picture of a standard, or knife, pleat, for comparison.

box pleats knife pleat

Box pleats appear in the center back of dress shirts and where the lining of a coat meets the coat in the top center back. I use inverted pleats in many places where I need to take width out, because I think the way the fabric spreads is pretty. For example, if I were making a bag that was to be fuller on the inside than at the top opening, I would probably use a box pleat on the side to bring it down to the top dimension.

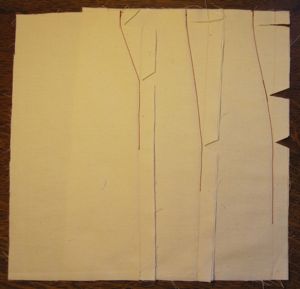
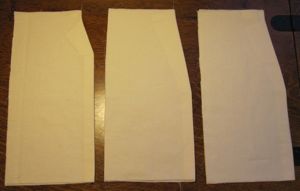
The following is my attempt to show the results of different approaches to meeting a new seam and an old one, for example when you take in pants at the waist. You can see that a very obtuse corner is not much different from an actual curve, because the fabric is inclined against having sharp folds, but a sharper angle (though still obtuse!) gives a decided corner to the fabric. The pictures below also illustrate clipping curves in seams. [I would also trim the allowance in real life so it was all in the 5/8″ range.] If the seam line is closest to the raw edge at the middle of the curve, clip a notch out; if the ends of the curve are toward the raw edge you can notch or just snip. In the former case when you turn the piece right-side-out the seam allowance has less room and in the latter case it has more room.

seam tapering seam tapering results

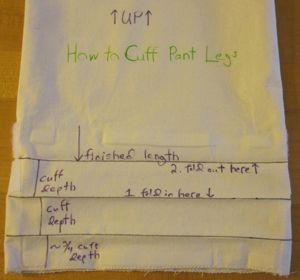
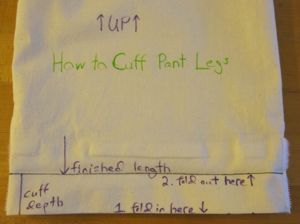
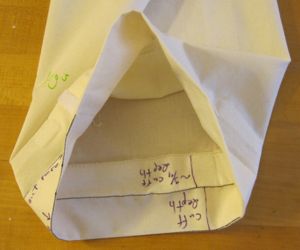
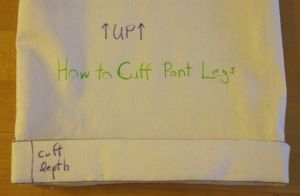
Finally, I have action shots of the pants cuff manipulative from class.

cuff making cuff making

cuff making cuff making

Just a few things of use…

Adventures in Tension

Sewing machine thread tension was never anything I worried about until about the last two years, when suddenly it seemed to become a huge deal. Machines were skipping stitches, thread was breaking, everything seemed haywire.

As implied by the name, tension is tautness of the thread. On most machines there are two or three metal or plastic disks that you run the top thread between when threading the machine. When the presser foot is up they are loose, and when the presser foot is down they are compressed, by an amount determined by the user. There is also a tension setting for the bobbin thread, but setting it requires a screwdriver and is intended to be done only by sewing machine mechanics. Unless something is wrong with the machine, you’ll be able to adjust the stitching as needed using the top thread tension.

Proper tension means the stitch lines look the same on the top and the bottom, with no looseness, looping, skipped stitches, pull-through, or fabric puckering. To set the tension, start with it at its middle value. Load top and bobbin threads of two different colors into your machine and sew a straight stitch at your usual stitch length on a double-layered fabric of a third color. Choose the fabric to be representative of your usual sewing – I set my tension using calico or muslin. If the stitches look taut, the fabric puckers, the thread breaks, or the bobbin thread pulls through the fabric, decrease the tension. If the stitches look loose or the top thread pulls through the fabric, increase the tension (the top thread pulling through is not much of a problem in most situations, though, as long as it’s not creating actual loops on the back).

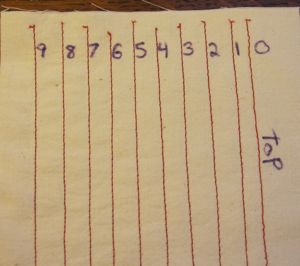
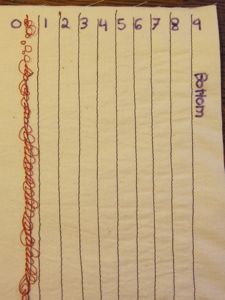
Here is an image of my sewing machine’s various settings. It is worth noting that 0 tension really is no tension! You can see that the bobbin thread hasn’t even stayed put in that one. I’m not getting puckering, but the stitch seems to be shorter on higher tension.

tension spectrum tension spectrum

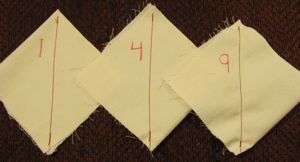
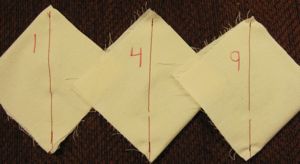
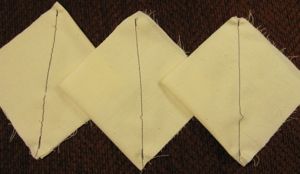
More information is obtained if you stitch on the bias instead of with the grain of the fabric. In that case you can also pull the corners of the fabric until the thread breaks; good tension should lead to each thread breaking and in roughly the same place. If only one thread breaks then it is too tight relative to the other. My tension sits at 4, which works well and is the setting my sewing machine mechanic told me is right for my machine. According to this test, though, that’s still too high! Before the breakage test you can see 9 (actually, I think it was 8 and I wrote the wrong number) is too high – the fabric wants to cup.

bias swatches

Then I gave them each a yank; the 1 broke only on the back and the other two only on the front.

after snapping, front after snapping, back

Incidentally, I found a page on sewing machine tension that said to adjust your tension only when the presser foot is down, which was echoed by a couple of commenters who said otherwise you will completely wreck up your machine. I have never heard of this in my life, and I have worked in a costume shop and an alteration shop, and discussed tension with a sewing machine mechanic. I did find it mentioned casually in one of my sewing books, but not in my sewing machine manual or this New Mexico State University guide to sewing machine maintenance.

Now, for 90% of projects, you don’t need to touch the tension (mine runs 0 to 9 and I leave it at 4). There are some exceptions.

You may want to decrease the tension if

  • You’re working on delicate fabric that puckers easily.
  • You’re making a zigzag stitch and the fabric is scrunching.
  • You’re using a twin needle to sew and are getting skipped stitches.

I do not know any circumstances under which higher tension is desirable, except perhaps to intentionally scrunch the fabric up.