We Were Tired of Living in a House

Another image is done!

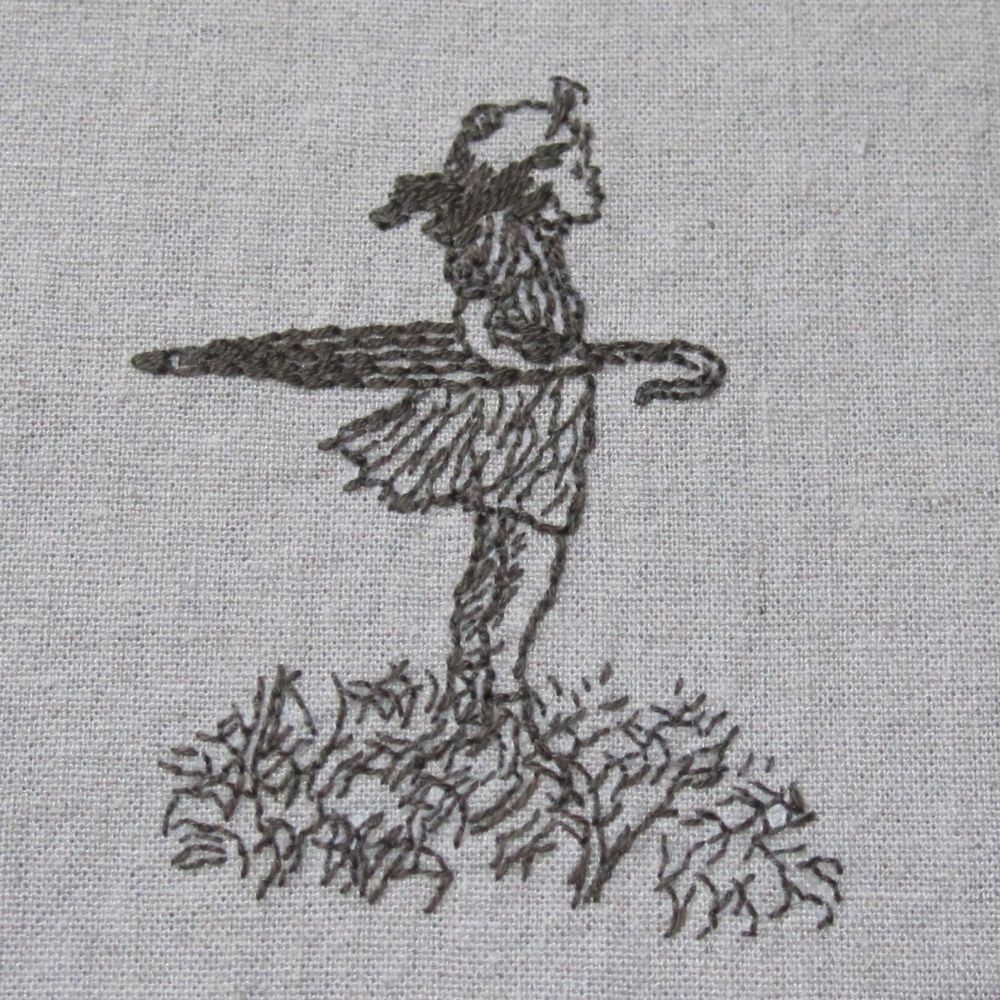
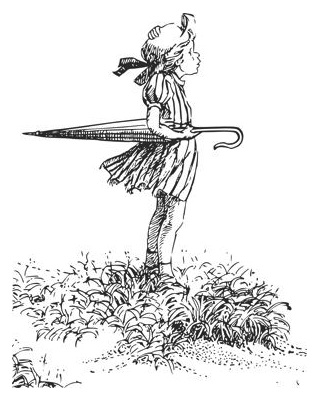
One of my favorite books as a child was We Were Tired of Living in a House, written by Liesel Moak Skorpen and illustrated by Doris Burn. The children try living in a tree, on a raft, and by the seashore, collecting an object from each but moving on when nature makes it impossible to stay. Burn’s illustrations are gorgeous, by turns excited, silly, and wistful, and full of detail. It was difficult to find one that was manageable for my project. Here is what I ended with:

embroidery 3

original drawing

Of course as I write this I am traveling, so I cannot fulfill my promise of telling you all the planned embroideries and appliques for the Children’s Book Quilt. However, I have images on wash-away paper and fabric selected for two (having decided after all to find a different Moomin picture): Sylvester and the Magic Pebble and Harold and the Purple Crayon.

Sketchbook Project: 2012

The Sketchbook Project is a brainstorm of the Art House Co-op, which has its physical location in the Brooklyn Art Library. Blank sketchbooks are available for purchase; the buyer chooses a theme from the year’s list and is sent a book with a personalized barcode on the back: name and hometown appear on the label, and those plus theme are encoded into the barcode. The completed books must be sent back by the end of January of the title year and go on tour starting in April, with 14 locations (though in 2012 London and Melbourne will include only European and Australian books, respectively). People check out the books to look through them, which means the artists can find out how much their books are being selected, and after the tour is over the books are housed permanently in the Brooklyn Art Library.

After witnessing my sister waffle about doing the project this year, I waffled myself – there was a tempting theme, and finally I decided that if I didn’t complete my sketchbook, I was comfortable with having made a donation to the Art House Co-op.

My sketchbook arrived May 16, giving me eight and a half months to complete it. Since then I’ve had notepaper with me all the time – I always carry paper in my purse, but now I have it in the little mesh bag I tote around at the gym, for making notes on the exercise bike. I’m hoping the deadline will inspire completion, but the ideas are not – so far – sufficient to fill it, so let me know if you have suggestions along the way for themes or images.

My theme? Stitches and folds. Naturally. It was difficult to convince myself to mark the first page, but ultimately, that step had to be taken, so I just freehanded something. The inaugural work:

the inaugural page

Don’t ask to see the back – I haven’t decided what to do with it yet.

Fibeenacci stained glass

Did you know the members of each successively earlier generation of a bee’s family tree are counted by the Fibonacci numbers? Starting with a drone or worker, one bee, there is one parent, the queen. The queen has two parents, a queen and a drone, and between them they have three parents, two queens and a drone. Among those three bees they have five parents, three queens and two drones. And it goes on: 1, 1, 2, 3, 5, 8, 13, 21, 34, …

I learned this from a lovely page on the Fibonacci numbers generally, that I found years ago while looking for teaching resources, and it came to mind when quilting friend of mine said she would love to make a Fibonacci quilt, but didn’t have a pattern.

My first design test is a stained glass quilt square. In stained glass quilting, the fabric is bordered by black or dark gray material (usually bias tape) to look like panes of stained glass. My square is 8″x8″ plus a 1/4″ allowance. Except for one corner, all of my “leading” was in straight lines, so I was able to substitute black ribbon for the bias tape I didn’t have. I attached everything with fusible web: Wonder Under for the contrast fabrics and Stitch Witchery, cut into thirds, for the ribbon. Gigantic (A Tale of Two Johns) kept me company.

Fibonacci bee family tree stained glass quilt square

I started at the top, and was able to hide all cut ribbon ends under other ribbon without any folding except for that lower right corner out in space. That took a fair amount of manipulating and some extra Stitch Witchery, and made me grateful for my retractable tweezer fingers.

My other ideas are more traditional quilt formats, and hence less intriguing to try out, but will follow in later installments.