Chain, fly, feather stitches

This panel of the embroidery sampler got a little bit for its britches. It covers chain stitch, its close relative the feather stitch (which is also related to blanket stitch), and the fly stitch, which cosmetically resembles feather.
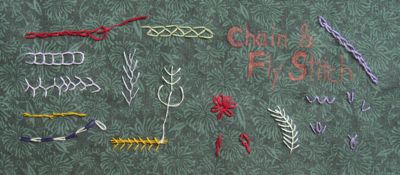
chain and fly panel

The chain stitch is a caught stitch. If you only did half of it the thread would tighten down to a tiny little straight stitch. To make it, with the thread to the front of the fabric, take the needle down right next to where it came up, and before you tighten the thread, bring the needle up again a bit away and catch the previous stitch’s thread. Now pull through and tighten (but not too much!) and you should have a teardrop. To finish the row, just make a little tacking stitch by taking the needle down just outside the final teardrop. That is also what you should do to end a thread. Begin a new thread by taking it up just inside the final teardrop and proceeding from there.

making a chain back of chain

The back of chain stitch looks like the front of backstitch: a bunch of straight stitches end to end.
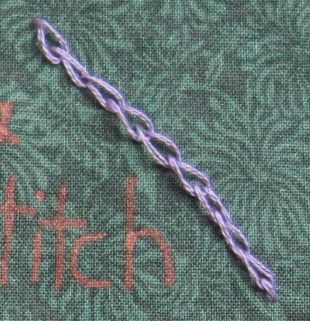
chain variation

Just to try it out, instead of putting the needle down right next to where it came up to make the loop, I put it a bit back along the chain. The point end of the teardrop gets a little bit pointier, and the reverse-side stitches overlap a little.

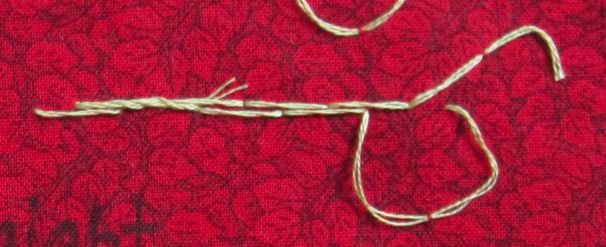
If you decide to make the ends of the teardrop stitch a bit away from each other (perpendicular to the line of stitching), you can get open chain. This one’s a little more complicated because you can’t tighten the stitch until you’ve come up and gone back down again for the next teardrop. I recommend not pulling the needle all the way through the fabric on the down stitch and tightening by tugging the thread by hand, to avoid accidentally overtightening the thread for the next loop. That is not fatal, of course; you can always pull it back to the front of the fabric, but it is annoying.
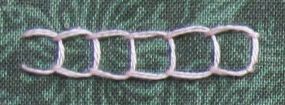
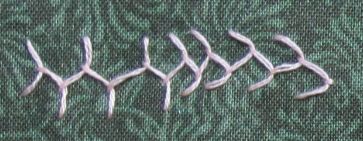
open chain Cretan and feather

If you decide to catch each loop of open chain under only one end of the following loop, it becomes feather stitch. Actually, in the second picture above, it starts out as our old friend Cretan stitch and only becomes feather when it starts getting that distinct V shape. Proper feather stitch alternates the side the free end sticks out on; if you keep the same side (say, always catching the previous loop with the left end of the next loop) it is called one-sided feather stitch and looks an awful lot like blanket stitch.

Feather stitch can look very different if you vary the position of the stitches. On the left below is long-armed feather, which has a plant-like look, and on the right is closed feather, which looks more like a trellis.
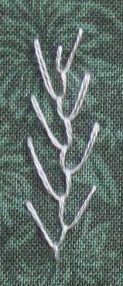
long armed feather closed feather

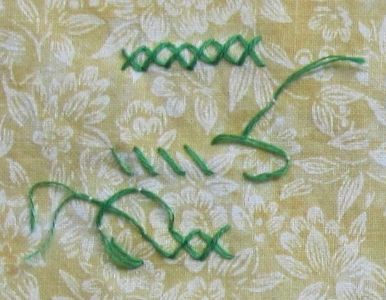
If you basically start from scratch every stitch with feather you get fly stitch. Properly speaking, fly stitch is an isolated stitch, and if you work it all in a line like the picture below it is closed fly.
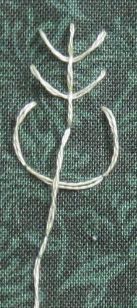
fly stitch from the back

To make fly stitch, with thread to the front of the fabric, bring the needle down a bit away and then, before tightening, back up to make a triangle with the three points. Catch the previous loop and tighten. Take the needle down through the fabric either just over the loop or a bit further in the direction the V points, and then back up to the side to start the next fly.

As with feather, you can vary the lengths and starting and ending positions of the stitches to get very different looks. Individual fly stitches are shown below as well.
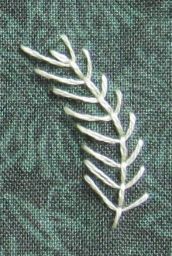
fly fern fly isolated

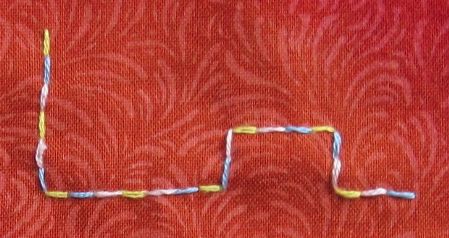
Back to chain stitch for a couple more. The magic chain stitch is much easier to make than it looks. You need to thread two different color threads on your needle, full complement of strands of each.
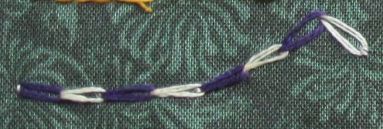
magic chain

The only difference from standard chain is that each time you come up you will catch the threads of only one color. Also, every other time you will have to tighten the thread by hand; the remaining time the color you want to tighten will be shorter than the caught color, and pulling the needle will suffice.

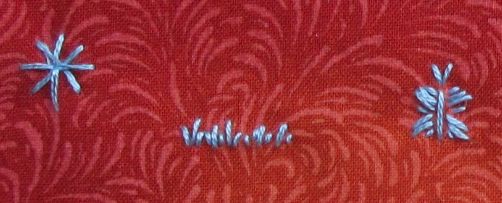
Finally, some isolated versions. On the left below is the isolated chain stitch, or lazy daisy. You get different effects making the tacking stitch long or short.
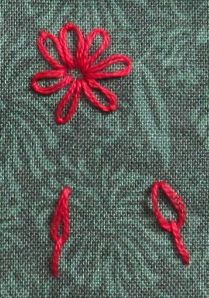
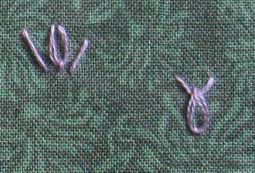
isolated chains isolated chains

When diagonal straight stitches are laid on either side of a lazy daisy, the result is tete de boeuf. I have no idea why, since the rightmost stitch above, the wheatear, looks much more like a bull’s head to me. The wheatear is a hybrid stitch; it is a fly stitch finished off by an isolated chain.

Now, I know these stitches maybe don’t seem as decorative or a functional as the others – good for outlines and plants and not much else. However, they can be beautiful when done creatively. I went looking for examples and found a number: samplers on CRAFT show sometimes neat stitching and good color choice is all it takes. Susan at art of textiles has a long-stemmed fly stitch that reminds me of seedlings. And Raphaela at Textile Explorations, whose blog I will surely explore further, has entries dedicated to feather, chain, and detached chain.

That concludes the individual panels of my sampler. The embroidery class is in three weeks; we’ll see the finished sampler then.
Straight stitches

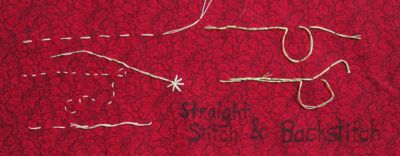
This week’s installment of the embroidery sampler covers running stitch, backstitch, and variations thereon. These stitches somewhat unnecessarily take up two panels of the embroidery sampler.

running

running

Properly speaking, straight stitch is an isolated stitch. Anything that involves only bringing the thread up at one point and taking it back down at a nearby point, far enough to make a dash. When you do this repeatedly at regular intervals, it is called running stitch. Running stitch looks the same on the front and the back, although offset by one stitch length. The back is shown mostly to give you an idea of securing the loose end of the thread.

running stitch from the back

Backstitch is slightly more complicated, but not too much so. In backstitch the stitches are worked in the opposite direction from the one in which the line grows: stitching right-handed, the line grows to the left, but the stitches are laid down left to right. The opposite is true when stitching left-handed (though again, take this with a grain of salt, since I make my stitches any which way – I think it is easier to put the needle through pointing from your working hand toward your nonworking hand). Come up through the fabric, back up one stitch length, put the needle through to the back and bring it up to the front two stitch lengths away.

backstitch from the back

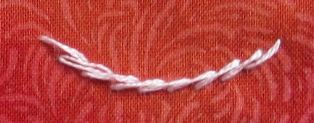
The back side of the fabric has stitches twice as long as the front, doubled but offset. Working backstitch “upside-down” and carefully you get stem stitch. Here, the stitches are twice as long on the front as on the back. What makes this different from backstitch worked on the wrong side of the fabric is that the overlap keeps the new stitch on the same side of the old stitch. Some sources will say it is stem stitch if each new stitch is above the previous and outline stitch if it is below but I can’t imagine that mattering to anyone who wasn’t competing in some esoteric embroidery knowledge contest. These stitches are laid down in the same direction as the growth of the line (as the stitches on the wrong side of the fabric in backstitch are).

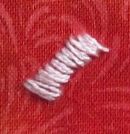
stem stitch satin

When the stitches become very slanted and overlap more and more, it becomes encroaching stem stitch and finally satin stitch, as on the right above, used to fill areas in embroidered images.

Split stitch is a relative of stem stitch where the overlap of stitches is very short, and the new stitch does not lie above or below the old, but instead comes up through it. Since I was working with two strands of embroidery floss I just came up between them. You make a stitch, backtrack just a little, come up through the old stitch, and repeat.

split stitch

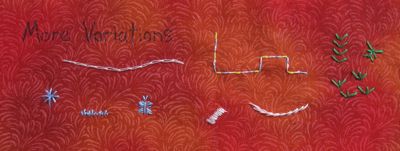
Holbein stitch is what you get when you double running stitch, offset so they form a continuous line.

Holbein Holbein

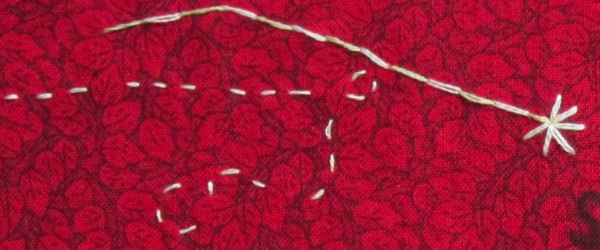
The first picture also has an example of running stitch worked at irregular intervals, and straight stitch used to make a star. The second example uses three different running stitches, a variation on Holbein.

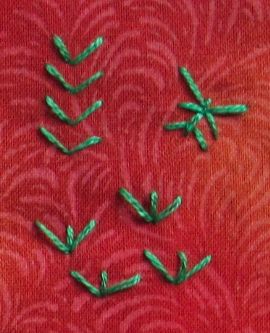
Finally, back to straight stitch proper, as it is the best stitch for drawing. The embroideries for my children’s book quilt use straight stitch as the primary stitch.

drawing drawing

Somewhat unnecessarily, the green V stitches and the green 3-line stitches have names: arrowhead stitch and fern stitch, respectively. The others are just freehand, doodling with stitches.

Knots and crosses

It’s going to be Embroidery Monday here for a while as I work through my embroidery sampler. Maybe before the end I’ll have my sewing machine back from the shop and be able to put it together into its finished form, which will involve more decorative embroidery along the seams.

Oh, French knots. It took me so long to successfully, consistently make French knots. Of course, it didn’t help that I was trying them on Aida (cross-stitch) fabric, which has enormous holes — the better for your knot to pull through and completely come undone, my dear. They are one of the few stitches I think it is easier to make neatly on ordinary fabric.

This installment of the embroidery sampler tour covers multiple kinds of knots, and cross-stitch. I wasn’t sure I should even include cross-stitch, since it is so well covered elsewhere, but we’ll look at it in brief.

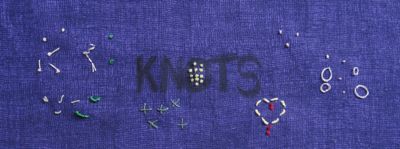
knots!

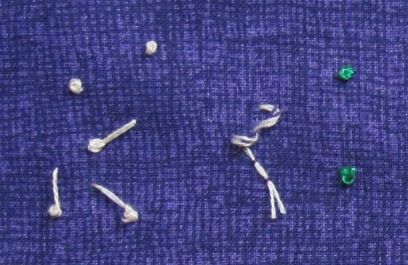
The knot panel of the sampler was originally supposed to also contain satin stitch, but I omitted that almost entirely, so it’s just a little light instead. I didn’t show the back, either, because it’s not illuminating. Here is the key to all knots: tighten the thread down around the needle before pulling the needle all the way through the fabric. If you leave the thread wrapped up around the needle while pulling the needle through, it will not stay neat. Tug on the loose end to get the wraps tightened down where the needle meets the fabric, and then put your thumb on them while pulling the needle through. Much better results.

The most common knot is the French knot, which is made simply by wrapping the thread twice around the needle and inserting the needle right next to where it came up – or even in the same space. I have seen directions to wrap clockwise and counter-clockwise, and I did both in the course of making the knots below. Can you tell any difference?

knots! knots!

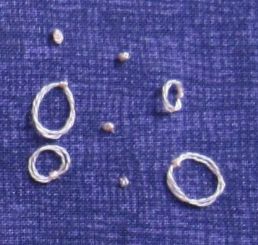
The shooting stars in the lower left are tailed French knots, made the same way as regular French knots except that the needle is inserted further away from where the thread came up. Tightening the knot before pulling the needle through is vital in this one. The little corkscrew is my effort to show the wrapping; the purple thread that goes through it is the needle, and it should point down and to the left. That is, the wrapping proceeds from eye to point. The green knots were made with four strands of floss instead of two.

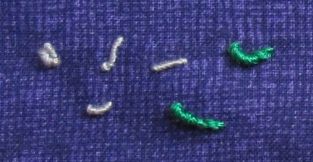
A tailed French knot with several additional wraps becomes a bullion knot. Well, sort of. To make a bullion, after bringing the thread to the front of the fabric at a point we’ll call A, insert the needle a distance away and back up at A, without pulling it through at all (it should be going through the fabric like a safety pin). Wrap the thread five or six times around the needle, from eye to point again, and then pull the needle through. This is one where tightening the wraps on the needle too much is problematic, because it becomes difficult to get the needle through. However, if you tighten them gently and put your thumb on them while pulling, they should still make a reasonable bullion.

knots! knots!

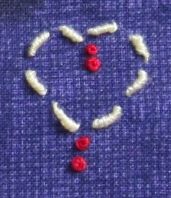
The second picture above was made with bullions and French knots. In the first picture, again, the green floss was four-stranded and the rest two-stranded, and the upper green bullion shows you what happens when you don’t put your needle in a full bullion-length away.

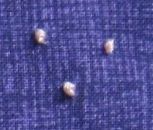
The colonial knot, on the left below, is supposed to be a larger knot than the French knot, and the Chinese knot, on the right, is a smaller one. I didn’t get an enormous difference among the three, honestly, but someone who’s worked more knots and has more consistency probably would. In both of them the thread is tacked down by the stitch. With thread on the front of the fabric and needle pointing toward the top of the work, the colonial knot is made by bringing the thread over the needle to the right, under the needle to the left and below (eye-side of) the first wrap, over the needle to the right again and under to the left and above (point-side of) the first wrap. Then the needle is inserted next to where the thread came up, the wraps tightened, and the needle pulled through.

knots! knots!

The Chinese knot has a nifty feature where you can leave it untightened to get a loop. The thread coming out of the fabric is looped so the loose end is underneath the end coming out of the fabric, and the needle is inserted into that loop next to where the thread comes out of the fabric. The wrap can be tightened on the needle to make the simple knot, or left looser to get the loop effect.

Finally, the four-legged knot is almost a woven stitch. Make a vertical stitch and bring the needle up at one end of the horizontal stitch. Hold the thread straight across, slide the needle under the vertical stitch and over the thread that loops back from the horizontal bar to the eye of the needle. Tighten that down on the middle of what will become the cross, and insert the needle through the fabric at the opposite end of the horizontal stitch.

knots!

I don’t have a lot of patience for knots, but there are some who use them exclusively, such as in these commercial kits for small rugs and similar pieces. All in knots. They give an impressive texture.

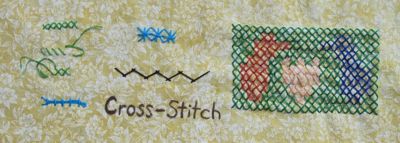
Finally, we come to cross-stitch. My first ever needlework project was in cross-stitch, and I would guess it predated any of my sewing efforts as well.

xstitch

A basic cross-stitch is made by making a diagonal stitch in one direction, and topping it with a diagonal stitch in the opposite direction. When you wish to make a row of stitches, it is neater and more efficient to make all the bottom stitches first, and then move back across the row with the top stitches. In fact, if you can stand it, make all the bottom stitches there are before making any top stitches (at least in a particular color). Cross-stitch definitely benefits from having all crosses made with the same diagonal stitch on top, and in fact you will be dinged for having stitches that don’t go the same direction if you enter a competition.

knots! xstitch

The method is to go diagonally down in front and straight up in the back. The back then ends up looking like a bunch of doubled vertical stitches (a vertical from laying down the bottom half of the cross-stitch, and a vertical from coming back across with the top halves).

As an aside, you have two options for starting the next stitch when moving across a row. Suppose you have made a diagonal from northwest to southeast. You could go due north or due east to start the next one. Embroidery stitches in general look nicer when you take the thread in right angles or tighter than when the angles are obtuse. In our example, going due north will take the thread 45 degrees from its previous direction, and going east will make the angle 135 degrees. Therefore, north is preferable.

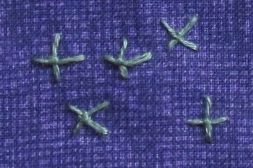
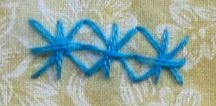
This leads us to double cross-stitch, which makes a star. This stitch, even when used in the same manner as cross-stitch, is made one star at a time. Make either the cross first or the plus first, but be consistent, and when you move from one to the other take the thread across the back, not to a neighboring spot. That is, if you make the cross first and end in the southeastern corner, go to the north or west spot to start the plus, not the south or east part.

knots! xstitch

Finally, herringbone stitch. This relative of cross-stitch is not just a spread-out version – in fact you can make it quite tight together. The corners of your crosses no longer meet, and you alternate diagonal directions with each stitch. The method: make a diagonal stitch. Bring the needle back up horizontally behind where it went down, and make another diagonal stitch. Repeat.

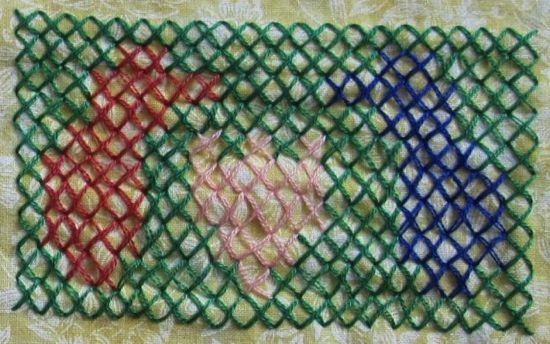
Of course cross-stitch is most often used to “color in” regions and make pictures. You can see I free-handed the one below, but you can cross-stitch successfully on plain fabric by making pencil lines to guide you.

xstitch