There are a number of knots that come up in multiple crafts, and for the sake of my own as well as others’ reference, I thought I’d write a post summing them up.
Jump past uses of knots to tying knots or additional resources.
Uses of knots
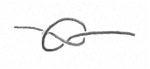
Shoelace tying begins with a half knot, which is also the first half of the square knot. The square knot is perhaps the fundamental knot for tying two strands together. While Animated Knots and The Morrow Guide to Knots both say this is not a good knot under strain, the amount of strain in crafting is typically far less than the limit for this to hold. I use it mostly in crochet: in a chain bracelet, it ties the beginning and ending strands together. If I change to a new strand of yarn in amigurumi, I might tie the ends of the old and new strands together with a square knot. I sometimes tie the beginning and ending tails of embroidery yarn together this way, for securely stitched facial features and so forth.
To put a starting knot in a length of sewing thread I use a few overhand knots, and to finish off at the end I use a few half hitches around a stitch or a bit of fabric. The half-hitch is also the fundamental knot of friendship bracelets and tatting. The overhand knot is useful for tying tassels, because the thread or yarn ends will lie in a smooth bundle; ends coming out of a square knot want to point away from each other.
The slip knot is used mostly in crochet as well, though it is useful whenever you want a removable knot (say, to hold a strand in place during work). In crafting we tend to use the term “slip knot” regardless of which end of the cord is tied around the other, but in knot tying they are separated into slip knot (released by pulling the short end) and noose knot (released by pulling the long end). Both have their uses as beginning crochet knots: the noose knot, also referred to as the locking slip knot, can’t change shape after you stitch on it without distorting the rest of the work (and hence won’t want to change shape). The knot tyer’s slip knot, also called the adjustable slip knot by crafters, can be used as a magic ring substitute: stitch your first round all into the first chain, and then pull the cut end to tighten that chain and close the starting hole.
Finally, the lark’s head knot is an easy way to attach a hanging loop to an object, and preferable if the loop should be removable. It can also be used for fringe, but isn’t that secure – a little picking can loosen the strands and ultimately remove them. It is the knot used for latch-hook rugs, where the extra friction from using fuzzy yarn and having many neighboring strands of fuzzy yarn make up for the insecurity. [Latch-hooking is not to be confused with rug hooking, which uses no knots.]
Tying Knots
Links below are to other pages about knots; most are to Grog’s Animated Knots.
- Half Hitch
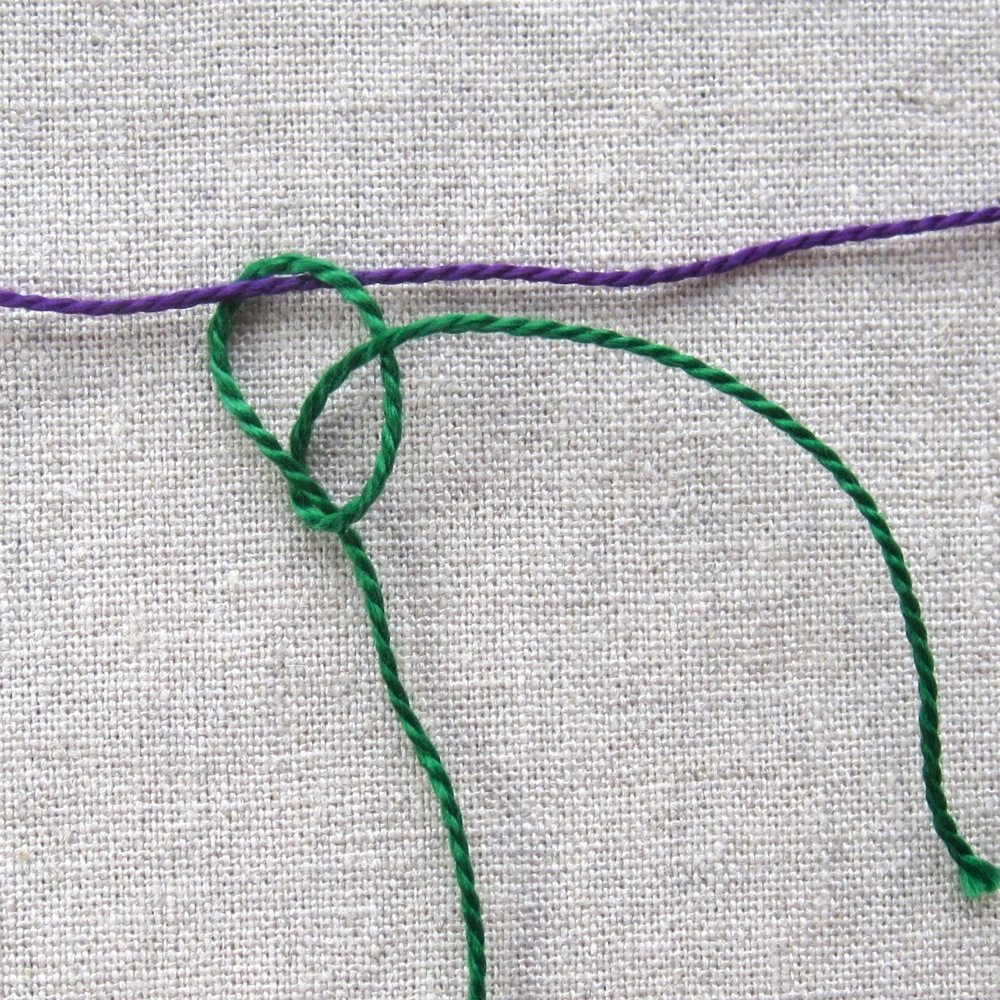
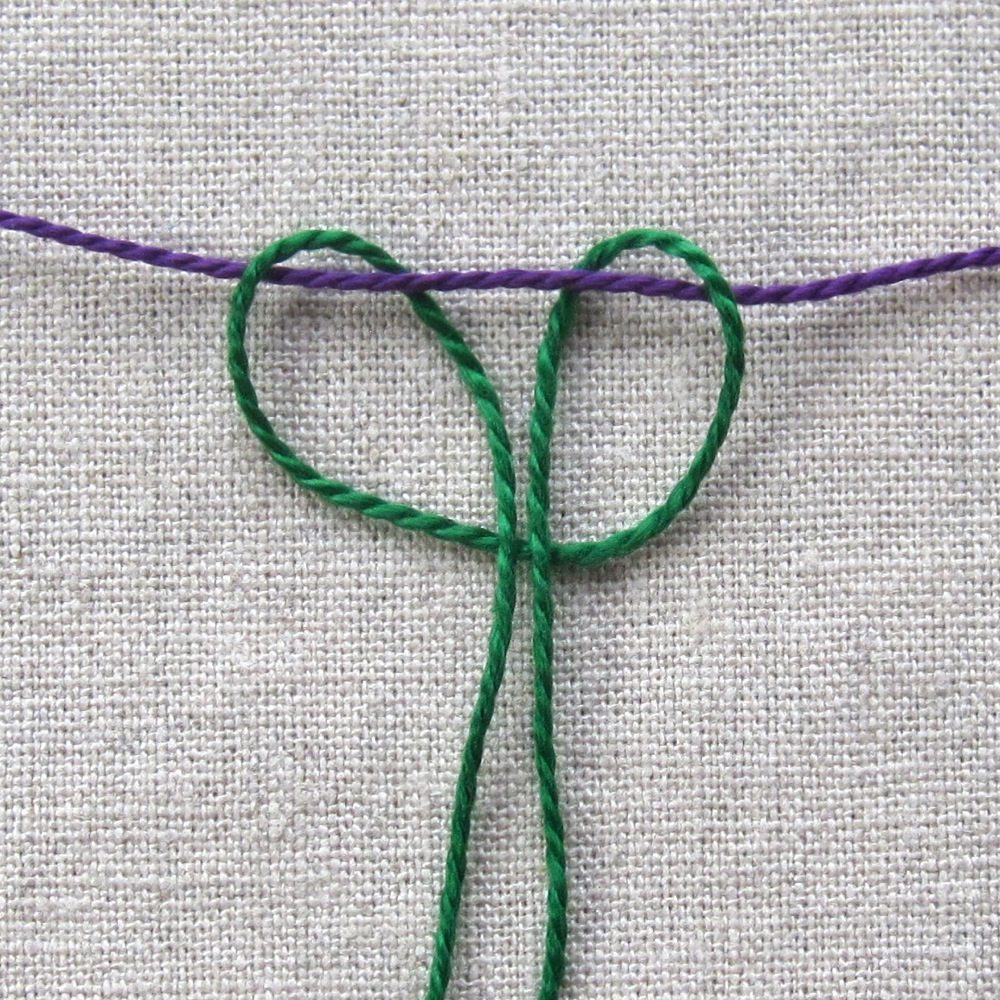
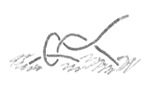
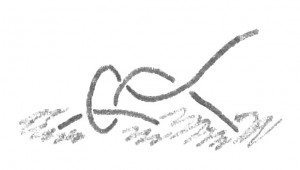
The half hitch is an attaching knot in sailing; it must be made around another item. I wasn’t completely honest about its uses, because in crafting an extremely similar knot called the figure four is used at least as often and fairly interchangeably (in fact, in macrame it is called the half hitch). The figure four requires one end of the thread be attached and the knot be made right up against the point of attachment. The photo below is of a half hitch; the diagram is a figure four. To make it a half hitch you would take the thread right to left through the loop on the left (which would be a good idea in the diagram, where the thread emerges from the fabric far away from the stitch it is knotted around). The figure four is the knot used for friendship bracelets; in that and macrame direction matters, with the figure four often called a “left knot” and its mirror a “figure P” or “right knot.”
In either case, make the knot by passing one end of the strand around an object and wrapping it around the other end of the strand. For a half hitch, come through the loop you formed by crossing the strands; for a figure four just make sure the loose end is trapped under the fixed end.
In sewing, the object you knot around is a tiny bit of fabric or one of the last stitches that was made. One knot might not stay put, but a few of them will hold your thread very well.
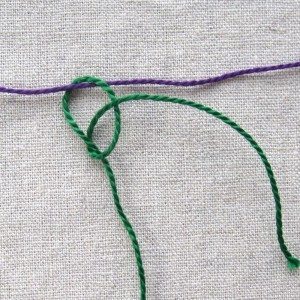
You may notice the half hitch is really an overhand knot in disguise, made around another object and given its own name because it is typically made and used differently.
- Lark’s Head Knot (AKA cow hitch)
The lark’s head is another joining knot, but instead of joining the end of a strand it joins the middle (or something inward a bit). Bend the strand and wrap the bend around the item you are tying on to (if necessary you could pull it with a hook). Finally, pass the ends of the strand through the loop and tighten. If you wish to make a lark’s head knot onto fabric, the easiest way to do it is thread both ends of the strand on a needle so it has a loop dangling from it, stitch through the fabric where you want the knot, and pass the needle through the loop before tightening.
To a macrame artist the knot above would be a reverse lark’s head; the lark’s head would be the version where the vertical strands are underneath the horizontal bar of the loop.
For a fancier version with more friction (and hence resistance to coming unpicked) try the cat’s paw.
- Overhand Knot
The overhand knot is a half knot tied with the ends of a single strand: cross one end over the other, making a loop, and pass it around the other end through the loop. This is my preferred way to tie a knot in the beginning end of a length of sewing thread. Typically I make at least two, with more if I need a larger knot. I never got the hang of the “wrap and roll” knot, much less the one that’s made around the needle and passed down to the far end of the thread.
To make a larger knot with more friction, and hence more hold, pass the end of the strand through the loop four or five times instead of once. The result is called a multiple overhand knot. The Morrow Guide to Knots advises making sure that in the wrapping, one end of the rope is coiled around the other, which is straight. Then pull abruptly to tighten the knot so the wraps completely hide the rest. This is a good knot to put weight on the end of a cord.
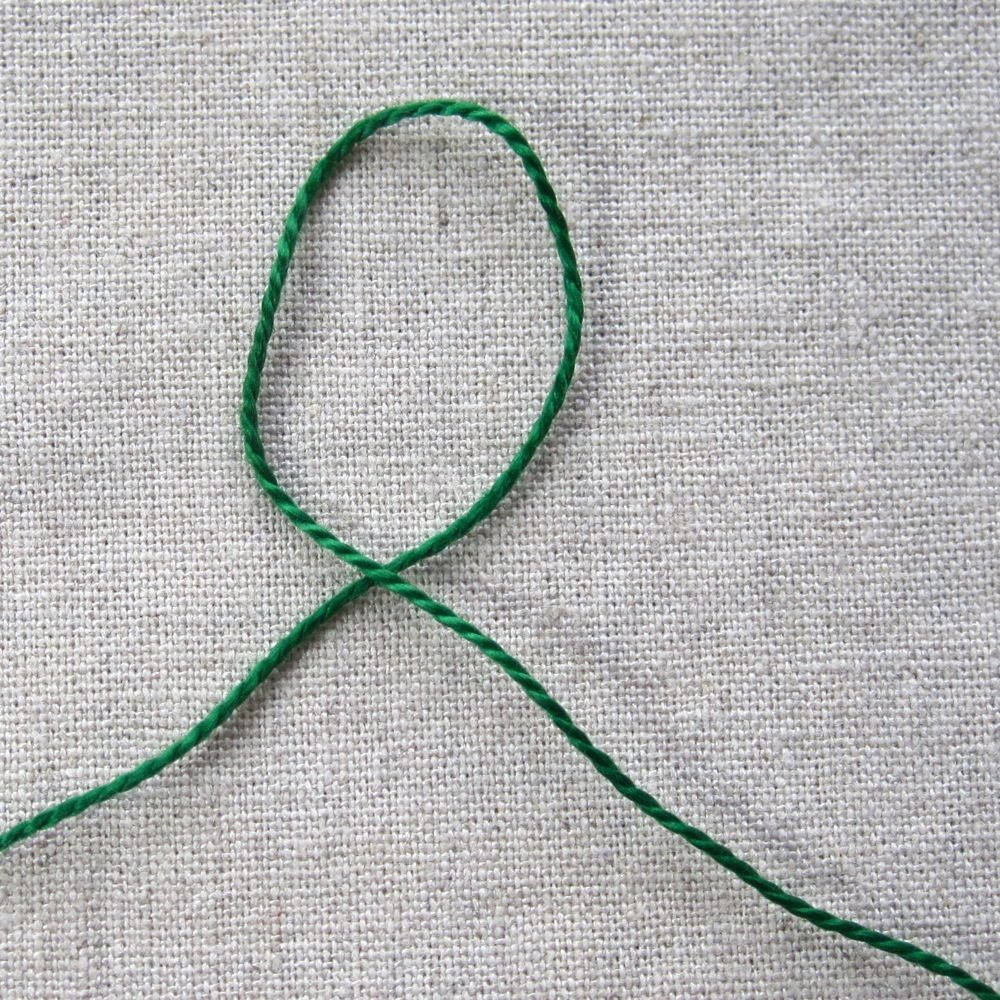
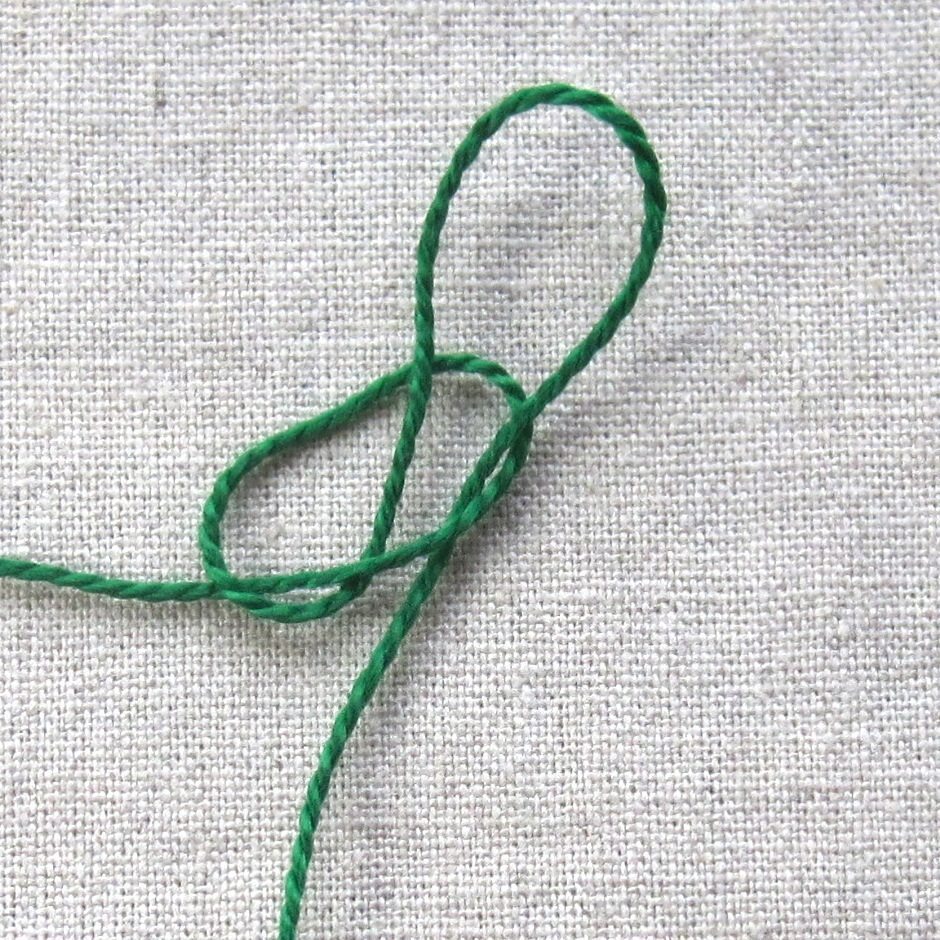
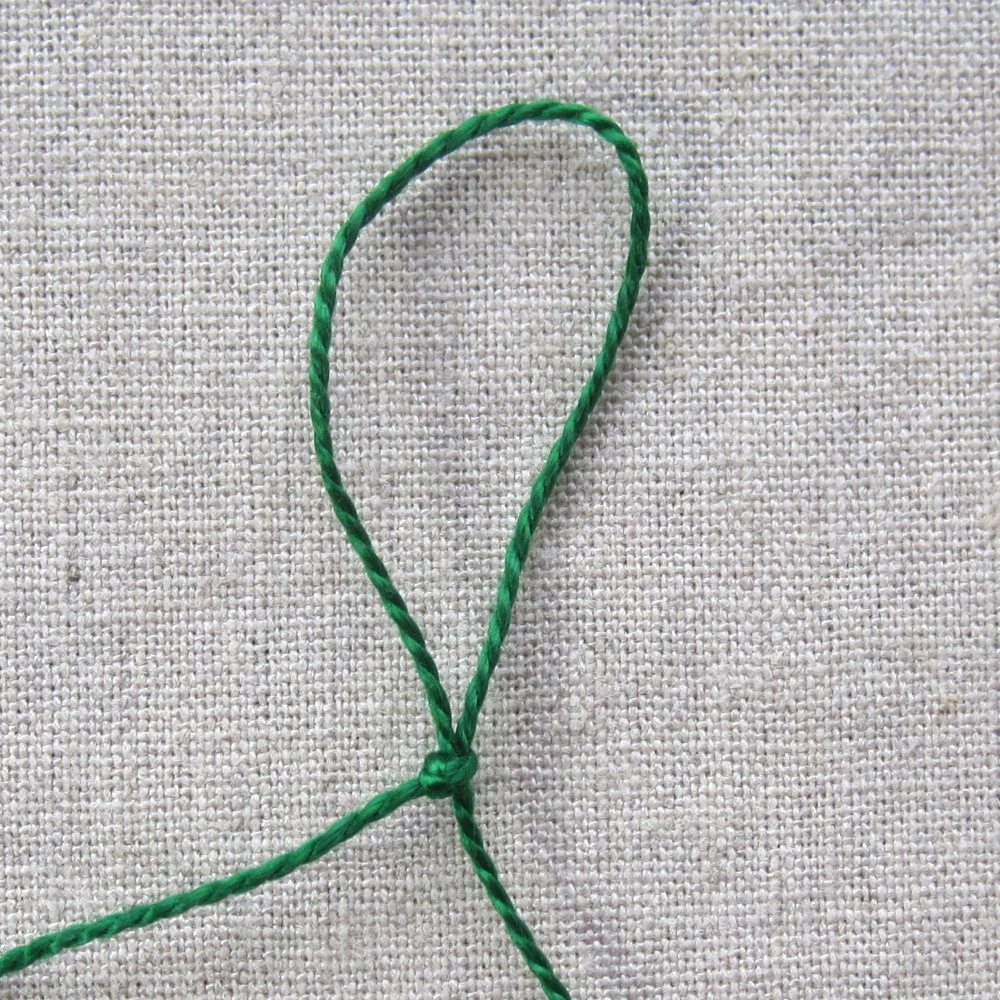
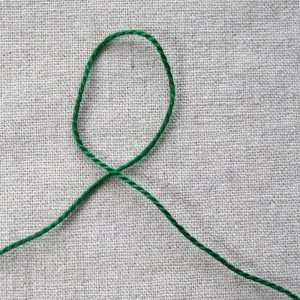
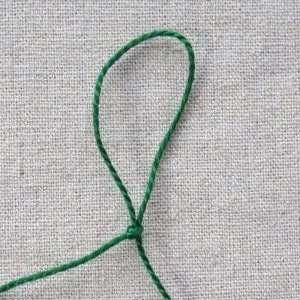
- Slip Knot and Noose Knot
The slip knot and noose knot are an overhand knot tied so that one end of the strand loops back through the knot, without crossing a strand in between. The difference between them is which end goes back through. As with the half hitch, though, the overhand knot idea isn’t the way to think about tying these.
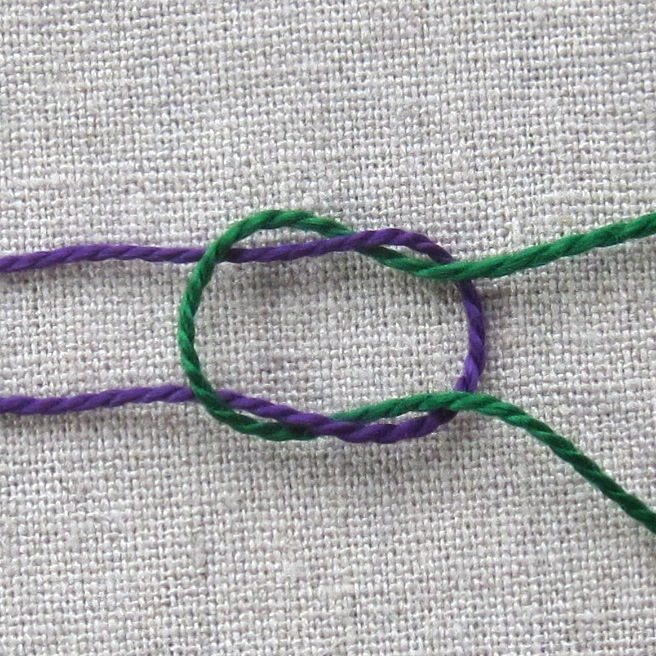
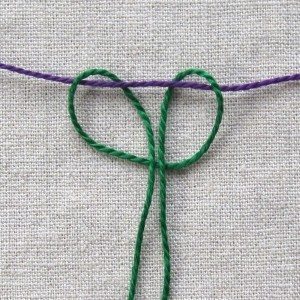
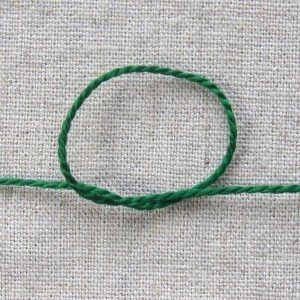
Although you will see many instructions to tie a slipknot with a crochet hook, I always do it by hand. Decide which end of the strand you want to be able to pull to release the knot (control the size of the loop, or pull it out of the knot entirely to untie it) – let’s call this the release end. Hold the opposite end in your left hand, near where you want the knot. Loop the strand as though writing a cursive lowercase e, with the release end on top, and pinch the crossover point with your left hand. Reach down through the loop with your right hand and pull up the release end, so just a loop of it comes up. Hang onto that loop and the release end, and pull the end in your left hand to tighten the knot. In the photos below, the release end is toward the right.

As I mentioned above, the terminology is different between crocheting and knot tying. The standard crochet slipknot is the knot tyer’s noose knot, also called the locking slipknot; it can’t work loose after you’ve continued crocheting. Its release end is the long end. The knot tyer’s slip knot is also called that for the crocheter, and more specifically the adjustable slipknot; it can loosen up after you’ve continued stitching but conversely can be tightened down. Its release end is the short end. As long as you can secure the end after tightening it sufficiently, it is fine to use for crochet.
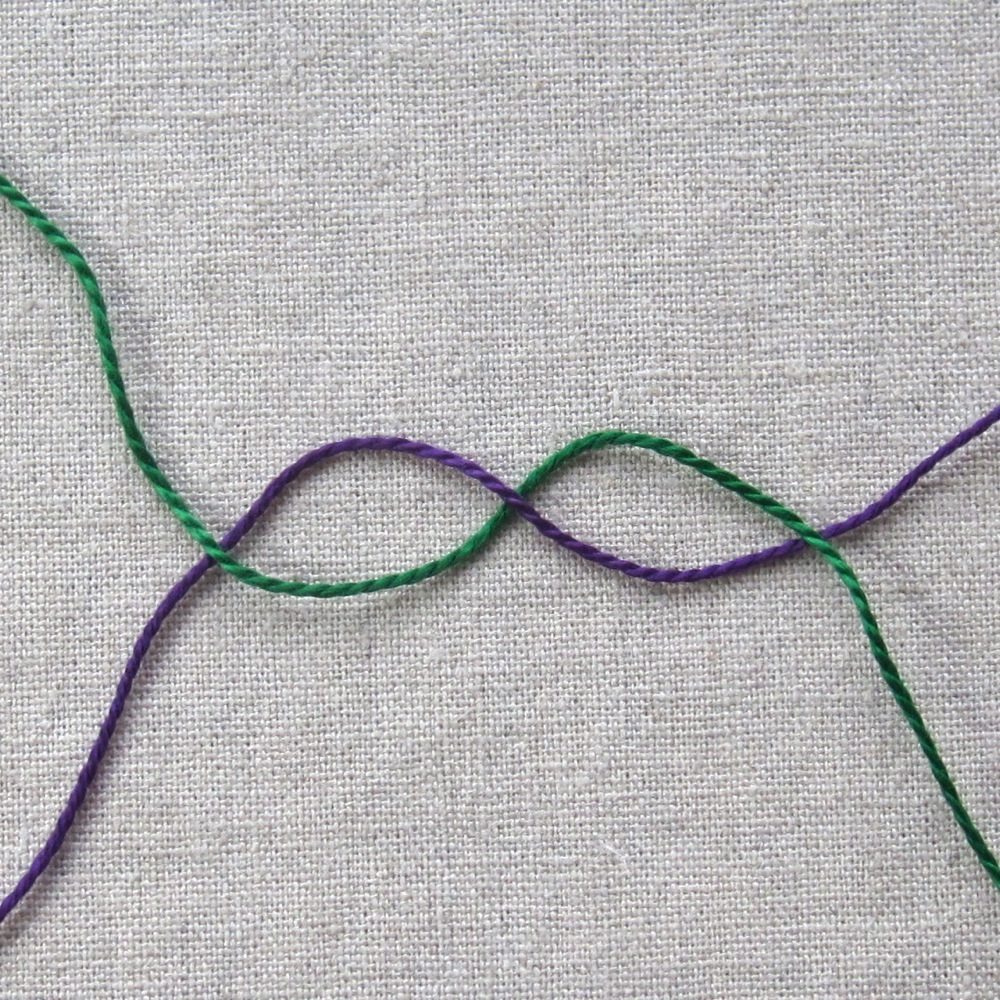
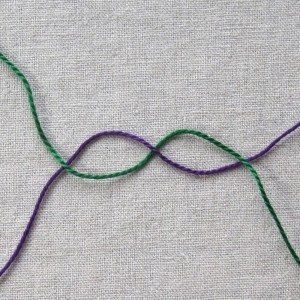
- Square Knot (AKA reef knot, sailor’s knot)
The Boy Scouts say “right over left, left over right, makes a knot tidy and tight.” The square knot is composed of two half knots (the first picture below) made with the same strand on top: cross the strands and loop one around the other underneath. Cross the strands again, same strand on top as before, and loop one around the other under the cross but above the first half knot.
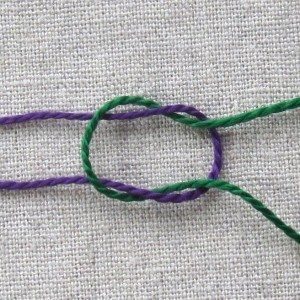
The granny knot is what you get when you don’t keep the same strand on top for both half-knots. It is less secure. The Animated Knots page’s picture of it (see the top square knot picture, mouse over “granny knot”) even looks less secure.
If the square knot is not secure enough for your purposes, try a surgical knot (mouse over “surgical knot”), which involves crossing the strands a second time in the first half-knot (or, if desired, both). If you want to get fancier, try the sheet bend, also called a weaver’s knot; fancier yet is the carrick bend, known in macrame as the Josephine knot.
Additional Resources
General Knotting: Grog’s Animated Knots is a thorough resource, especially for related knots and uses, although sometimes you have to use another source to find the name of the knot used on Grog’s site. Wikipedia’s list of knots is a good place for synonyms, and is also quite thorough. The Open Directory Project, which I always forget still exists and isn’t just an artifact of the Web circa 1996, has a list of links to various knot references for different purposes.
A practical and old use for knots is making netting, as taught at More Than Fish and Hammocks and Rita’s Netting Nook (note some “classes” on the latter page are not free). The related art of tatting creates lace; there is a nice photographic introduction at Atelier de Happa (though the page didn’t render quite right for me) and links to video instructions at Tatted Treasures. It is natural to move from tatting to macrame. Stone Brash Creative has a great macrame tutorial with lots of knots for that craft.
Decorative knotting for paracord, making bracelets and keychains and the like, is the content of Unique Ropecraft. From there I found a site for boondoggles, or what I would call plastic lanyards. For traditional Chinese knots, try chineseknotting.org or a page from a New Jersey Cultural Heritage site. I could not find a site dedicated to tying Celtic knots (though there are plenty dedicated to drawing them) but several can be found in the gallery on Fusion Knots, and Threads magazine has an article about weaving a Celtic knot to make clothing trim. There are many pages for friendship bracelet patterns, but the best introduction I found is at The Purl Bee.
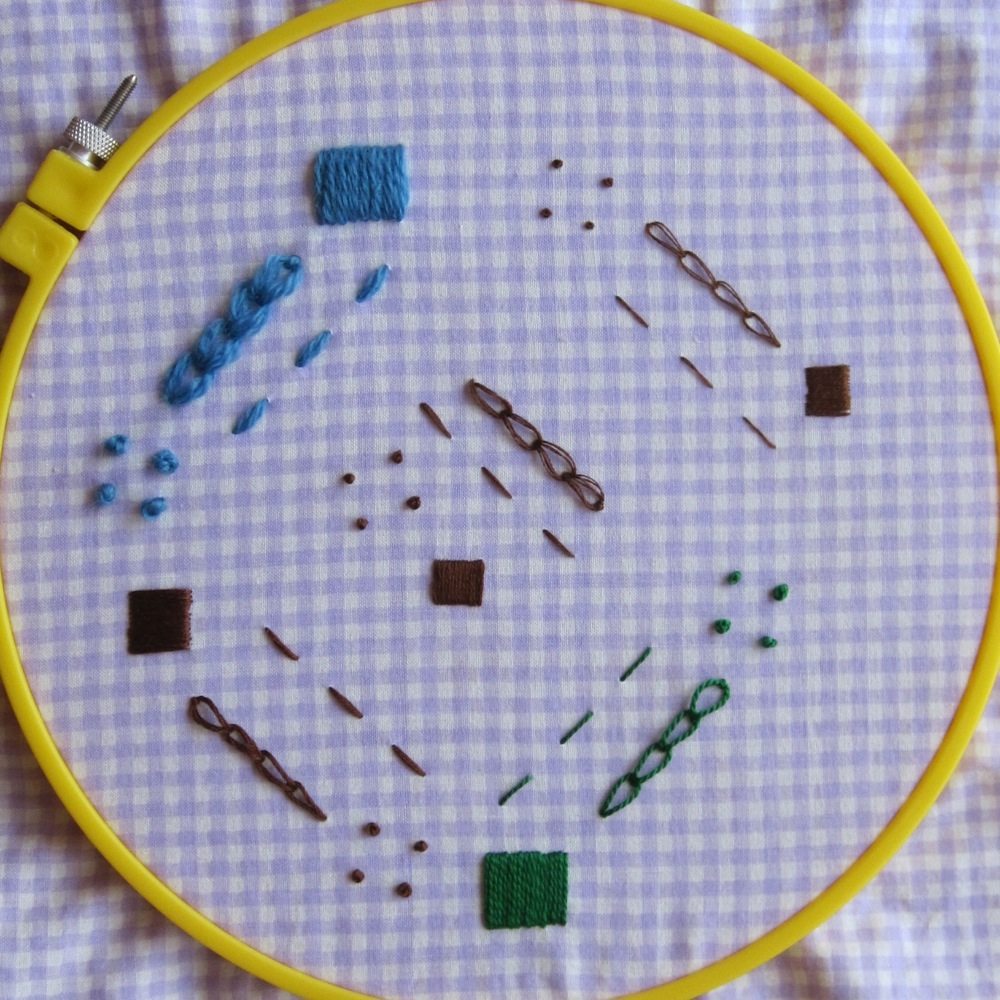
Finally, I had an embroidery sampler panel on knots, and although most of my favorite online stitch dictionaries are not organized in a way that allows picking out knots, Sarah’s Hand Embroidery is the exception. Unfortunately there are no internal links so you’ll have to scroll and pay attention, but the stitch families are in alphabetical order and the knot family is tenth in line, with yellow and orange samples. Click on a photo to see stitching instructions.