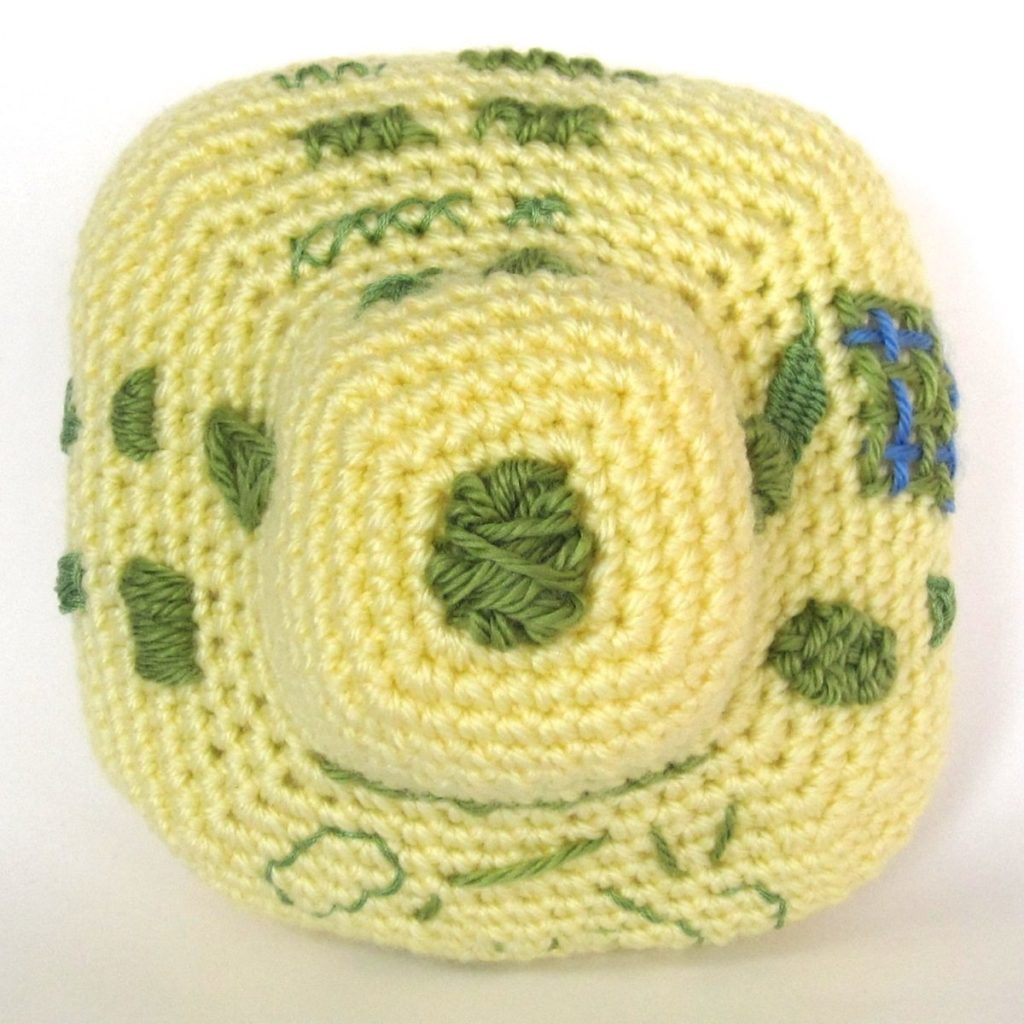
Here we are! The first post in the series. As we explore embroidering crochet fabric, please do leave me any questions or comments you have. I love to experiment and will work out any answers I don’t already have.
Two notes: All photos may be clicked to reach larger versions. To keep the front page of the blog from being overwhelming, I’m going to cut each of these posts after the table of contents. The rest is after the jump!
| Inside this post: | |
|---|---|
| Beginning and ending Stitching on crochet fabric Running stitch and backstitch |
Satin stitch Cross stitch Freehand weaving |
Beginning and ending
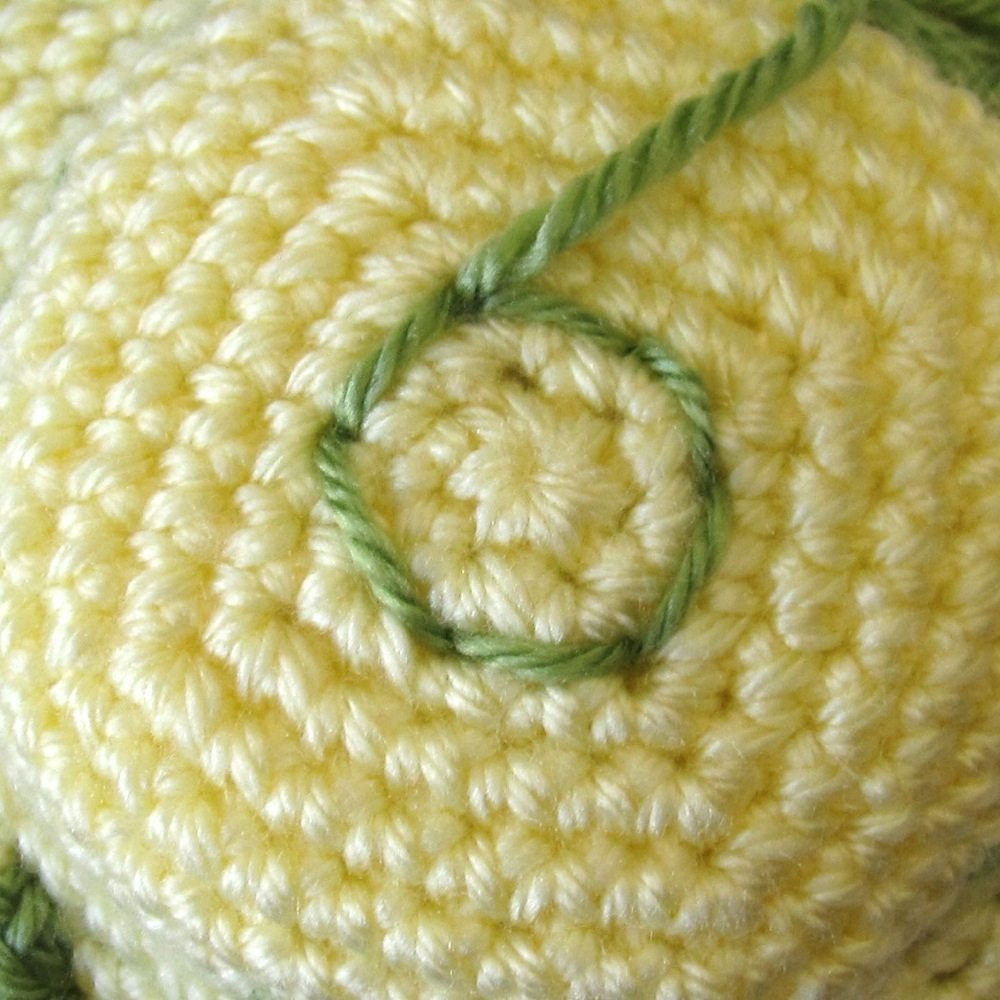
A while ago I wrote a post about securing and hiding yarn ends in amigurumi, and mentioned it could be used in reverse to begin a length of embroidery floss or yarn. Let’s begin by recapping that method, with some new photos.
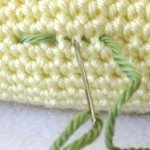
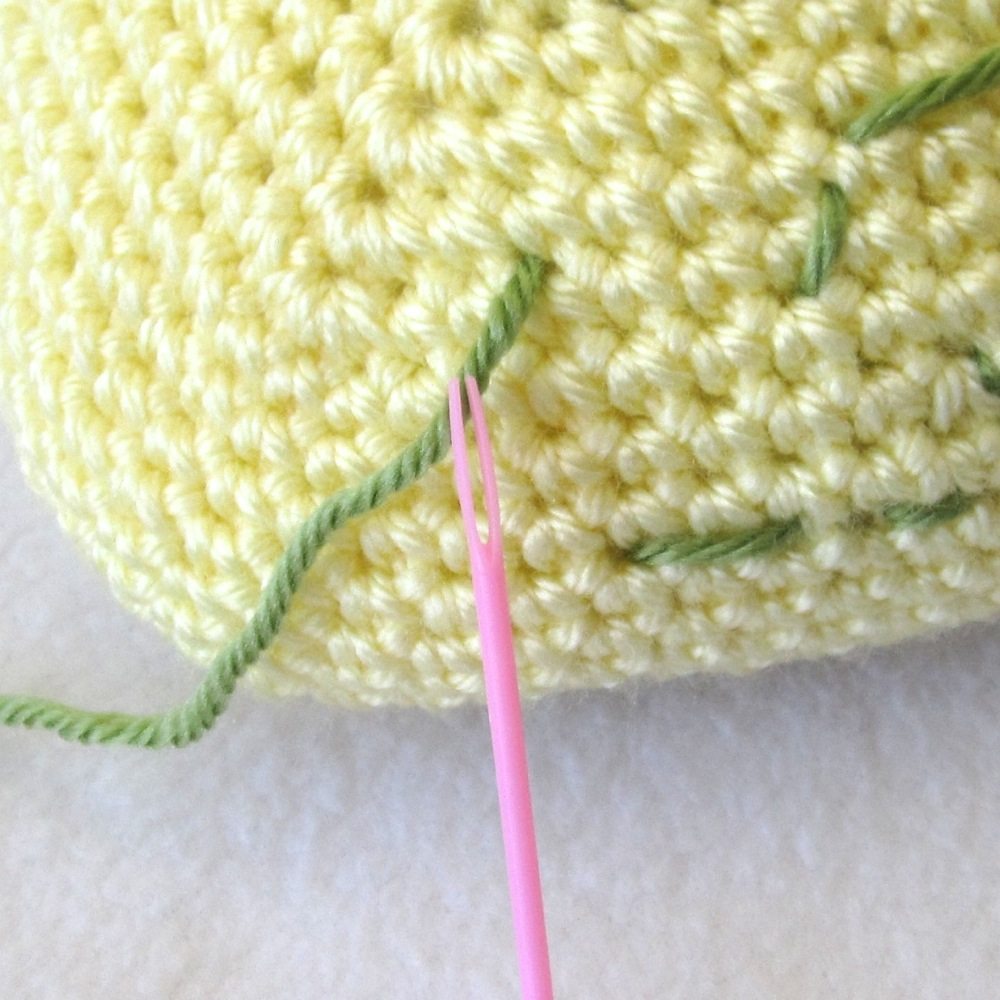
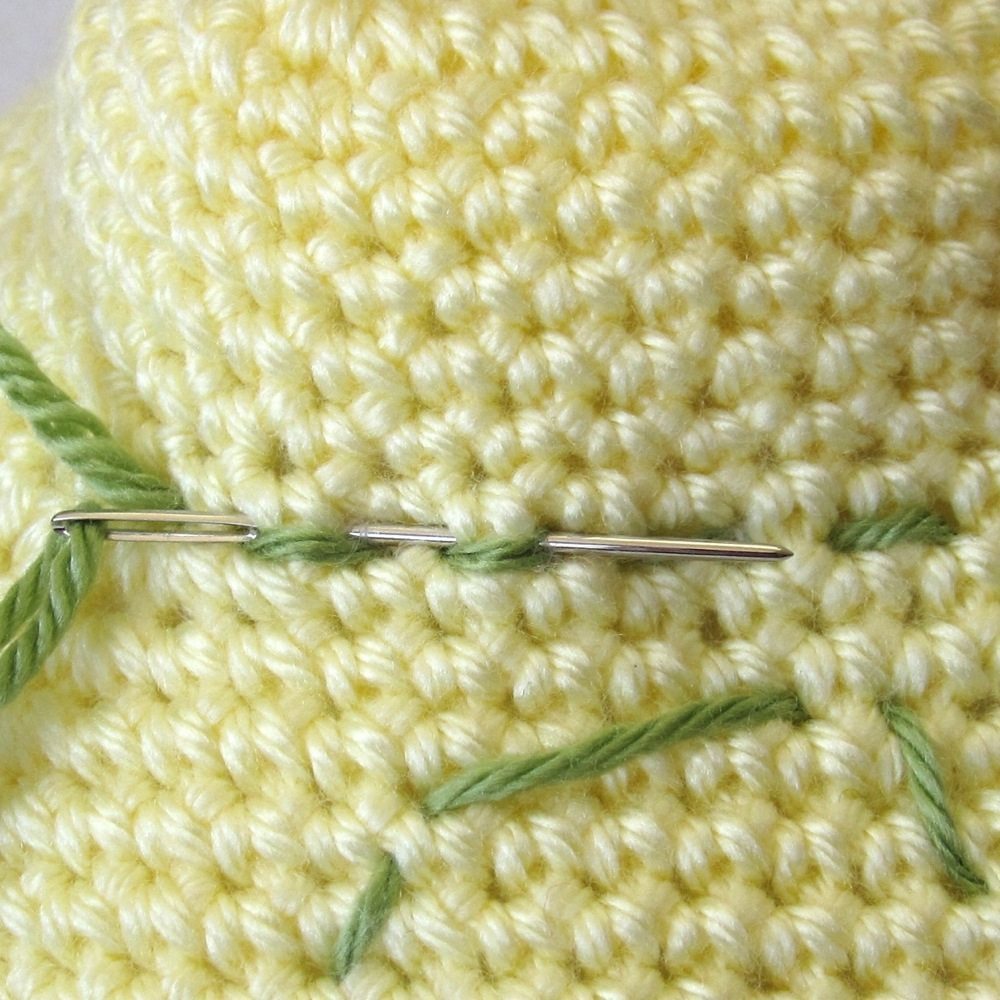
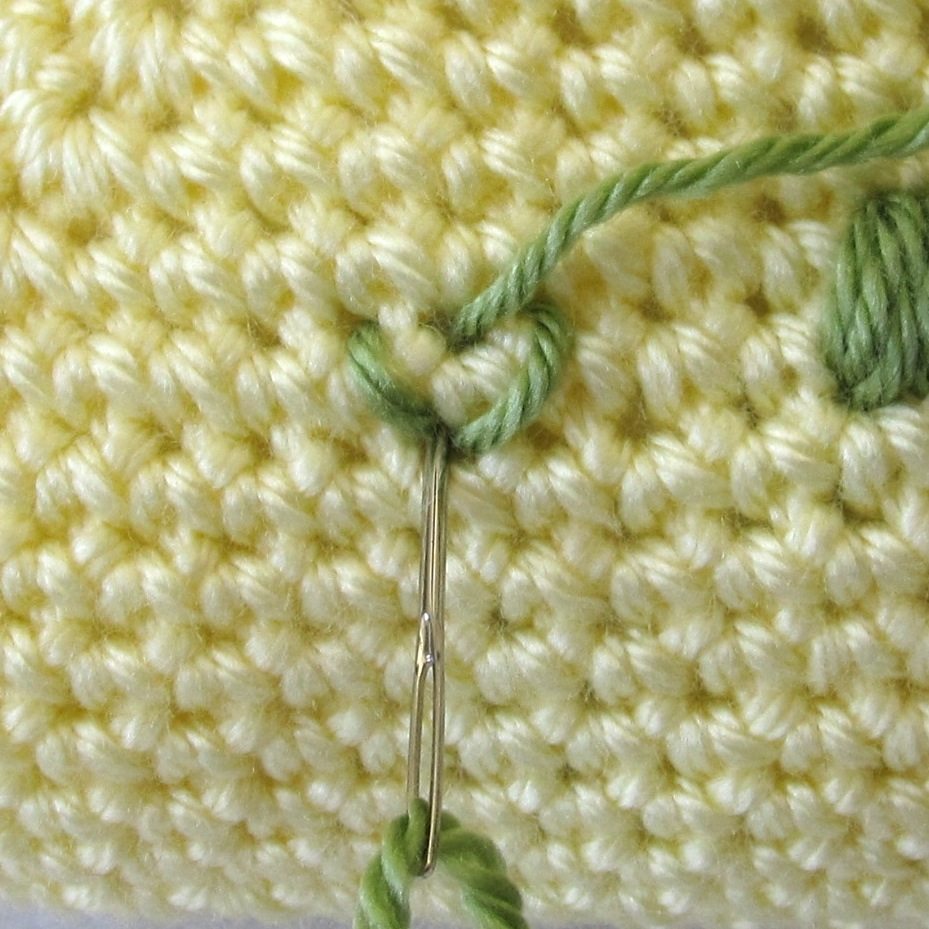
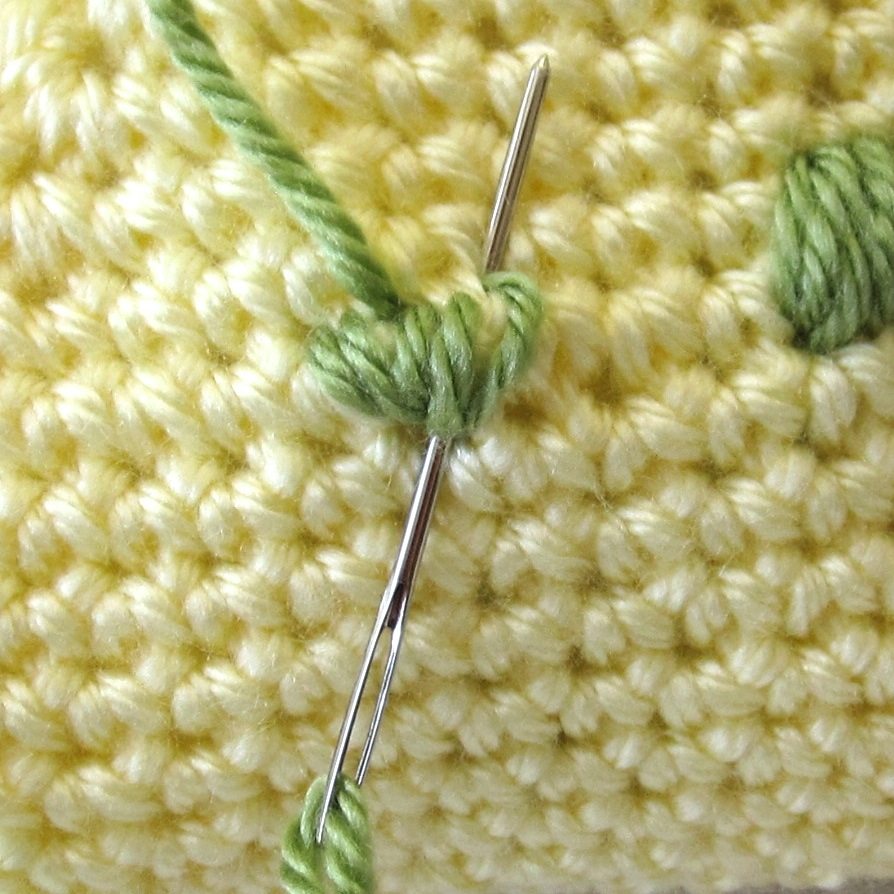
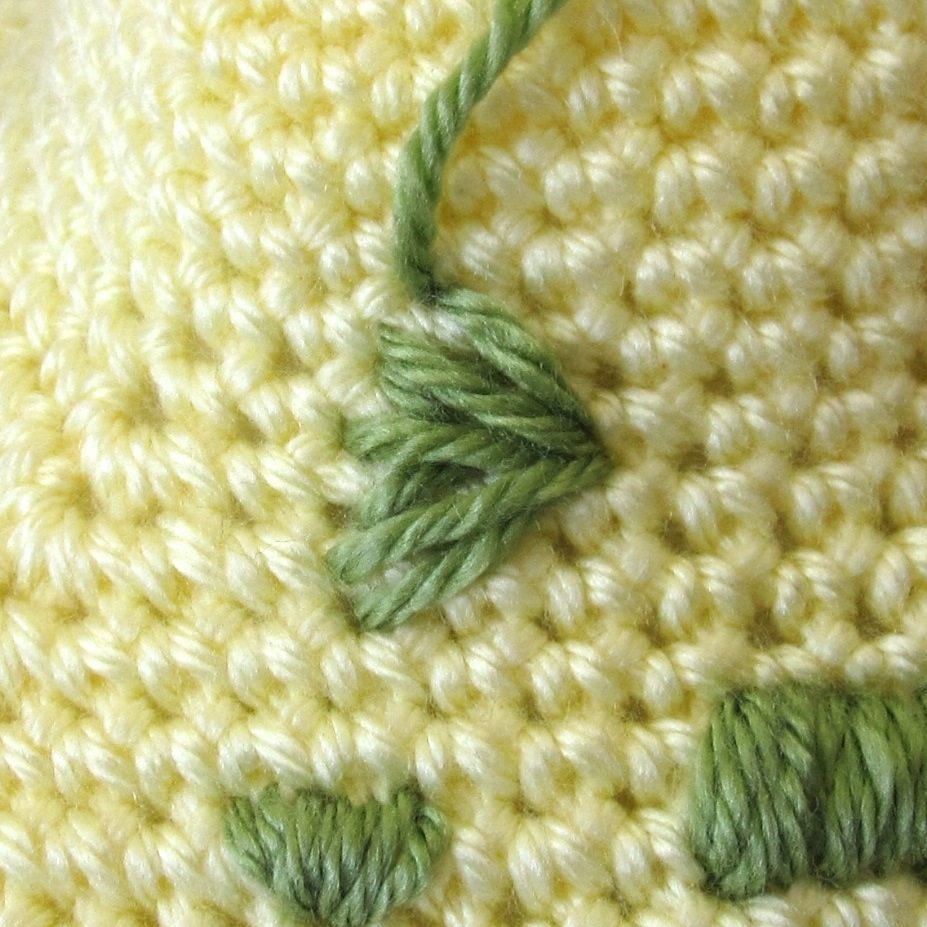
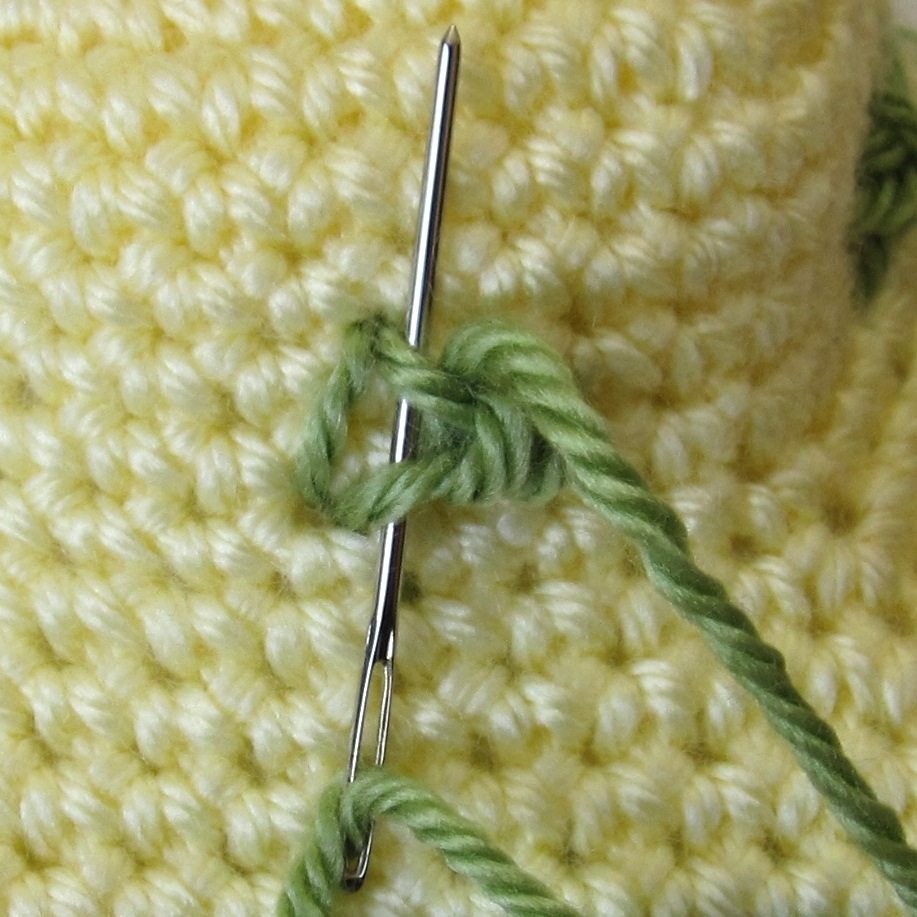
Yarn secured through your crochet stitches may peek out no matter how careful and skilled you are. If there is a spot on your piece that will be less visible (under an ear, in the shadow of a limb, etc), you can hide the yarn by securing it in that spot. On the present piece I’ll use the base for hiding the yarn.
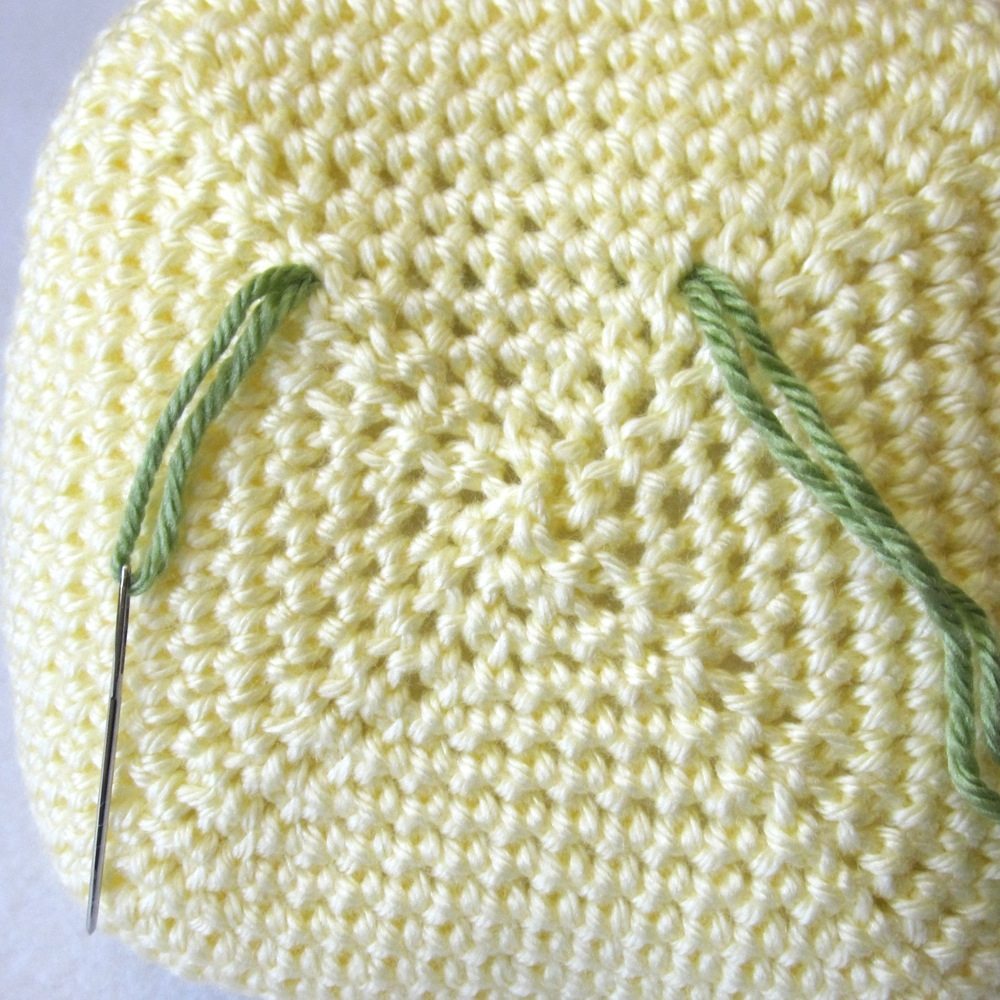
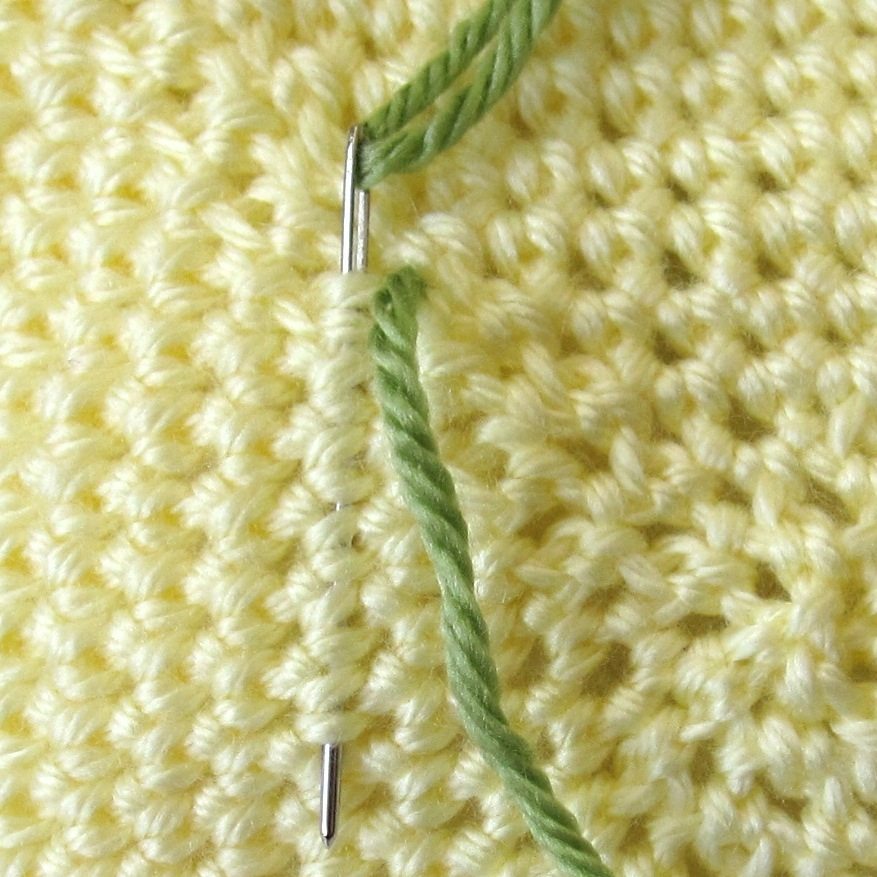
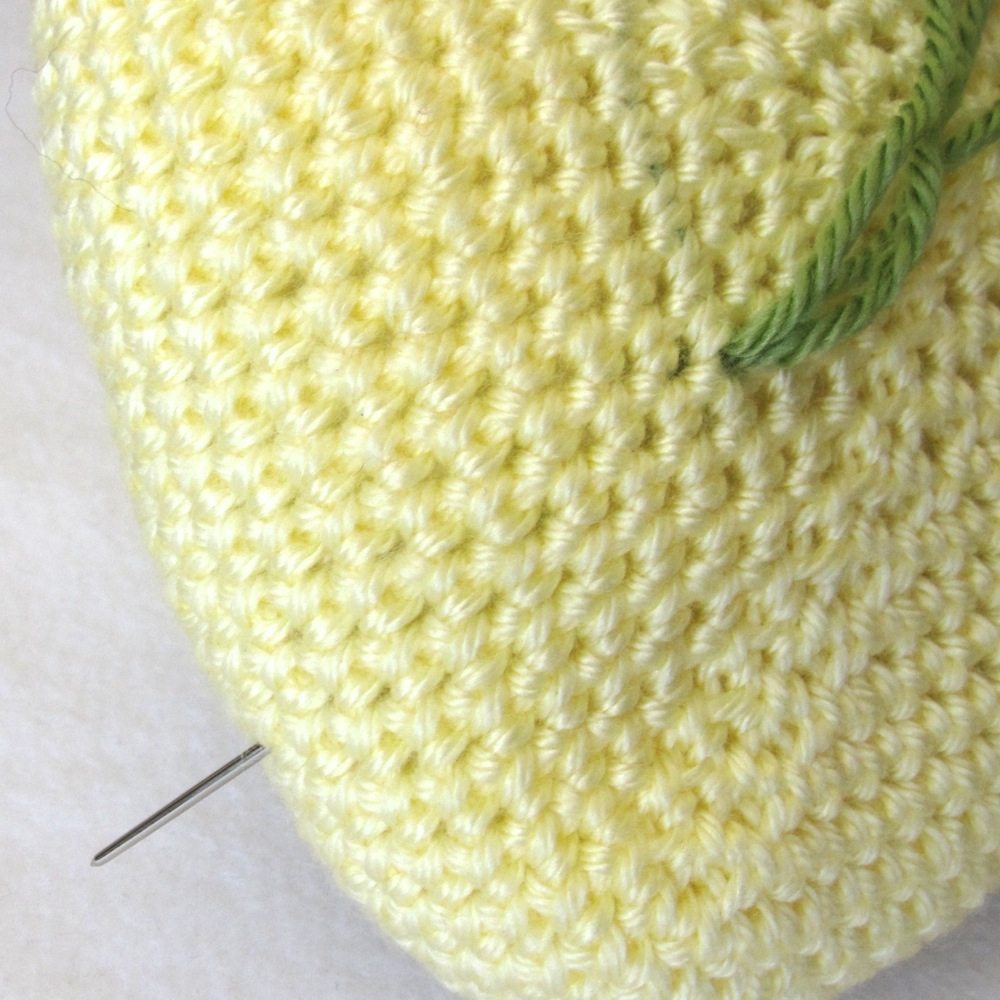
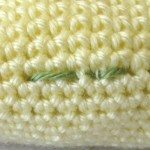
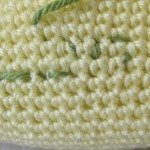
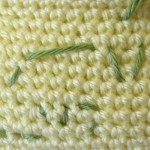
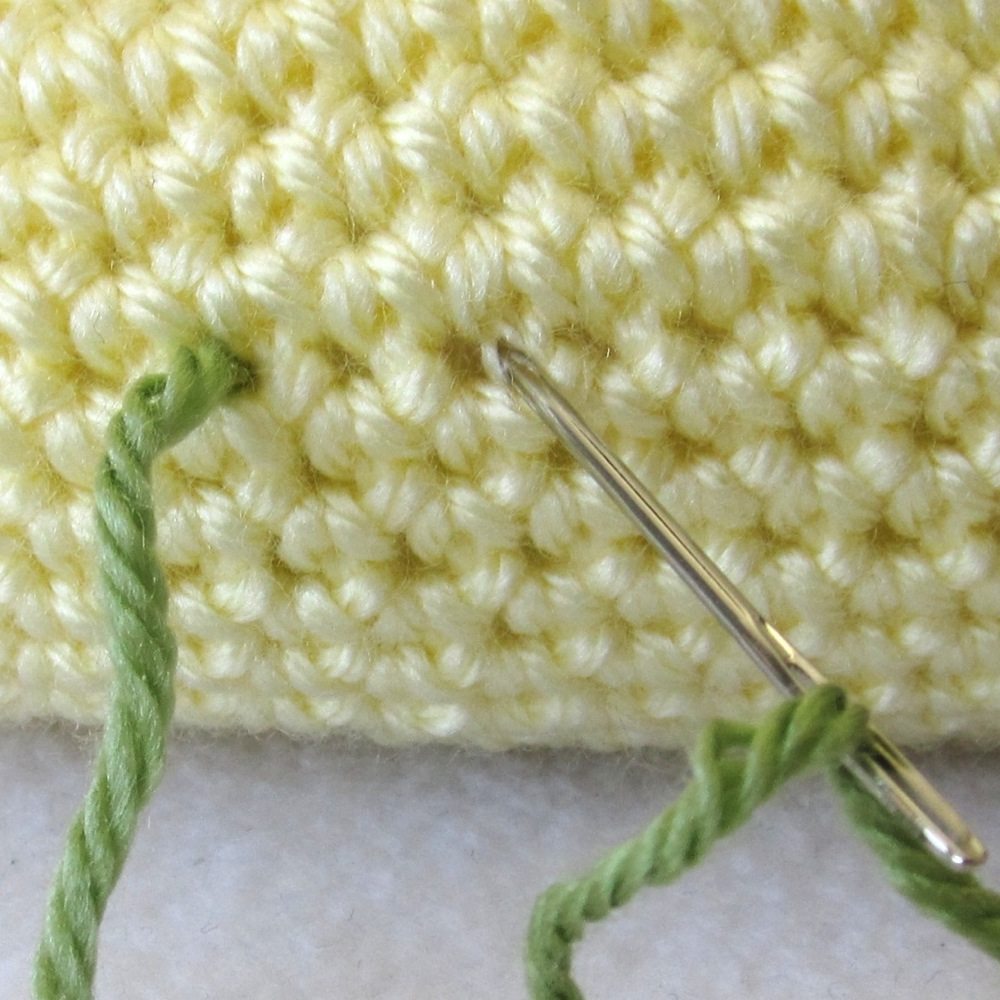
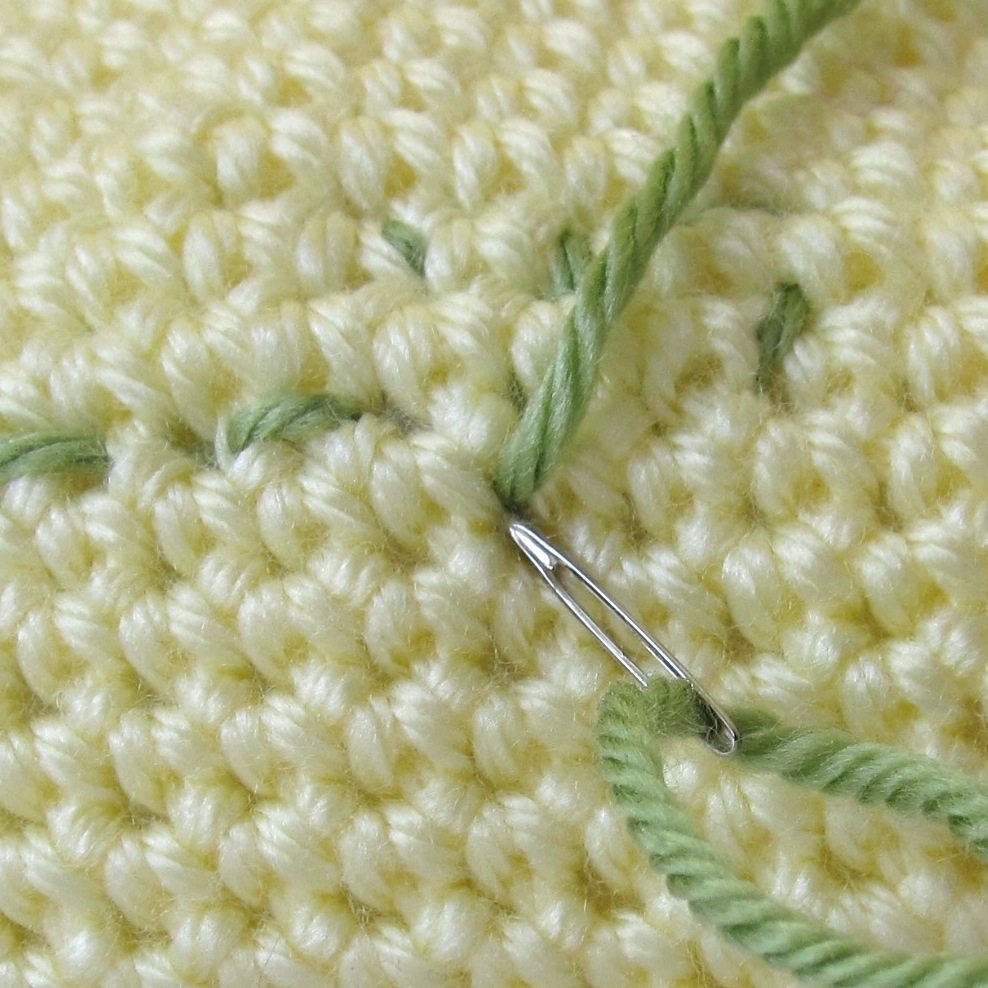
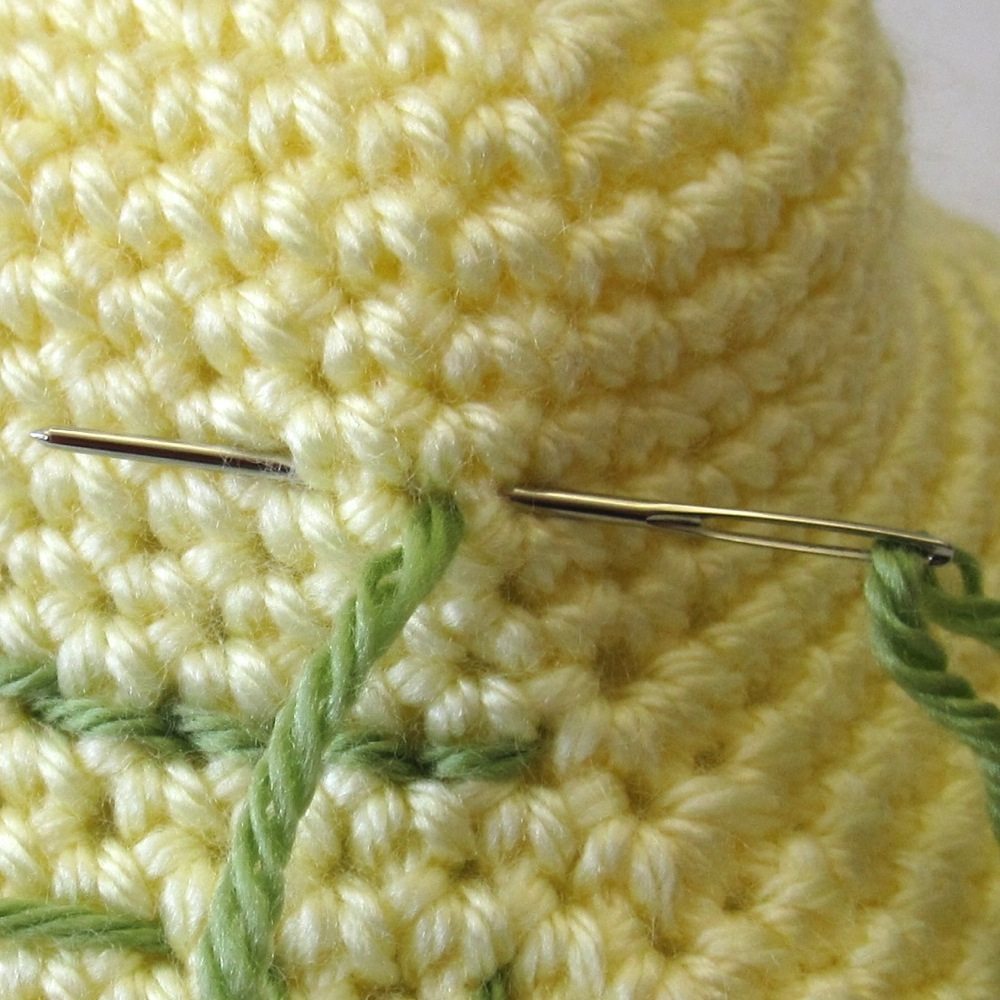
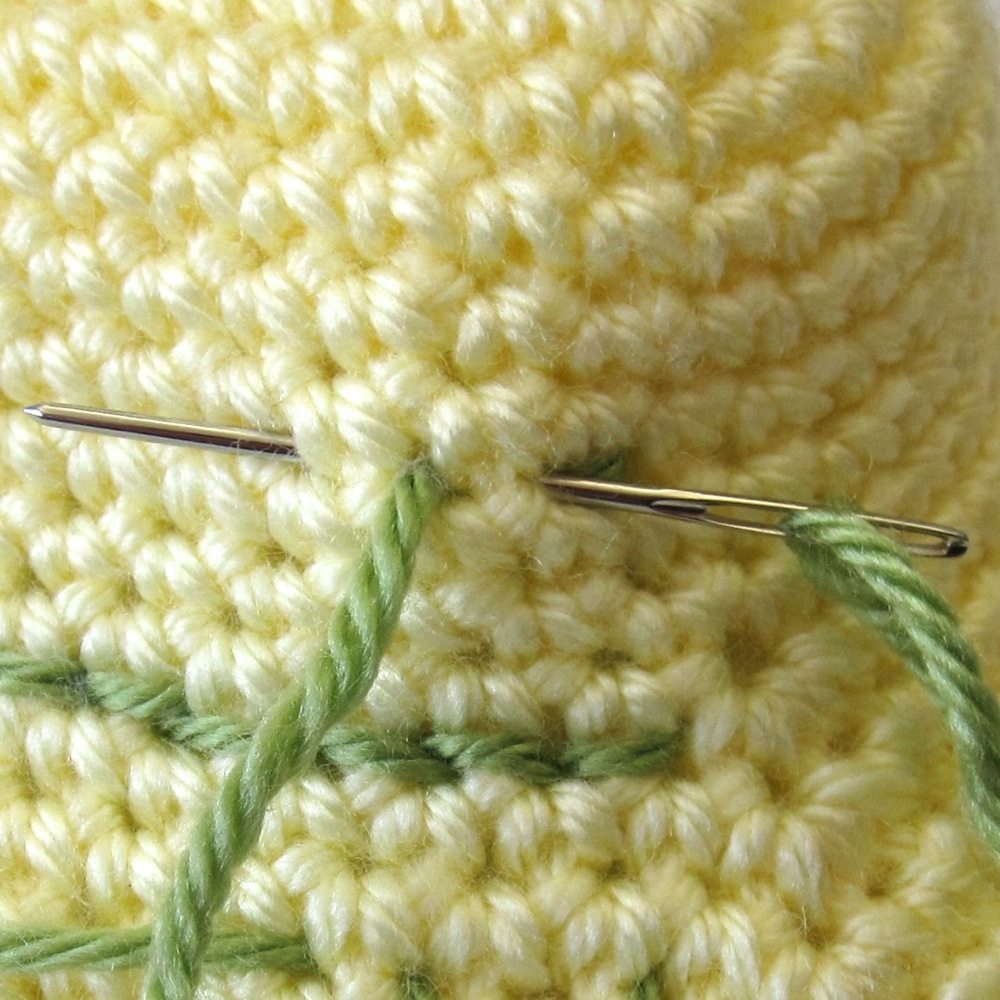
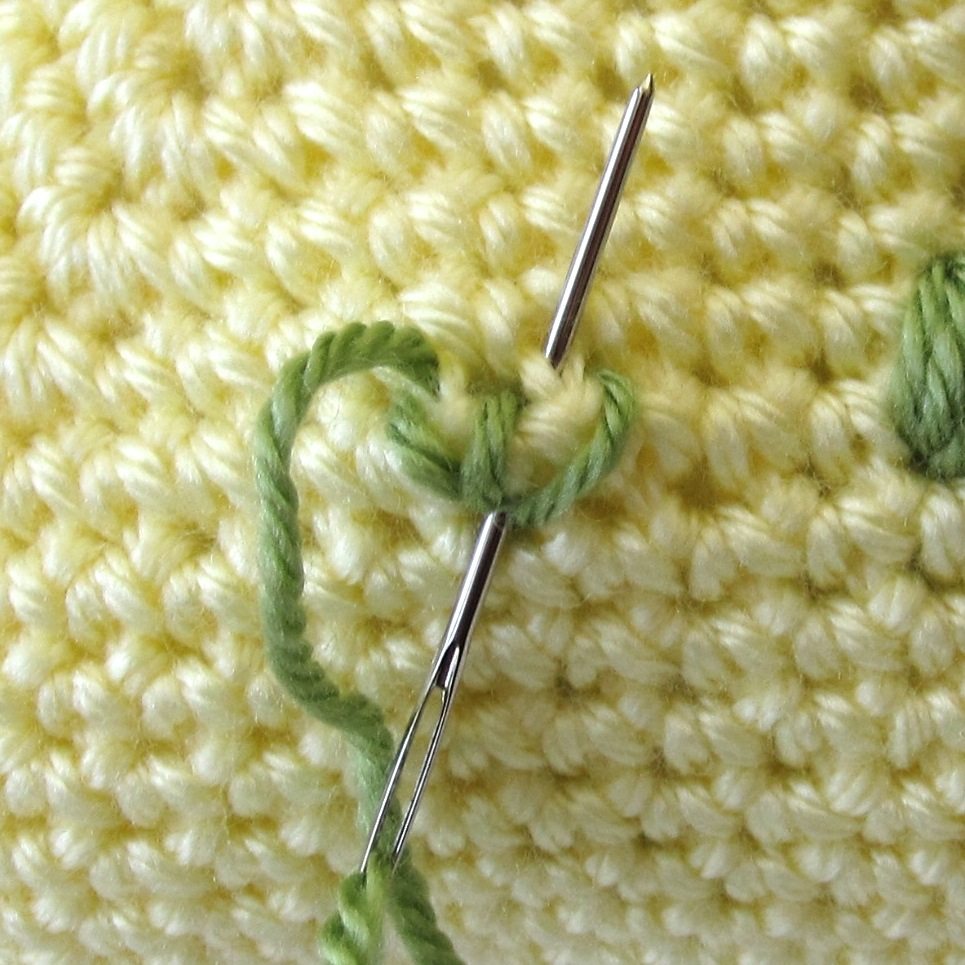
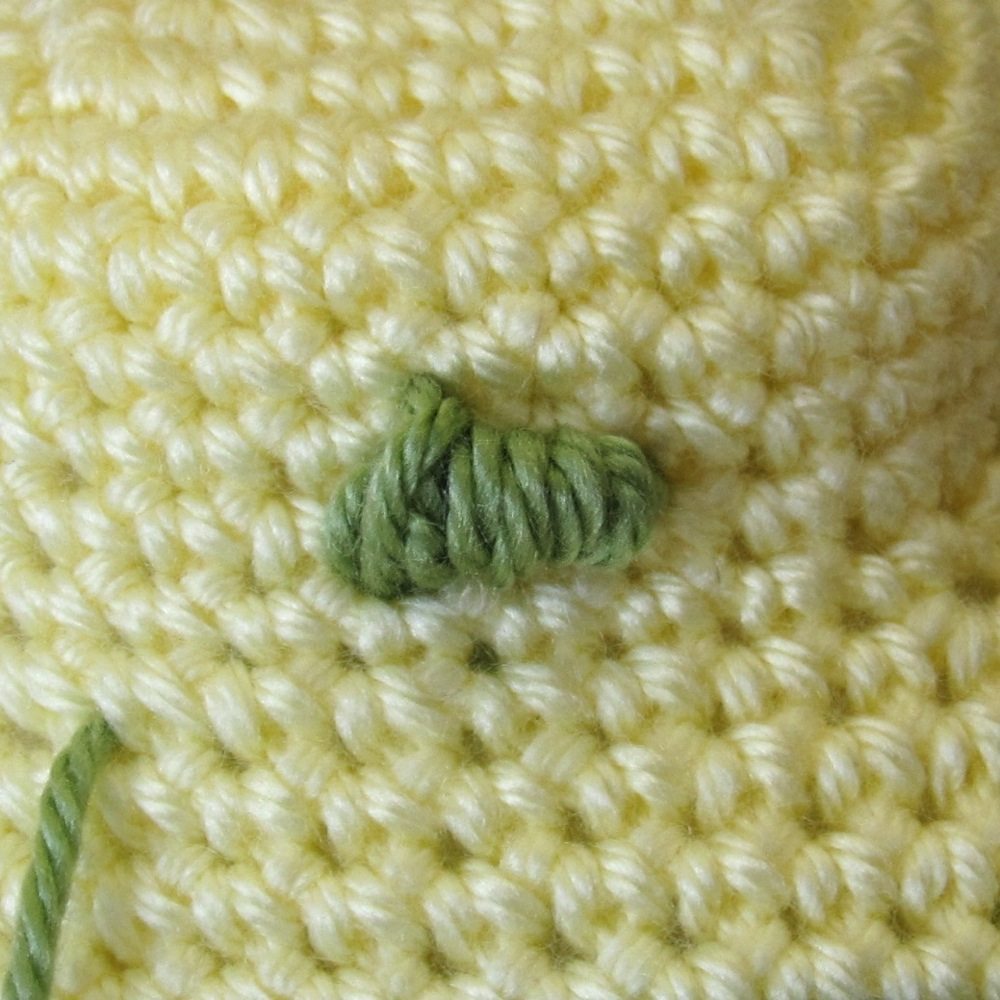
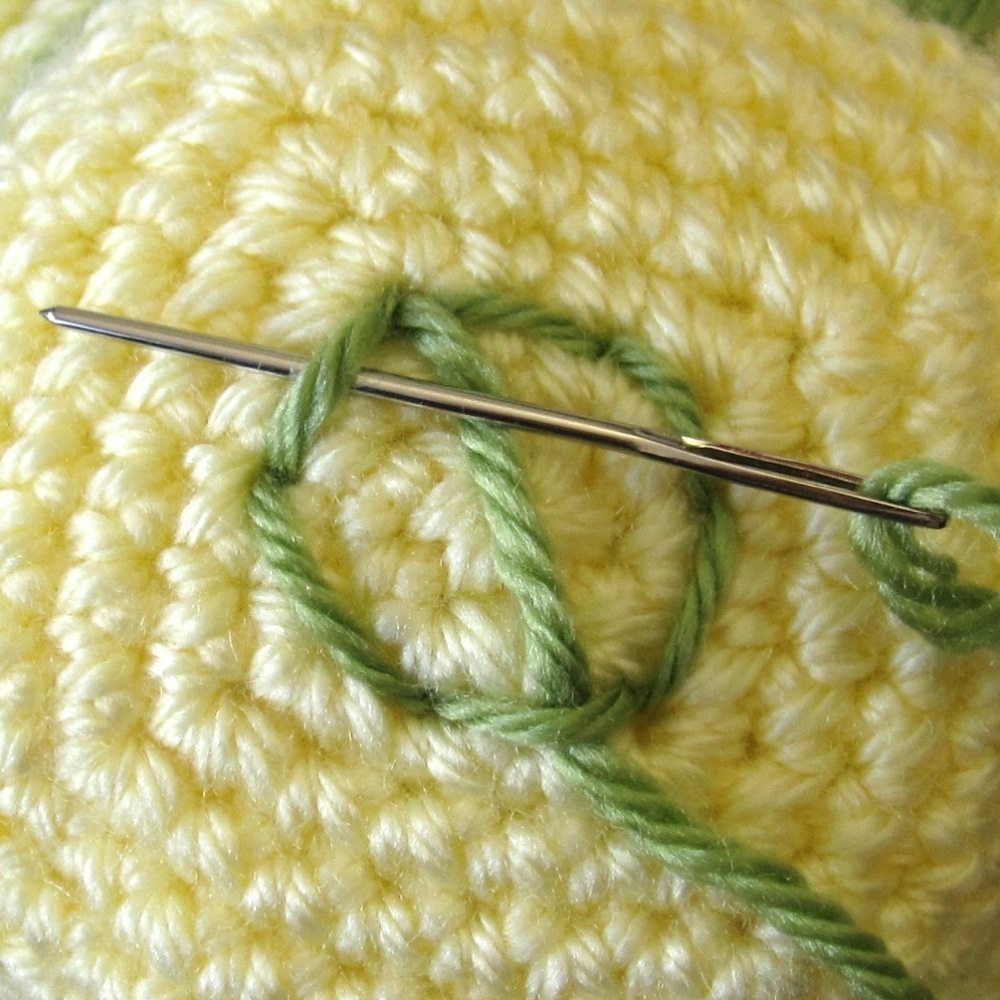
To keep a fuzzy clipped tail from peeking out of the stitches if they stretch and compress with handling, stitch completely under the fabric and back up again 2-3 inches away (1st picture above). Carefully pull the yarn just far enough to hide its end inside the crochet piece. Then put your needle through the centers of a row of stitches to secure the yarn with friction (2nd picture above). Depending on how much handling the piece will see you may want to go back and forth multiple times. Finally, stitch back under the crochet fabric completely and emerge where you wish to begin the embroidery (3rd picture above).
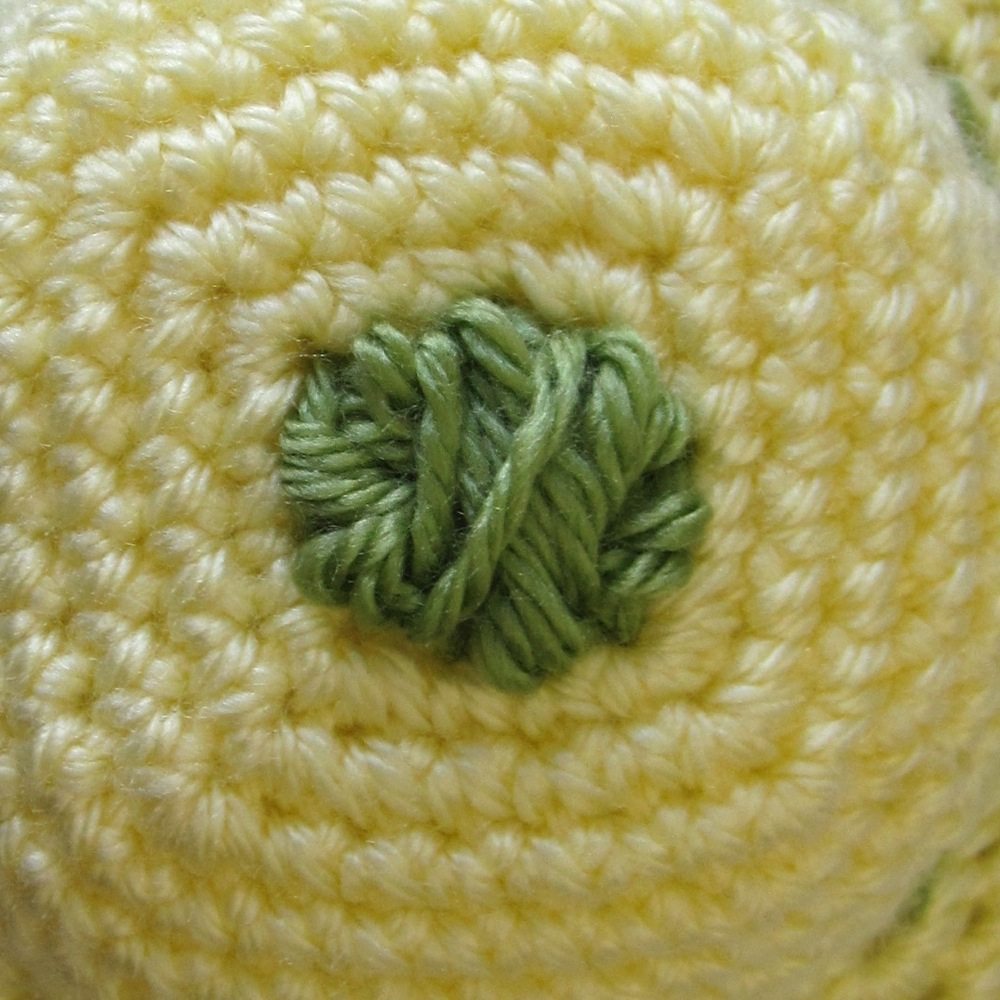
At the end you’ll reverse this process, stitching down to the hidden location, securing your yarn, stitching under the fabric for a short distance to hide the cut end, coming up and clipping your yarn close to the surface. See the aforementioned earlier post for photos of that process.
If you use embroidery floss be aware that it being smaller and smoother than yarn makes it harder to secure. Even for an item that won’t see much strain you may find you want to make at least one U-turn securing the initial end so you don’t pull it out when embroidering.
Stitching on crochet fabric
Crochet fabric is not like woven fabric. It has gaps and a lot of hills and valleys. Here are some considerations.
- The more tightly your fabric is stitched, the more you can treat it like woven fabric. Knitted fabric, while not our topic here, can often be treated similarly to woven fabric as well. If you intend to thoroughly cover a region and your piece is fairly solid, you can stitch wherever you like, piercing yarn or stitching into gaps. I’ll point you to a tutorial on embroidering on a hat using waste canvas, which is an evenweave fabric that sits on top of what you want to embroider and is removed afterward. Everything we do in this series will apply to more tightly crocheted fabric as well as gappier fabric.
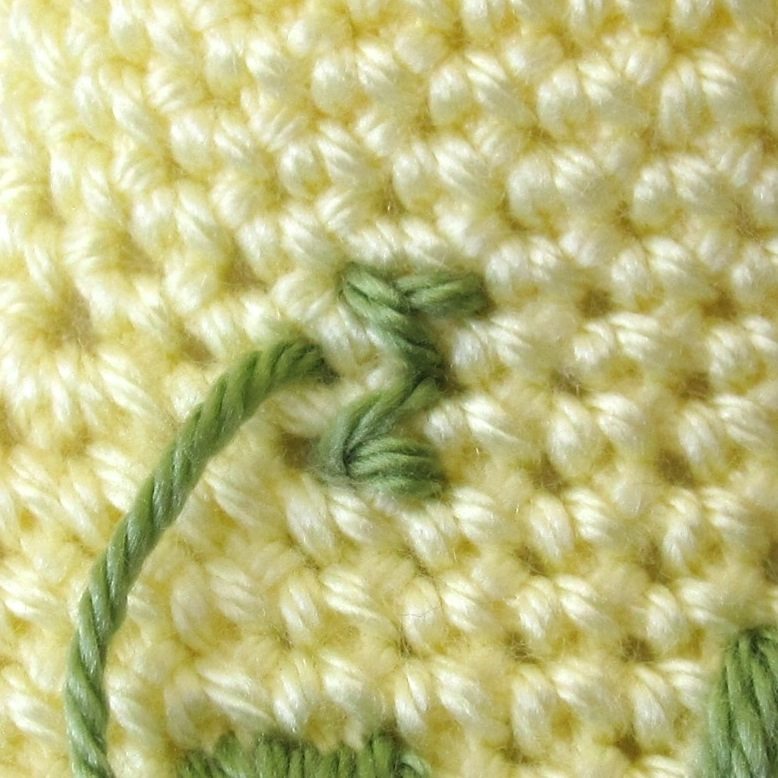
- In general I think it is better to stitch between the strands of your crochet, for two reasons:

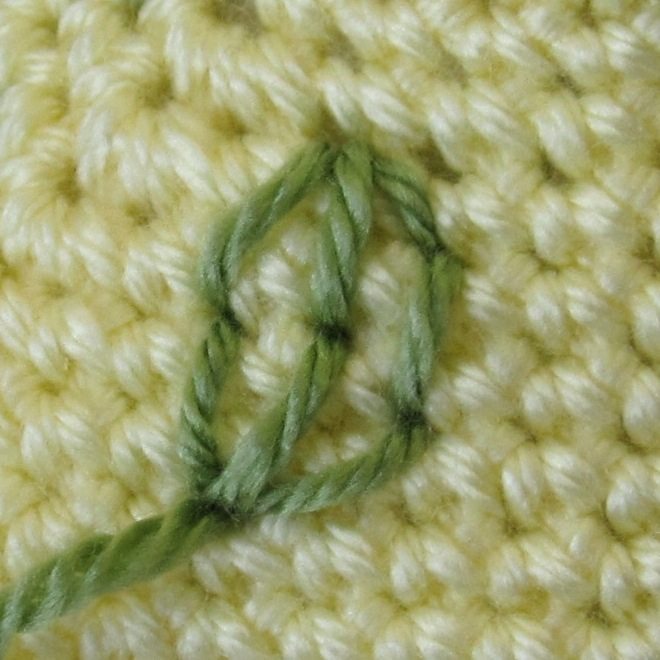
- If you pierce a strand, it can be apparent and look messy. You can see in the pictures above that it depends on where you pierce the strand, but when a little bit of yarn is between your stitch and a gap, it’s highly visible.
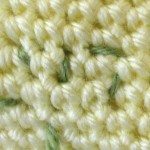
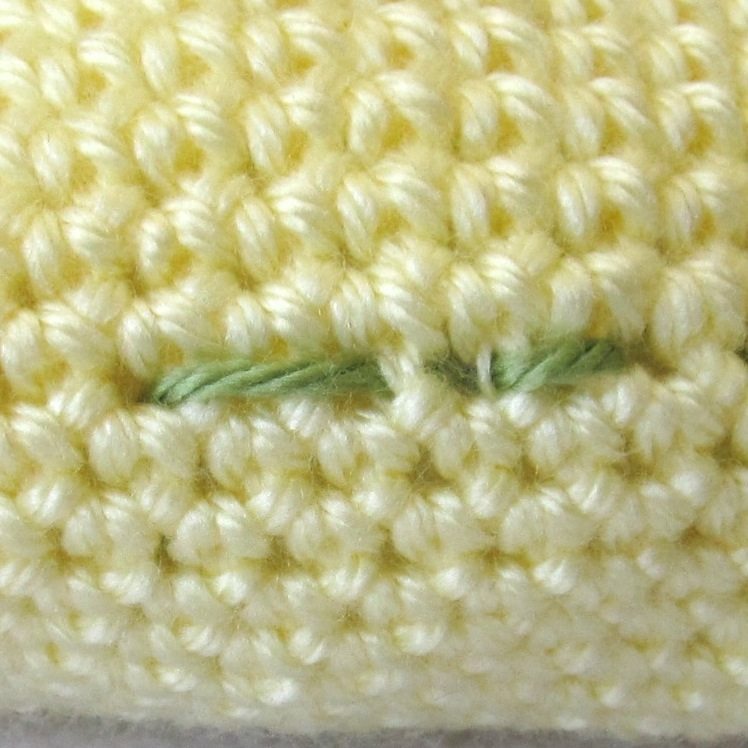
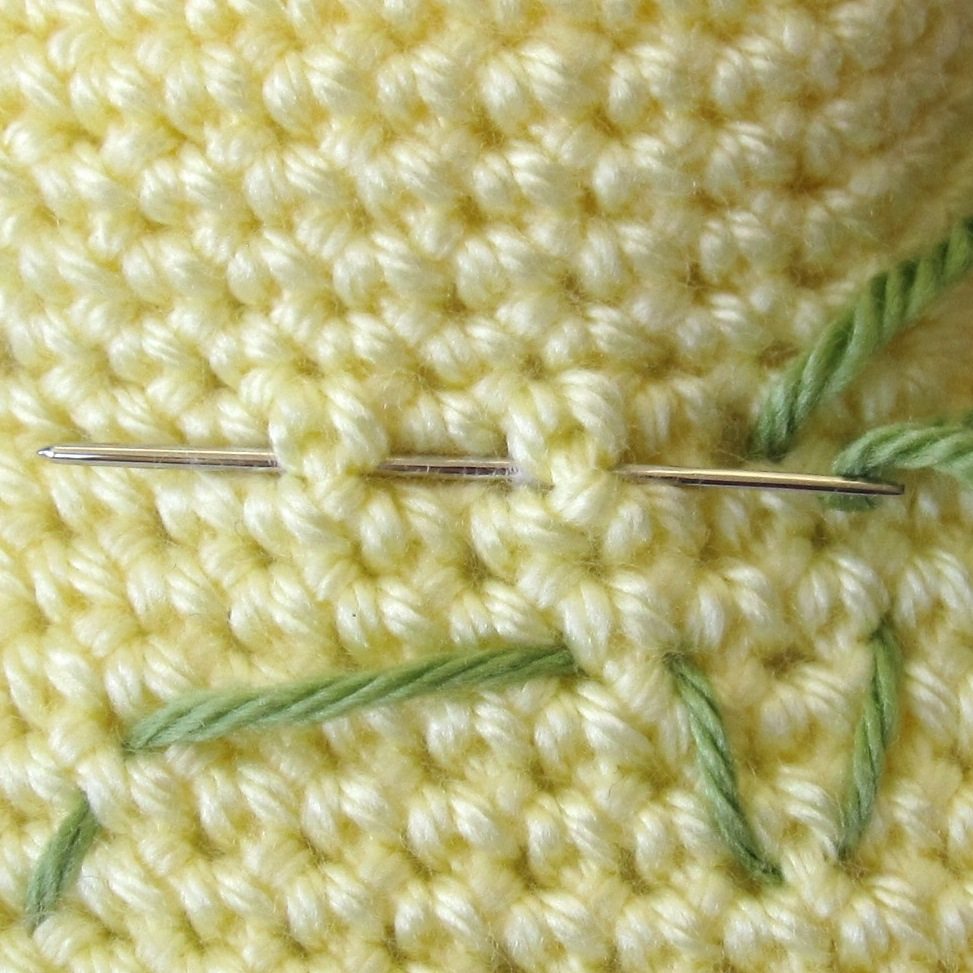
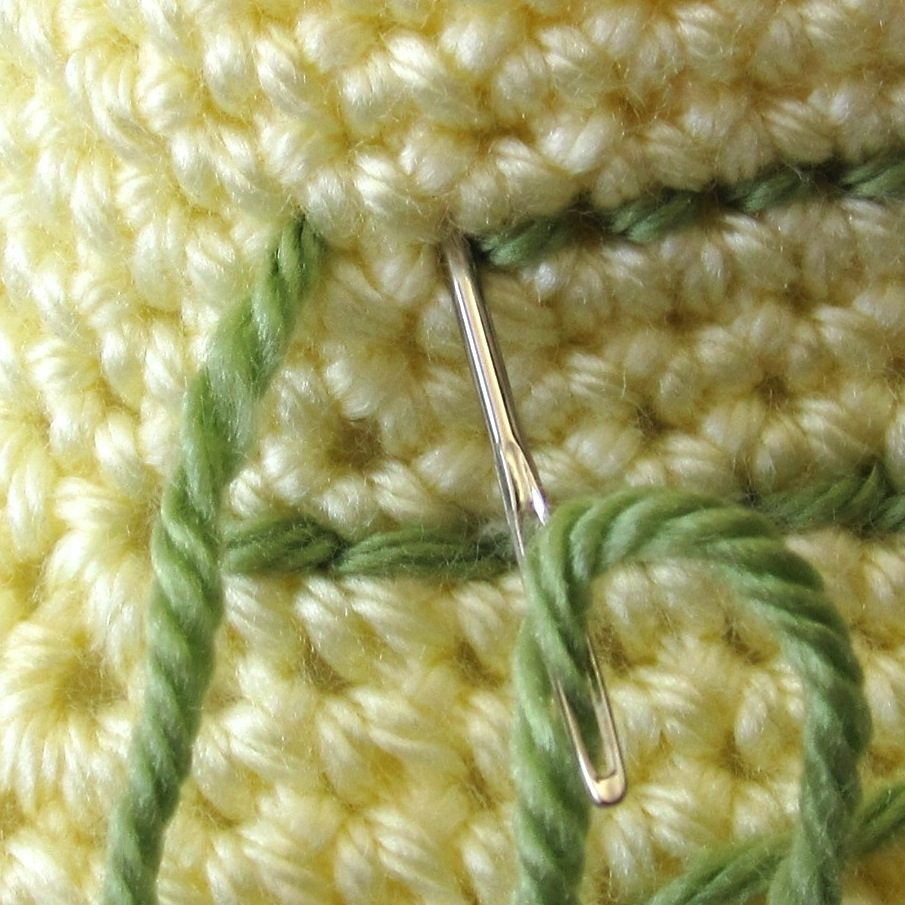
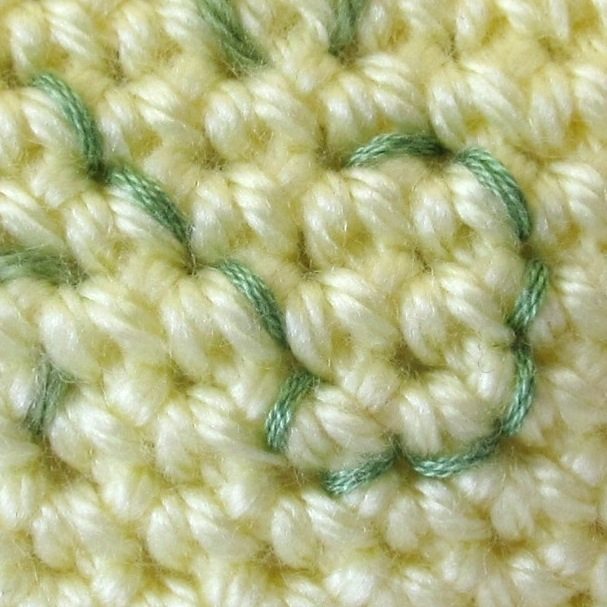
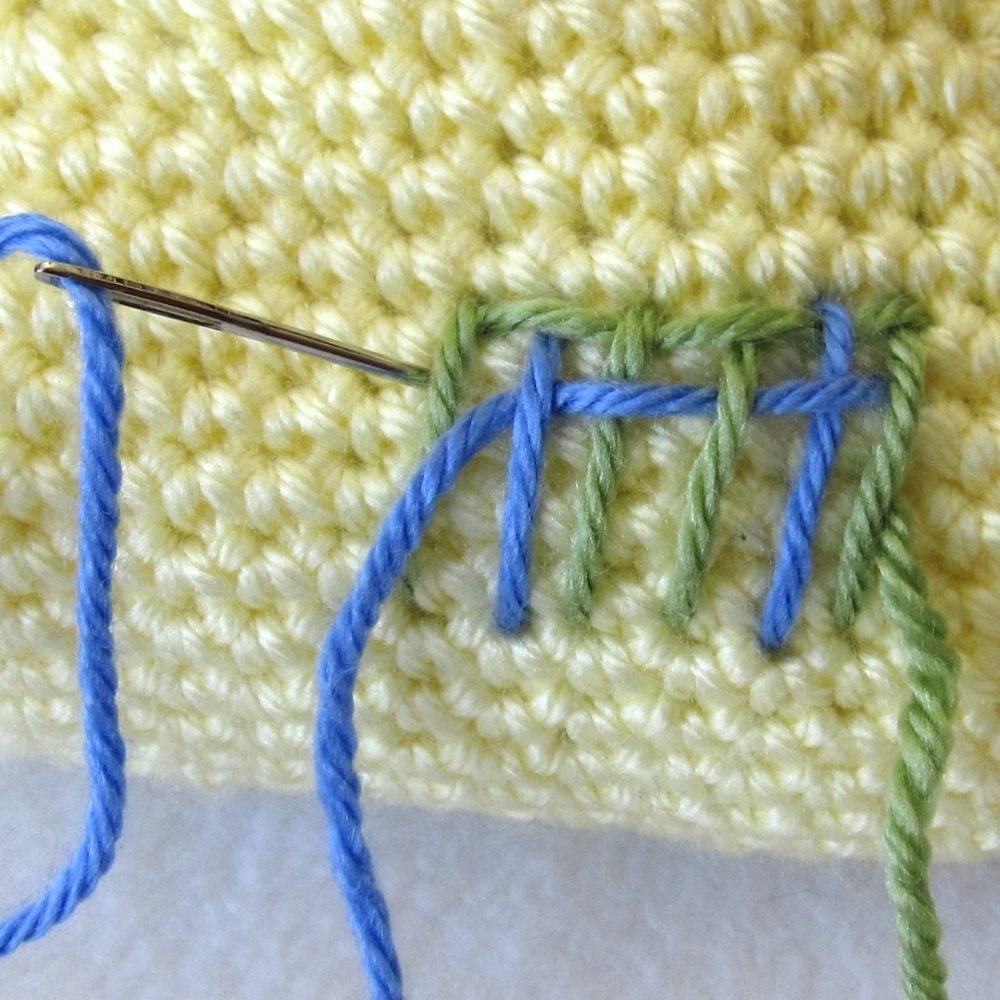
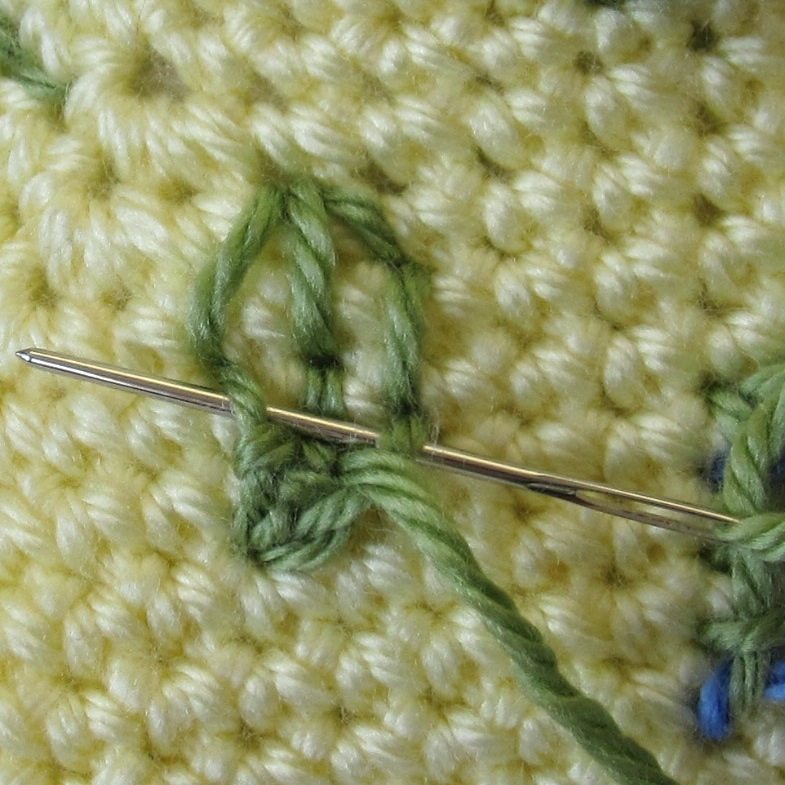
- (A more significant reason in my opinion:) If you keep your stitches between strands, it is easier to undo stitches, or simply shift your needle to a different spot if you decide the first spot wasn’t right after all. You can see in the pictures below that after stitching right next to my yarn in the same spot and out a ways away, the yarn is completely relocated — no green is visible under the stitches between the two points. I frequently put my needle out in some random location to tighten a stitch so I can look at it before deciding what stitch to make next.

You still have plenty of options for where to stitch!
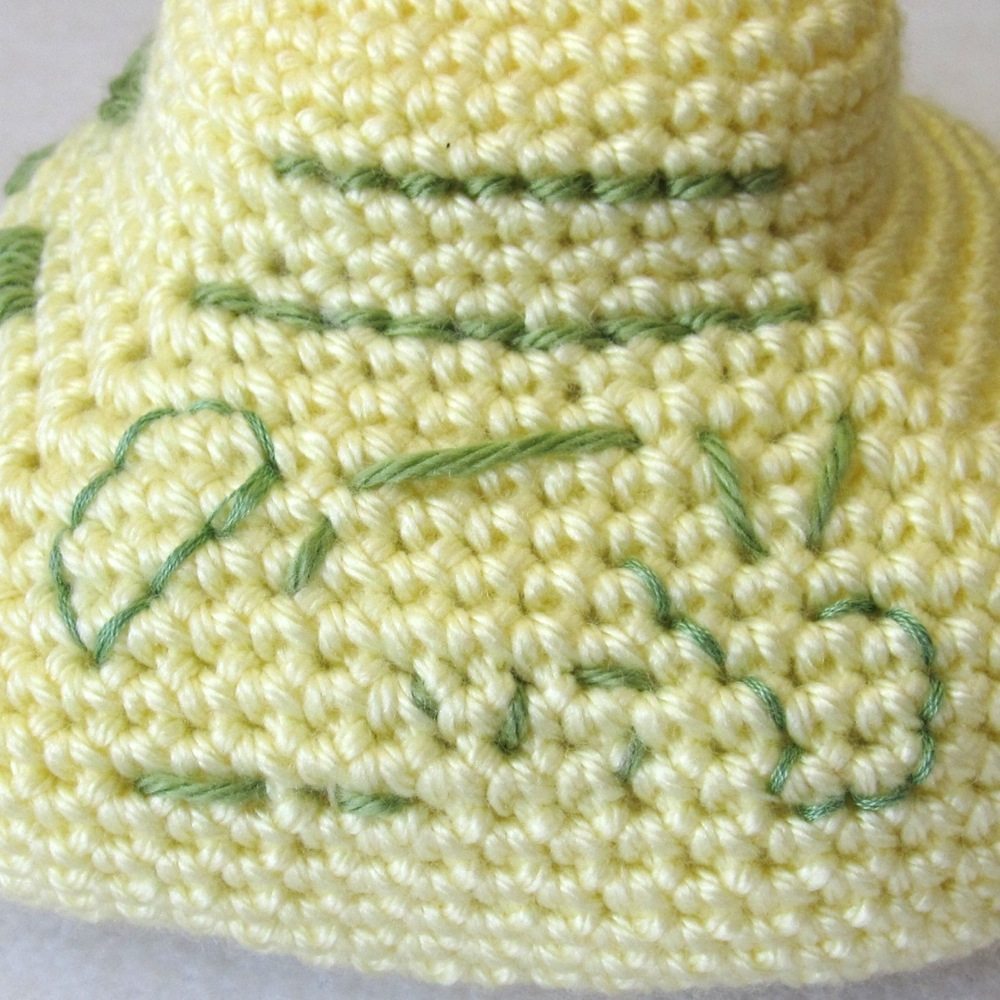
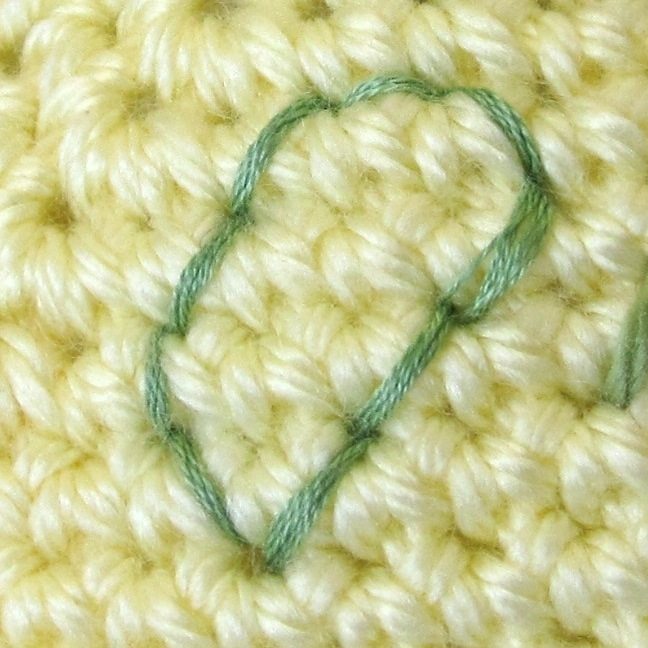
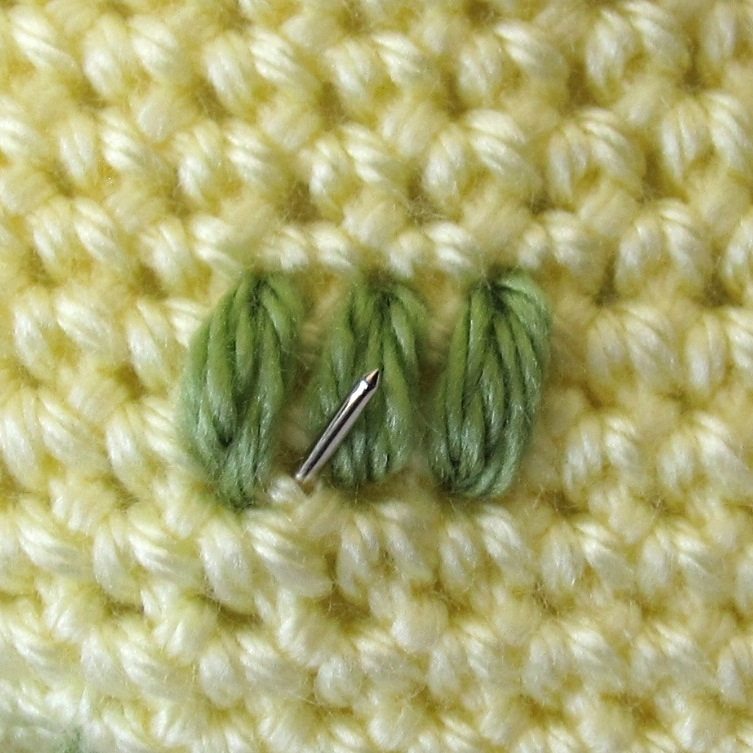
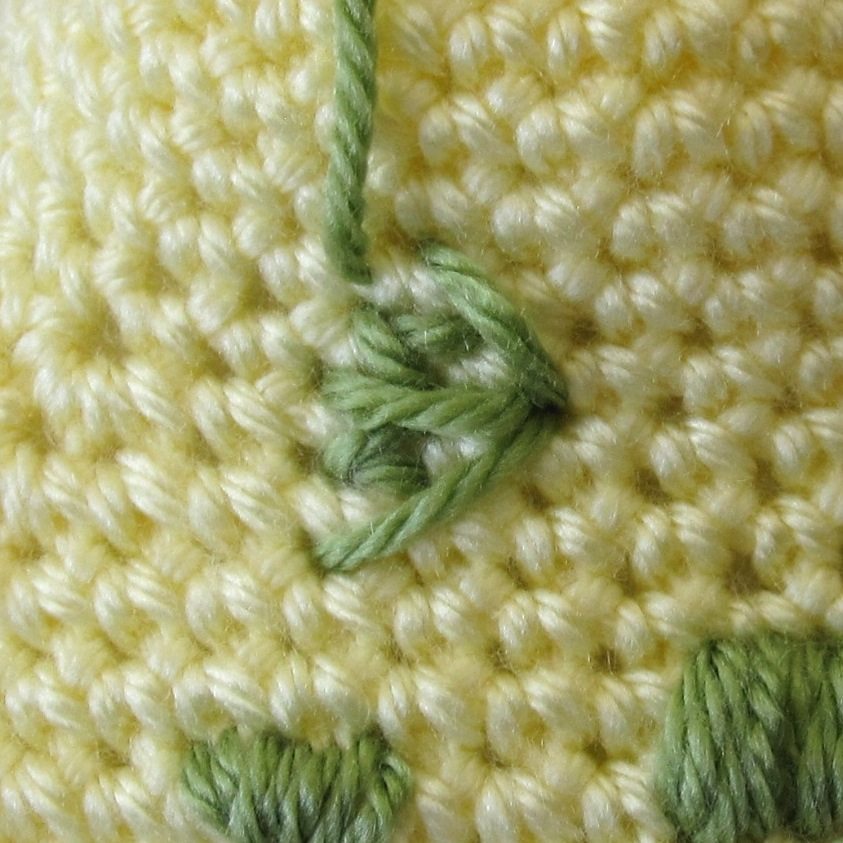
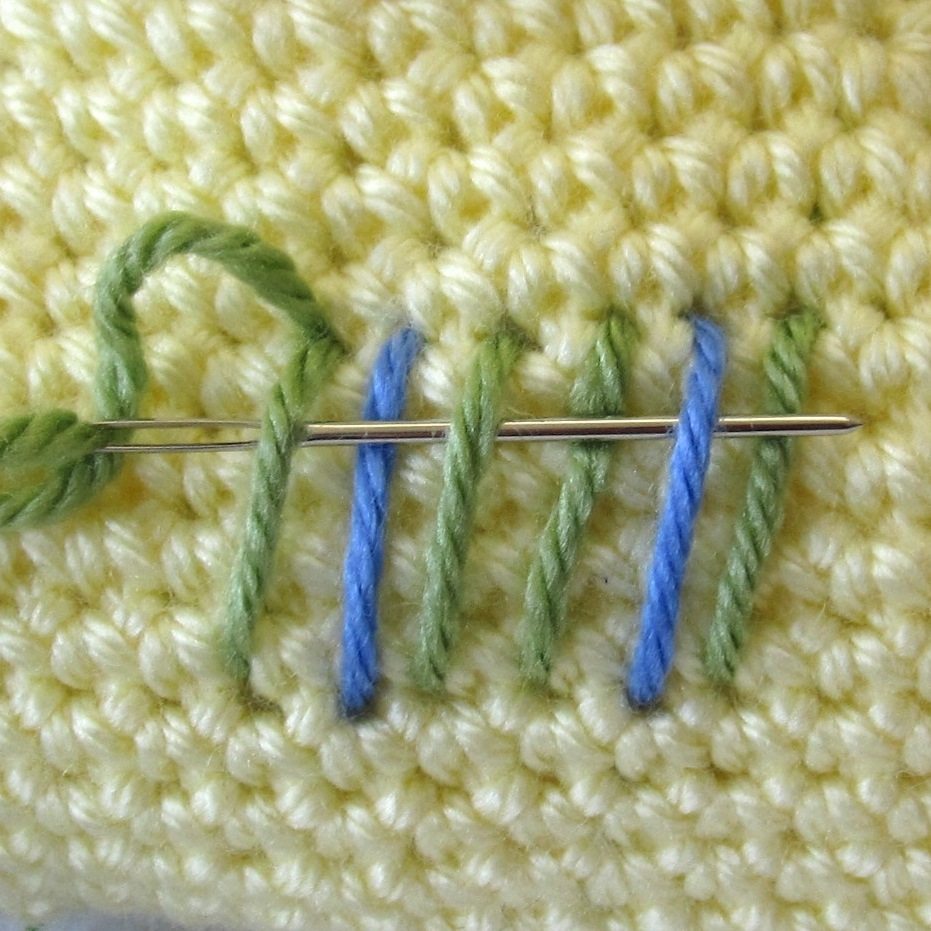
- Although even single crochet fabric is not a grid, it bears some resemblance to cross-stitch fabric. The texture gives it some distinct differences, though, that affect stitching. Consider the photo below, of crochet fabric. Each upside-down V (each model in this series was crocheted starting with the top) is the post of a single crochet stitch, and has four gaps associated with it, roughly at the corners of the post.
If you stitch between neighboring gaps and pull tightly, as in the first picture above, the stitch will all but disappear into the crevice of the fabric. Stitching along a straight line of gaps but farther than just between neighbors (as in the rightmost stitch of the second picture above) makes the strand stay up and visible, but it still sinks into the fabric a bit. Stitching with any diagonal shift bumps the strand up above the fabric, as seen in the other stitches of the second picture above. These both have advantages and disadvantages. A stitch made along a crevice stays put but doesn’t assert itself; a stitch made diagonally gives dimension to the feature being added but might be prone to shifting around.
- I’d like to reiterate that it is important, because of the texture of the fabric, not to pull your embroidery stitches too tightly — especially if you are working with floss rather than yarn. Just as when you place a slip knot on your hook to begin a crochet chain, you don’t want the stitch to be loose, but you also don’t want it under any tension. Pull your stitches only until they lie flat and smooth against the fabric.
- Particular to stuffed items is the need to work around fiberfill. Yarn needles are fairly blunt, which is in general a desirable characteristic, but they don’t penetrate stuffing well, which can lead to the needle pushing stuffing out through the crochet fabric. To avoid this, try to keep your needle close to and flat against the fabric on the inside.


If you do get a little cocoon of stuffing around your needle, after completing the stitch you can hold on to the yarn and push the stuffing back inside with a stuffing tool. The one shown above started life as a plastic yarn needle. I clipped off the end of the eye and lightly sanded the resulting prongs.


Running stitch and backstitch
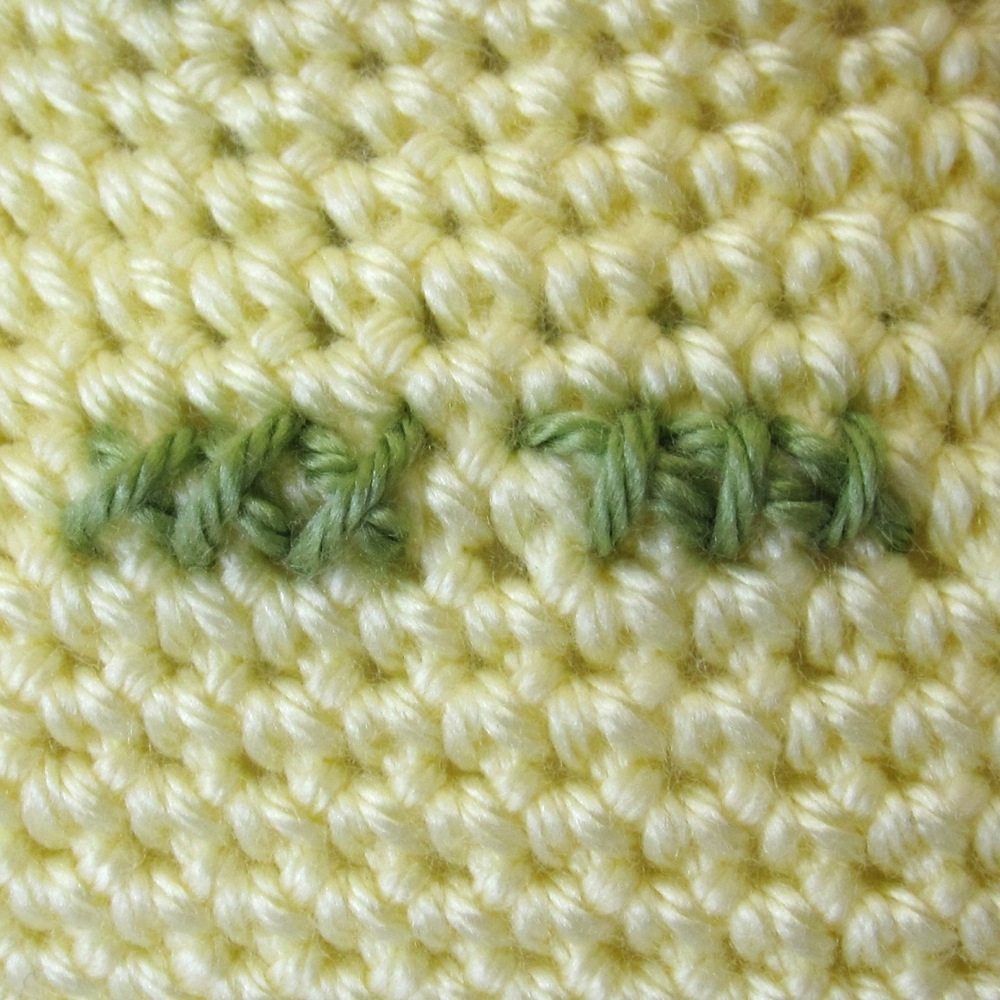
A straight stitch is any stitch you make by coming up in one location, stitching down in another location, and tightening the thread into a straight line connecting those two points. If you make a number of these in a row, you get running stitch, shown below.
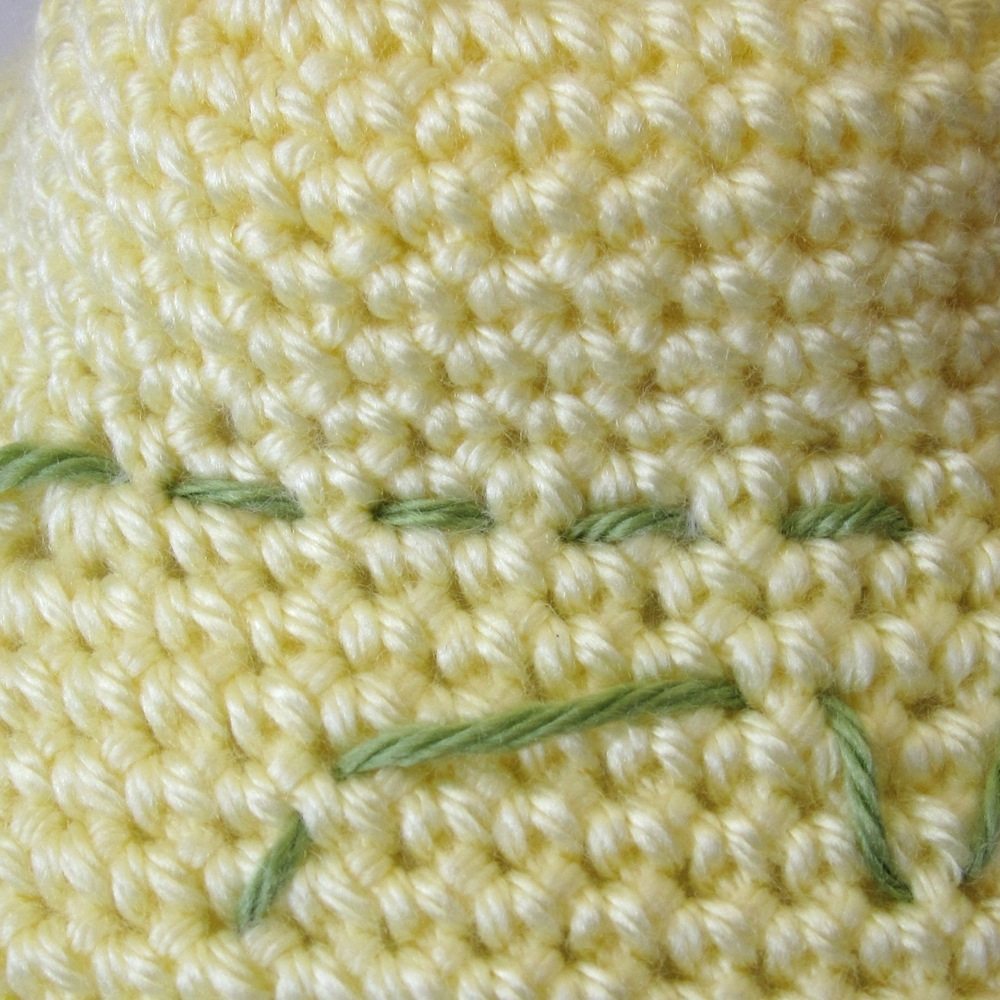
Running stitch is great when you want something to look “sewn,” but for amigurumi features you typically want a continuous line instead of a dashed line. There are two easy way to do that. The first is simply to make a second line of running stitch that “connects the dots” of the first line, obtaining something called Holbein stitch or double running stitch. The last picture above is of turning around and filling in the gaps just that way. The completed line is second from top in the big picture above.
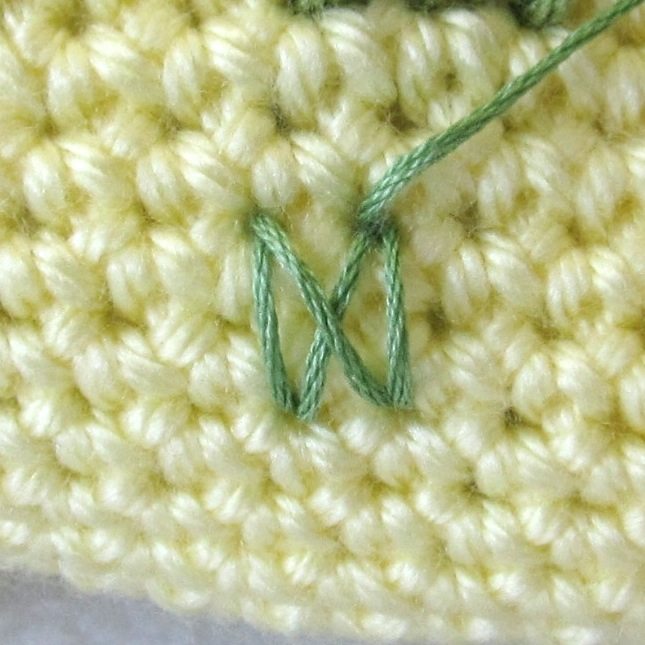
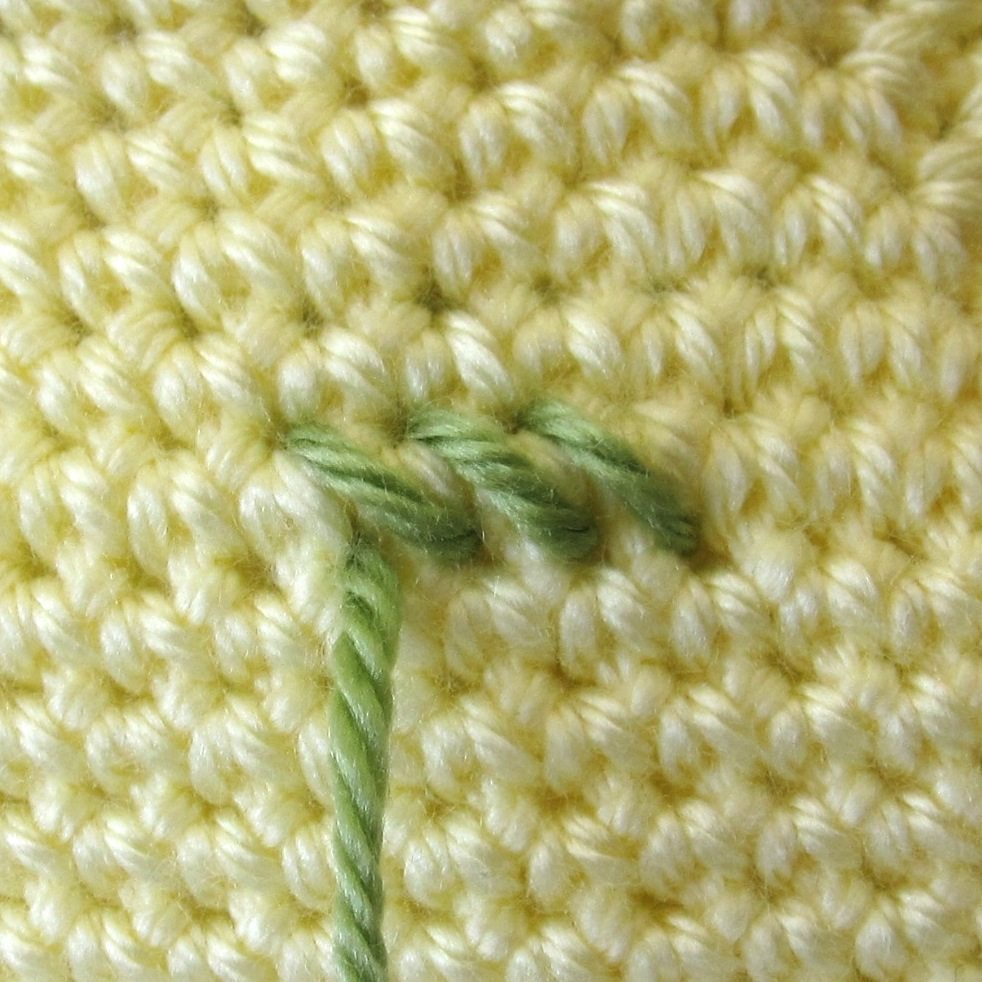
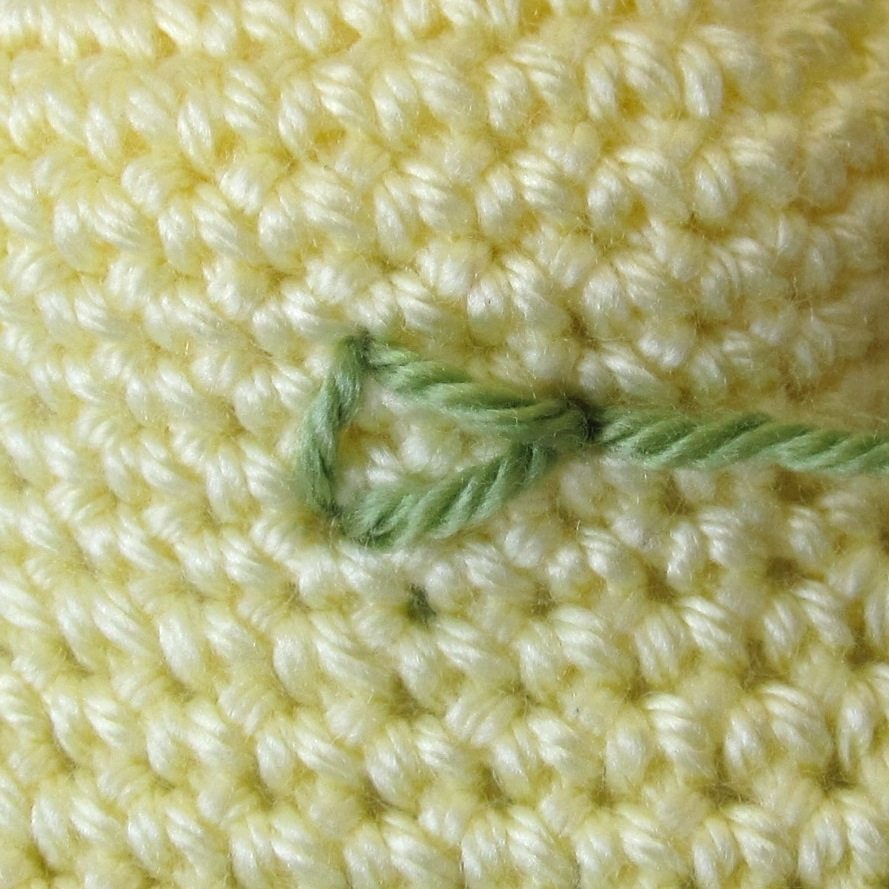
The second way to get a continuous line of stitches is with backstitch, which is a very sturdy stitch. The first two pictures above show the first two motions of making a line of backstitch: move back one stitch length for the downward motion and forward two stitch lengths for the upward motion. The third picture is of ending the last stitch in the line.
With either a backstitch or a double running stitch, the spots where stitches meet may be quite apparent, as the stitch ends sink into the gaps of the crochet fabric. We’ll meet one way to manage that in part 4 of this tutorial series, with a whipped backstitch, but meanwhile here’s a tutorial from Salihan Crafts where she shows you a version of double running stitch that “connects the dots” of running stitch in a gapless way.
The last two pictures, above, are of double running stitch (left) and backstitch (right) done in embroidery floss.
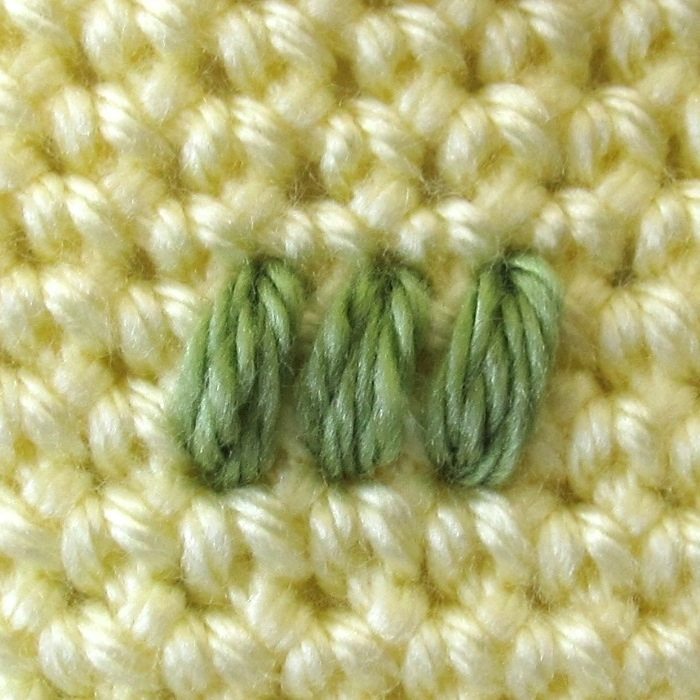
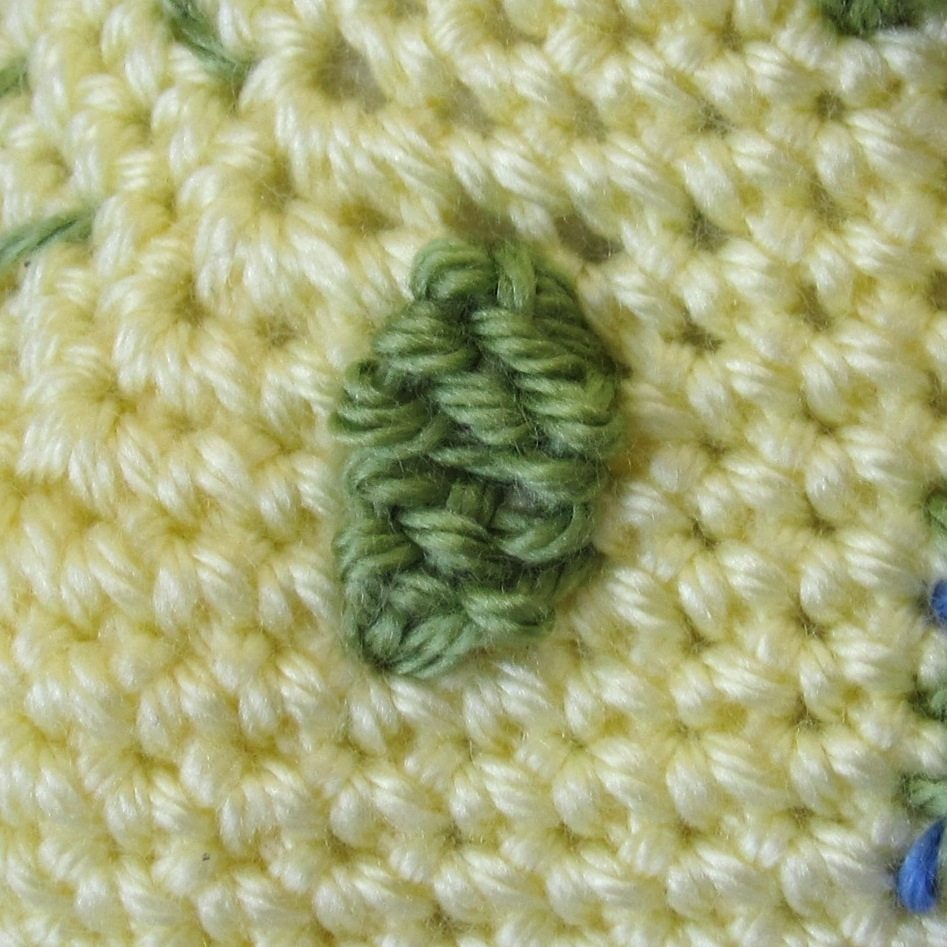
Satin stitch
Satin stitch is the name applied to a bunch of close, parallel straight stitches, used to solidly fill in a region. We’ll also look at other non-woven filling stitches.
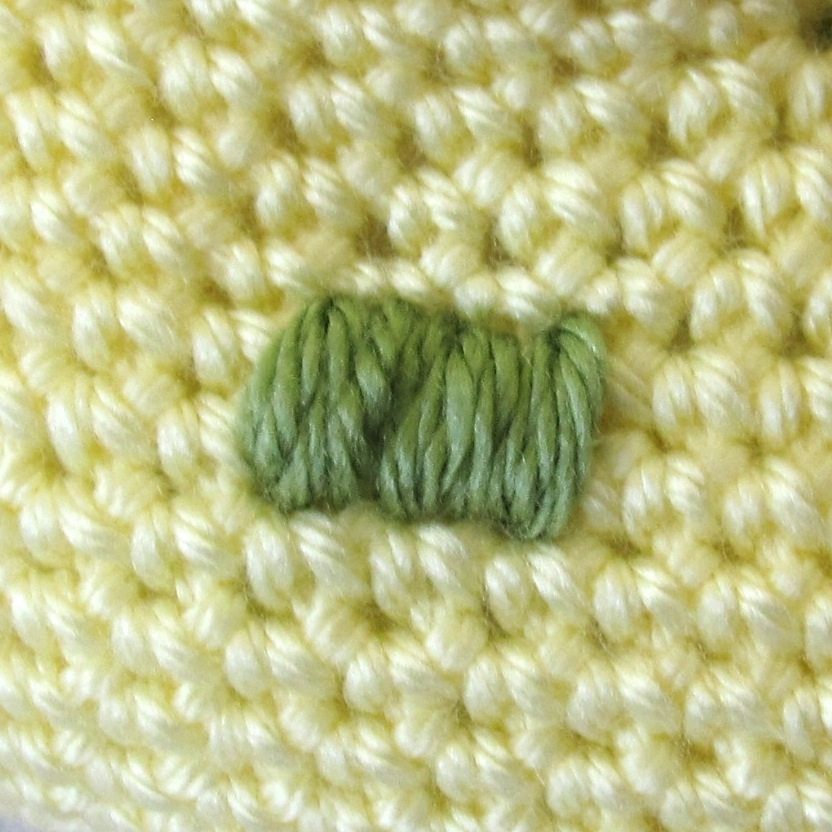
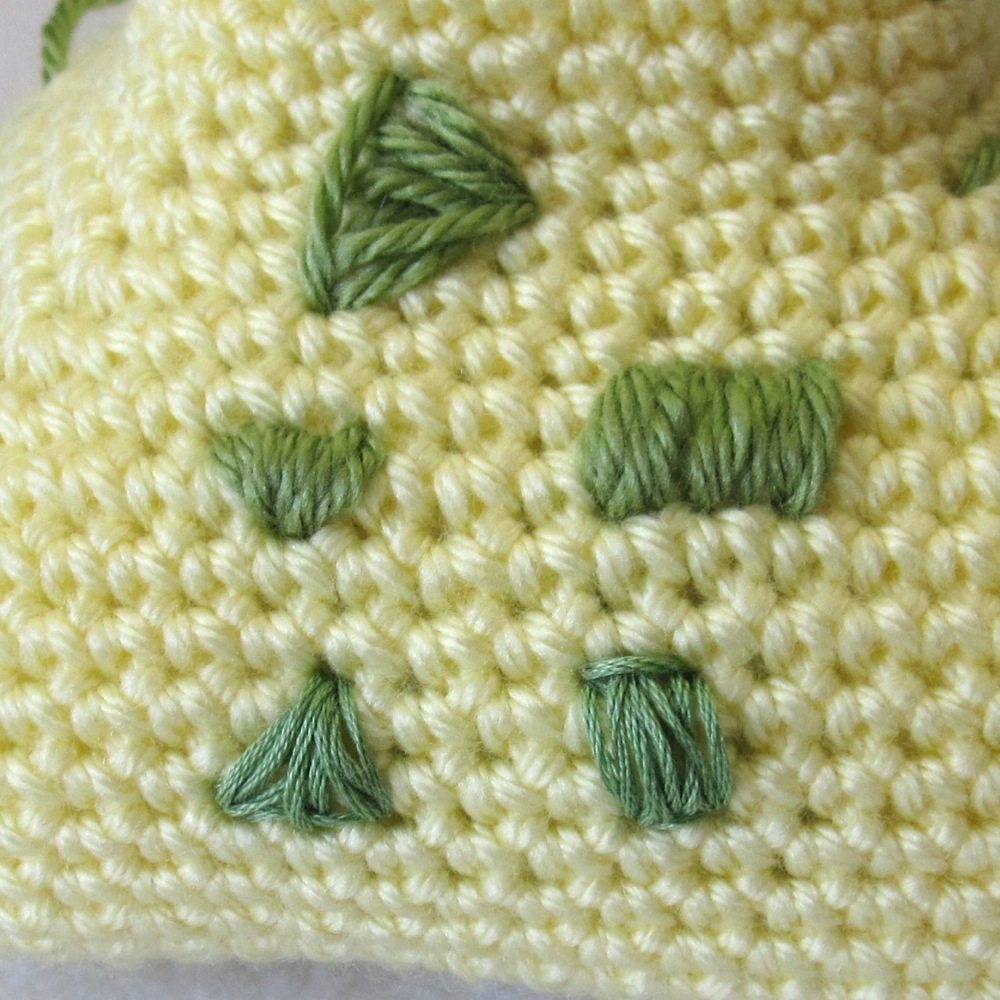
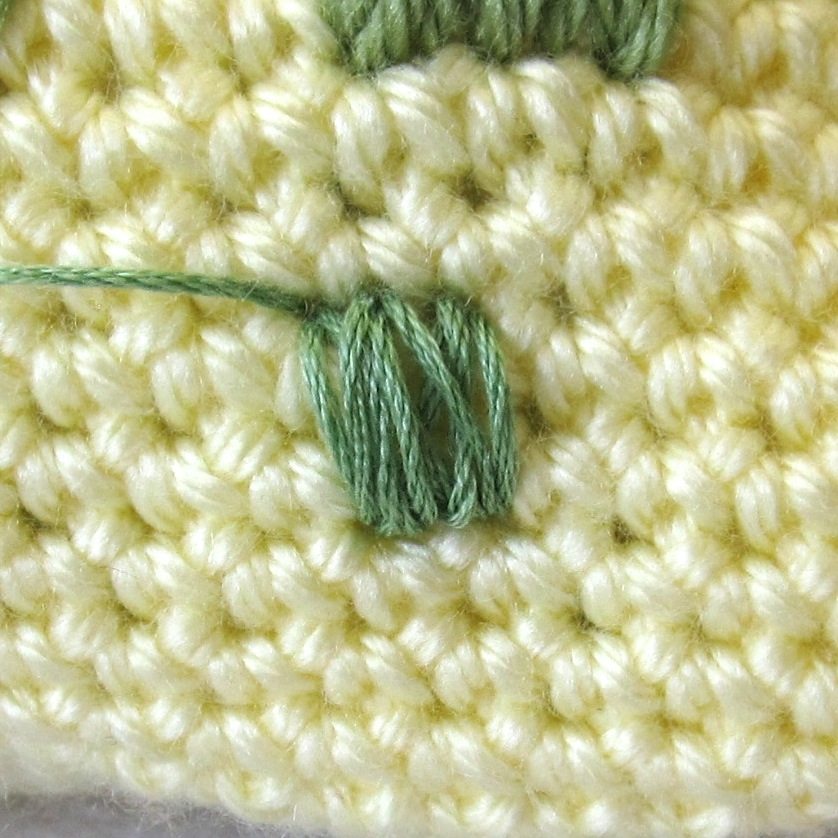
To fill in a rectangular shape, start by stitching between opposite gaps. The direction you stitch may depend on the look you want, but if it doesn’t matter you will likely get a neater result by stitching across the shorter direction. The first picture above has three stitches between each pair of gaps. I got them to lie smoothly by placing them with my finger before pulling the yarn snug. You can see they nearly fill the space; to finish I pierced the crochet stitches between neighboring trios (2nd picture above) and laid one more stitch down in each spot.
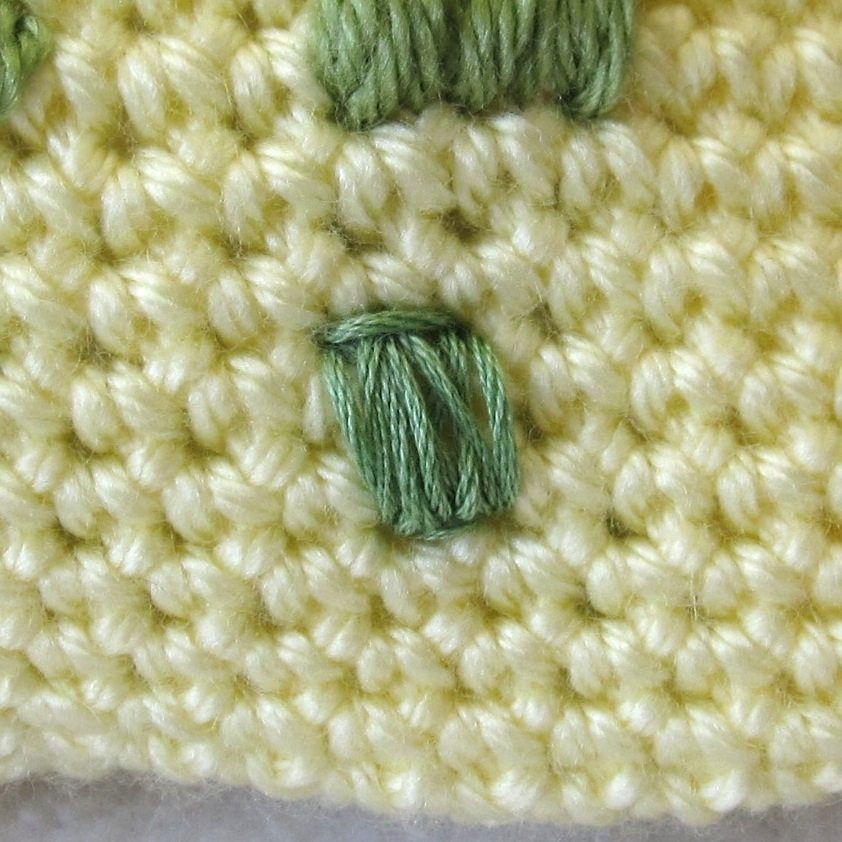
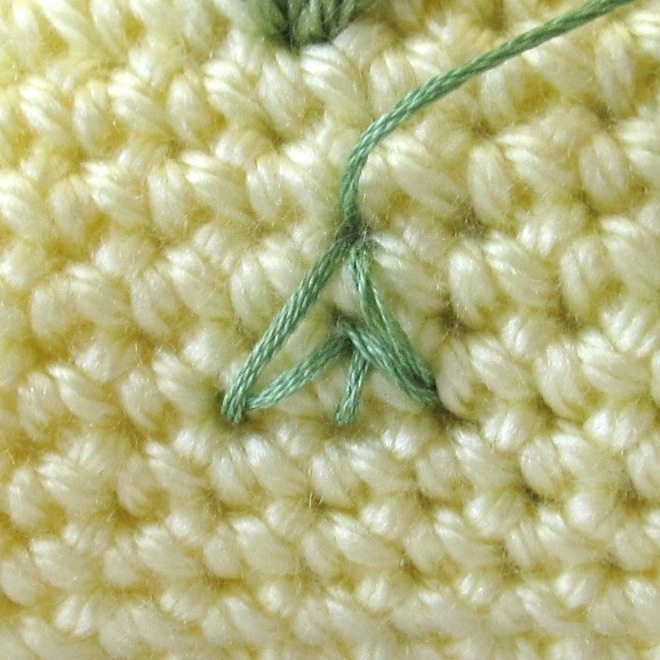
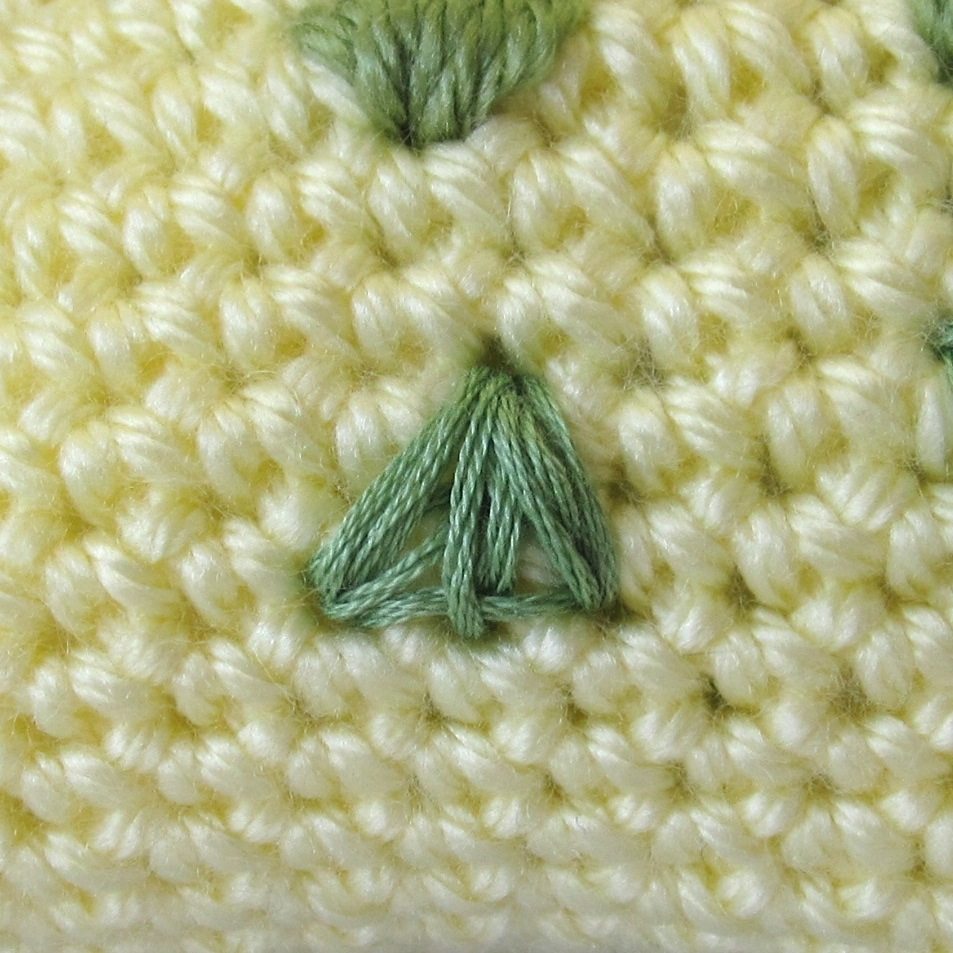
Sometimes you have to work by feel. For this triangular shape (animal nose?) I started by stitching in the gaps, added stitches piercing strands, and finally added an extra stitch in the middle and right-hand gaps because that was where it looked bare.
For a larger triangle, you can fill in a lower layer on the wider portion and then stitch the full length on top of it. In this case I also stitched crosswise along the top (seen in the larger picture, above); if I had wanted to fill blanks with such a stitch without having a bar across that end of the triangle I would have laid the crosswise stitch first and made sure my other stitches enclosed it.
Since embroidery floss is much thinner, it takes a lot more stitches to fill a space. I did not depend on purely parallel stitches in this case, although I possible could have if I’d made multiple stitches not just from gap to gap, but between the spots where I pierced my crochet stitches. The last picture shows a crosswise stitch along the top and (faintly) the bottom.
This last example shows both a triangular shape made with embroidery floss, and what I mean by enclosing a crosswise stitch with the main filling stitches: the centermost vertical stitch encloses the crosswise stitch along the bottom.
Cross stitch and stars
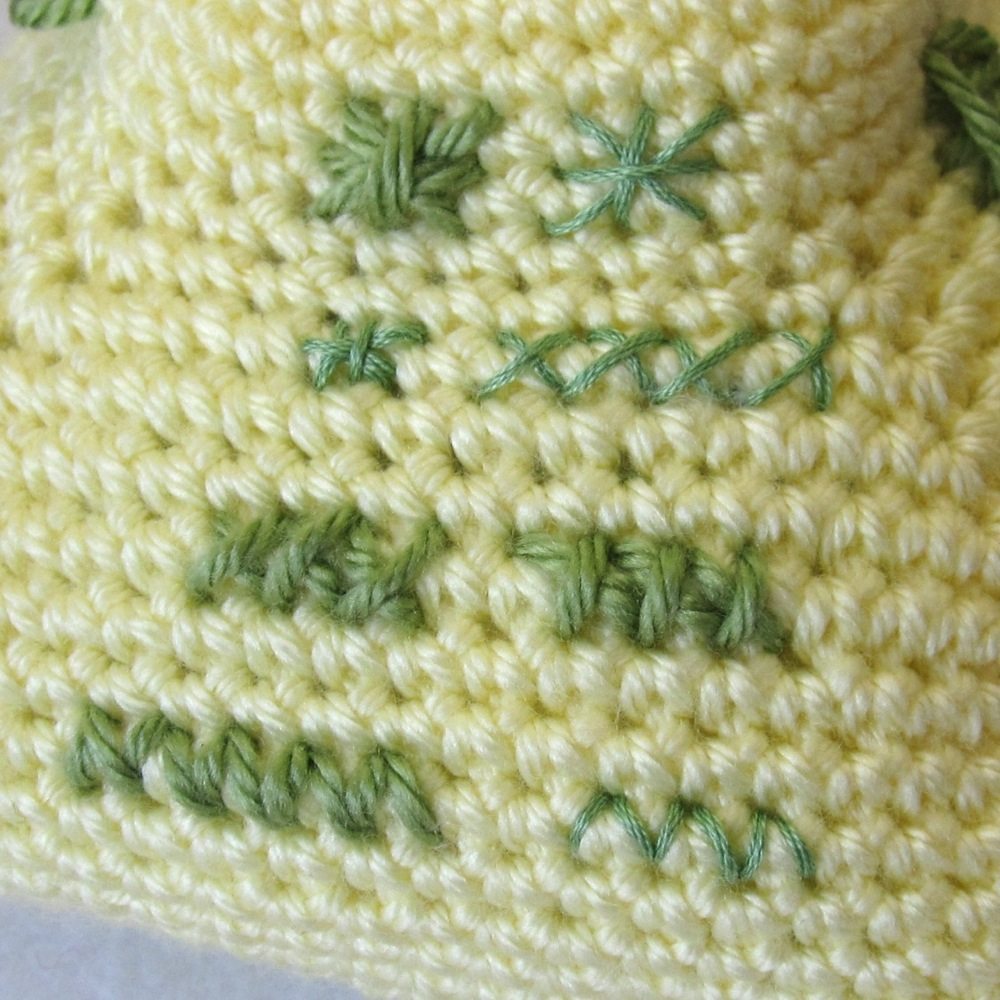
Cross stitch is an embroidery stitch often used as the sole stitch on a work. It’s popular for use on knitted and crochet fabric, as well. With no effort whatsoever I found half a dozen tutorials about cross-stitching on crochet fabric, including these from Moogly and CraftStylish.
The bottommost portion of the picture above shows straight stitches made as a row of Vs covering the Vs of the posts. It could be considered the crochet version of duplicate stitch from knitting, and can be used in place of cross stitch to embroider images on crochet.
A cross stitch is just an X made from two straight stitches. Typically you make a row of slanted stitches all at once (as in the first picture above), and cover them with a row of stitches slanted the opposite direction. The standard for cross-stitching on crochet is to make the X over one single crochet post, but you can make it however you’d like. In the second picture above the left-hand batch of cross stitches is made over the posts, and the right-hand batch (to which the first picture belongs) is made askew so only the lower half of each stitch crosses a post.
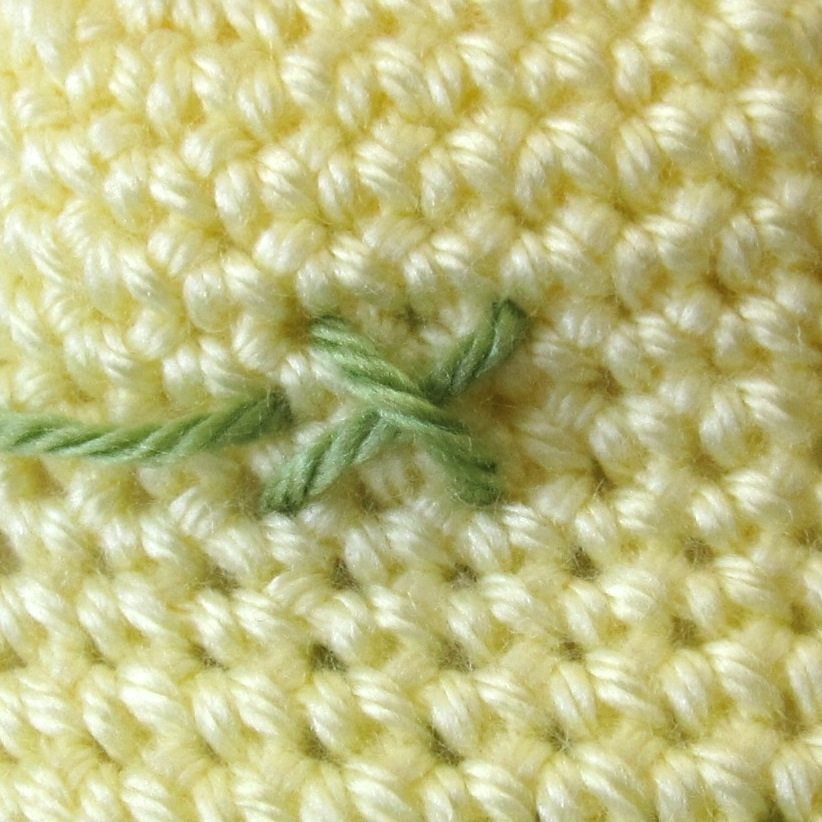
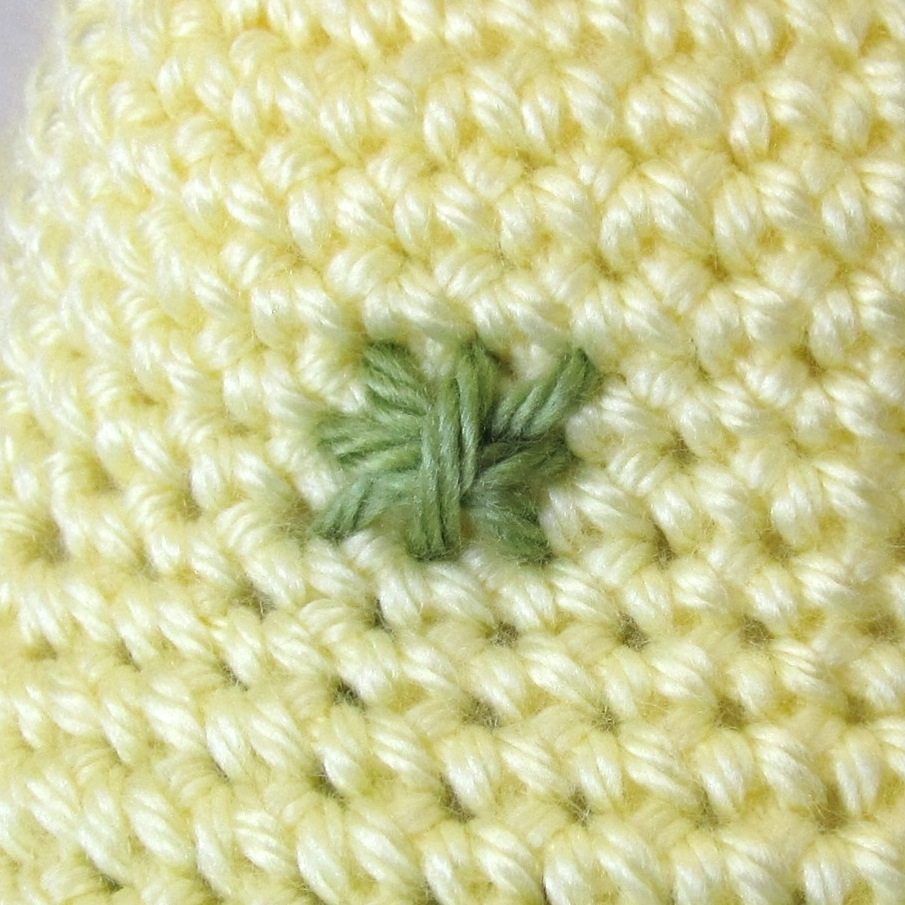
If you add a plus on top of the X, you have double cross stitch. If you don’t want to pierce threads you’ll need at least a 2×2 block of single crochet posts to work over, but you can make a smaller one by stitching through the sides of the post. You can see both cross stitch and double cross stitch made with embroidery floss in the larger picture above.
If you like this look, you might try Montenegrin, a three-stitch version of cross stitch that might look quite cool on crochet.
Freehand weaving
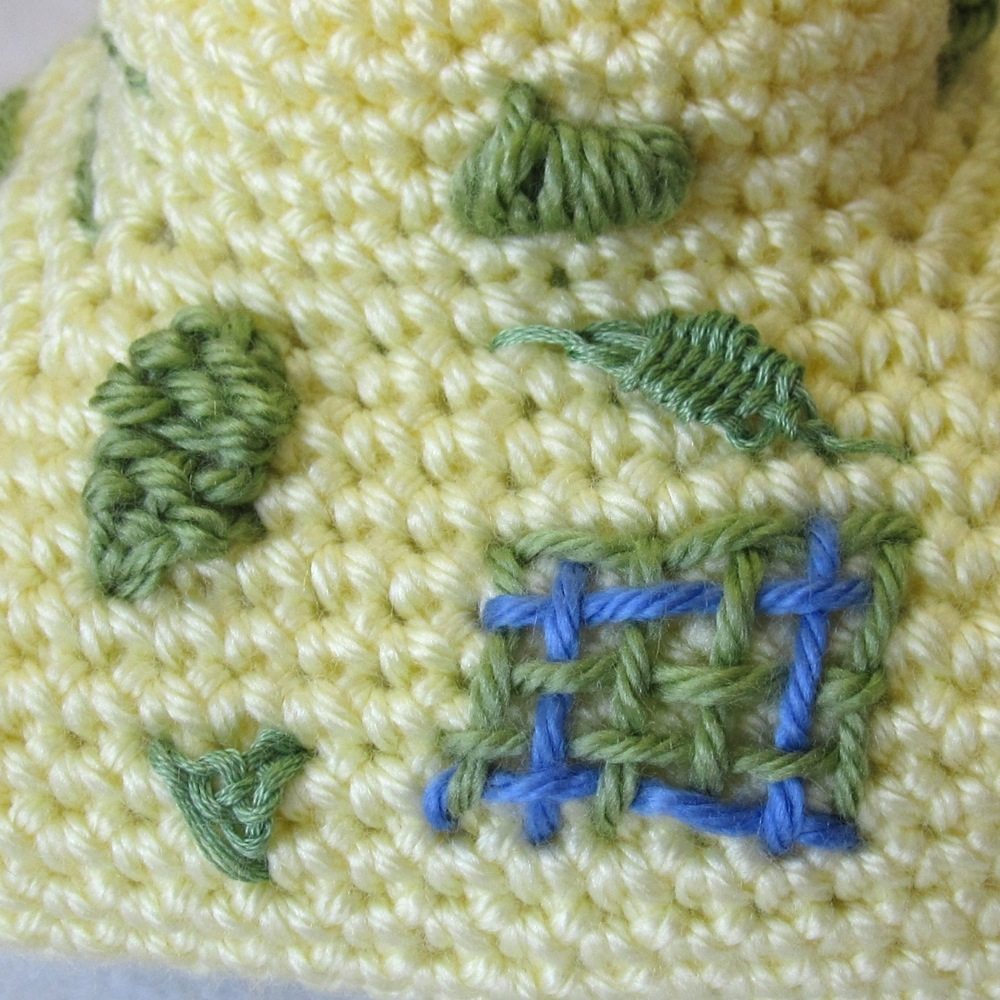
In weaving, you stitch some kind of framework and then use it as your base for filling in the opening. We’ll see more formal weaving in part 4 of this series.
The easiest error to make in any kind of weaving is piercing the strands of the framework. If you pierce the framework your strand is trapped in that location, which won’t always matter but often will.
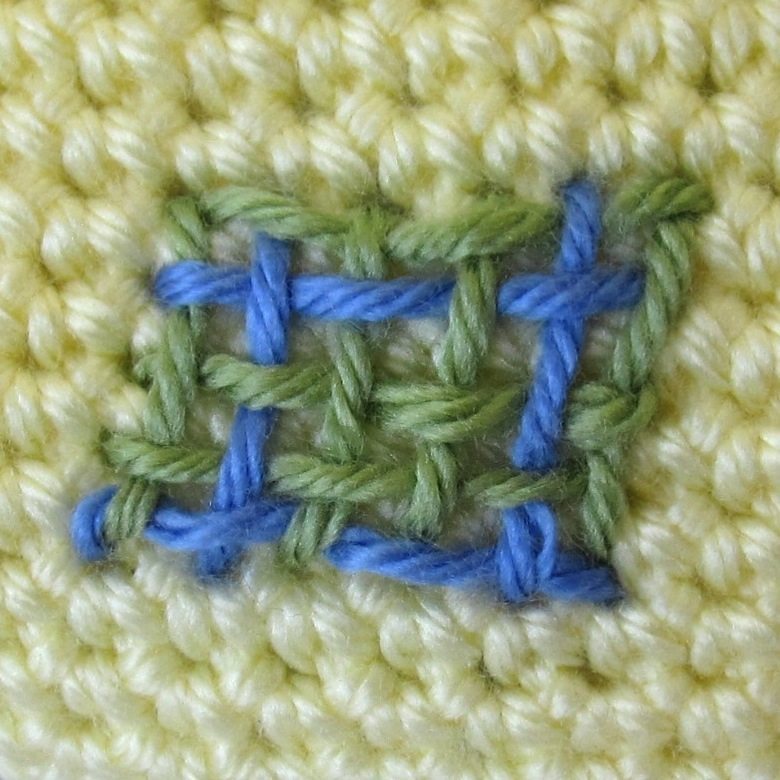
Of course you can make woven patches that have the over-under grid construction of woven fabric. Here I’ve chosen my colors to make a sort of plaid. If you wanted to embroider, say, a patch on the knee of a crocheted doll, this would give a great look. You can see in the 3rd picture above that I pierced the leftmost vertical strand with the bottom horizontal strand and no amount of manipulation with the needle would get it to lie smoothly along the bottom.
The simplest kind of weaving consists of outlining your shape and then stitching around and around the outline (needle always pointing as it does in the 2nd picture above). As with satin stitch, guide your stitches by hand to lie where you want them. You can also stitch over-under here, coming up outside one strand and then scooping under the opposite strand to end up outside it. The trade-off is that it “looks woven.” If you stitch around and around, it looks like satin stitch.

This batch of photos shows over/under weaving again. I’ve outlined an irregular shape, plus stitched down its center. The center line could have been a single stitch, as it is straight, but that would be prone to shifting side to side. I broke it into two stitches for stability, which is something the “around and around” example of weaving, above, could also have benefited from.
Over/under in this case, with three framework lines across, means that when stitching in one direction you are under the outside strands and over the inside, and coming back the other way you are over the outside strands and under the inside.
If your shape is roughly circular, it may be easier to fill with a spray of stitches that all cross the center point. If you are neat (I was not) this can give you a lovely fan effect as you might see on a hand-wound ball of yarn.
The large picture above also shows weaving done with embroidery floss.
Many people will find this is all the embroidery they need to happily decorate all their crochet items. If you want some fancier stitches, stay tuned for parts 2, 3, and 4!
 Visit the table of contents post for this series or all posts labeled “embroidery on crochet.”
Thanks for amazing post ….
this may work… nothing else I have tried works for me :(…. will see…
Such an amazing tutorial! I am a cross stitcher and love crocheted items because I love the luxurious texture of crochet. I’d never really thought of adding to the fabric for a whole new layer of texture! I’m inspired to go and play right now!
Hi, I love crochet items. Will use this, hope it will work for me.