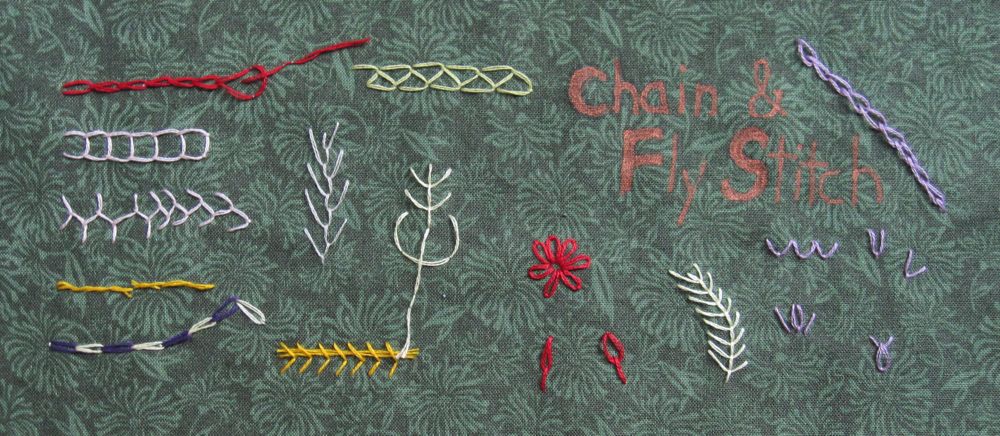
This panel of the embroidery sampler got a little bit for its britches. It covers chain stitch, its close relative the feather stitch (which is also related to blanket stitch), and the fly stitch, which cosmetically resembles feather.
The chain stitch is a caught stitch. If you only did half of it the thread would tighten down to a tiny little straight stitch. To make it, with the thread to the front of the fabric, take the needle down right next to where it came up, and before you tighten the thread, bring the needle up again a bit away and catch the previous stitch’s thread. Now pull through and tighten (but not too much!) and you should have a teardrop. To finish the row, just make a little tacking stitch by taking the needle down just outside the final teardrop. That is also what you should do to end a thread. Begin a new thread by taking it up just inside the final teardrop and proceeding from there.
The back of chain stitch looks like the front of backstitch: a bunch of straight stitches end to end.
Just to try it out, instead of putting the needle down right next to where it came up to make the loop, I put it a bit back along the chain. The point end of the teardrop gets a little bit pointier, and the reverse-side stitches overlap a little.
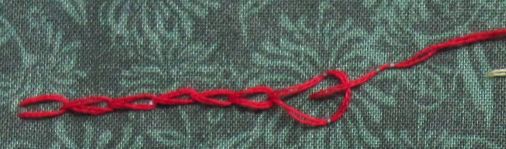
If you decide to make the ends of the teardrop stitch a bit away from each other (perpendicular to the line of stitching), you can get open chain. This one’s a little more complicated because you can’t tighten the stitch until you’ve come up and gone back down again for the next teardrop. I recommend not pulling the needle all the way through the fabric on the down stitch and tightening by tugging the thread by hand, to avoid accidentally overtightening the thread for the next loop. That is not fatal, of course; you can always pull it back to the front of the fabric, but it is annoying.

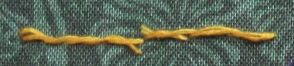
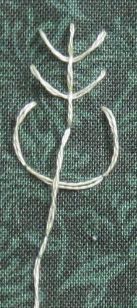
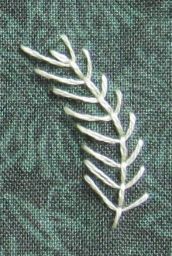
If you decide to catch each loop of open chain under only one end of the following loop, it becomes feather stitch. Actually, in the second picture above, it starts out as our old friend Cretan stitch and only becomes feather when it starts getting that distinct V shape. Proper feather stitch alternates the side the free end sticks out on; if you keep the same side (say, always catching the previous loop with the left end of the next loop) it is called one-sided feather stitch and looks an awful lot like blanket stitch.
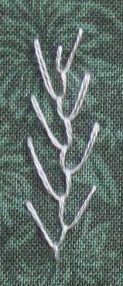
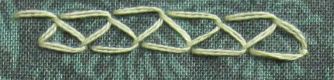
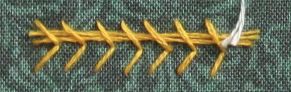
Feather stitch can look very different if you vary the position of the stitches. On the left below is long-armed feather, which has a plant-like look, and on the right is closed feather, which looks more like a trellis.
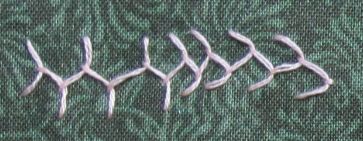
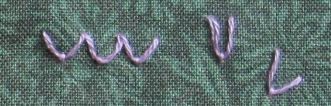
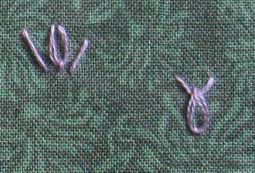
If you basically start from scratch every stitch with feather you get fly stitch. Properly speaking, fly stitch is an isolated stitch, and if you work it all in a line like the picture below it is closed fly.
To make fly stitch, with thread to the front of the fabric, bring the needle down a bit away and then, before tightening, back up to make a triangle with the three points. Catch the previous loop and tighten. Take the needle down through the fabric either just over the loop or a bit further in the direction the V points, and then back up to the side to start the next fly.
As with feather, you can vary the lengths and starting and ending positions of the stitches to get very different looks. Individual fly stitches are shown below as well.
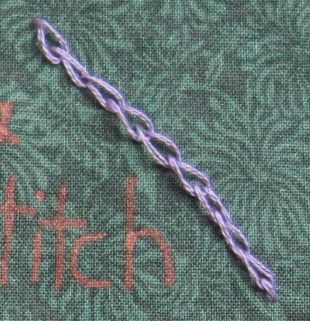
Back to chain stitch for a couple more. The magic chain stitch is much easier to make than it looks. You need to thread two different color threads on your needle, full complement of strands of each.

The only difference from standard chain is that each time you come up you will catch the threads of only one color. Also, every other time you will have to tighten the thread by hand; the remaining time the color you want to tighten will be shorter than the caught color, and pulling the needle will suffice.
Finally, some isolated versions. On the left below is the isolated chain stitch, or lazy daisy. You get different effects making the tacking stitch long or short.
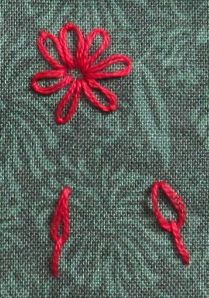
When diagonal straight stitches are laid on either side of a lazy daisy, the result is tete de boeuf. I have no idea why, since the rightmost stitch above, the wheatear, looks much more like a bull’s head to me. The wheatear is a hybrid stitch; it is a fly stitch finished off by an isolated chain.
Now, I know these stitches maybe don’t seem as decorative or a functional as the others – good for outlines and plants and not much else. However, they can be beautiful when done creatively. I went looking for examples and found a number: samplers on CRAFT show sometimes neat stitching and good color choice is all it takes. Susan at art of textiles has a long-stemmed fly stitch that reminds me of seedlings. And Raphaela at Textile Explorations, whose blog I will surely explore further, has entries dedicated to feather, chain, and detached chain.
That concludes the individual panels of my sampler. The embroidery class is in three weeks; we’ll see the finished sampler then.