Embroidery on Crochet 1: Basics and freehand stitching

How to embroider on crochet from the very beginning, including satin stitch, cross stitch, and some weaving. The start of a tutorial series on revedreams.com/.

Here we are! The first post in the series. As we explore embroidering crochet fabric, please do leave me any questions or comments you have. I love to experiment and will work out any answers I don’t already have.

Two notes: All photos may be clicked to reach larger versions. To keep the front page of the blog from being overwhelming, I’m going to cut each of these posts after the table of contents. The rest is after the jump!

Inside this post:
Beginning and ending
Stitching on crochet fabric
Running stitch and backstitch
Satin stitch
Cross stitch
Freehand weaving

Continue reading Embroidery on Crochet 1: Basics and freehand stitching

How to embroider on crochet

How to embroider on crocheted items, start to finish. A four-part tutorial series at revedreams.com/.

Welcome!
If you like this, you might like more crochet technique posts.

I am very excited to announce a blog post series I have been wanting to do for quite some time: an in depth study of embroidering on crochet. In particular, we’ll discuss embroidery on closed crochet pieces such as amigurumi, where you don’t have access to the interior of the piece.

The series will be in four parts, two in the next few days and two in a week, divided as so:

How to embroider on crochet from the very beginning, including satin stitch, cross stitch, and some weaving. The start of a tutorial series on revedreams.com/. 1. Basics and freehand stitching.
Covers securing ends, working on crochet fabric, running stitch, backstitch, cross stitch, satin stitch, and freehand weaving.
How to embroider lazy daisy, fly stitch, French knot and bullion knot on crocheted items. Part of a tutorial series at revedreams.com/. 2. Separated stitches.
Covers lazy daisy, fly stitch, French knot, bullion knot, and some variations.
How to embroider the chain, blanket, and feather stitches on crocheted items. Part of a tutorial series at revedreams.com/. 3. Linked stitches.
Covers chain stitch, blanket stitch, feather stitch, and some variations.
How to weave, thread, whip, and couch. Part of a series on embroidering on crochet at revedreams.com/. 4. Weaving, whipping, and couching.
Covers threaded and whipped backstitch, Pekinese stitch, spider wheels, couching, and detached woven picots.

There will be many progress photos, links to alternate instructions for various stitches, and all the tips I can muster about neat and easy embroidery on crochet. Please do let me know if you have questions or would like to see more details or additional variations. Until tomorrow — happy stitching!

Securing and hiding yarn ends

A lot of posts recently, I know – I’m on a mission. Don’t expect four a week all the time, though. 🙂

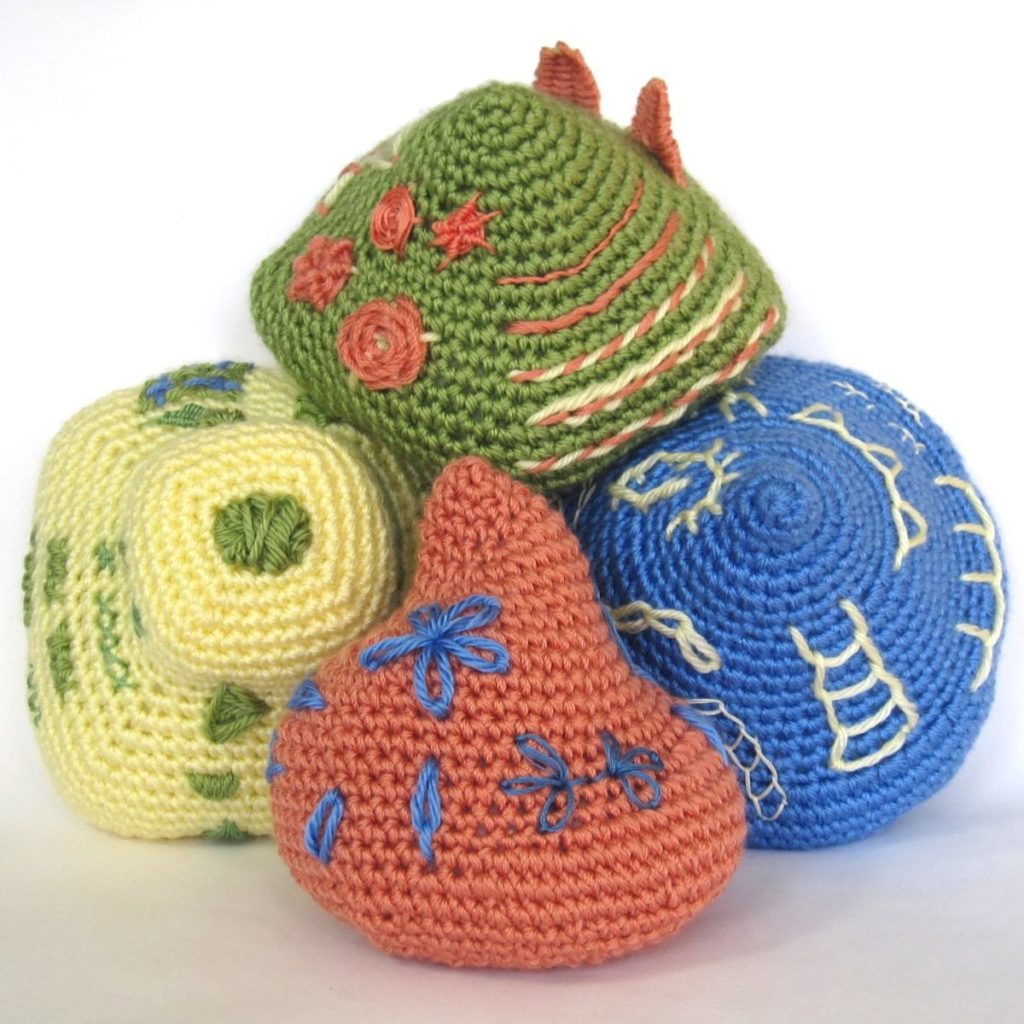
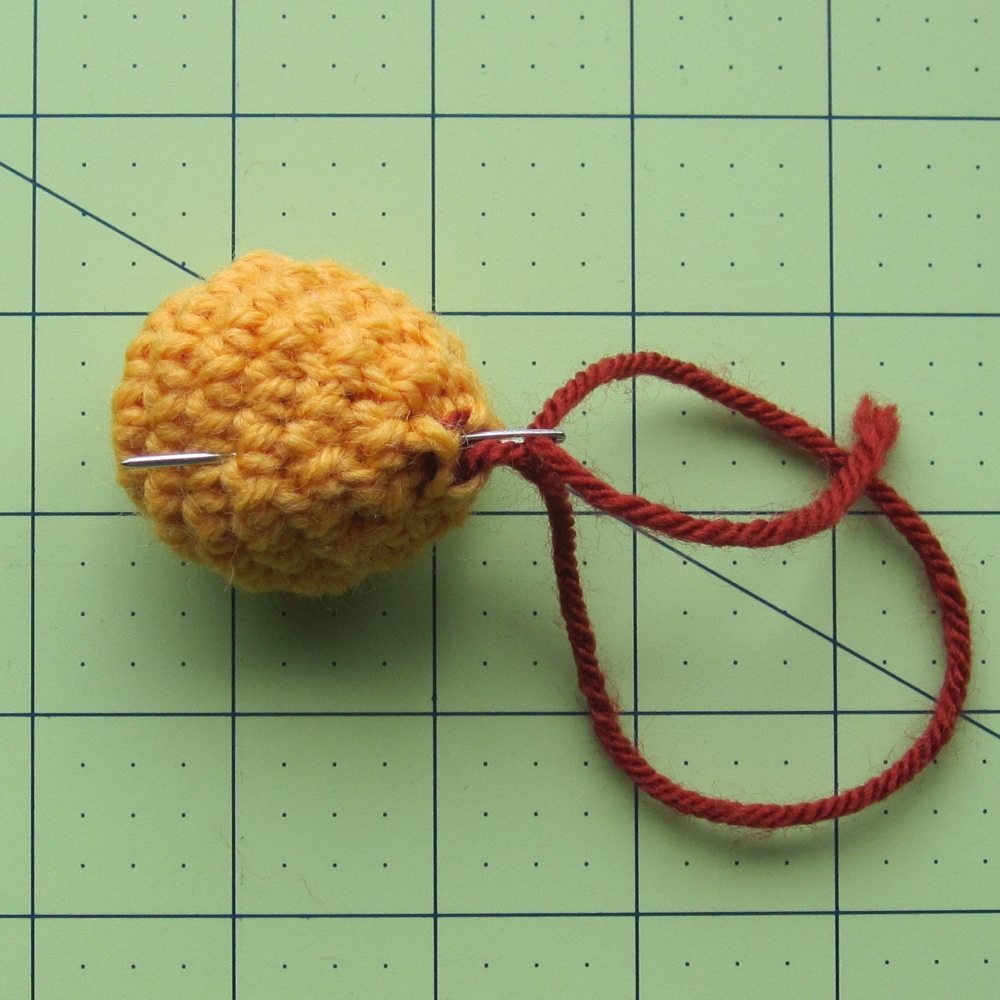
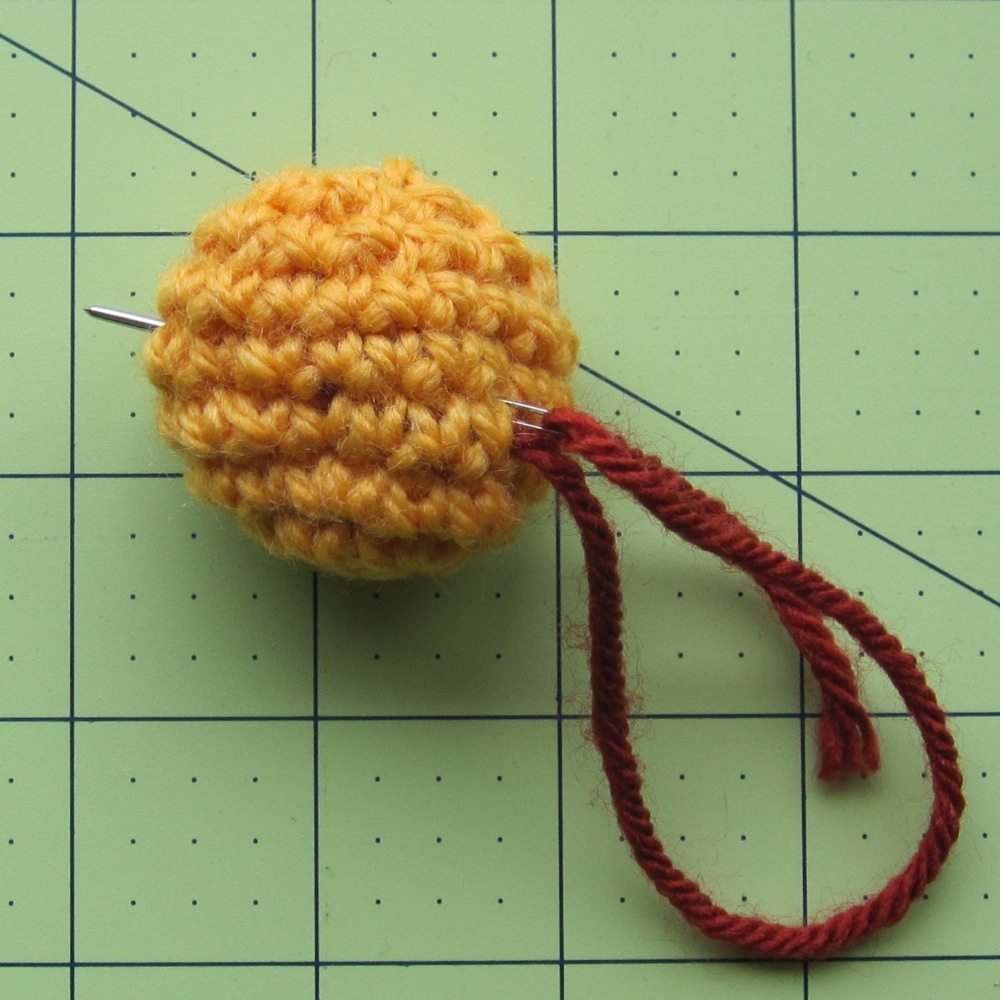
We amigurumi makers have a big advantage when it comes to hiding our yarn tails: a side of the crochet that will never show. We never have to have that little fuzzy cut yarn end in our stitches, waiting to peek out. Here’s how I hide it. (The red yarn was joined at the last stitch purely for visibility; it reality it would be orange like the rest.)

before drawstring first line of securing

Above: After stitching whatever drawstring method you prefer for closing the final hole in your piece, put the needle down through the opening and out the side of the piece to tighten the drawstring. This prevents your final round from being pulled outward to form a nub. Run the needle through some stitches around the side and back out again. Don’t tighten too much or the piece will compress! [1]

second line of securing hiding yarn tail

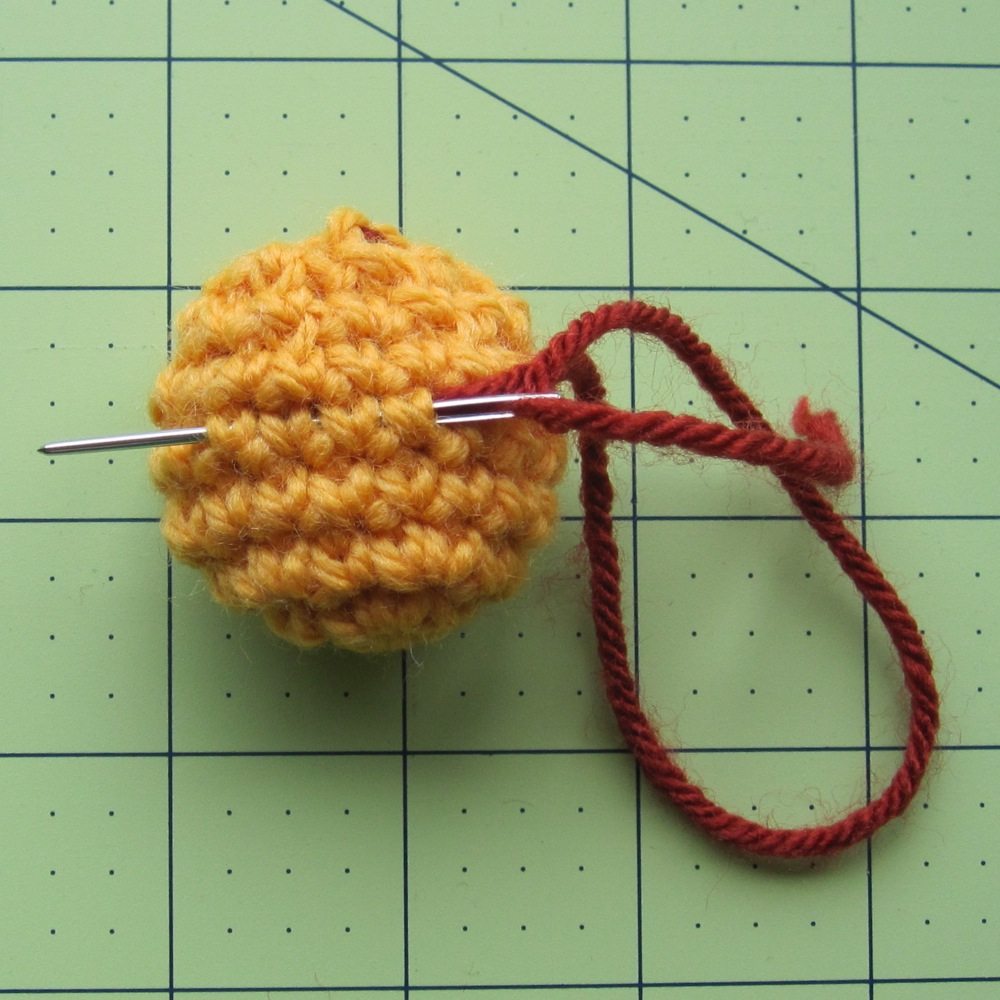
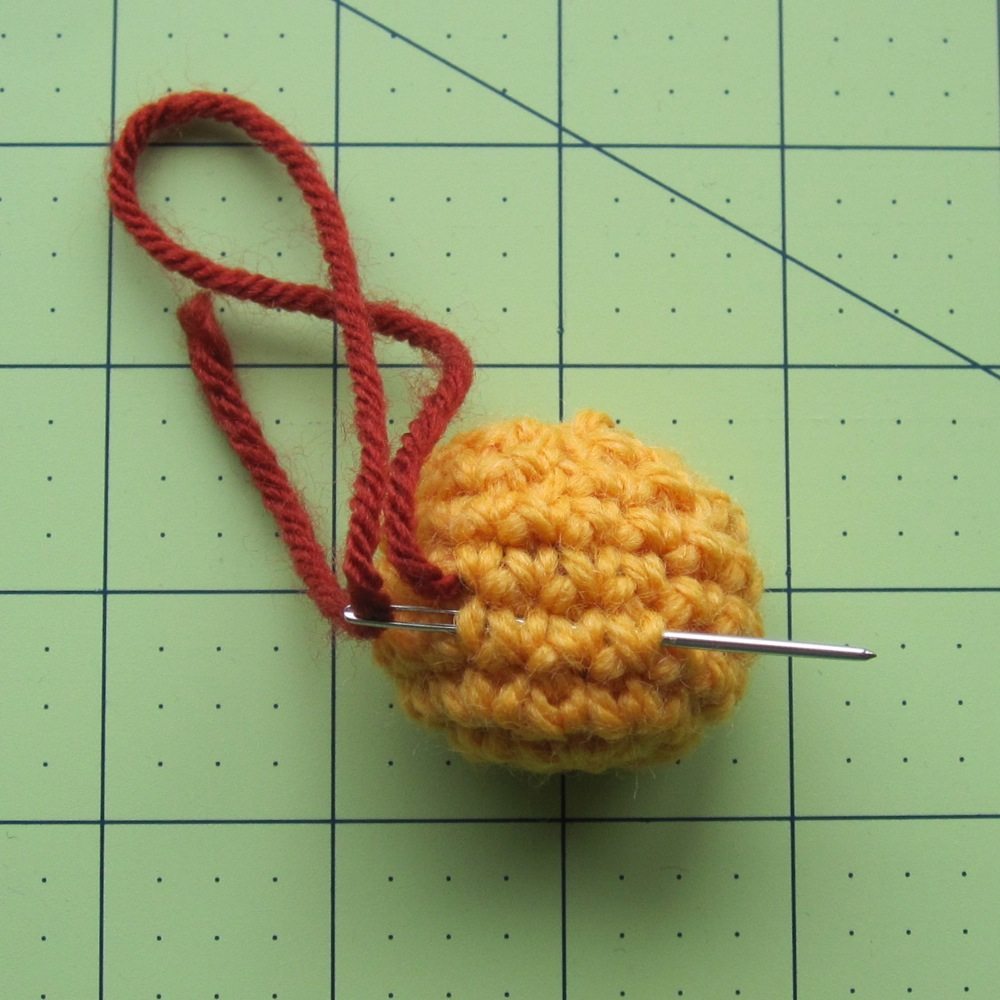
Above: Make a U-turn with the yarn, stitching under the intervening strands enough to make sure the base of the U isn’t lying on top of your crochet stitching. Run it through another line of stitches. Finally, put it back into the piece at the spot where it emerges from the stitches, and run it entirely inside and out again a ways away. Clip the yarn close to the stitching and massage the piece if necessary to get the tail to disappear inside.

After the cut: using this technique in embroidering and fine-tuning pieces. Continue reading Securing and hiding yarn ends