Welcome to Episode 3 of this series about embroidering on crochet. I often call lazy daisy and fly “caught stitches.” We’ll see more caught stitches this time, but I’m calling them linked stitches to evoke the fact that they are multiple stitches in a row, rather than separate. Remember that if you have any questions or suggestions, I’d love to hear them!
As before, the photos link to larger versions, and the full post is behind the cut.
| Inside this post: | |
|---|---|
| Chain stitch Blanket stitch |
Feather stitch |
Chain stitch
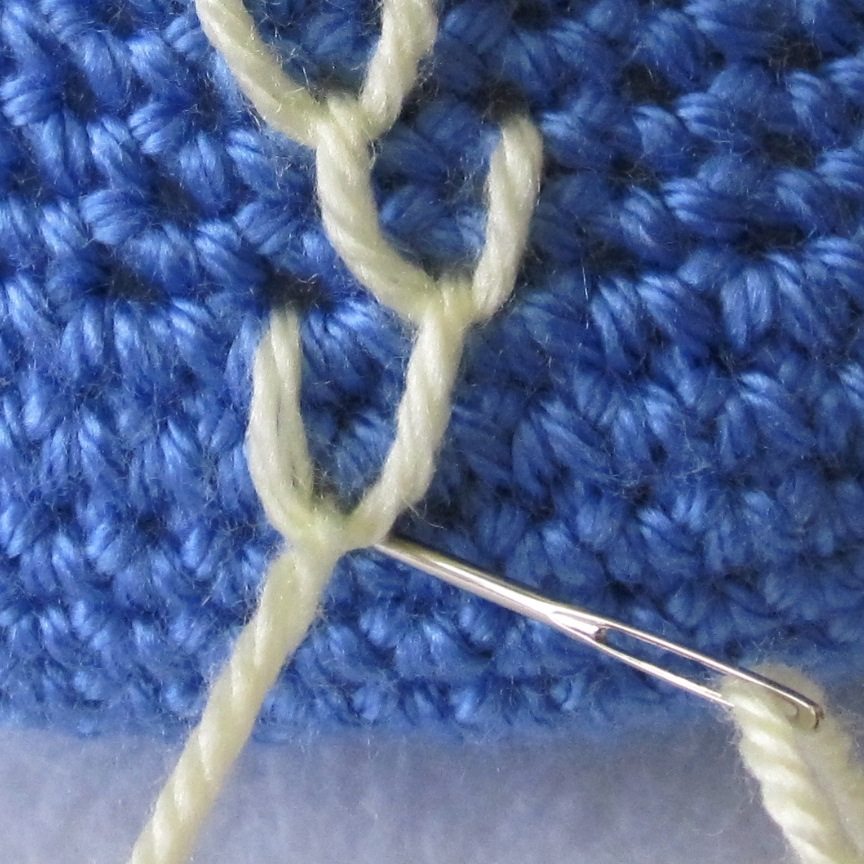
The chain stitch is a sequence of interlocked lazy daisies, each one tacked down by another except for the last, which is tacked in the usual way.
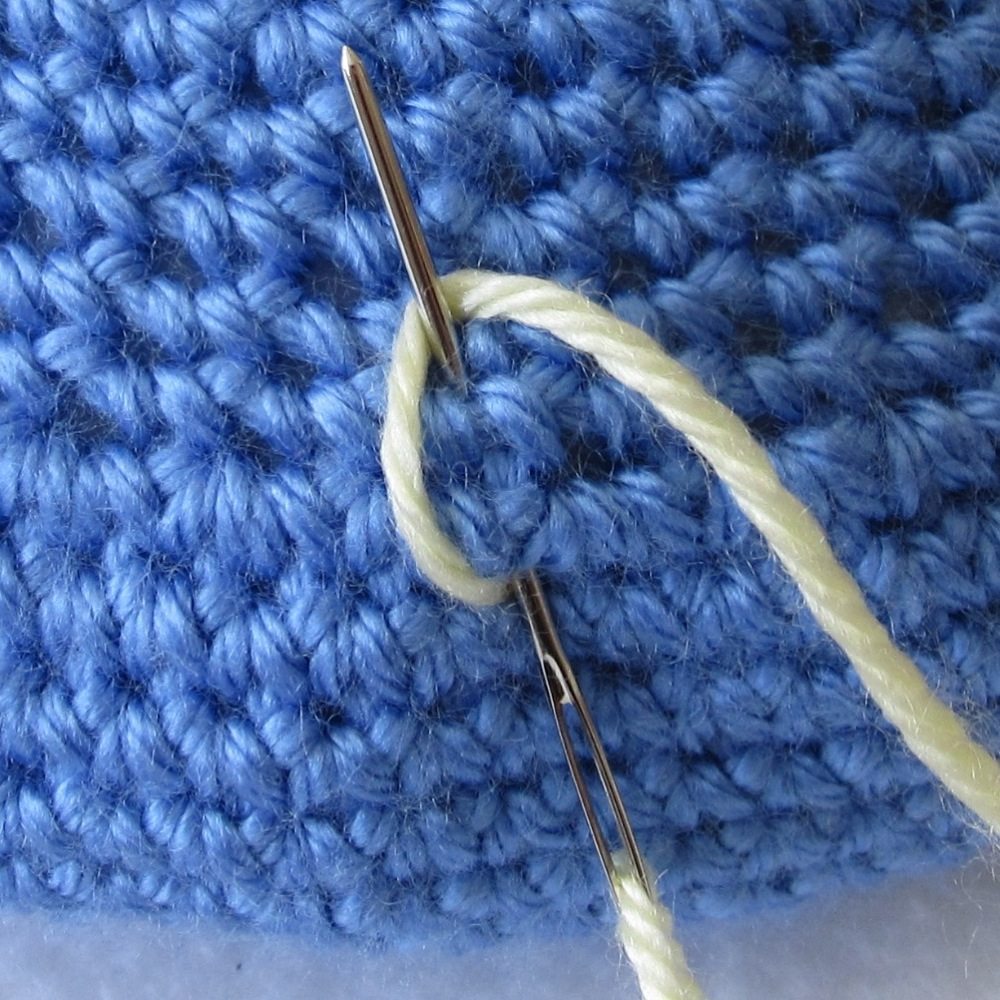
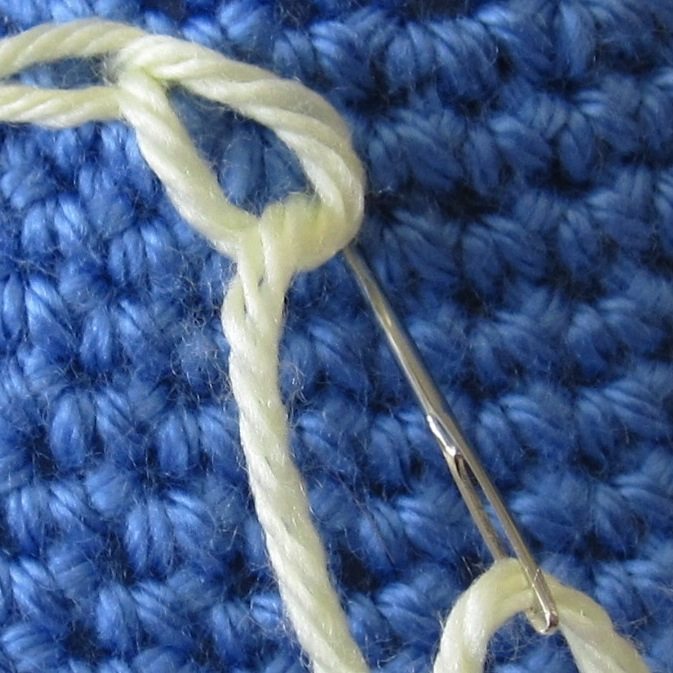
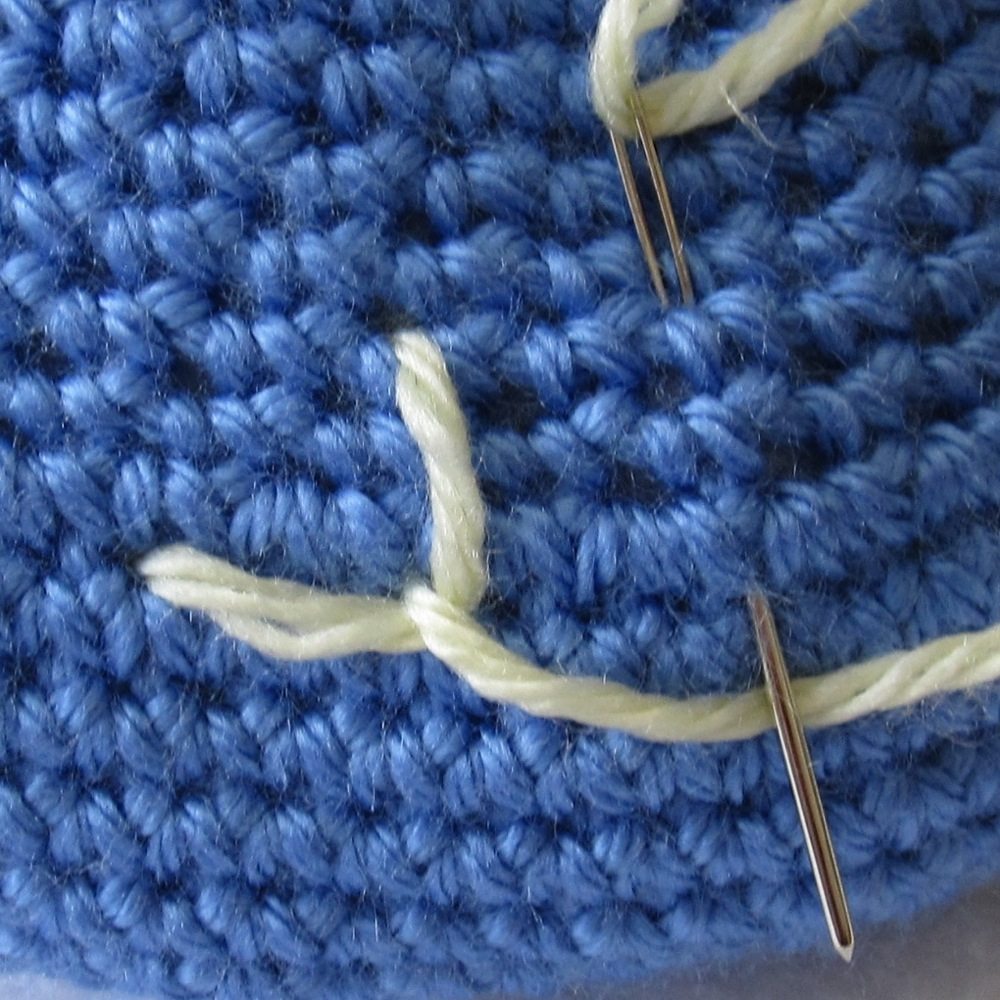
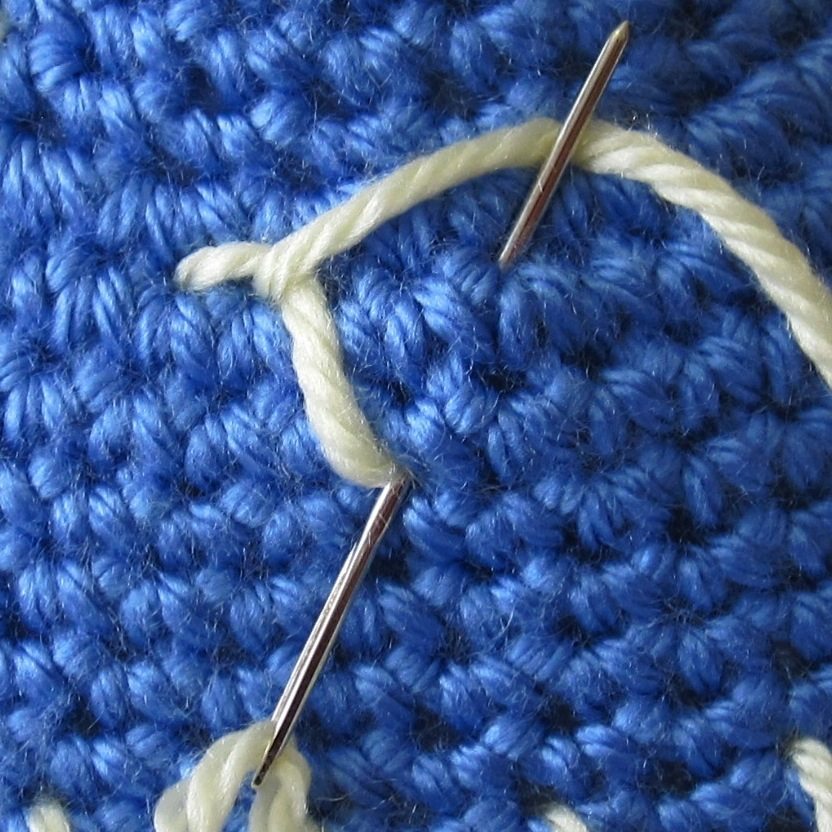
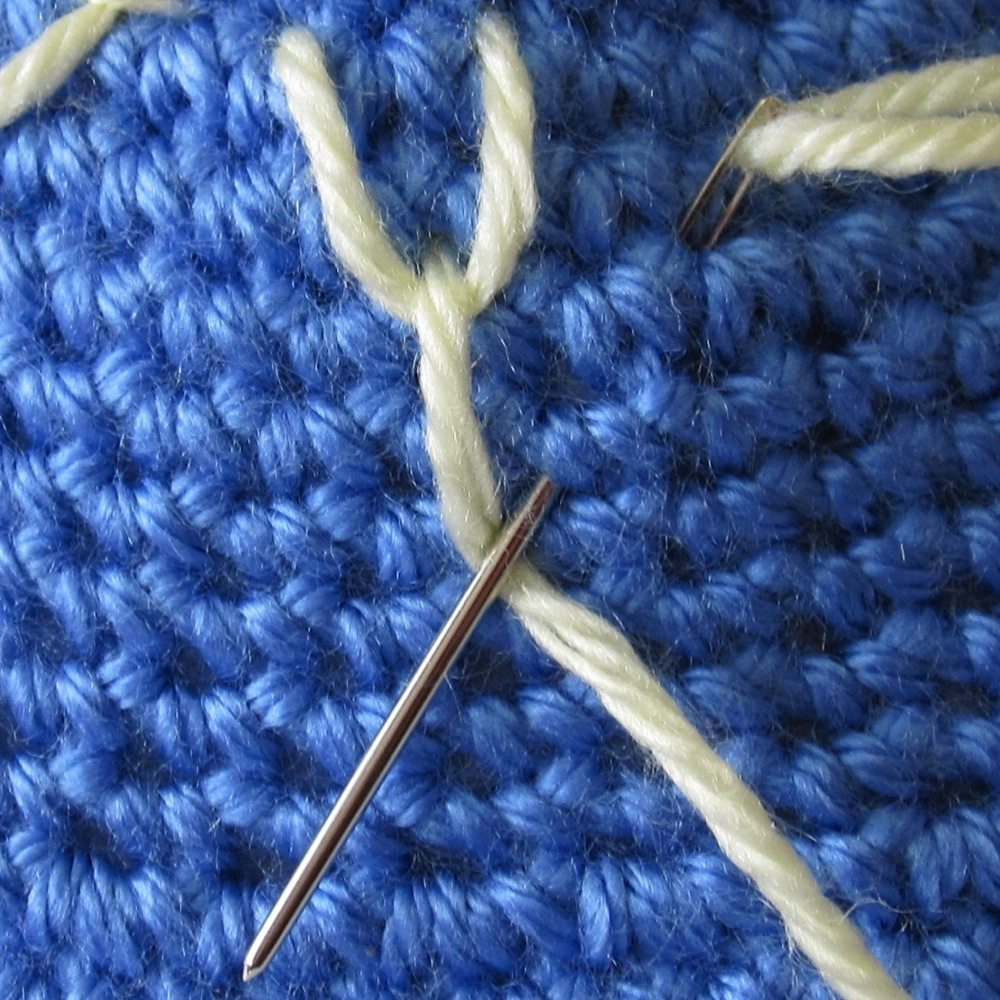
Each chain stitch begins at the pointed end of the teardrop. Bring your needle up at that point and back down in the same spot. Reemerge where you want the rounded end of the teardrop and catch your yarn with the needle before tightening the stitch (1st picture above). Use the spot your thread now emerges from as the point of another teardrop. Your teardrops need not be all in a straight line, although if they angle by 90 degrees or more the loops they tack might not stay flat against the fabric.
When you get to the end, stitch down in the same spot your thread is coming from, but on the opposite side of the teardrop yarn. Just as with lazy daisy, don’t pull your final tacking stitch too tightly, or that end will disappear into the fabric. It is uncommon to make a “long-tailed chain stitch;” i.e., a chain with a long final tacking stitch, but it would certainly work.
The chain stitch is exactly the crochet chain, just made in a different way. If you have access to both sides of your crochet fabric, you can create a chain along the fabric with crochet, as shown on The Zen of Making. Once you have a chain, regardless of how it was created, you can use it as a foundation chain for additional crochet, which is described on About.com.
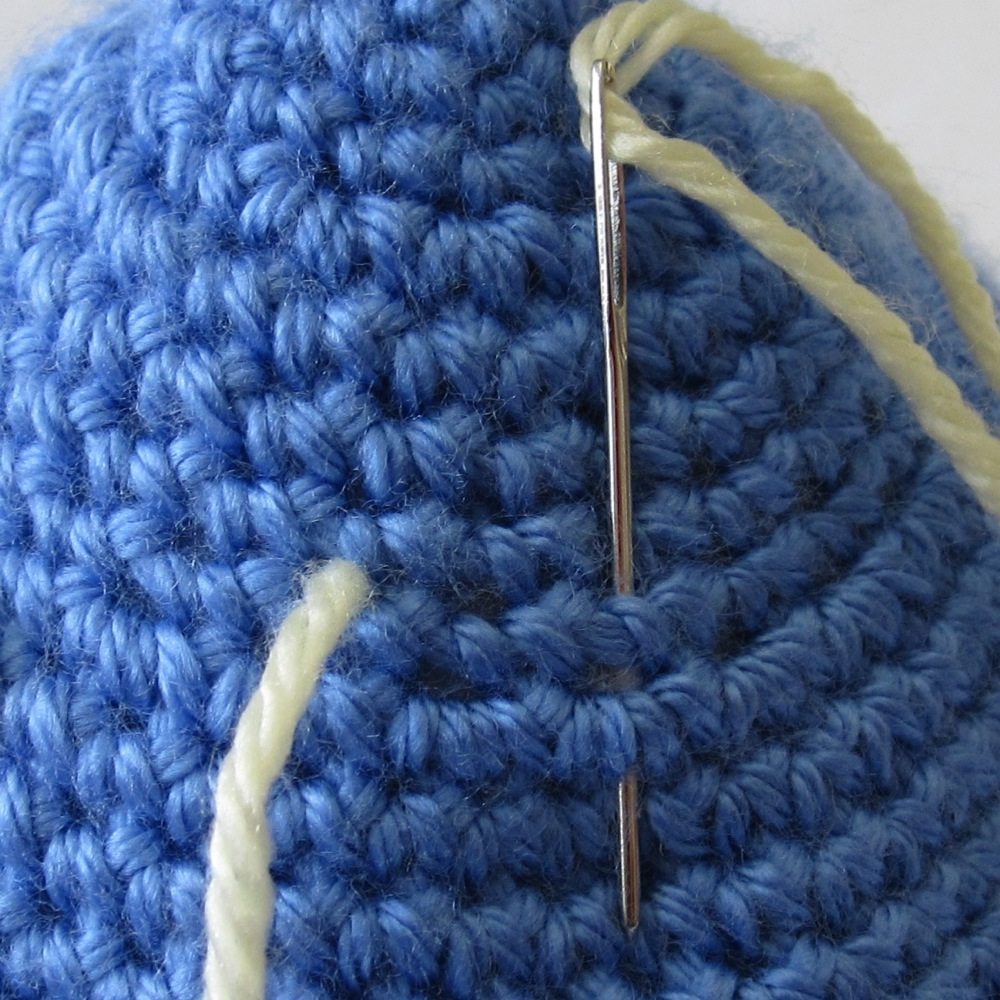
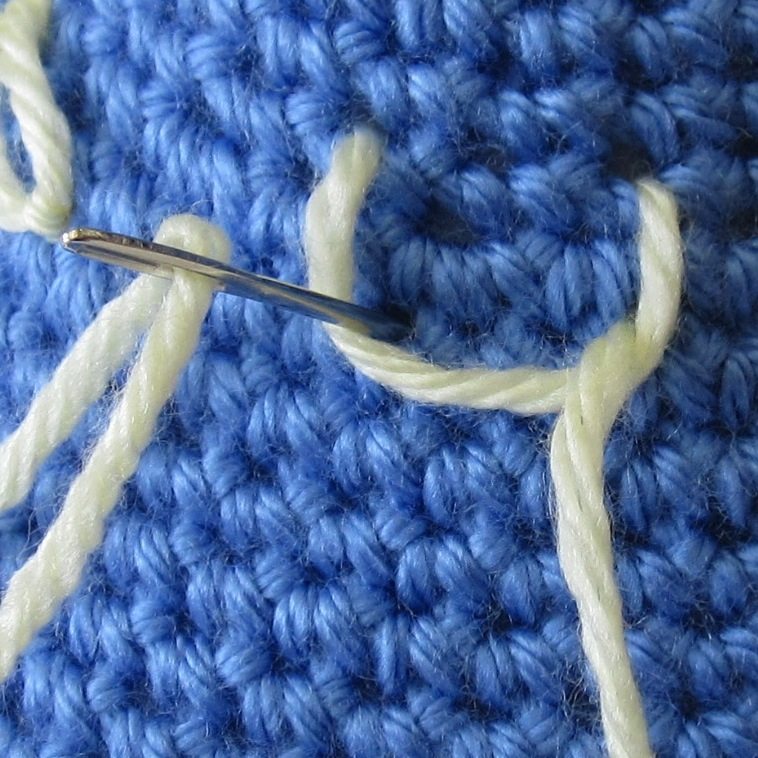
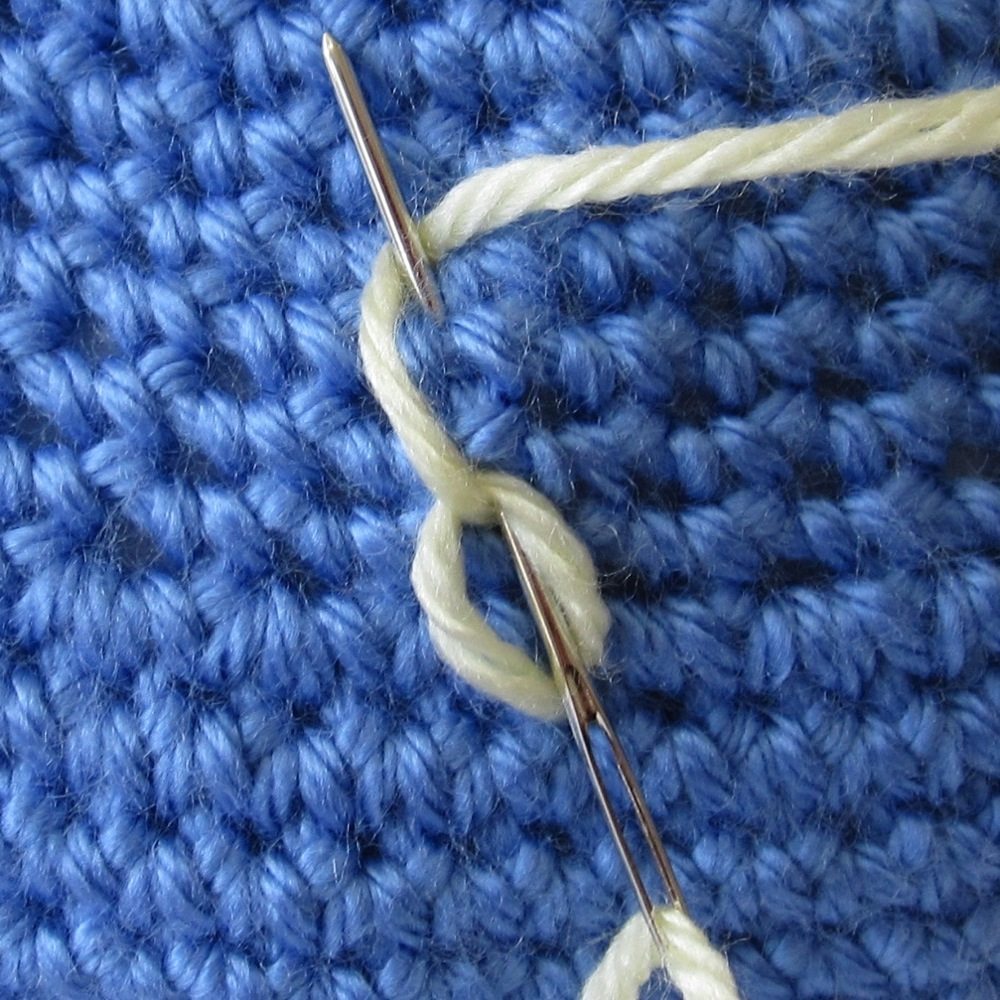
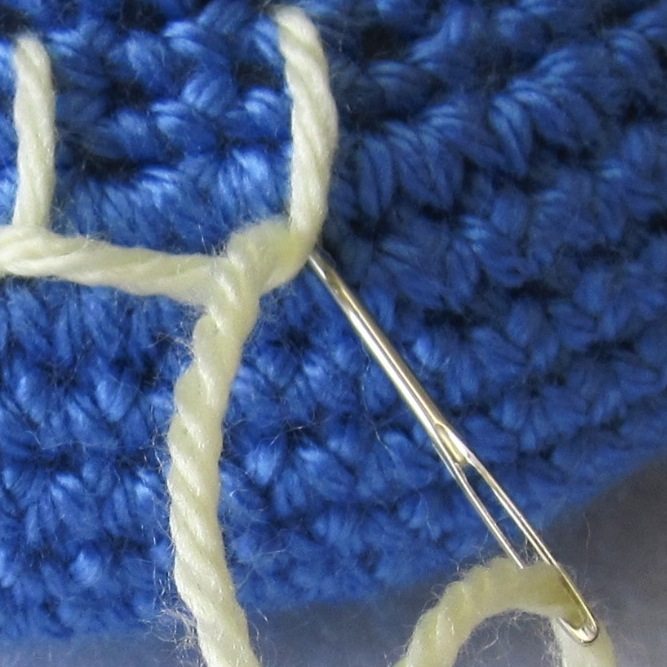
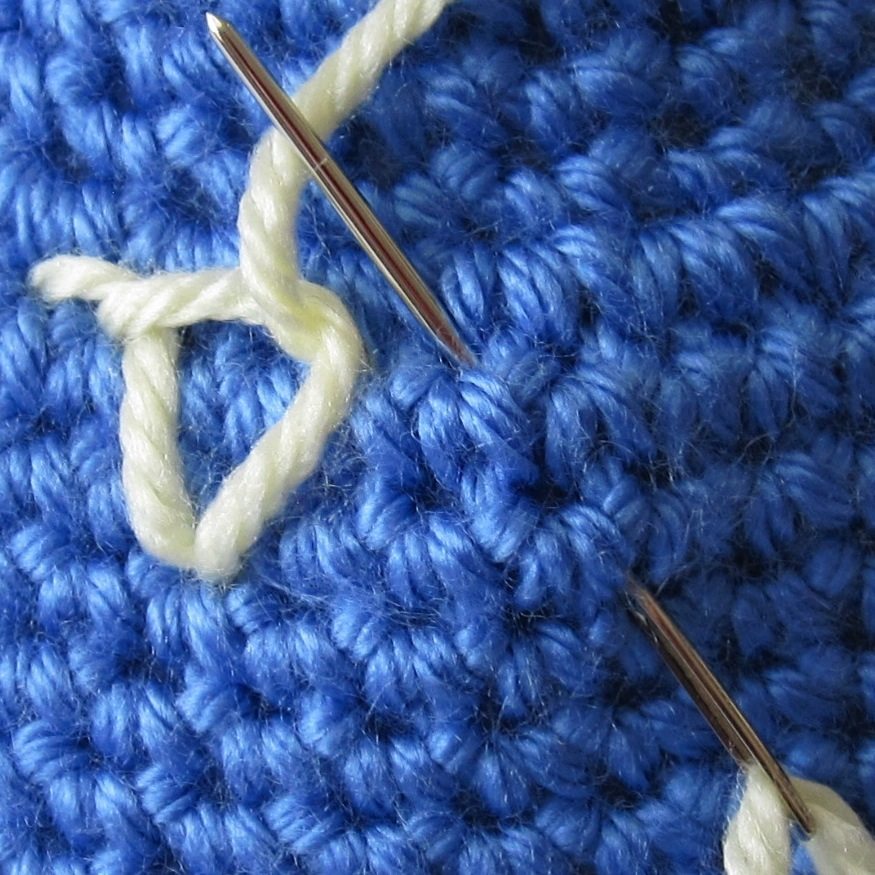
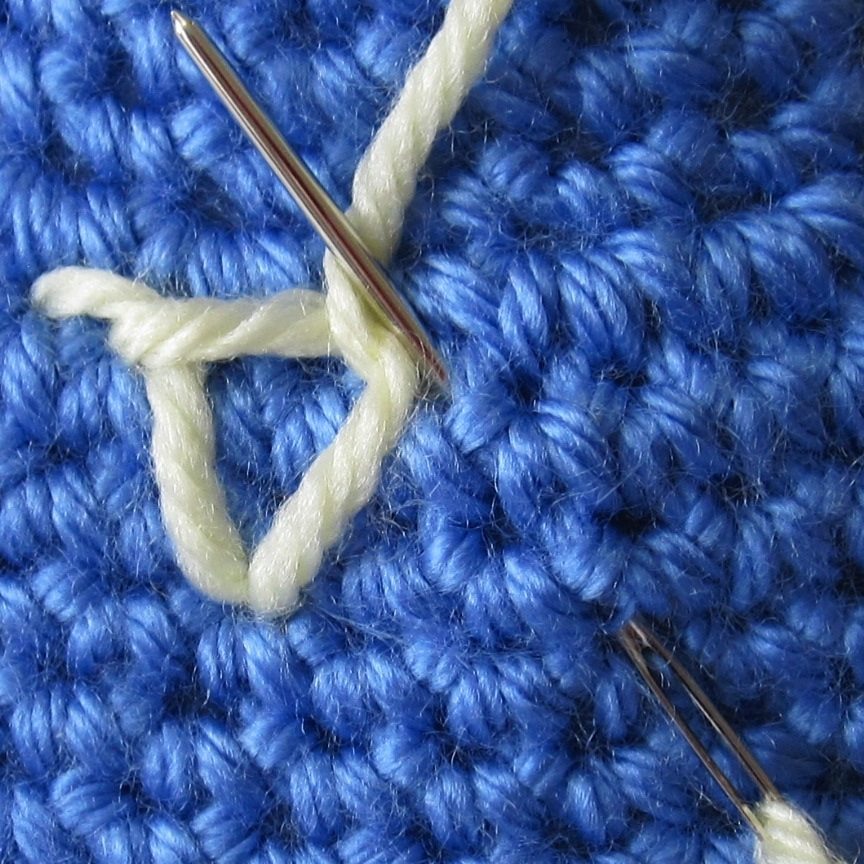
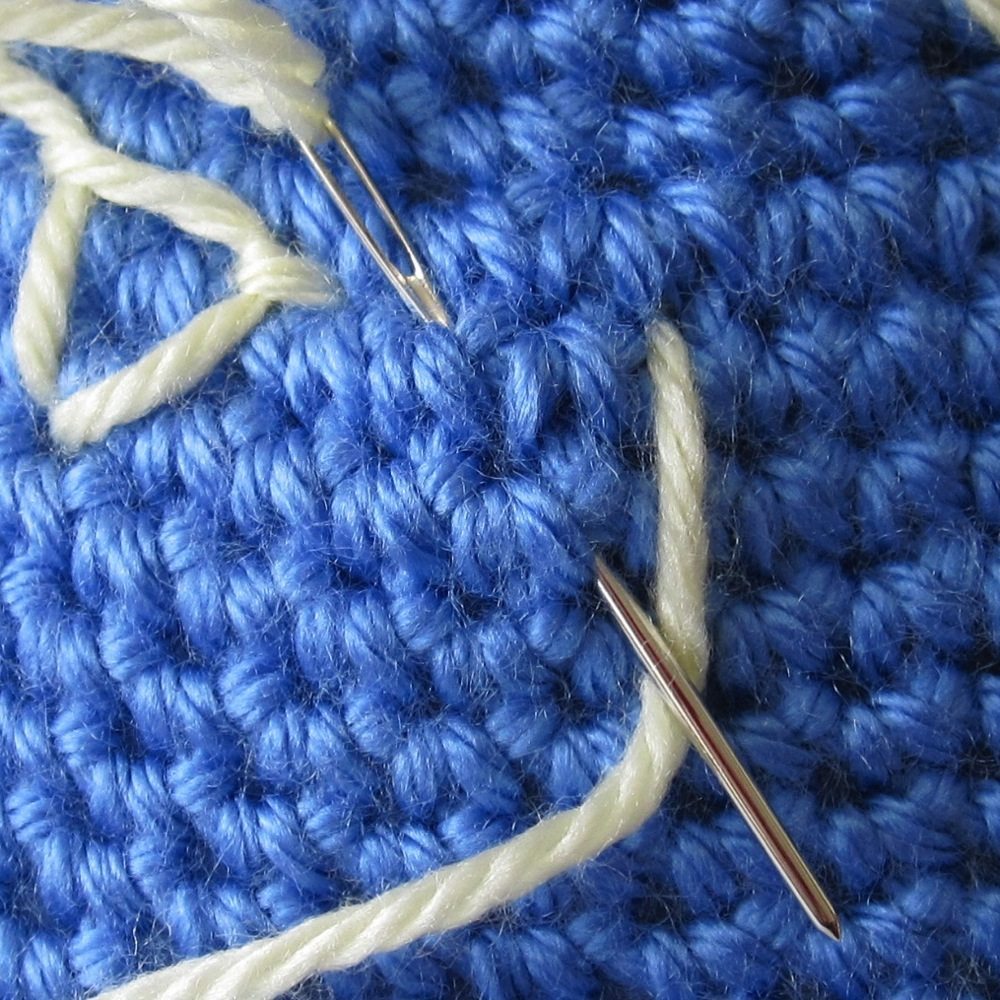
Open chain stitch is a series of interlocked Us or horseshoes rather than teardrops. It’s slightly more fiddly than chain stitch, but has the same concept. Come up at one end of the open side of the U, stitch down at the other. Come up again at the base of the U on the same side as your downward stitch (1st picture above) and catch your yarn. This time, before tightening, also insert your needle into the other base “corner” of the U (2nd and 3rd pictures above). You will most likely need to hold on to the needle with one hand and pull the yarn away from the chain rather than straight up from the fabric, so the side of the chain caught by the yarn has some downward pressure.
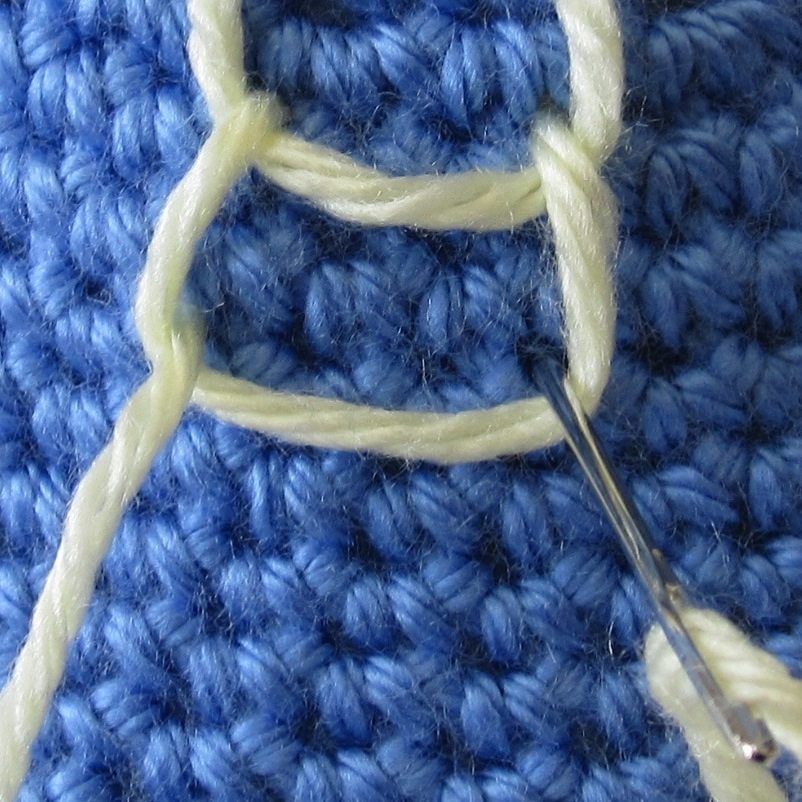
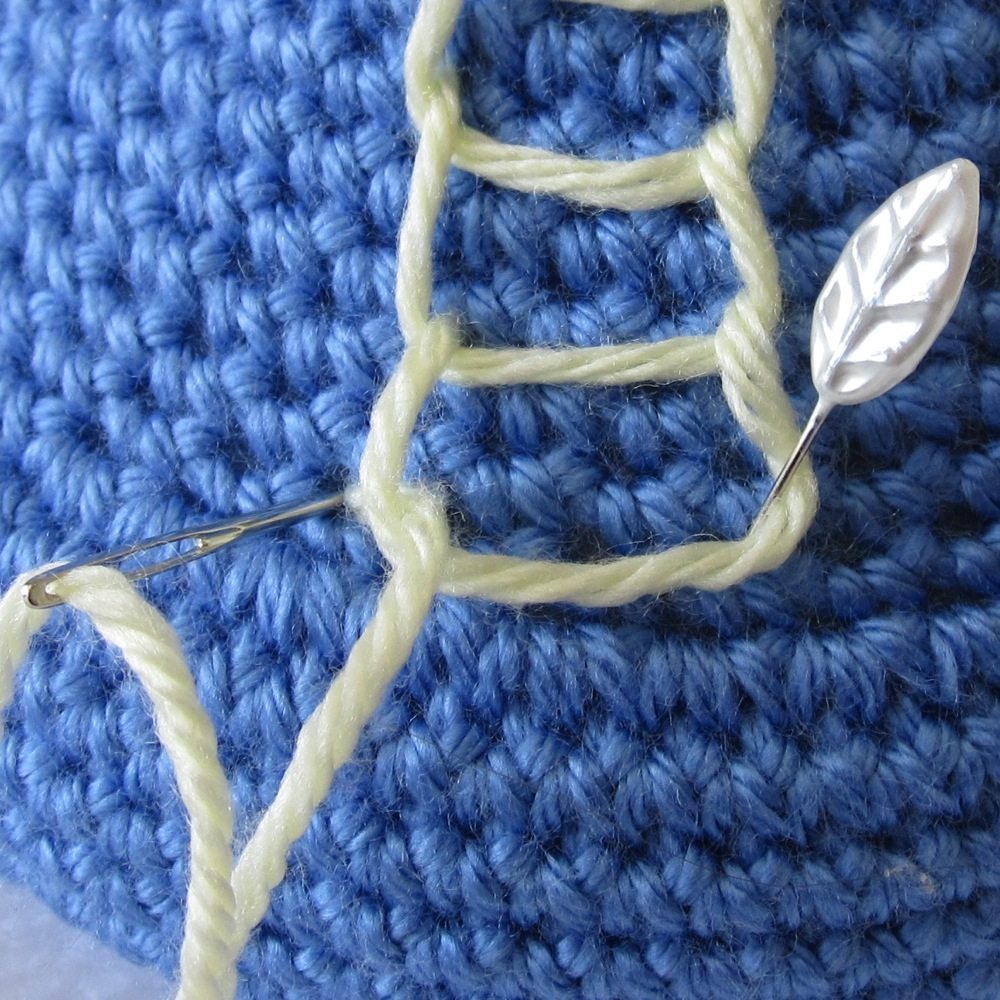
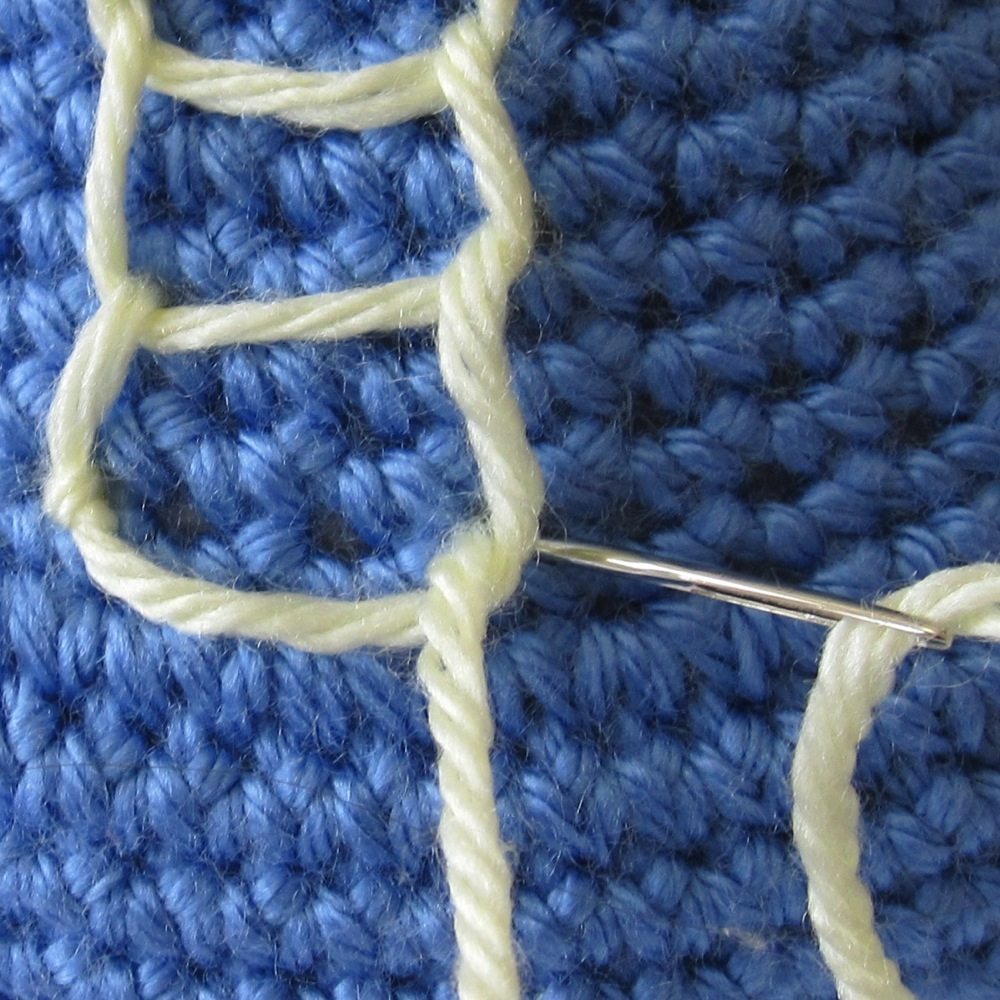
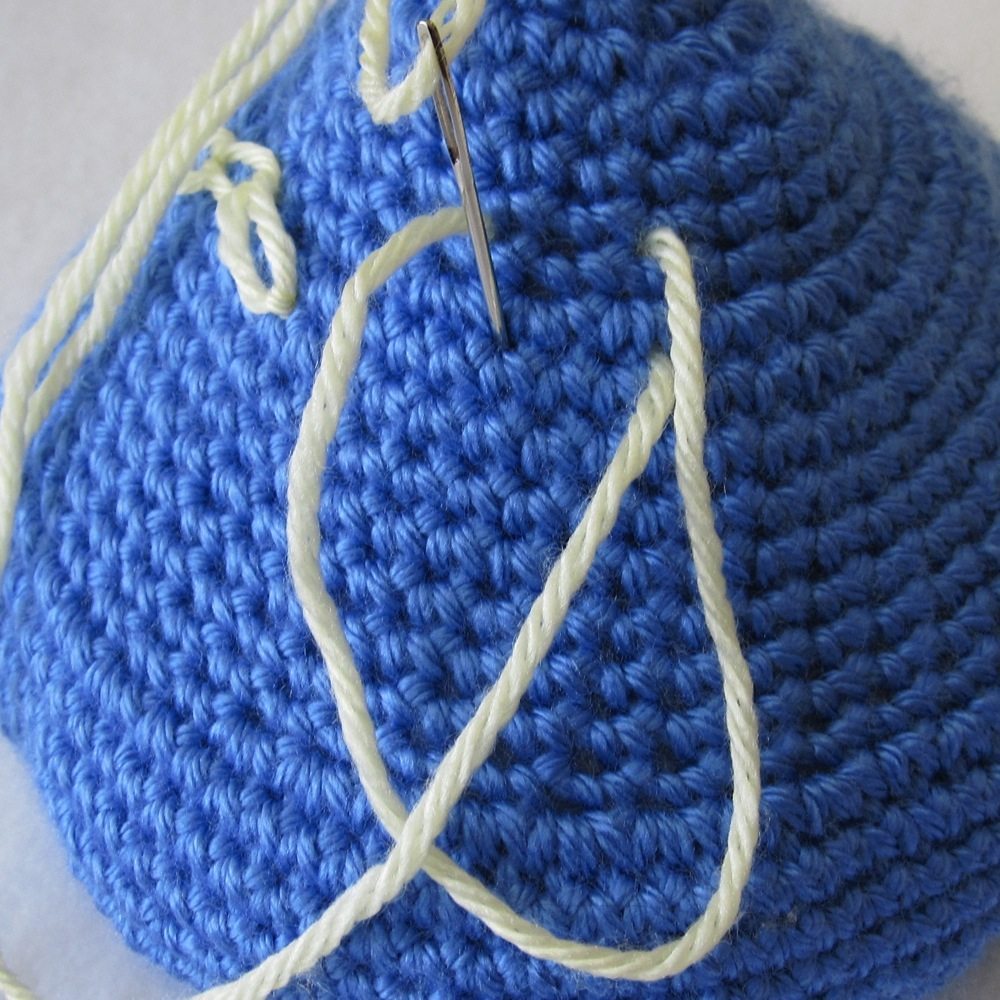
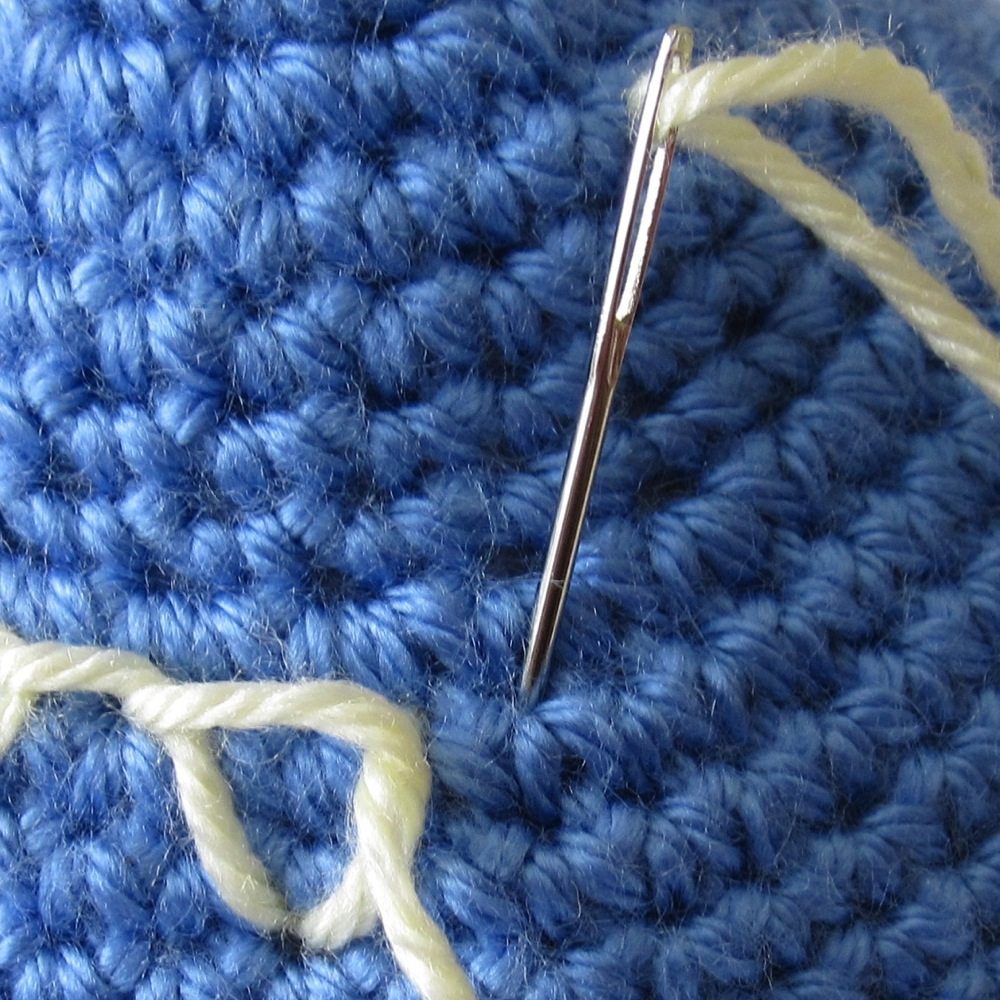
Which side of the chain is caught by yarn and which by needle will alternate, as shown in the first picture above. The other two pictures show tacking your final open chain stitch. After tightening the link, remove your needle and replace it with a pin. This makes sure you don’t accidentally pull the loop too tight while making the first tack. Then tack as usual in each corner. Although a long-tailed open chain is also not common, it would make sense to tack with stitches the same height as each chain stitch, completing the ladder-like shape. Alternatively you can make tiny tacks as shown and add a straight stitch across the top of the open chain, closing it into a series of boxes.
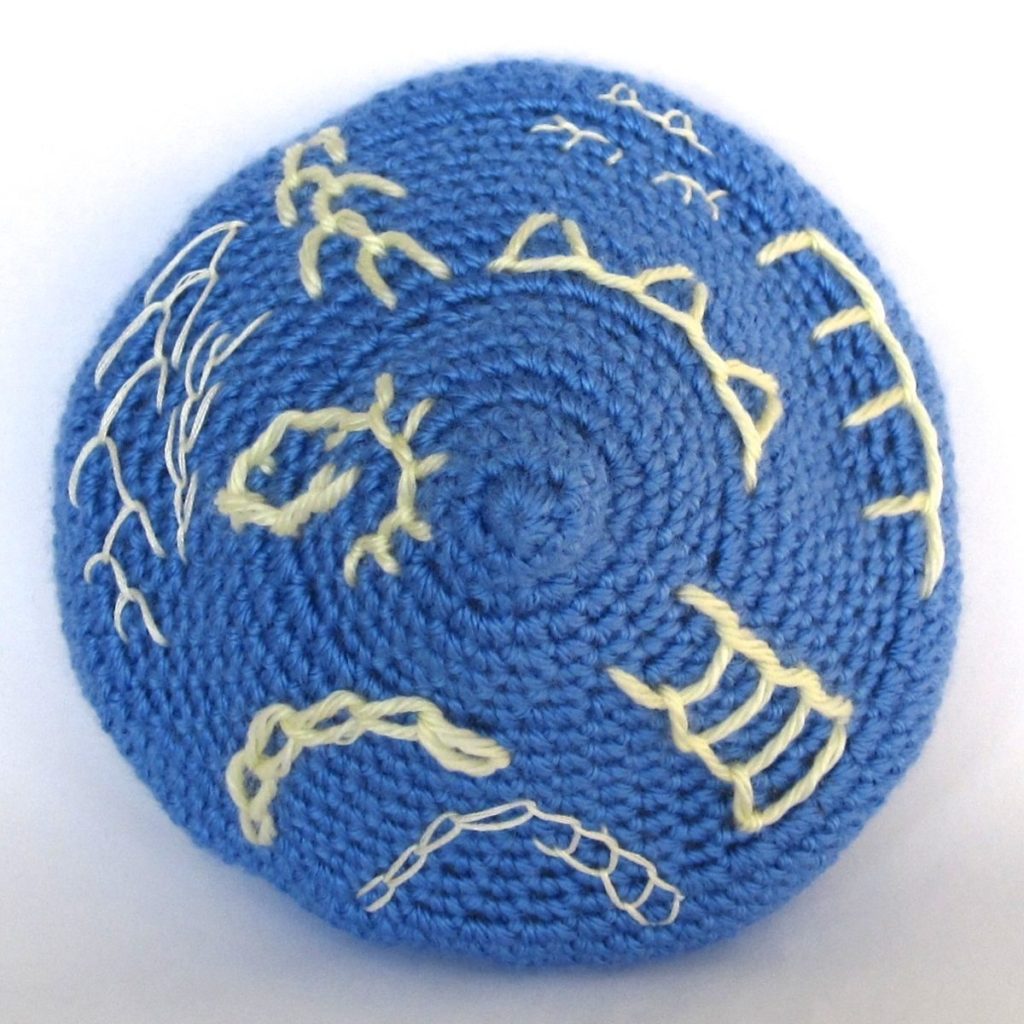
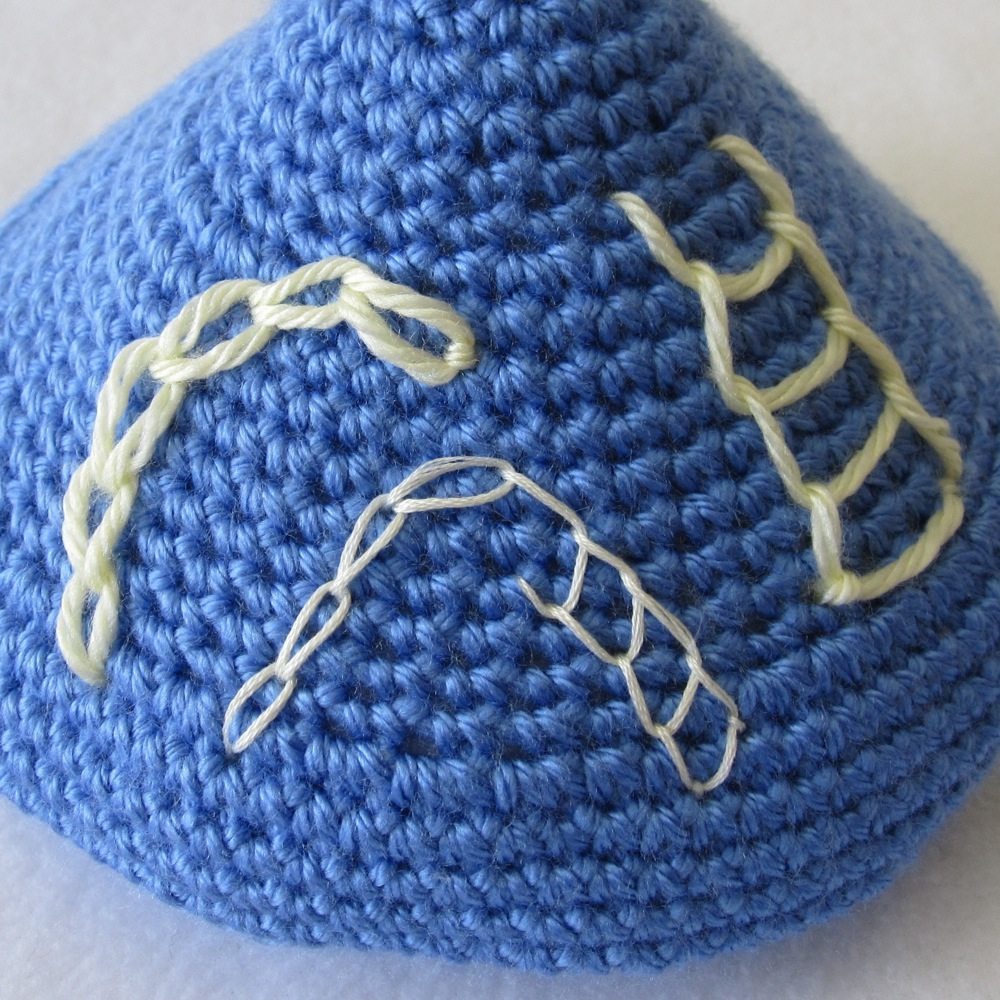
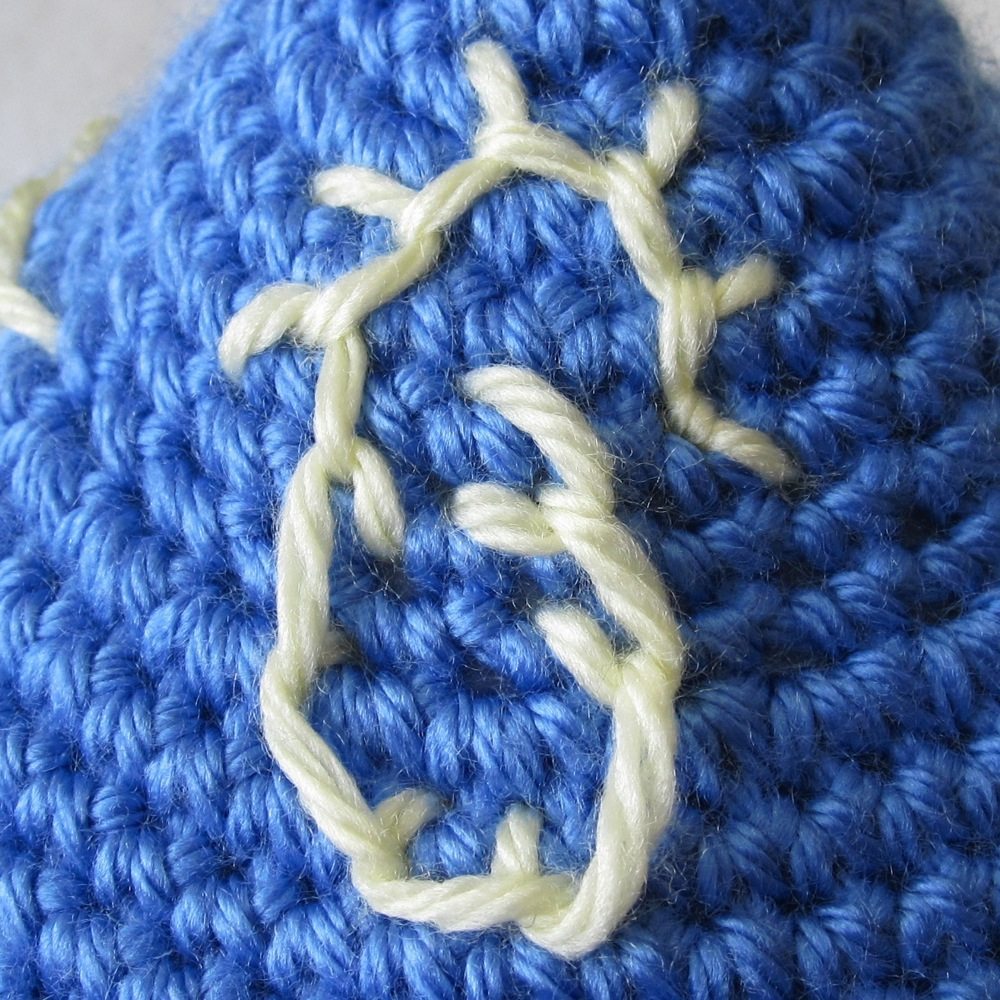
The larger picture above shows both chain and open chain made with embroidery floss, and additionally what open chain might look like if you don’t use right angles for the corners.
You can find additional instructions and versions of the chain stitch on Sharon B’s In A Minute Ago and Sarah’s Hand Embroidery Tutorials.
Blanket stitch

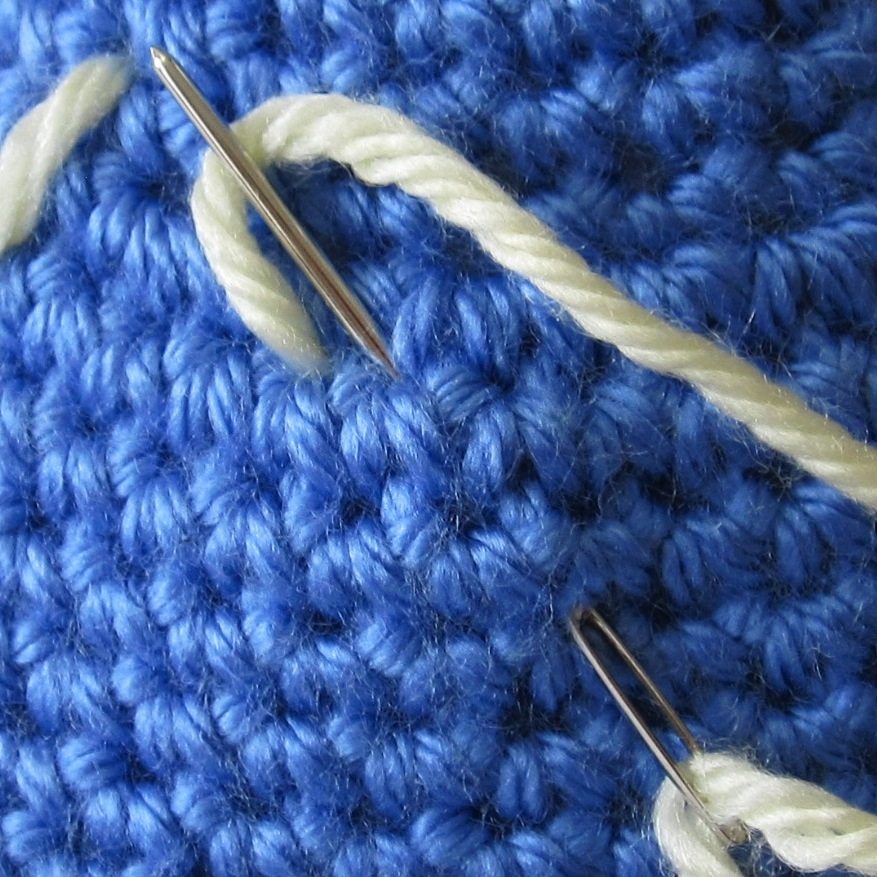
The blanket stitch can be thought of as a sequence of interlinked fly stitches. Plain old blanket stitch is on the lower left of the picture above. Each stitch is an L, and together they form a sequence of open-topped (or open-bottomed, etc) boxes. For some ease of reference, I’ll refer to the “in-line side,” “corner,” and “leg” of each stitch: the corner is the spot caught by the next stitch or the final tack, the in-line sides form a continuous line of yarn, and the legs stick out perpendicularly from that line of yarn.
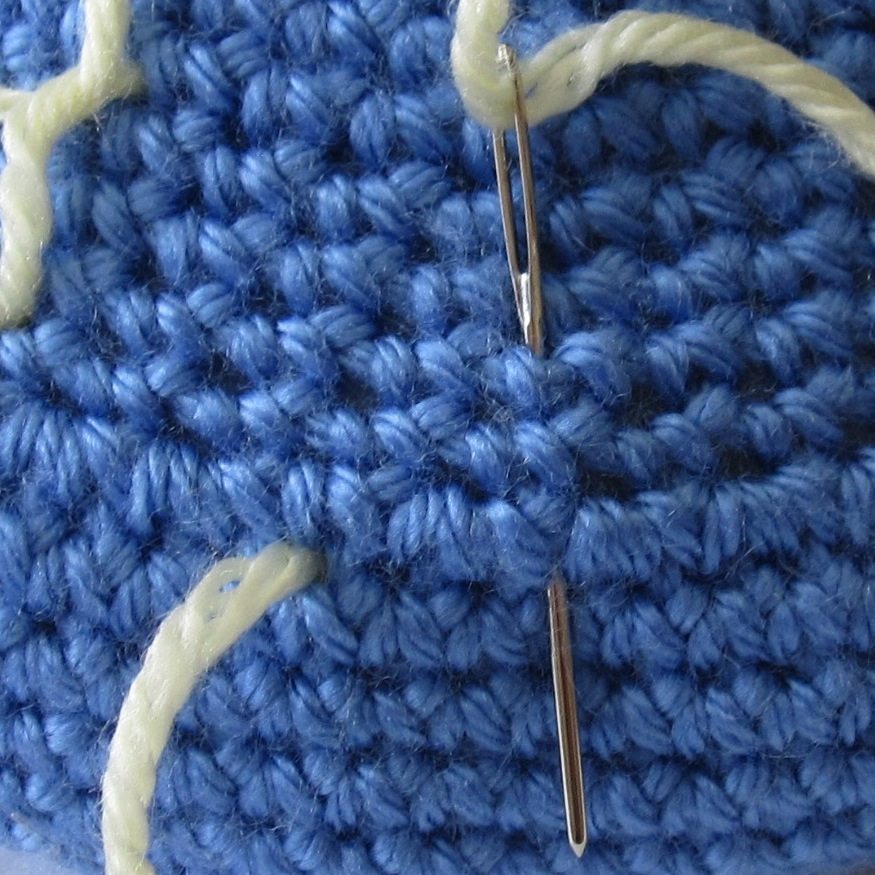
Bring your needle up at the end of the first in-line side and down at the end of the first leg. Come back up at the corner (1st picture above) and catch your yarn, tightening it into an L shape. That corner is now the in-line end of the next stitch (2nd picture above). When you get to the end make a tacking stitch as usual (3rd picture above) or make a long tacking stitch for symmetry.
Blanket stitch on the edge of a sewn item is the typical basis for a crochet edging, such as around the opening of a pillowcase. On the edge of a piece the details of working the stitch are slightly different, so I will point you to futuregirl’s comprehensive tutorial for that.
Closed blanket stitch looks much more complicated than regular blanket stitch, but isn’t really, and gives a great look. It’s blanket with the in-line sides alternately longer and shorter and neighboring legs leaning toward each other. The first two pictures above show two options for beginning. The first, which is what it shown in later pictures, gives a short in-line side to begin; the second has no length to the in-line end: it’s just a straight stitch. In any case, come up at the in-line end and down at the end of the leg, back up at or close to the in-line end, catching your yarn. This stitch should be more open than a standard blanket stitch: a larger than 90 degree angle. After tightening, stitch down for the next leg at the same point as the previous leg, and up to make a corner that is smaller than 90 degrees (3rd picture above). I’ve tried make my legs symmetric, so a line drawn down the center of the triangle is perpendicular to the in-line sides.
When you get to the second “tooth,” you can once again choose whether to have any length to the in-line side of the stitch (1st and 2nd pictures above). The first picture shows how the final sample was made. At the end make a tacking stitch as usual; the 3rd picture above shows one with length matching the initial in-line side.

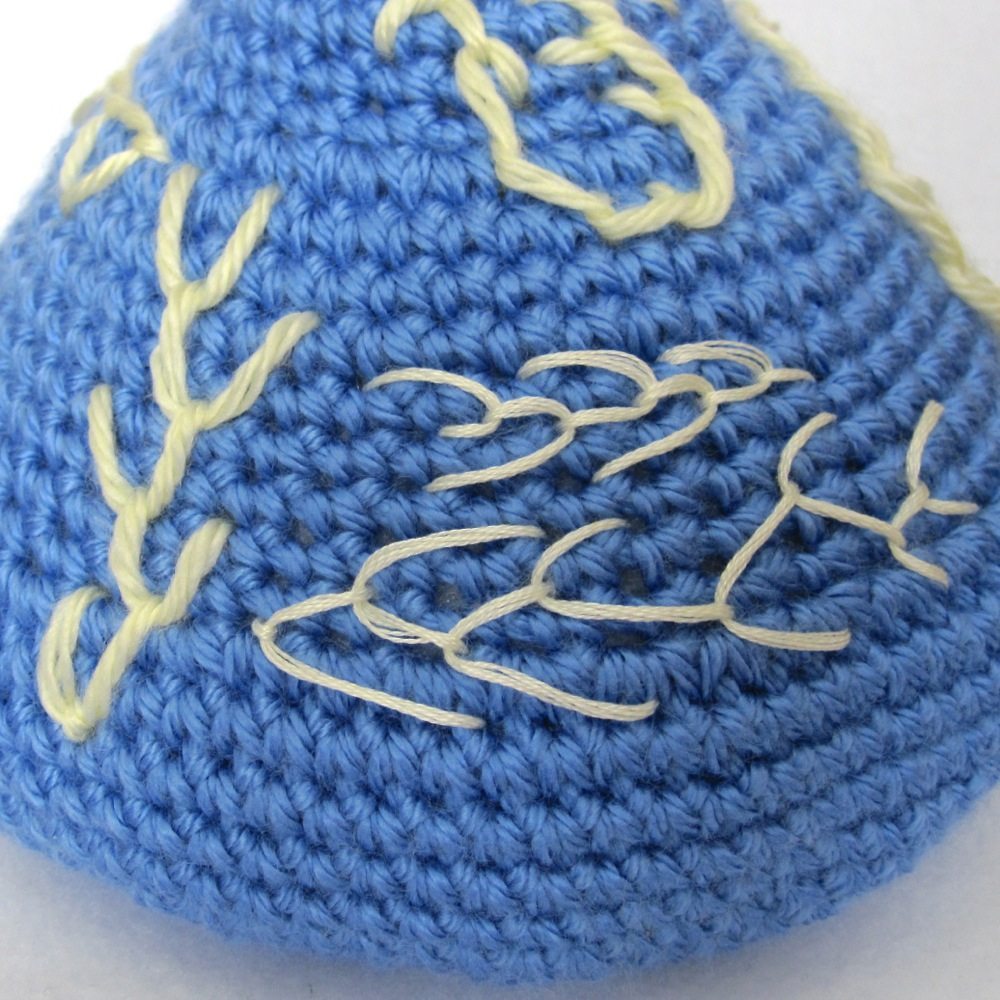
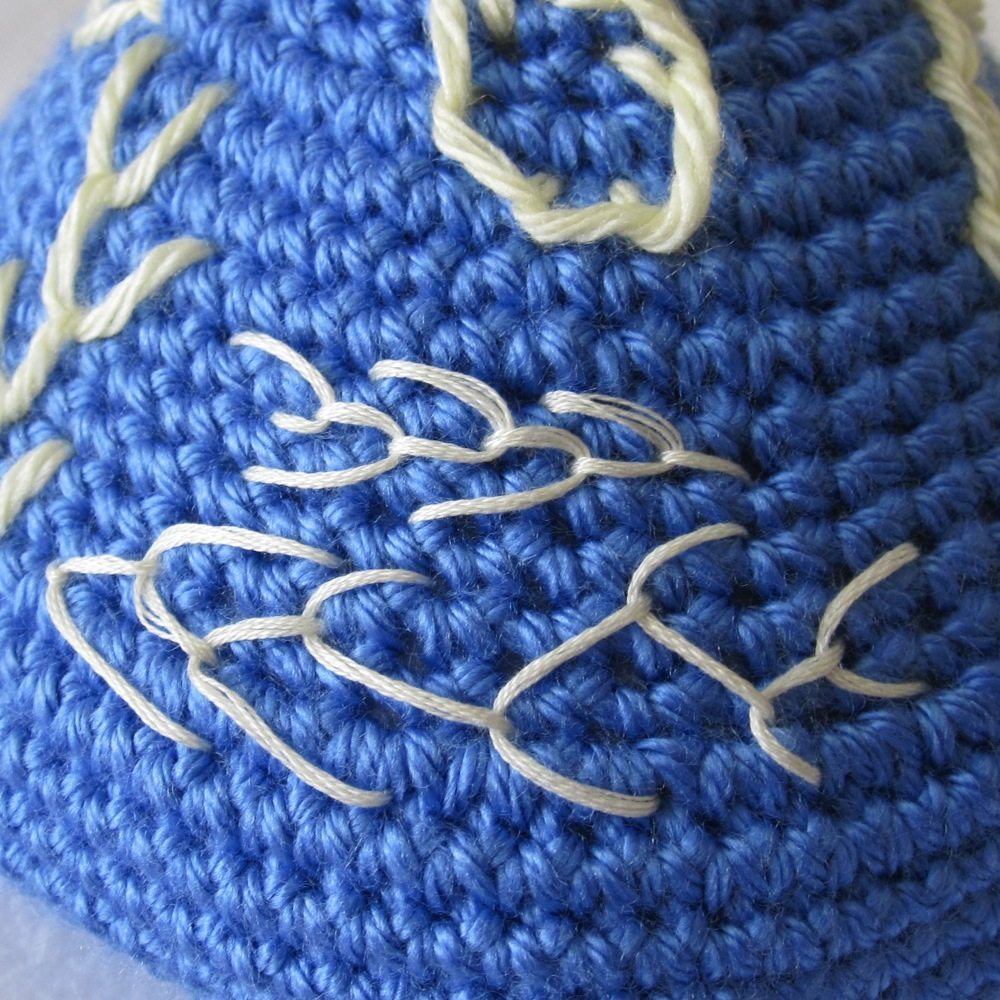
The pictures above are just little doodles made with blanket and closed blanket. The first was done with embroidery floss and shows a bit of angling to the blanket stitch. The second one, in yarn, is all standard blanket stitch, but curved strongly. You can see when the legs are on the inside of the curve the in-line sides want to roll in, but there is no such problem when the legs are on the outside of the curve.
You can find additional instructions and versions of the blanket stitch on Sharon B’s In A Minute Ago (which includes feather stitch, below) and Sarah’s Hand Embroidery Tutorials.
Feather stitch
The feather stitch can also be thought of as a series of interlinked fly stitches, with a different orientation and arrangement.
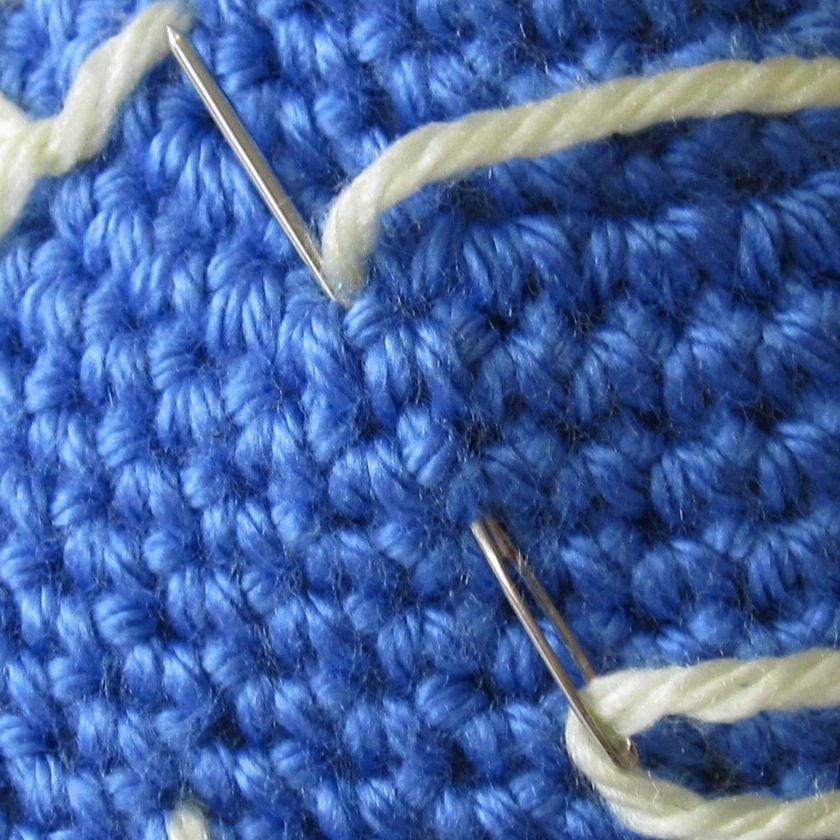
As in fly stitch, the links of a feather stitch are more V-shaped than L-shaped. The pictures above show the construction of a feather stitch in which alternating sides of the Vs form a (nearly) straight line. The first upward stitch is the end toward the inside of the feather, and the first downward stitch is toward the outside. Come up to catch your yarn where the inside end of the next stitch should be (1st picture above), and continue by stitching down on the outside (2nd picture above). Tack with a tiny stitch (3rd picture above) or a longer stitch that makes a stem of sorts (see picture below).
Varying the length and angle of the free arms and tacking arms can result in a big visual difference. You can find additional instructions and versions of the feather stitch on Sarah’s Hand Embroidery Tutorials.
 Visit the table of contents post for this series or all posts labeled “embroidery on crochet.”