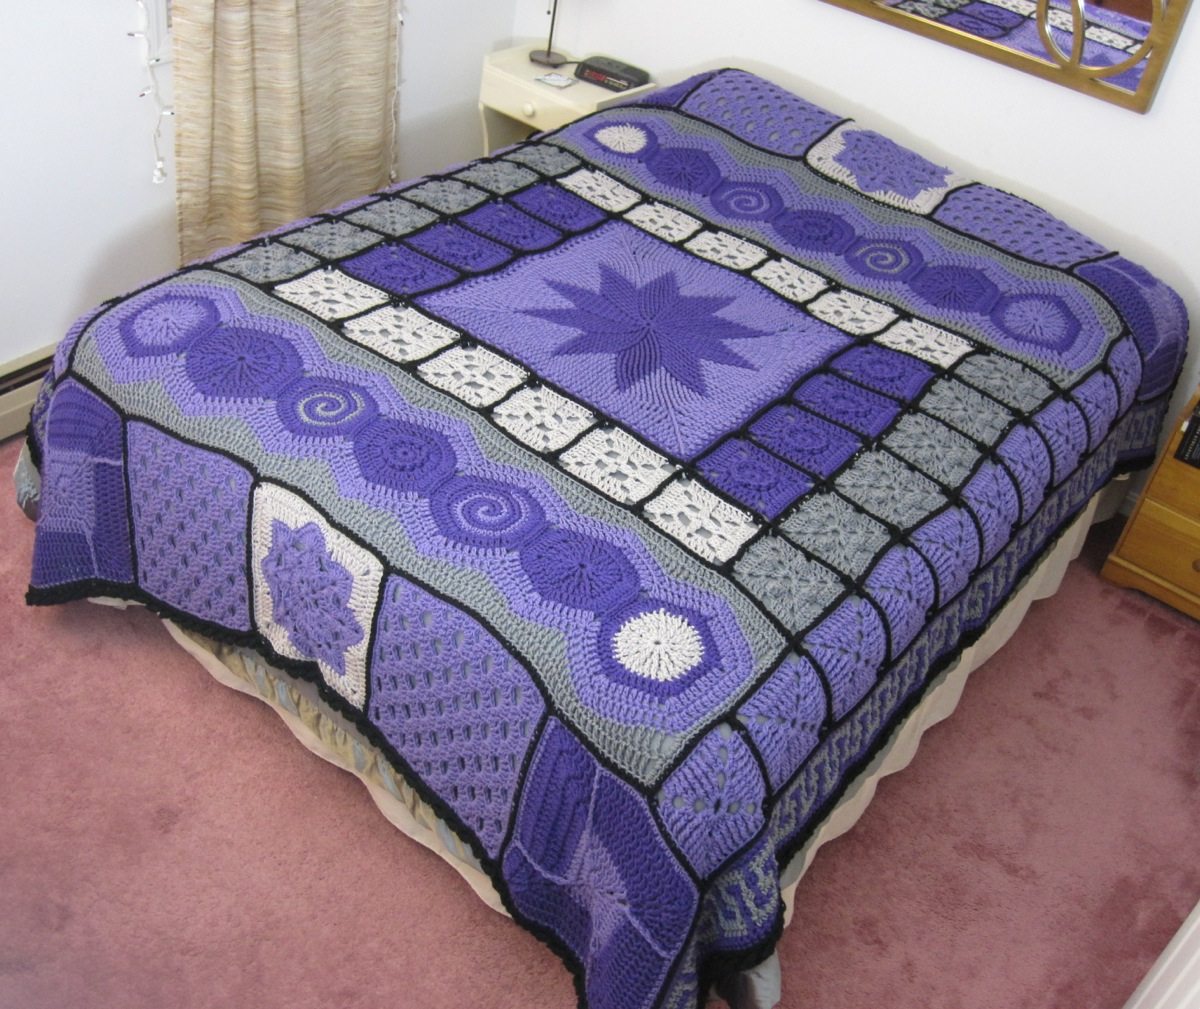
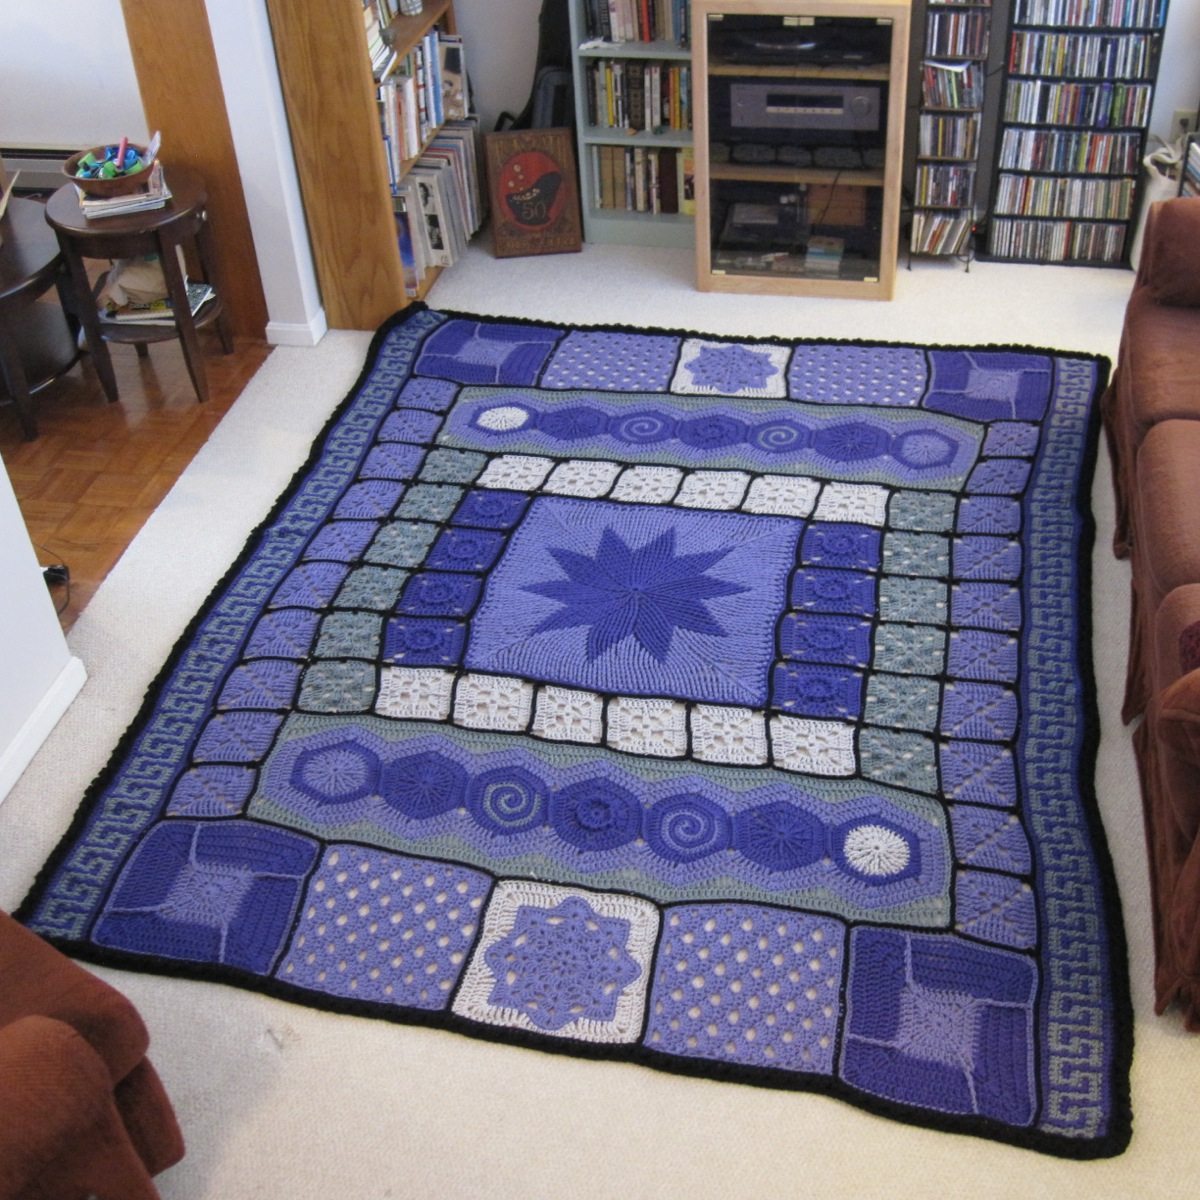
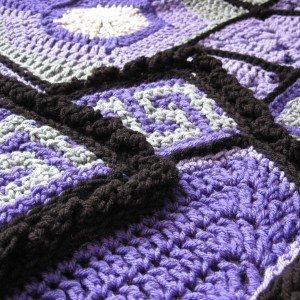
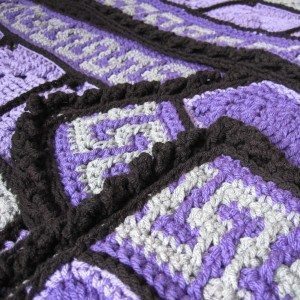
The afghan is bordered! Amazing. It takes rather a while to get all the way around a queen-sized afghan.
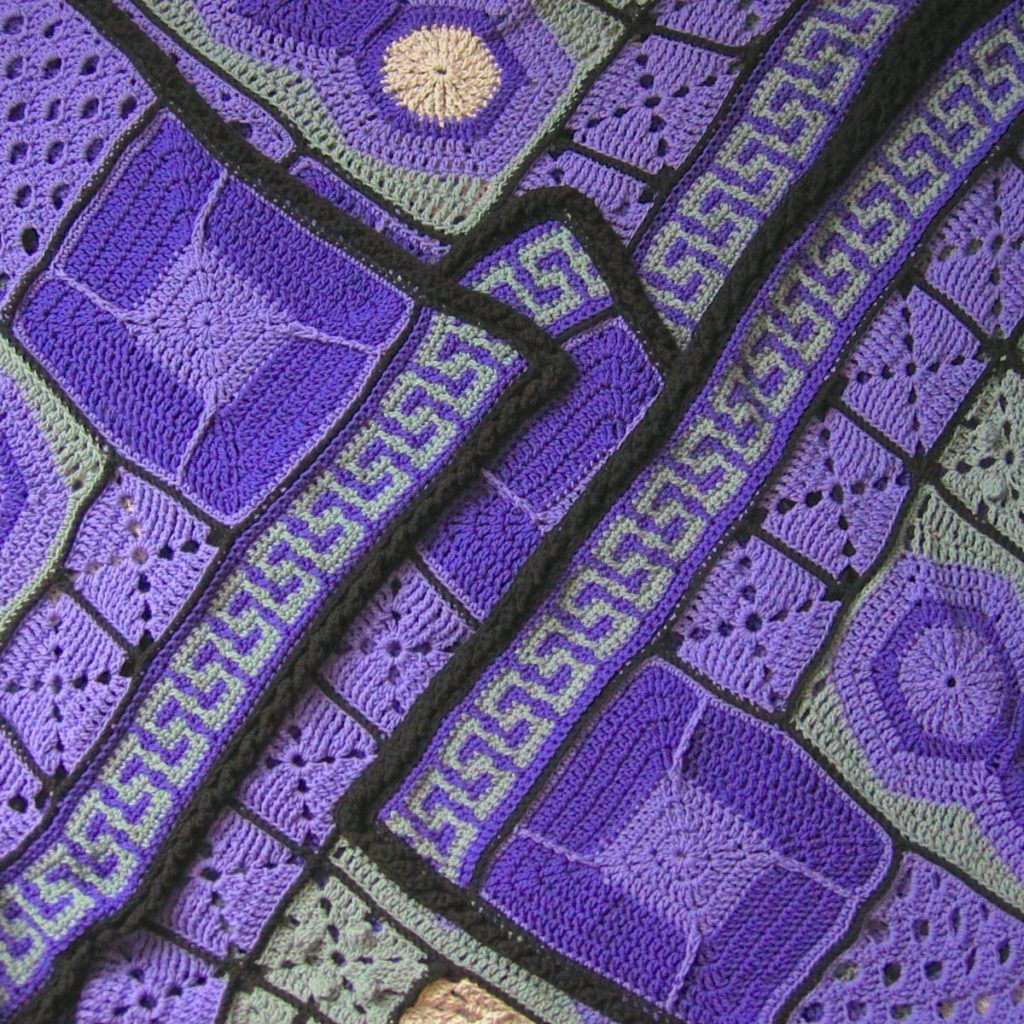
Anyway. After adding the Greek key panels, I went back to clue 8 for the border. I read a project note that opined the border was too curvy for such a geometric afghan, but it reminds me of wrought iron, which goes perfectly with the stained glass idea.

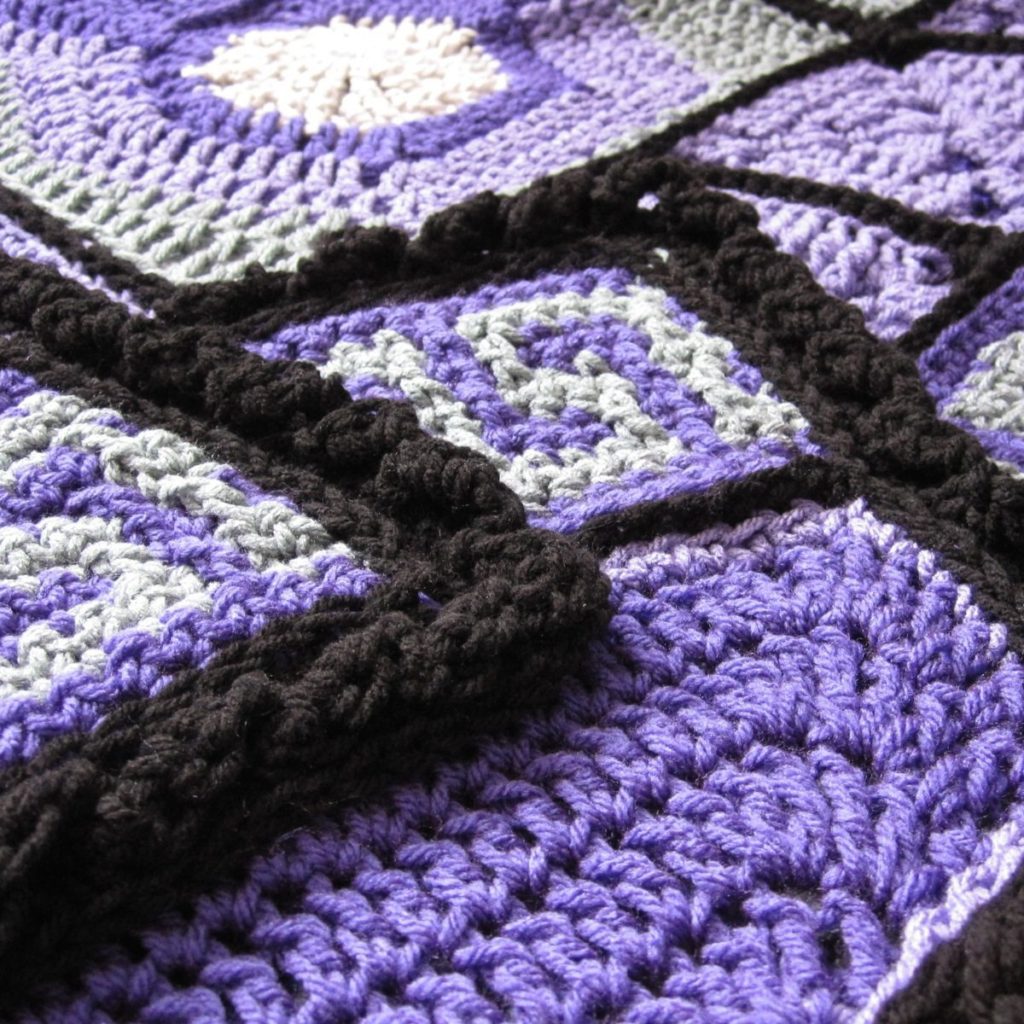
[The photo looks a little unreal because I brightened the shadows so you could see the texture of the border, and then tweaked the tint and saturation because it looked unappealingly washed out.]
The pattern described the border as cable stitch, but it’s not like what I think of as crochet cable stitch. Instead it’s a series of arcs that slightly overlap each other. I changed it a little bit, but just the very beginning (and consequently the end) and how it acts at corners.
For the single crochet base (round 2), of course I didn’t have the right stitch count. Just make sure that each side stitch count is a multiple of 3, not counting the stitches in the very corners (the middle of the 3 sc made into the previous corner stitch). [In particular, on side 1 don’t count your first sc, because it will become the middle of 3 at the end.]
Mark the joining slip stitch of round 2 with a stitch marker. In round 3, when you make your first arc, skip 3 stitches, not two. Mark the first of those skipped stitches with a stitch marker – that is where your last arc will connect – and make sure when you “sc in 2 skipped sts” they are the unmarked two.
 Proceed down the side, skipping the next 2 unworked stitches each time you attach a new arc, until you get to the corner. You’ll attach an arc to the very corner stitch, and the next arc will be joined to the next stitch after: make the “sc in 2 skipped sts” 2 sc in the very corner stitch, to make 3 sts in the corner counting the previous arc’s end. In the diagram, the heaviest lines are round 2. The dashed lines are the “sc in 2 skipped sts.”
When you get to the last corner, the arc that is attached to the very corner stitch will be attached to the slip stitch you marked. You can try to attach it to the same sc as the sl st is made into, which is really where it belongs, but that might be difficult.  The next arc, which is the one that cups the corner, is attached to the other marker stitch, the first of the 3 you skipped in making the first arc (dotted line in diagram). When you go to “sc in 2 skipped sts” you’ll only sc once (dashed line in diagram), again into the slip stitch that ended round 2. The second sc is the one you made at the very beginning of the first arc. Now you can sl st to that sc, and proceed as instructed with round 4.
I was pleased to realize that although my last arc ended in front of the first arc, because of the backtracking I didn’t have to cut my yarn between rounds 3 and 4 – I was already in the back where I needed to be.
I took a break between skeins to secure the yarn tails, so I have to figure out how to photograph the whole thing, wash it, do the final trimming, and get the on-bed glamour shots. Until next time!
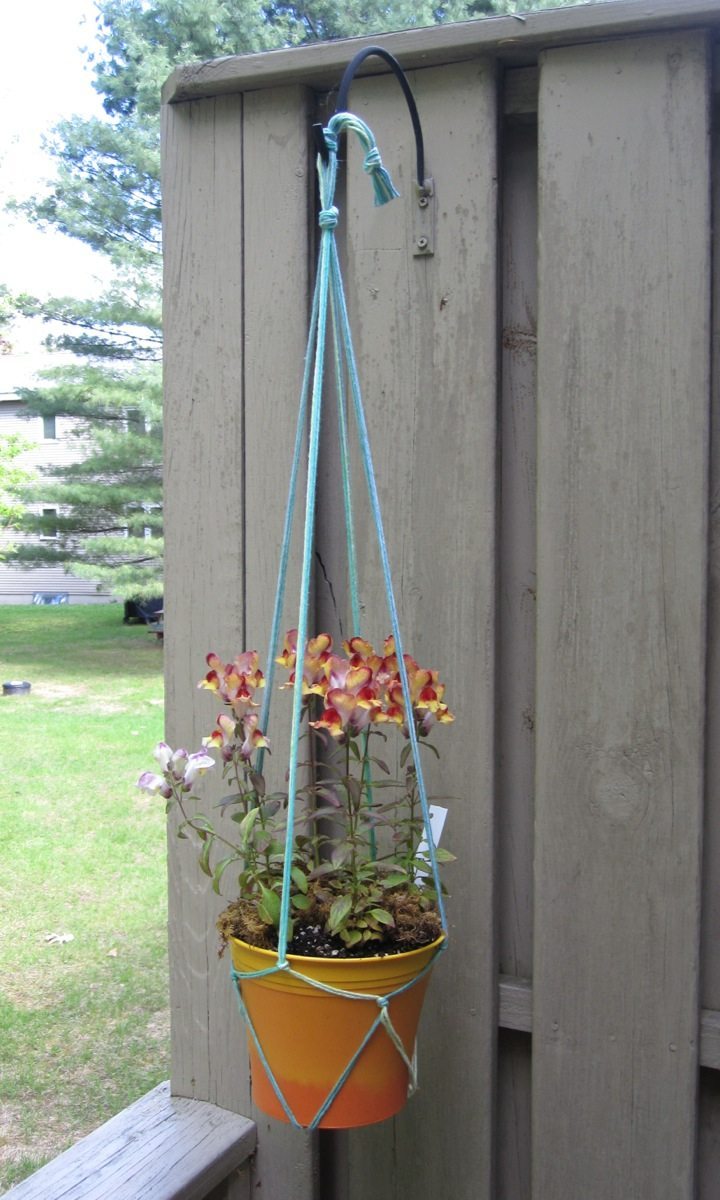 Last year I had a pot of snapdragons that bloomed off and on all summer, despite the fact that I really didn’t take any care of them. Last week I bought myself a little sixpack of snapdragons, and potted them up together. We’ve been using the deck a lot more so far this year than we had been before, so I didn’t want them sitting on the table where they would make a mess that would have to be cleaned up all the time to use the table.