Last-minute scarf

I promised a scarf to a friend for her daughter, and sat down to start it. To my surprise, in less than an hour and 45 minutes the crocheting was done and I just had to add fringe!

last minute scarf

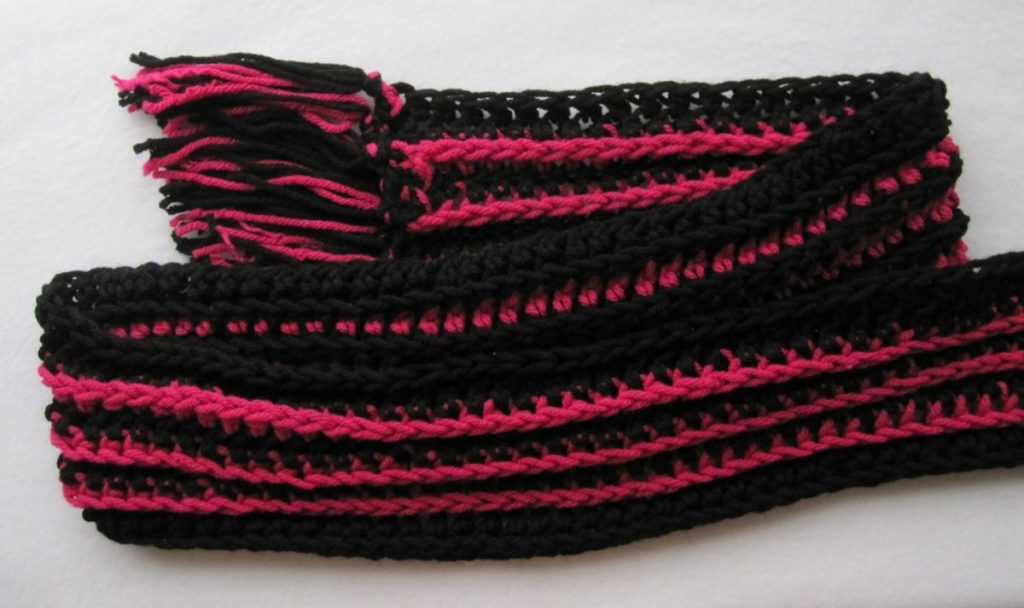
There it is with the fringe. This is a scarf in half double crochet, each row stitched in the bottom loop of the “faux teardrop” on the back of the previous row. I got the idea from Jenn Ozkan, but clearly from the pictures I used a larger hook for the yarn than she did: K/10.5 (6.5mm) for Red Heart With Love, a plush worsted at the thickest end of the weight class. I wanted the scarf to be soft and smooshy.

I started with a row of foundation hdc that was about 54″ long (though you could certainly use a starting chain instead), and stitched 9 rows total:
2 black
pink, black, pink, black, pink
2 black
The scarf is about 5″ wide. A skein of RH With Love is 7 oz/370 yds (198 g/338 m), and I used about three-quarters of a skein total: just over 3 oz (160 yds; 85 g/146 m) of black and just under 1.5 oz (80 yds; 43 g/73 m) of pink. Over half an ounce of black and about a quarter ounce of pink went to the fringe.

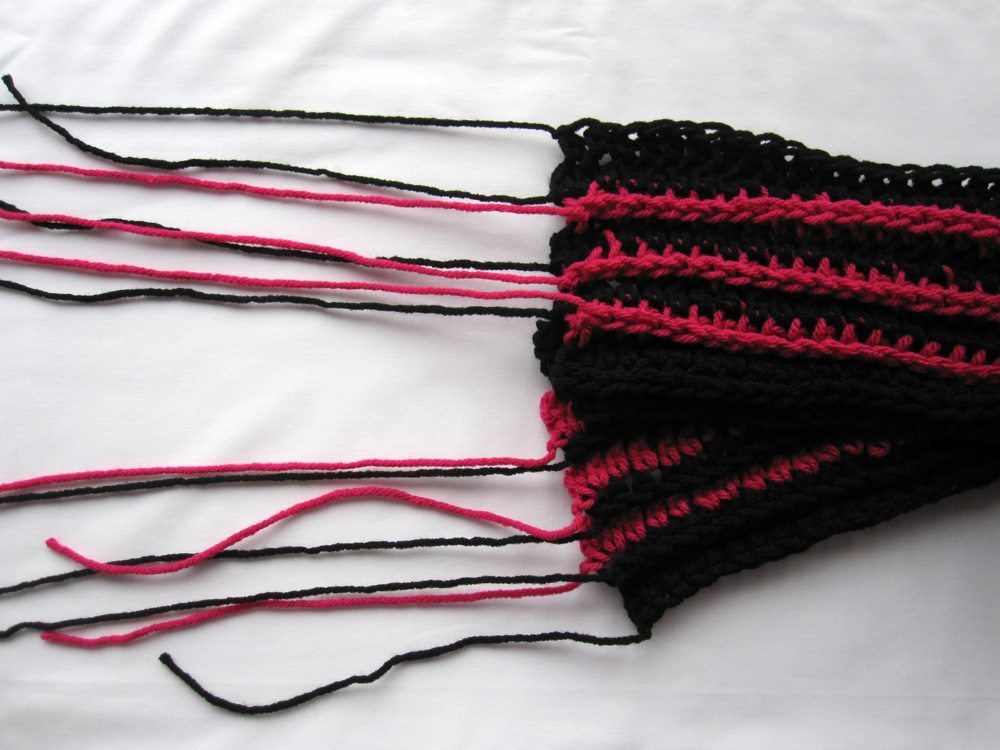
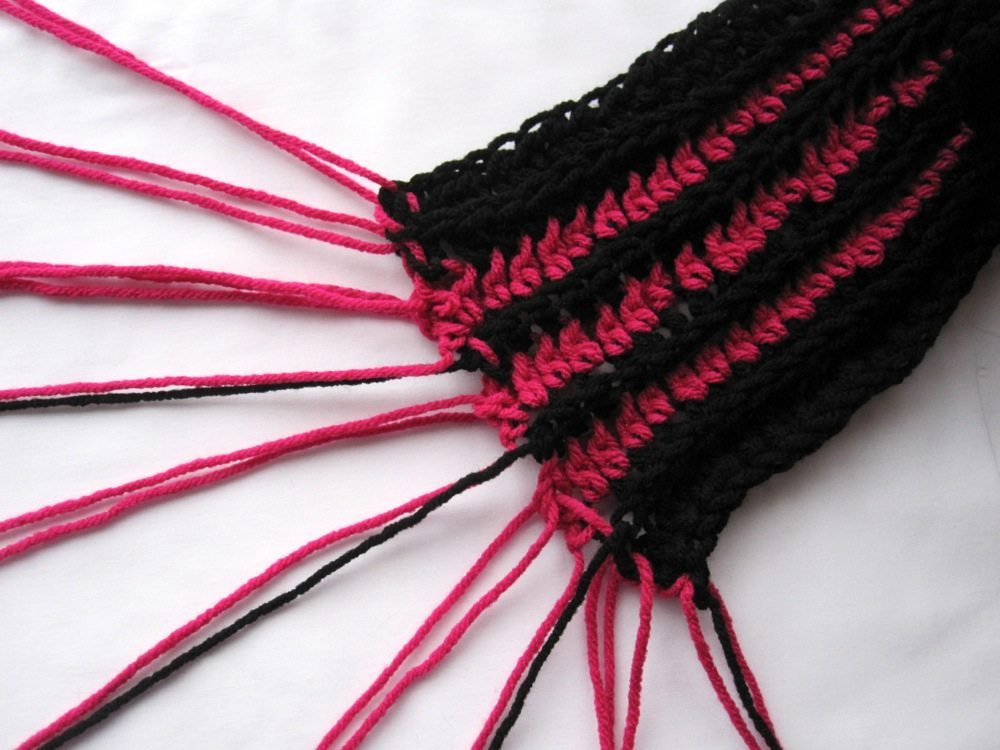
It wasn’t really practical to carry my yarn between stripes, because I was always starting colors at the opposite end of the scarf than I had finished them previously. Instead, at the beginning and end of each length of yarn I left a long tail to incorporate into the fringe. If you want to try out foundation half double crochet for the first time this isn’t a bad choice of project for it. There’s a great tutorial for foundation sc on futuregirl’s blog, and the modifications for hdc are minimal: still a ch-2 to start, a yarn wrap before each hook insertion, and pulling through 3 loops on the hook where in sc you’d pull through 2. Fuller instructions at the bottom of the post, but meanwhile fringe!

fringecloseup

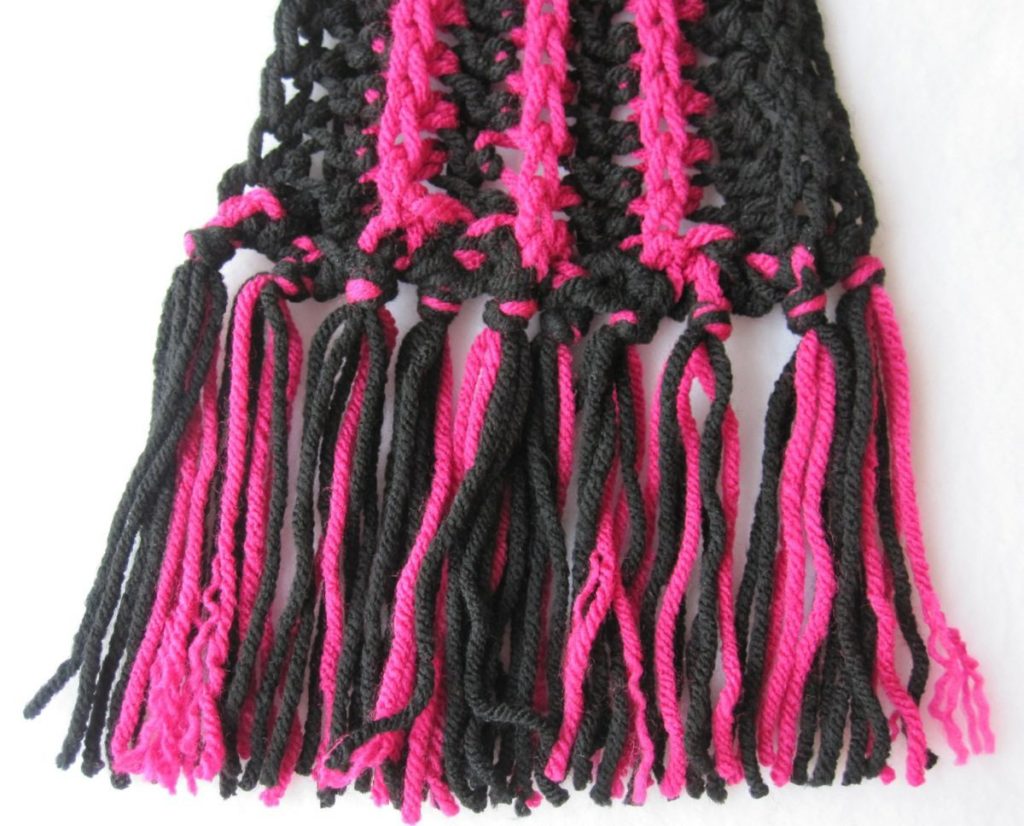
The recipient of the scarf has three younger siblings, the youngest of whom is still a baby. I wanted to put fringe on the scarf in such a way that picking it out would be laborious. My solution was to put the ends of any given length of yarn in two different tassels. I should probably tell you adding fringe took about as long as the crocheting, but if you did it a more simple way (either feeding a bundle of yarn through and tying it in an overhand knot, or attaching a bundle of yarn with a lark’s head knot) it would be a lot quicker. I cut two-foot lengths of yarn, 11 pink and 21 black for each side. Most, if not all, of the strands are in tassels no more than 3 apart. In between I tried to corkscrew them around – and sometimes not having messy strands meant getting the tassel strands around the outside of the lengths stretching between tassels. I did all the pink first so the black would cover it over a bit between tassels. The pictures below show the loose ends from crocheting, most of the pink strands woven in, and the fringe finished but not yet trimmed. I have a note to myself that indicates I believed I took pictures when 4 tassels had been knotted and the rest were awaiting the rest of the black yarn, but apparently that was only a hallucination.

unfringed scarf partly fringed scarf uncut fringe

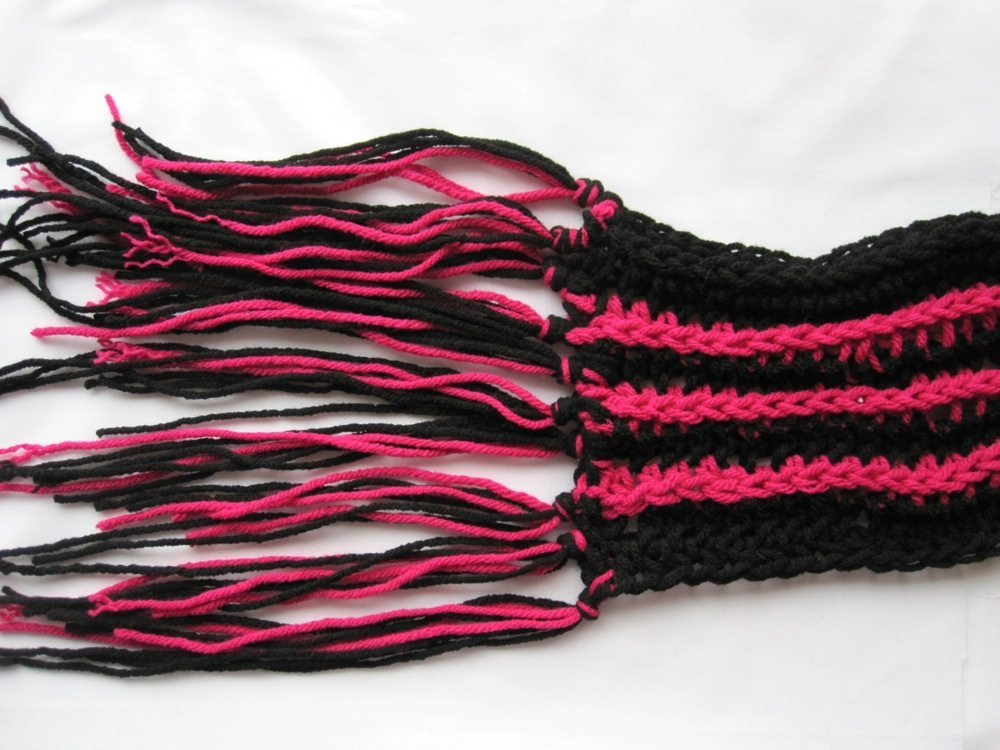
Most of the 10 tassels on each end have 7 strands of yarn, but one has 8 since there was an odd number of strands left from crocheting. They are 2 pink and 5 black, 3 pink and 4 black, and one 3 pink and 5 black. I tried to have more pink on the outside tassels and less on the inside ones. I trimmed the fringe by eye, and the reason it looks shaggy is that I did so before washing the scarf. The scarf is fully machine washable and dryable (in acrylic yarn, and in a mesh bag to avoid snags) but the fringe will get split ends, so don’t trim until afterward (and hand wash/line dry if that will bother you).


Foundation Half Double Crochet:
1. Chain 2; yarn over, insert hook into first chain and pull up a loop. Pull it up a little higher than you would normally.
2. Yarn over and pull through first loop on hook (essentially, chain 1).
3. Yarn over and pull through all 3 loops on hook. [One foundation half double crochet, fhdc, made.]
4. Yarn over, insert hook into chain made in step 2 and pull up a loop. Again, a little higher than you would normally.

Repeat from step 2 as many times as desired, but stop after step 3 of the last hdc. Basically, step 1/4 creates a location to stitch into, and steps 2 and 3 are a half double crochet made in that spot. My note about pulling the loop in step 1/4 up higher than you would normally is because foundation stitches are supposed to be true to width, but if I do not make sure to pull that loop up tall I get a tight edge (a fhdc strip that curls downward) exactly as I do if I use a starting chain without doing something about my natural chain tension.

Clotheslined

Our Halloween is all but over now, since the parties we typically go to both happened last night, so I thought I’d go ahead and show you my costume.

clothesline costume

I was a clothesline! It was a lot less elaborate than last year and three years ago. I sewed, but a total of no more than 90 minutes. On me you can see a tank top, towel, and pair of socks (though they would not even fit baby feet; they just look sock-shaped). There’s also a bird clipped into my hair. I made everything from scratch, freehand, though I did use rulers and aim for symmetry. There were two pieces that didn’t make it onto the line in the moment:

mini pants mini slip

The skirt is out of leftover fabric from the slip of my paper doll costume and the tank top is tie dye left from my bird shirt remodel; the rest is stash fabric that hasn’t been seen here.

The pictures above also hold a lesson in freehanding: Yes, a pants piece is basically a tapered rectangle with a half a U cut out, curve of the U at the crotch. BUT the half-U has to have its top at the waist. If you cut it with the top of the U at the cuff you get some seriously bandy-legged pants!

Matt’s costume was hard for people to guess. Imagine him making a goofy face and telling you jokes. (I like to say, he went as himself.)

Matt close-up

Reviving, part 2

In part 1, I showed you the result of combining two of my three worn shirts into one reverse-appliqued shirt. There was one left, and I planned to combine it with a secondhand white shirt and overdye again, but I didn’t want to completely repeat myself. Ultimately I had this:

front of finished bird shirt back of finished bird shirt

This took longer both because there were more steps and because I didn’t buckle down with it like I did with the green shirt. The white shirt was a men’s XL and huge, so before beginning I cut a panel out of the front so that I would leave a usable amount of the material in its original state. I thought the birds would be more interesting if they weren’t solid red on a red-orange background, so I tried out a Tulip tie-dyeing kit. After accordion folding and rubber-banding the fabric, and then folding it in thirds and rubber-banding again, I put it in a plastic bag, sprinkled dye powder on it, and wet it thoroughly with a spray bottle. This was to preserve the leftover dye powder for later use, as the box warns it loses potency fast, without making the risky maneuver of putting it in a cup and mixing it separately. I could see myself getting dye powder all over the counters. I let it sit for about seven hours and then rinsed it and washed it. Good results! [Incidentally, I tried dyeing elastic as well, and you can see the mixed results there. The one that dyed well was Dritz stretch lace elastic, and the one that barely dyed at all was Stretchrite knit elastic.]

bundled up tie-dyed

I’d wished for a dark red, like RIT’s wine color, but this would have to do. At least it came out well!

After a time I decided to dye it again, bundled it up in a different direction (and with a scrunch rather than accordion folding), folded it in half, rubber banded it three times and threw it in a dilute bath of RIT dark brown. That made it come out even better. I pinned the dyed panel inside the orange shirt, on which I had drawn freehand bird shapes. As with the previous shirt I sewed with higher thread tension and lower presser foot pressure, just outside the drawn lines. Since there was really no obvious color choice for thread, I used yellow, thinking this might help the birds really pop once the whole shirt was overdyed. After stitching, once again, I very carefully cut out the birds.

birds sewn and trimmed

I wanted to do something to the back of the shirt, but decided after trying it on at this point that birds all the way around would be too much. Instead I raised my thread tension a bunch and sewed with a long stitch along a line centered on the back of the shirt at about the level of the tops of the birds’ heads. That gathered the fabric nicely, and then I pinned a length of ribbon along the line on the inside and stitched the fabric to it with a short, narrow zigzag.

Then came a red dye bath, which I did not pay much attention to, and ended up with a very splotchy shirt – almost tie-dyed.

blotchy bird shirt
This is why the RIT bottle says “STIR CONSTANTLY.”

It really wasn’t my cup of tea, especially the strange shade of pink the birds had turned, so I went one more round to get the result at the top of the post. This time it was in the washing machine instead of a bucket, and was a dilute bath of red, orange, and brown that I left the shirt in for a good hour. There was some relief when I pulled it from the wash afterward, though it was unfortunate how much the variegation on the birds had disappeared.

Overdyeing like this, incidentally, is something I learned from reading about graphic design. When choosing a color scheme, for a website for example, one way you can make sure the colors coordinate is to set out your palette and then add a semi-transparent layer of a single color over all of them. The resulting blended colors have more in common with each other. The first time I wore the green shirt a longtime quilter, sensitive to color, commented on how well the colors went together, which told me the technique did indeed translate successfully to dye!