I learned something making my mini saddlebags that I thought I’d share with you all. Sew-on snaps by machine!
I didn’t want to sew the snaps on by hand, because it takes a long time and is just annoying. So I thought maybe I could do it with a zero-length zigzag stitch on the machine. The only problem was my regular presser foot couldn’t get close enough, and the other foot options (such as the zipper foot) didn’t accommodate zigzag. Solution? Take the foot off entirely!
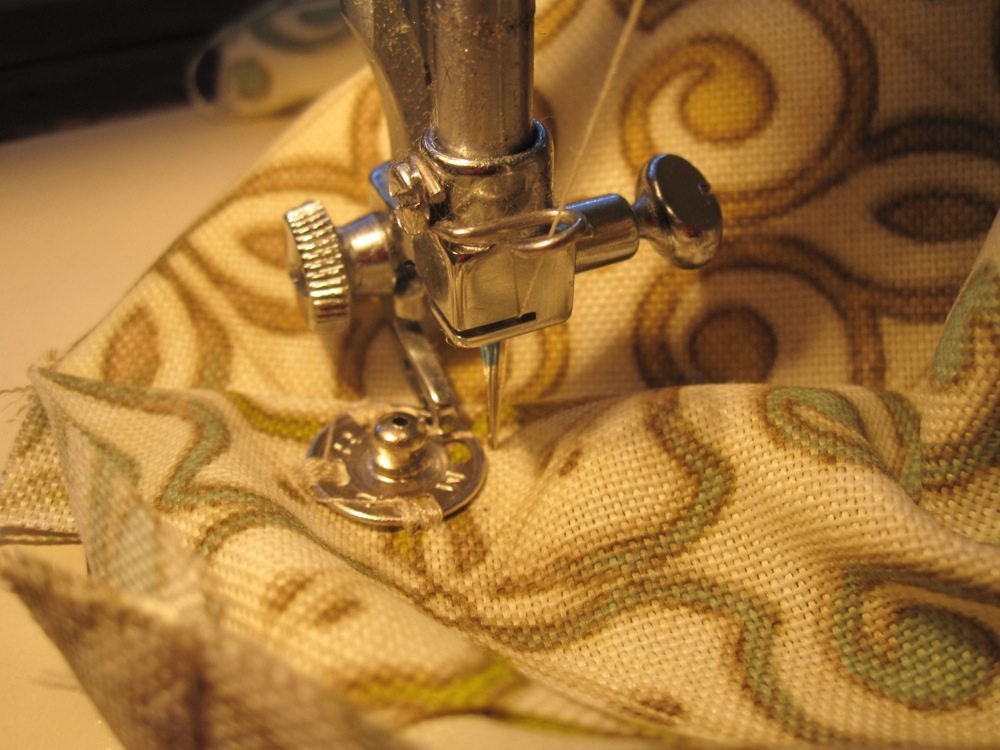
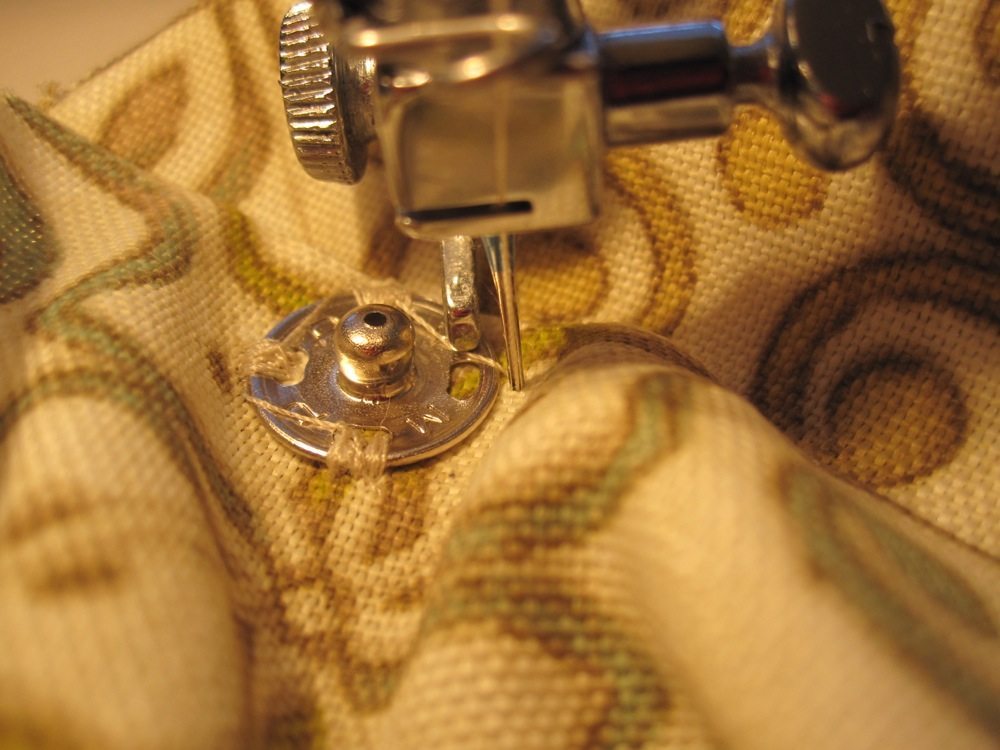
Set the stitch length to 0 and the stitch width appropriately (with a size 4 snap for me this was in the middle of the range). The flat side of the snap is much easier than the rounded side; with the flat side, sew on the right side of the snap and the presser foot mount will help hold the snap in place. You’ll have to move the fabric and snap in the midst of your stitching to get good coverage on the stitching hole. The foot mount tries to bounce the rounded side of the snap out of place, so for it sew on the left side of the snap to keep it clear of the mount. You’ll have to hold the snap in place yourself, so be careful the screw that holds your needle in place doesn’t whack you in the finger while you do. I did all the stitching with the hand wheel on the side of the machine.
I don’t know how many snaps will be amenable to this, but certainly whenever it’s okay to stitch all the way through what the snap is attached to I’ll investigate this option.