Blackwork-appropriate embroidery alphabet

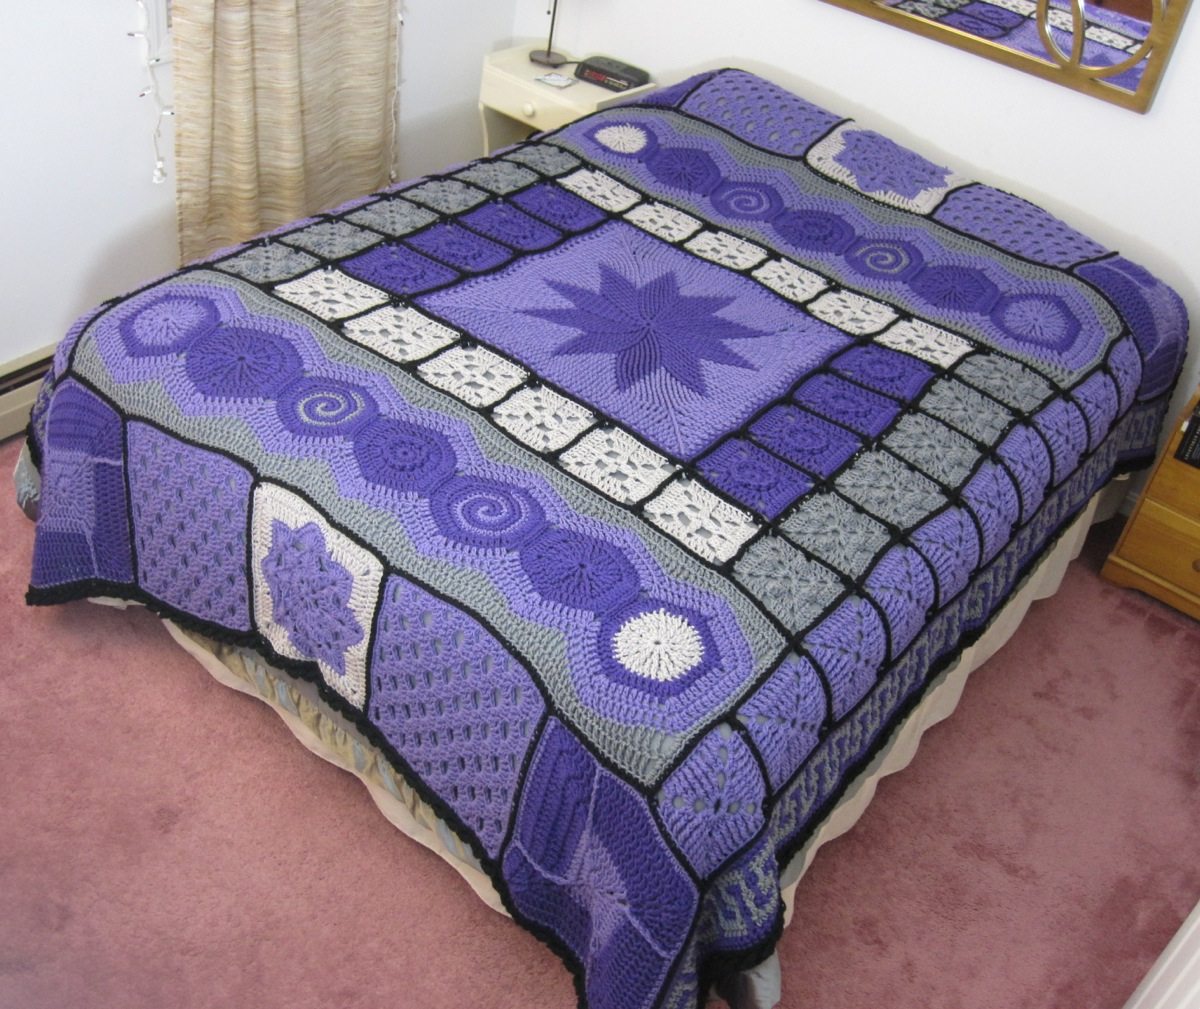
Remember the blackwork map of my local area that I spent so much time designing and stitching last year? I’ve added to it.

annotated blackwork map

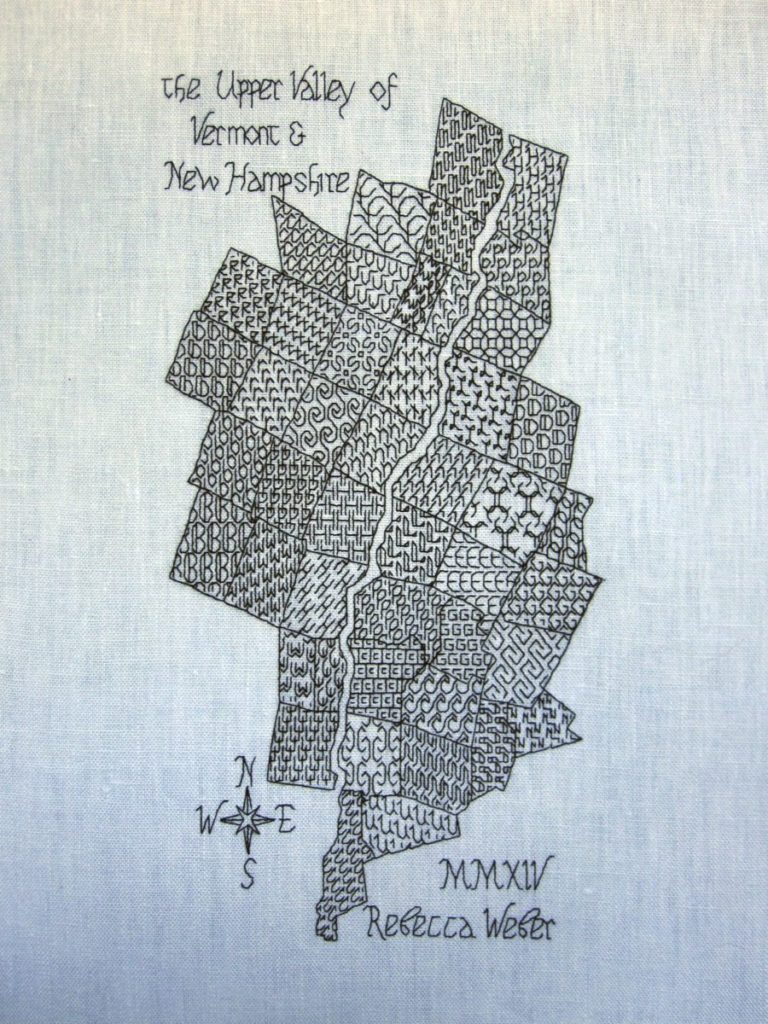
Title, compass rose, and attribution. Since I did the vast majority of the work last year I used that date. And since I am me, I designed the alphabet myself, all the letters in upper- and lowercase, and digits although I ultimately liked the look of the Roman numerals better.

Since blackwork was popular over a long stretch of time I had a lot of options for an era-appropriate script. I found a website called Medieval Writing with lots of examples of scripts and was able to observe my lowercase options pretty thoroughly. I decided to create a blend of 15th-16th century English chancery hand and 15th-16th century French and Italian humanistic minuscule, with an eye to legibility for modern readers. Well, it turned out more to be based on those scripts in the way that TV movies are based on true stories, but I think it has the right flavor. I made the uppercase and numbers by looking at assorted typefaces and online calligraphy lessons, and the ampersand right out of my head. My favorites are the old-looking a, dramatic d, and potbellied U.

I have for you a blackwork alphabet PDF that includes the laid-out text for the map (aside from my name, which I didn’t think would be of much use). I thought it would be useful as an example of kerning the letters even if you wanted to use this for a different project.

blackwork map drying

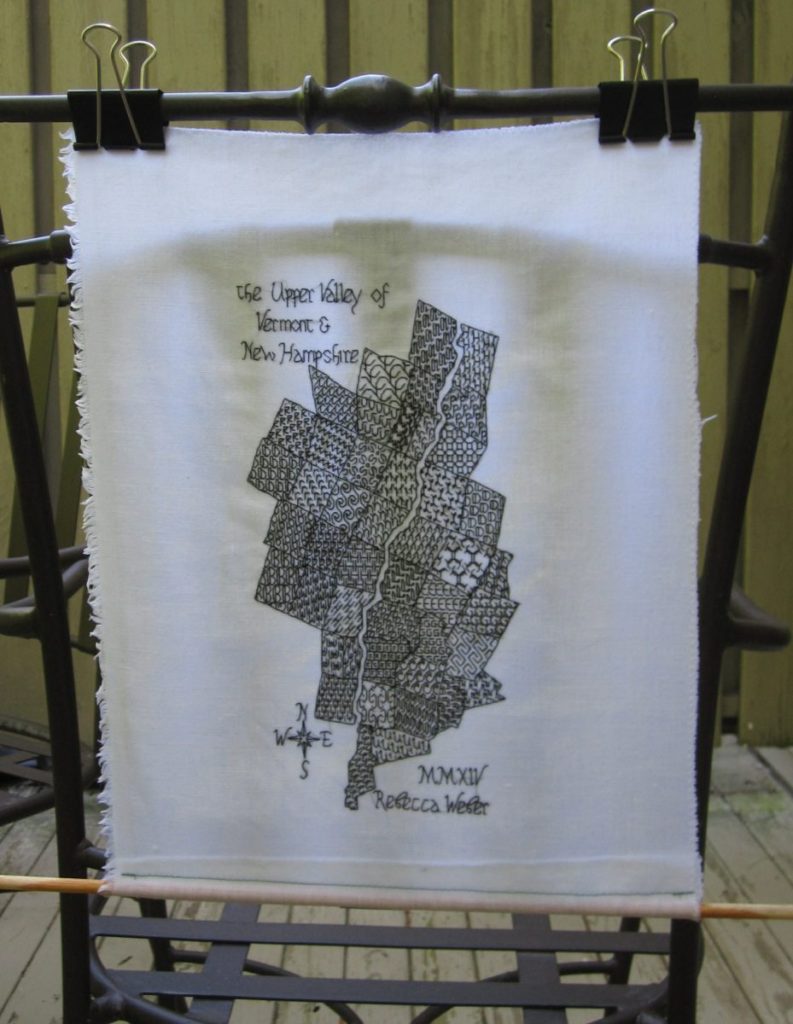
After stitching, I washed the map and hung it from a deck chair out back, before I remembered I needed to block it on the ironing board with six or seven hundred pins. Next stop: the frame shop. I’ve never had any of my embroidery framed, so this will be an adventure.

Messenger Bag

messenger bag hanging with laptop inside

And there was bag.

The main pocket has no additional pouches or pockets inside it, but there is a flat full-size pocket on either side opening to the outside. The flap, which covers nearly the entire front side when closed, has a secret zippered pocket that could hold pens or flash drives.

The width of this bag was determined by my laptop and its thickness by the width of the braided strap. The height may have been my laptop but was certainly influenced by whatever was necessary to have an entire fabric motif show on each outer pocket.

To make it, I lined the outside pockets and attached them flat to the sides. I constructed the flap pocket on one side of the flap by first adding a strip of fabric to each end of the zipper to extend it the width of the flap. Then I sandwiched the zipper tape between pieces of lining and outer fabric. The lining is stitched away from the zipper through the seam allowances on both sides, and then the upper piece folds down across the zipper. The bottom pocket seam is above the bottom flap seam, largely because I was working with stash fabric for the lining and that was as big as it got, but they share side seams.

I used interfacing on the outer pockets but nowhere else. This was partly because the construction of this bag was so spread out that I’d forgotten by the time I got to the main lining, but partly because I didn’t want the bag to get too heavy.

messenger bag open, showing interior and zippered pocket in flap

The strap is machine stitched at the top and bottom of each side and hand-stitched in between to stay nice and smooth. If I’d known in advance how long the strap needed to be I would have constructed the bag from the bottom up, but I did the bottom last, which was slow and awkward. Oh well! It turned out fine. I added the flap before I added the bottom because I couldn’t decide what order things should go in or whether I should machine-stitch the straps all the way down, and I needed to make sure I could fold the top edge down if so. That made finishing it up feel super fast – all that laborious sewing the bottom and hand-stitching the straps, and then boom, just slip the lining in, sew around the top, and done!

messenger bag closed and folded

Or not done, actually, because as soon as I put my laptop in the strap stretched way out to the point of being uncomfortable. I tried an idea I’d had a while ago: machine-sewing along the center of each strip of twill tape that wasn’t decorated with embroidery floss. I wished the whole time that I’d done it before making the bag because it was quite awkward. AND it didn’t even work. I had to back the strap with bag fabric to take the weight, and attach it less-than-perfectly where the straps meet the bag itself. At first I really hated how the strap came out, but now that I’m used to it, I think it’s all right.

At any rate, now I have a fairly lightweight and pleasingly comfortable cross-body laptop bag that I can use to walk or bike to meetings all summer long.

Mystery afghan final thoughts (and pictures)

The afghan is washed, all loose ends are trimmed, there’s a gray duvet on the bed (thanks, Mom!) and the afghan is on top! And it only took almost two months. With much contortion to get this photographed in our tiny bedroom, here it is in situ.

finished mysteryghan on bed

And some thoughts….
I have no idea how to make the fuzzy tips of the yarn disappear. In amigurumi, you just hide them inside a stuffed part of the piece. Here, no matter how good my weaving job (and I can’t say it’s that good) I can’t seem to hide the very ends of the yarn.

I’m very pleased with the look and structure of my join. It lends the piece such interest.

I like the feel of Red Heart With Love much better than Classic – some of the Classic was almost crunchy off the skein – but it was unexpectedly difficult to find two coordinating shades of gray. After washing, it’s better, but still clearly not as soft.

I’m in no hurry to make another item this large!

So you can see all of it, I undertook some additional contortions to spread it out on the floor. It doesn’t really fit but you can see it pretty well anyway.

finished mysteryghan laid out in the living room