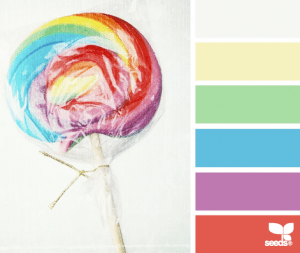
 The recent Design Seeds at left inspired me to round up candy crafts for this month’s First Friday. I realized shortly after beginning, though, that the category is far too big for a single post. For example, gingerbread houses (and their Johnny-come-lately relatives for other seasons) could certainly be a post unto themselves, and then you have crafts made with candy, reuse of candy packaging, and non-food items made to look like candy (such as my crochet candy sticks). I like all of these but we have to focus, and for this edition I chose crafts made with candy.
Much of what you’ll find if you look around the Internet for candy crafts is dressing up candy for party favors, teacher gifts, and the like. Wordplay is popular. Although the bright shiny packaging of candies makes them well-suited to crafting, these crafts aren’t terribly candy-specific, so we’ll just make a brief survey of the highlights. Roll candy, such as Rolos or Lifesavers, can be decorated to look like any long cylinder: I saw firecrackers (my favorite version was from 30 Minute Crafts), dynamite, pencils, cigars, candles, rockets, rolled-up diplomas, even a snowman and Santa. You can use candies as the centers of flowers (especially lollipops) or bodies of butterflies or spiders. A variety of candies can be mounted on skewers and made into a bouquet, or attached all over a paper cone or wine bottle to make a Christmas tree. The standout in this category was a Tootsie roll sundae from Cheri’s Creations. Small candies or stick candies can be glued all around a candle or straight-sided vase; this is one way to turn a can or jar into a nice-looking vase. And, of course, there is the traditional sleigh with candy cane runners.
You can use candy in place of any small tiles, beads, buttons, or similar items. That’s Country Living suggests using seasonal candy in a votive holder in place of the glass marbles or pebbles you’d usually find. There are many tutorials for decorating picture frames and similar wallhangings with candy. If you want to hang on to such a project, though, you’ll want to preserve the candy somehow. Woman’s Day recommends drying out candy and then coating it with a Krylon product to preserve it, all prior to the crafting. Another preservation idea is given in this Craftster tutorial for an “art glass” lampshade made with Fruit Roll-Ups and gummy candies. It is worth seeing.
A few candies are or can be converted to aromatic clay-like substances. Marshmallow Peeps are popular for dioramas and art projects, but you can also completely destroy them and make them into play dough. Gumdrops are also a good dough-like craft item; you can easily cut, roll out, or skewer them, but then they will keep their shape. They are a time-honored substitute for Tinker Toys, and you can also make them into people. I also found a tutorial for bracelets braided from AirHeads, which sound really sticky to me, and AirHeads shot glasses, which do also, but at least you’re not wearing them.
I have thought for a while it would be fun to crochet with licorice; a small flat heart with red licorice would be a cute Valentine. However, I have yet to find long enough licorice ropes, and then there’s the whole sanitation issue. Housing a Forest showed me a different use for licorice that doesn’t require length: sticking it on acrylic blocks to make stamps. In that post she also discusses painting with Nerds and Laffy Taffy. Apparently painting with candy is popular; you can also do it with M&Ms and Skittles.
Finally, we melt. Peppermint candies can be melted into platters, as shown on Crafty Home Improvement (Mis)Adventures. While they are warm you can shape them, even going so far as to mold them into bowls. Note that those two links advise wildly different temperatures and correspondingly different times. I suspect peppermints do better with the lower temperature.
 Our last candy craft, which is similar to the peppermint trays, is my favorite: hard candy stained glass. By crushing clear hard candies, arranging them on parchment paper on a baking sheet, and melting them in the oven, you can make ornaments, cupcake toppers, or other decorations. They’re basically edible suncatchers. To shape them, you can either let them cool and break them into shards, melt them within cookie cutters, or use greased cookie cutters to score them thoroughly and break them apart on those lines once they’re cool. The recipes generally say 325 to 350 degrees F, but it is forgiving. In fact you can make stained glass cookies: use a sturdy cookie dough, make shapes with cut out regions, and bake them until they have 3-5 minutes left to be done. Take them out of the oven and add crushed candy to the cut-outs, and then put them back in to finish baking. Make sure you let them cool completely before removing them from the paper. The Cooking Channel has a gingerbread version, and Wilton has directions that include adding icing after baking for additional detail. A non-seasonal version of that can be seen at Tasty Morsels Bakery.
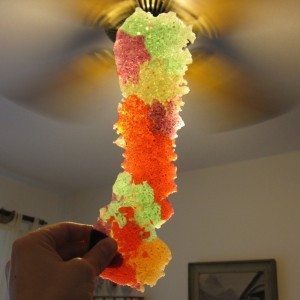
The picture above the description is from our attempt earlier this week, which was with Lifesavers. They crushed easily and melted in six minutes (we preheated to 355 but turned it down to 345 before putting them in), but after crushing they clumped back together and everything we melted inside a cookie cutter broke during removal. Now they are sticky and oddly wet, though that could be the weather. I think the ideal material might be those cheap suckers with loop handles: harder than Lifesavers and hence probably less sticky, but thin enough to break easily, unlike Jolly Ranchers. More on this another time; we haven’t finished experimenting.
Did I include your favorite candy craft?