I had a craft night for my birthday party! I hope to have more, hence the “1” in the title. I’m finding there’s a lot to weed out when finding craft night ideas, so I thought I would post about the ideas I end up using.
My craft night standards are strict:
- Anyone has to be able to do the craft successfully, without needing to possess any specific art/craft skills, and even if they are not having a super creative-feeling night.
- Someone who really wants to engage in the craft should be able to do so – nothing so simple that you can’t sink your teeth into it – but no one should *have* to focus tightly on the craft in order to do it. I want people to be able to come and not do the craft and still have a good time.
- The practical restrictions: it has to be doable in an evening, so no lengthy dry time between steps (say), and without any expensive materials or specialized tools. Ideally it should be doable mostly from stash and salvaged materials.
- And finally, the aesthetic considerations: the final product needs to appeal to a wide variety of humans (or have the customizability to do so). Nothing that only fits a certain rustic-crafty decor, for instance.
I thought the decoupaged notebooks were a resounding success, so here’s the lowdown.
Decoupaged Notebooks: Process
Materials On Hand
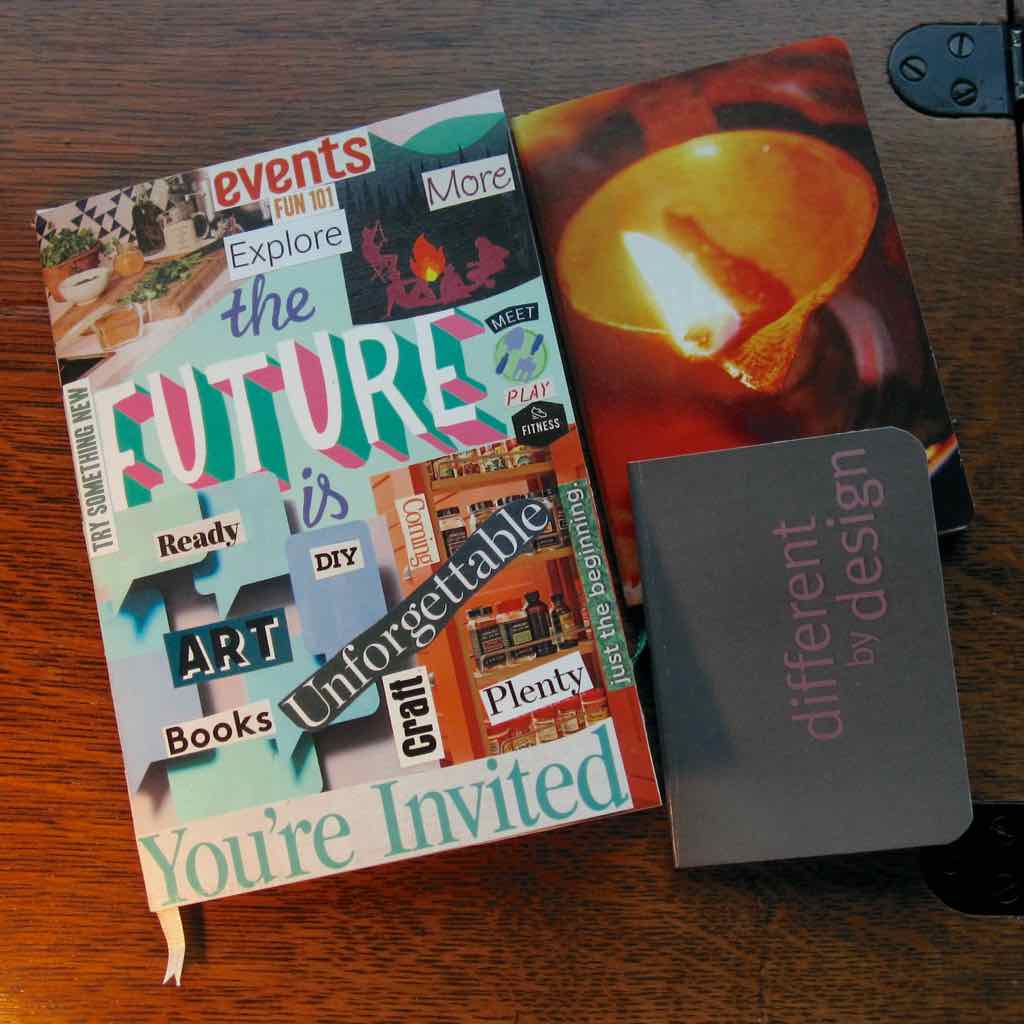
- Notebooks – I thought I would be able to find plain-brown-cover Moleskine knockoffs all over the place, but that was not true. I ended up with mini composition notebooks (3.25″ x 4.5″) from the dollar store and larger notebooks (4″ x 6″ and 5.75″ x 8.25″) from TJ Maxx. They worked just fine, and in fact having something already on the notebooks made for some fun design options – “the future is” on the largest notebook above was pre-existing printing.
- Magazines, origami paper, and of course scissors – Originally I planned to get out scrapbook paper also, but it was too much. A big stack of magazines, catalogs, and tourism brochures, plus a few varieties of solid origami paper, seemed to be enough options to keep everyone happy. This gives me a whole different selection to provide at a future papercraft night.
- Glue sticks and Mod Podge – I prefer to glue with glue sticks and seal with Mod Podge, just, you know, FYI, but a lot of people glued with Mod Podge and it works fine.
- Foam brushes and a wide-mouthed mason jar with some water in it – the jar for putting used brushes in so they could wait for cleaning (which did not happen until the following day).
- 1/4″-wide ribbon and tacky glue – for bookmarks. Cut a piece of ribbon twice the height of your notebook plus 1-2″ and glue it along the inside back cover, close to the spine, so the excess sticks out at the top. That excess then folds down to be the bookmark, and you can cut a little v-shaped notch in the end to help keep it from fraying.
- Wax paper – to slide inside the covers of your notebook to protect your pages from the glue and Mod Podge. I pre-cut a bunch of pieces and I think that worked well.
- Miscellaneous buttons, beads, and small fabric squares – I had these around so I put them out, but I think one person used some fabric and the rest of the items were untouched.
Setup
We set up a folding table in the living room and spread the magazines and blank notebooks out on it. I covered the dining table with two layers of newspaper and set everything else out there (including the origami paper, so it wouldn’t get lost in the heap of other paper). Things moved between the two tables, but overall I think it was useful to have the separation, and people circulated during the evening depending on what they were working on.
14 people came and roughly half decorated notebooks, with many of those people decorating more than one. Everyone seemed to enjoy themselves whether or not they decorated.
Lessons?
I would have started looking for notebooks earlier had I realized how much less available they are than I thought they would be. In particular, I only had 3 of the largest size notebooks, and I would have liked to have more.
I would not bother putting out buttons and beads if I did this again, just save them for a different craft they are better suited to.
I might have done a sample notebook, perhaps in particular a half-finished sample notebook, to leave on the table and demo the use of the wax paper and how to make a bookmark. I didn’t want to be in teacher mode and hover over the tables to give instructions, so that would have helped show some things, but it also wasn’t a real problem to have that information come later or not at all.
This worked really well overall, and there’s nothing significant I would have changed! It was a great choice for Craft Night 1.