Sewing Machine Repair Class

bobbin thread in the needle
I am not sure how I managed, but once, in taking out my test fabric, I managed to thread the needle with the bobbin thread.
A few years ago I discovered the White Sewing Center Sewing Machine Repair Class – two three-day sessions (basic and advanced) on all aspects of non-computerized sewing machine repair. I couldn’t go at the time but I thought perhaps I could give the class to myself as a 40th birthday present. With my personal collection of machines (4 right now; hopefully not to grow more though I have developed a desire for a Singer Slant-o-Matic) and my unofficial responsibility over the Sew-op’s machines it seemed that it would be useful as well as simply interesting.

It was FANTASTIC. I couldn’t have imagined a better class. In the first part we covered:

  • Recommended tools/materials and what you use them for
  • How stitches are formed – in precise detail
  • The key to correct insertion and threading of needles on any machine
  • All about needles and their history; tracing sewing problems to the needle
  • All about thread; tracing sewing problems to thread
  • Cleaning and lubricating machines; detecting and removing varnish (sticky residue from old oil and dust/lint)
  • Testing machines including the clutch and externally-mounted motors; checking parts for wear and tear (and for being correct in the first place)
  • Clutch assembly
  • Feed dog timing, height, and orientation
  • Pendulum timing (for zigzag stitch), cams and cam stacks
  • Bobbin hook timing and how problems there cause skipped stitches
  • Causes for skipped stitches that have nothing to do with the hook
  • Needle bar height
  • All about bobbins: winding, cases, tension, insertion
  • Top threading general principles
  • Diagnosing tension and apparent tension problems
  • Check spring timing
  • Escapement (how top thread passes around the bobbin without the bobbin case being completely loose)
  • Dealer calibration of tensioners (if the number for correct tension is way off of the standard 4-5, how to change it)

We also went through all the machines in the room three times, once to find parts and adjustment points for clutch, feed dogs, and pendulum timing, once to look at the bobbin hook and its adjustment points, and once to look at the check spring timing, escapement, and tension calibration. It meant we weren’t limited to our own machines plus the ones Ray demoed on at the front of the room – we had a wide variety of machines to look at.

Ray’s approach is to teach you how machines work in general, what each part is supposed to be doing, and how to trace out the location to adjust each part on any given machine so you’re not dependent on having the exact service manual. The phrase of the week was “now, this looks different, but don’t let that confuse you – it works exactly the same as on every other machine.” It was perfect for me both because it matches how I learn best and because at the Sew-op we don’t necessarily have the operator manual, much less the service manual.

In the first three days I learned more about sewing machine operation than I’d managed to learn in my 25+ years of serious sewing and self-study. The formation of a stitch is finally not just magic to me! Ray is incredibly knowledgeable and clear, and he has great visual aids.

Two semi-dismantled sewing machines, an Elna and a Morse
A Sew-op Elna and my Morse: my setup for most of the first three days.

The second part was more of a guided work session, where we put what we’d learned into practice (we did some work in the first part, but there was a lot of lecture and demo time) with individual help from Ray and his assistant Cathy, and mini lessons on topics that came up from a given student’s work. During that part we had lessons on sergers, motor wiring, and foot pedals, and I learned more about diagnosing hook timing problems.

Before the class I was unsure how many machines to bring, and it’s hard to give advice on it because the number of machines you want will depend a lot on how much work each one ends up requiring. Ultimately I brought six: two that needed basically no work as far as I knew, two that I knew or suspected needed something moderate adjusted, and two that seemed likely to need significant work. It was the perfect amount, as it turned out. We had two no-show students and I was sitting next to one of the empty places, so I was able to have two machines out at a time. That way I could work on one till I got stuck (or until I needed to give oil time to penetrate) and then switch to the other until Ray or Cathy made it around to me to help me through my stuck point.

Here’s what I did (all machines got general cleaning and lubrication, and upper tension adjustments to balance the stitch):

  1. Extra work to clean and lubricate where handwheel mounts on main shaft (fixed clutch problems); adjusted bobbin tension
  2. Feed dog timing adjustment (fixed what looked like tension problems)
  3. Lowered bobbin tension (this machine had feed problems but they were cured by cleaning packed lint out of the feed dogs)
  4. Extra work to clean and lubricate where handwheel mounts on main shaft; replaced belt connecting handwheel and motor; re-bent bobbin case tension spring to increase tension (Ray did that); adjusted feed dog height (ditto)
  5. Oiled motor shaft (motor was seized); moved feed dogs forward (they were hitting in back on long stitches); adjusted bobbin hook timing (twice; went too far the first time); adjusted check spring timing; adjusted bobbin tension; recalibrated top tension knob
  6. Recalibrated top tension knob; tightened presser foot pressure dial (Ray did that, apparently just by turning it as tight as it would go – after that you could loosen it without it just spinning as it had before)

Those machines are in order of work I thought was needed – very little on the first two, a moderate amount on the second two, and a lot on the last two – so you can see my estimates were not always the best!

If pressed for advice, I’d probably say to bring as many machines as is practical for you but not expect to necessarily get through all of them. Since the class involves going through all the machines in the room multiple times, you don’t have to worry about trying to bring some kind of representative sample. You may have classmates with extras, too. At least two people in the room borrowed machines from other students, and there was a third person with extras to offer. Ray is also happy to make “adjustments” to your machine that mess up the sewing so you have to diagnose and fix the problem. Quite happy. 🙂

A straight-stitch-only Morse machine
My Morse’s big brother showed up.

Other advice would be to bring your checkbook, not just a prewritten check – a few people in the class did that, and then they had to get cash out because they wanted to purchase the myriad tools and supplies Ray makes available.

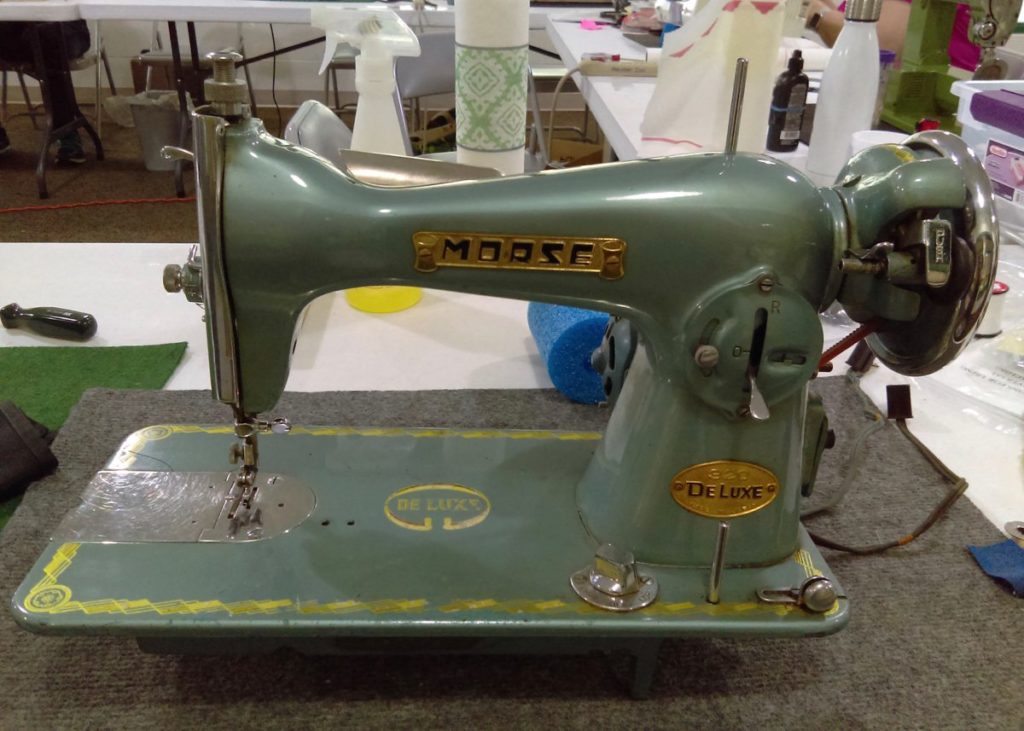
I think I got a lot more out of the class because of taking apart the Morse last summer (post on that adventure still forthcoming) as well as cleaning and oiling so many machines at the Sew-op. I had better context for what Ray was teaching; I knew what the guts actually looked like so I had some scaffolding instead of everything being new.

It was so very fun, too. At the morning break the first day I texted my husband, “I have found my people.” I never ate (or even drove to) lunch alone, and we laughed and made nerdy sewing machine comments and geeked out on each other’s cool machines.

Storing stickers

This fall I finally decided to break away from commercial greeting cards as much as possible. I’ll pay for wit, but if I just want sweet or pretty I’ll go the less expensive route and make them in-house. Of course, I got a die-cutting machine as a gift that I use for them, and if I had to count the cost of that in the cost of making them myself it would be a long time before the savings in card purchases caught up, but as-is I believe I can make a hundred cards for the price of a dozen in the store. My disintegrating sticker and card storage folder was due for replacing anyway, so I tried to figure out something to accommodate leftover die cuts.

the original expanding folder that was my sticker and card storage

I decided to put the cards in their own box and keep the stickers and die cuts together in another container. I thought about some kind of plastic envelopes in a binder, but found they were priced above my pain point. There were kinds that were a bit cheaper but didn’t have the panel with hole punches for a binder. Finally, when looking for ideas on making things “binder-able,” I stumbled upon an Instructables about making a pencil pouch. Essentially, you cover a shortened gallon zip-top bag with duct tape. I wanted to be able to see what was in the pouch, though, at least a little, so I bought generic unprinted bags and applied duct tape just around the edges. That should improve the longevity and help avoid the bags getting crumpled up.

my new sticker storage: taped bags in a binder

To make them the right size for a binder, instead of cutting off the bottom I folded it up: first to the top of the hole-punched panel, then that section in half, and then the whole folded section up again and taped near each end. That should keep any stickers or die cuts from getting pushed down into a sticky section. The small bags, of course, are just as-is, taped around the outside and with a duct tape extension at the bottom for the hole punches.

first gallon bag fold second gallon bag fold

third gallon bag fold taping the bags

The tape along each side is a single length folded over, and the tape along the bottom is full width, two lengths stuck to each other. I didn’t take a photo of it, but when I duct-taped the gallon bags, I made sure the tape came up a little above the folded part.

Note that if you use scissors on your duct tape you’ll be saying goodbye to them for the duration of the project. In fact, if you make as many bags as I did (20 of each size), you’ll need to clean the scissors at least once during the project, because they’ll get too sticky to use. I used Citrasolv, which worked wonders, and then dish soap because the Citrasolv left them oily.

One roll of patterned duct tape will do just over 9 gallon bags, or (I estimate) at least a baker’s dozen sandwich bags. Ten gallon and ten sandwich bags took most of two rolls – the photo below shows what I had after finishing the first 20 bags, done with most of two rolls of duct tape.

two new and one leftover roll of duct tape

Next up is my favorite part: reorganizing the contents. I also need to figure out a new storage system for my cards.

Lessons from large projects

mystery-ghan yarn If you follow the ReveDreams Facebook page you know I’m taking part in a mystery afghan crochet-along (Ravelry account probably required for that last link). I wasn’t sure about it at first; afghans are a big commitment, and when you don’t even know what it will look like? But I decided to trust the designer, whose other work I quite like, and the “art deco” in the afghan description. The hubs and I chose colors, and I ordered 4660 yards of yarn. That’s all in the two shades of purple and gray shown; I don’t yet have the joining yarn, which will be black.

I have clues 1-4 of 8 in my possession and they will continue to come out every Friday through the middle of August. I’ve stitched the first two clues over the past ten days, eating up far more yarn than I normally would in that time. The first lesson I’ve had to learn is how to deal with 16 skeins of yarn, 9 of which are double-size and at least 4 of which are “active” at any given time (I’ve gotten up to 6: one dark purple tied up in a motif whose instructions are spread over multiple clues and two more so I could do a spiral that had two dark purple strands). I also have to do something with the motifs finished so far. I’ve decided that, after photographing, I’m going to close the motifs for each clue in a plastic bag and label it with the clue number. Everything “inactive” is getting stored in the box the yarn was shipped in, which currently is just sitting on the floor in my sewing room (note: that doesn’t make it in any way unique among my craft supplies).

There’s a complication to this afghan that isn’t present in my other long-term project, the blackwork embroidery map: the materials in use at any given time are bulky and in many pieces. Usually I have one project bag with materials for several projects in it simultaneously – the life of an amigurumi designer! For this project I got out a smallish bag for the multi-clue motif and its active yarn, another for small amounts of yarn left at the end of skeins (just in case), and a larger bag that holds those two as well as the full or mostly full skeins of yarn. I’m considering buying a large basket to put them in so all three bags are still together but I have space in the large one for finished motifs of a clue still in progress. If I do, I’ll also keep the embroidery project in the basket.

Such a system not only looks neater, it makes it easier to move the project around if it’s in the way, which is bound to happen multiple times over such a long stretch. The soonest I could finish the afghan is late August, simply because I won’t have all the clues until the 15th. However, this brings us to the other lesson of this project: pacing myself. Each clue so far has taken at least 8 hours of stitching, and I’m two clues behind. My other considerations are that I’d like to finish the blackwork by some time this fall, write every other week for the local fibercraft blog, and keep up with my monthly goals here. I also need a substantial amount of time (30+ hours per week) to dedicate to my web development job. That’s not to mention that I want to continue to have a social life, spend time online, and read books. Something’s got to give in that scenario, and it’s the afghan. I’ve decided to spread out the stitching to a third of a clue per week, plus two towns on the blackwork map. That gets the map finished in mid-October (just in time for making Halloween costumes) and the afghan done by Thanksgiving, unless joining and edging take a very long time (just in time for making Christmas presents). Afghan and map work should run 4-5 hours per week, dropping down to 3ish hours when the map is done — though by then I may have a new long term project.

Delayed gratification and responsible time management are the watchwords. It’s the right thing to do for my goals and priorities. It just feels so slow!