Simplify, simplify

Tonight I teach an amigurumi class at the Sew-op, and unlike last time (when three students signed up and none appeared) I am optimistic it will actually happen. Since I can’t leave well enough alone, I redesigned the class. I had decided the dachshund was probably too ambitious for one class, and also had been considering providing a handout with pieces that could be recombined into other animals. I’m not quite there yet; the intermediate plan involves these little guys:

owl and grump

If we can get through Aviator Owl and the first few rounds of Baby Grump I’ll be ecstatic. The handout will help them through the rest of Baby Grump (you’ll note that unlike the big one, he hasn’t learned how to be grumpy yet).

owl 1 owl 2

The bottom of the owl is an open-topped sphere. In that piece we’ll learn how to make the magic ring, how to use stitch markers in the round, which side is the outside, the invisible decrease, consequences of working in a spiral, and how to stuff neatly.

The top of the owl, a closed sphere, will add working around stuffing, sewing round openings closed, and securing and hiding yarn ends.

To complete the owl we’ll have to learn how to pin and sew stuffed items, sewing on the buttons, and a bit of embroidery. The handout will show some embroidery stitches that might come in handy, like the French knot.

baby grump 1 baby grump 2

Baby Grump begins by stitching around both sides of a chain. The back legs are my beloved bobble stitch, and the front legs are made with separate yarn slip stitched onto the body. We certainly won’t get to the front legs, but I think they are a bit easier to figure out from the handout than, say, the magic ring. Baby Grump also gives the students more practice counting their stitches, because his increases and decreases are not all uniform like the owl. I’ve begun upgrading the Ami Elements page of the Learn Crochet series with additional helpful links and information, and though I may not get to it again before tonight, more is in store.

Embroidery: before you begin

I thought I’d put out my basic embroidery information. I’m not going to try to make an online stitch dictionary (at least no more than happens naturally from my own explorations), but I have thought a lot about embroidery for beginners through teaching it.

Fabric and thread to start: I like to start people with calico fabric (quilting cotton) and two strands of embroidery floss. That is a good combination weight-wise and those materials present no special challenges. Try other fabrics (coarsely woven, fuzzy or fluffy) and other threads (the full six strands of floss, perle cotton, ribbon) after becoming comfortable with the motions of embroidery. That shouldn’t be long, though, and then there are some rules of thumb for matching. Six strands of floss or something heavier like perle cotton is good on a very coarse fabric or to achieve a dimensional effect. On a puffy fabric such as fleece you’d likely want at least four strands of floss to keep the stitches from disappearing. For a smooth-surfaced fabric such as cotton or felt, two or three strands is good (for detail work a single strand might be employed).

thread comparison

Above: A sampling of materials. The fabric is cotton calico. The brown thread is Coats and Clark 6-stranded embroidery floss (6, 4, and 2 strands shown, left to right), the green at bottom is DMC perle cotton size 5, and the blue at top is Columbia-Minerva 100% wool “Persian-type” needlepoint and crewel yarn.

Tip 1: It is very difficult to separate a single strand of floss from more than one other strand without tangling to the point of knots. I find it easiest to separate two strands at a time, and if I want an odd number of strands, to separate a pair into singles and put the appropriate number together. Tip 2: While stitching, your floss will want to twist, which can lead to tangles. One way to lessen this is to separate all your strands, run your fingers all the way down each to smooth them, and then put them back together. Wetting the strands when you smooth them helps as well.

Needles: Embroidery needles tend to be fine and sharp, but unless you are working on unforgiving fabric (delicate silk, say), use whatever needle is comfortable to work with, has a large enough eye for the thread, and is sharp enough to pierce the fabric. Wetting and twisting the end of the thread between your fingers will help in threading.

Knots or Not Knots: Knotting is typically not done in embroidery; instead, you leave a few inches loose at the back and weave them under your stitches later (or to start, if it is not your first length of thread). The same is done to secure the opposite end. Sometimes you have to knot, however, such as if you are stitching around the edge of a piece of fabric. In that case two or three overhand knots to start and a half hitch to end are easiest.

Overhand Diagram Half Hitch Diagram
Above left: Overhand knot. Above right: Half hitch.

Tip 3: Let your needle dangle from the fabric after every dozen stitches or so. Its weight will help unwind the floss before tangles can happen. For more help, slide the needle down the thread until it is against the fabric, and use your fingers or a pin to separate and re-smooth the strands. Tip 4: In a situation where knots are appropriate and you have two layers of fabric, provided the thread does not show through a single layer you can hide its end easily. After making your final knot, stitch through one layer only and bring the needle out a short distance away. Pull so the fabric is slightly compressed and snip close to the fabric. The end will disappear between the layers, and the tail should be long enough to stay put inside.

Comfortable Stitching. To keep your hands and forearms from getting sore, stretch and rub them frequently. Make sure you are not gripping the work too tightly, and change your hand position regularly. If it is difficult to get the needle through the fabric, use a thimble to push and a bit of rubber to pull (you may buy one for the purpose, or cut a 1.5-2″ square of a rubber jar opener). As a right-handed stitcher, I find it is most comfortable to stitch with the needle pointing somewhere between left and forward, and to tighten the thread up or to the right. Experiment for the best solution for you – for me it is frequently not the direction given in stitch instructions.

How to teach embroidery

The title is misleading – “how to teach embroidery” is more of a question than an answer. I’ve taught it multiple times at the Sew-Op and the students seem satisfied, so perhaps I’ve succeeded already, but it’s such an odd, free-form class that I can’t really tell.

I’ve got another session of embroidery class tonight, so I’ve been thinking about this question over the past couple of weeks. Should I make it a project class? In December I taught one aimed at making felt ornaments, with a variety of holiday and non-holiday patterns printed on tracing paper. No one used any; they were all interested in embroidery for their own purposes.

Still, it’s nice to have something to hang up in the store to entice people to sign up. That didn’t happen, but I do have a few of the new models I wanted. In the last five or six days I’ve remembered several I would have liked last time, but didn’t note down for myself in any place I’ve looked at since.

new demos
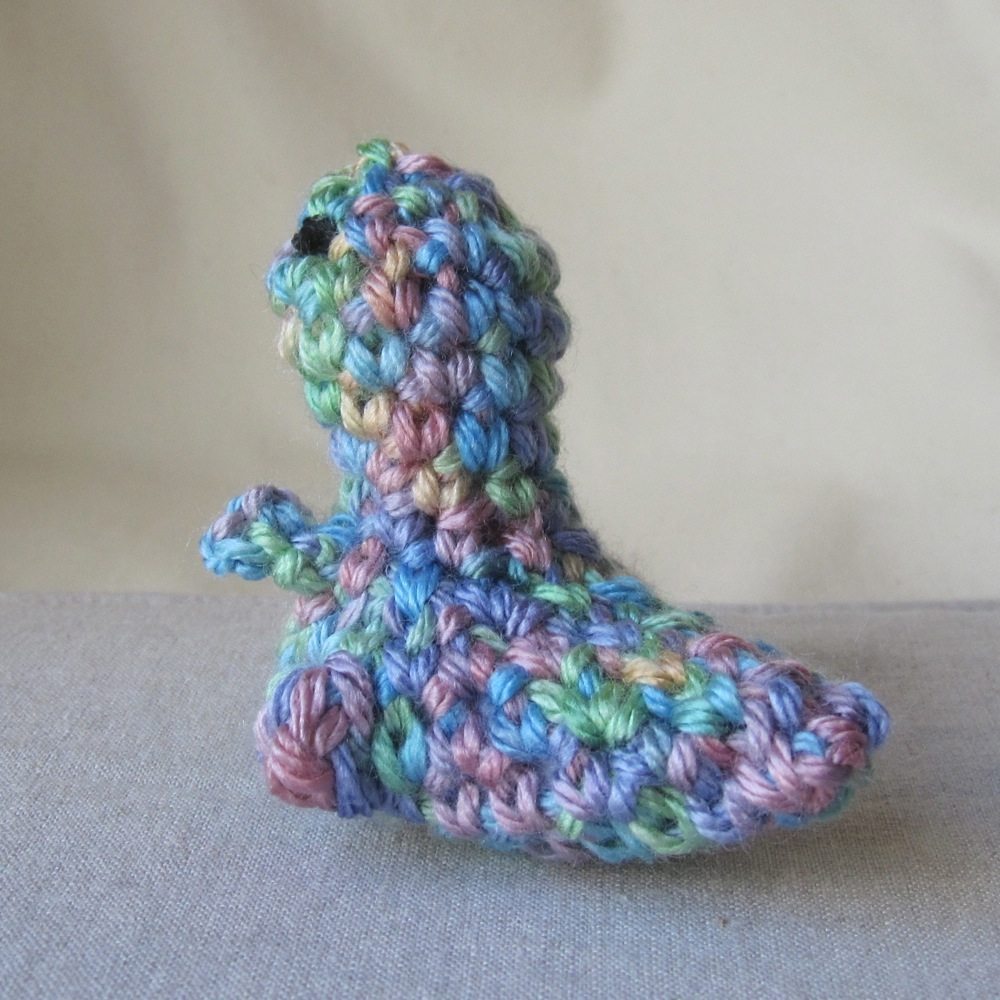
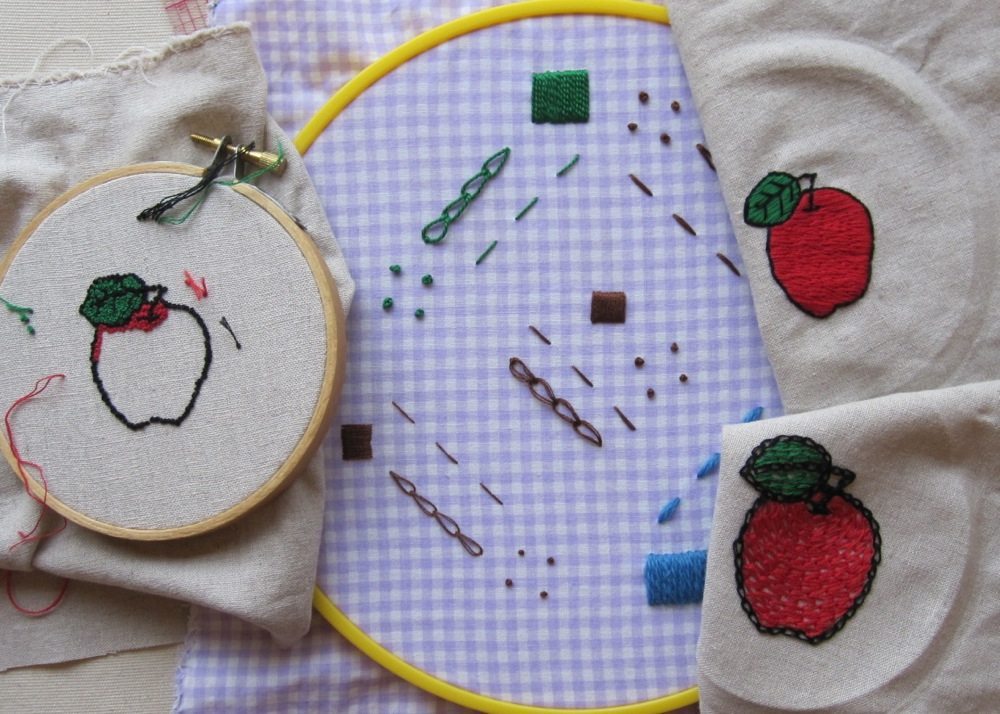
You’ll see these apples again.

I have learned some things in the few times I’ve taught embroidery. One was how to successfully make a French knot! No longer are they the bane of my cross-stitching experience. I’ve also had to learn to be flexible in how I describe stitches. I may do well describing the blanket stitch in terms of compass directions or the corners of a box, but that doesn’t mean everyone will. I even had one student who was the most kinesthetic learner I’ve ever met, and the only thing that worked was actually placing the needle for her and having her complete the motion, all the way through the stitch. After that she had it, but description and demonstration did not suffice.

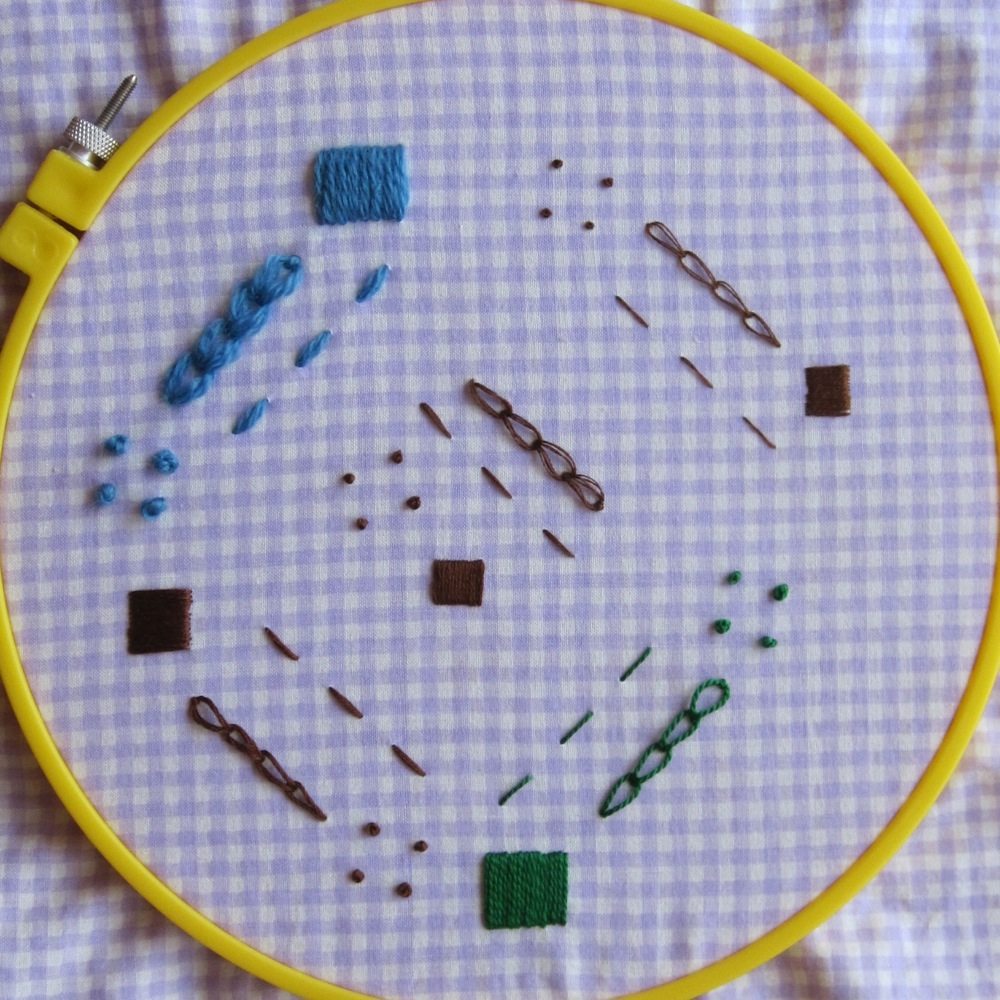
I try to emphasize how much can be done with just a few stitches, bringing a pile of examples to class. The embroideries for my children’s book quilt are almost entirely straight and satin stitches, with a few backstitched or stem-stitched portions (none of which are vital to the look). I have an antique handkerchief done in satin and straight stitch, and a tea towel with lovely flowers and butterflies made from lazy daisy, blanket stitch, stem stitch, and French knot. The examples I hope to have before the next time are more thorough but also modular: different numbers of strands, perle cotton and other non-embroidery-floss materials, quilting cotton versus more coarsely-woven fabrics, stitching in different sizes and with different proportions. Ideally I’ll eventually have a personal stitch sampler with a page for each stitch and for different thread/fabric combinations that can have its pages taken out and passed around.

Since there are only so many stitches we can cover in two hours, I try to emphasize the motions that distinguish the categories of stitches and are common to multiple stitches. Are you overlapping? Catching a strand? Pointing your needle in the same direction as the stitch line is progressing, off by ninety degrees, or backwards? My handout covers lots of embroidery basics, tips, and advanced notes they may come back to later, as well as ten stitches with variations. We don’t come close to covering all of them, but having them in the handout allows me to tailor the class to the interests of the participants. We always start simply with running stitch and general thread management, but then: If they are interested in classic stitching like my tea towel, we’ll cover stem stitch, French knot, chain stitch, and blanket stitch, probably in that order. If they are interested in making pictures more like my children’s book embroideries, we’ll work on the various straight stitches and doodle in thread. If they want to put edgings on blankets and garments, we’ll cover whipstitch, blanket stitch, and cross-stitch, and I might ad lib herringbone stitch.

Doing is the most important part of any class in arts and crafts, though. Doing anything! If I can teach them the basic motions and how to think about embroidery stitches, it doesn’t much matter which particular stitches we cover because they’ll be equipped to learn others on their own.

Maybe I had more answers than I thought…