It’s going to be Embroidery Monday here for a while as I work through my embroidery sampler. Maybe before the end I’ll have my sewing machine back from the shop and be able to put it together into its finished form, which will involve more decorative embroidery along the seams.
Oh, French knots. It took me so long to successfully, consistently make French knots. Of course, it didn’t help that I was trying them on Aida (cross-stitch) fabric, which has enormous holes — the better for your knot to pull through and completely come undone, my dear. They are one of the few stitches I think it is easier to make neatly on ordinary fabric.
This installment of the embroidery sampler tour covers multiple kinds of knots, and cross-stitch. I wasn’t sure I should even include cross-stitch, since it is so well covered elsewhere, but we’ll look at it in brief.
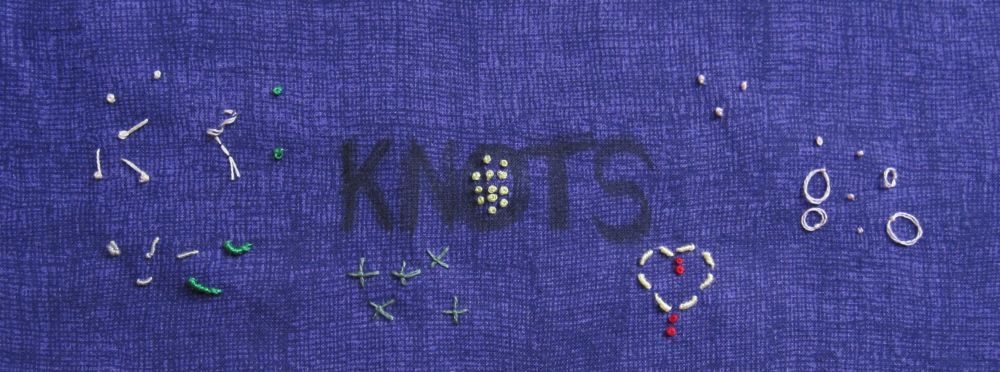
The knot panel of the sampler was originally supposed to also contain satin stitch, but I omitted that almost entirely, so it’s just a little light instead. I didn’t show the back, either, because it’s not illuminating. Here is the key to all knots: tighten the thread down around the needle before pulling the needle all the way through the fabric. If you leave the thread wrapped up around the needle while pulling the needle through, it will not stay neat. Tug on the loose end to get the wraps tightened down where the needle meets the fabric, and then put your thumb on them while pulling the needle through. Much better results.
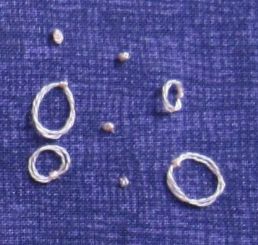
The most common knot is the French knot, which is made simply by wrapping the thread twice around the needle and inserting the needle right next to where it came up – or even in the same space. I have seen directions to wrap clockwise and counter-clockwise, and I did both in the course of making the knots below. Can you tell any difference?
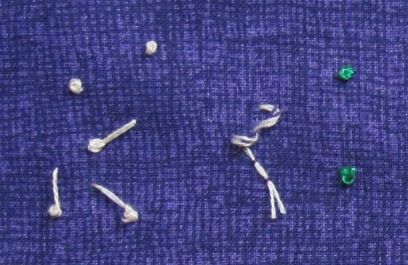

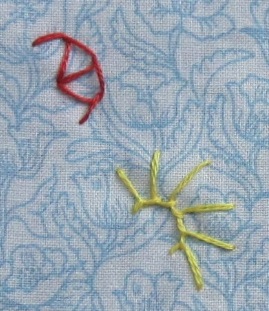
The shooting stars in the lower left are tailed French knots, made the same way as regular French knots except that the needle is inserted further away from where the thread came up. Tightening the knot before pulling the needle through is vital in this one. The little corkscrew is my effort to show the wrapping; the purple thread that goes through it is the needle, and it should point down and to the left. That is, the wrapping proceeds from eye to point. The green knots were made with four strands of floss instead of two.
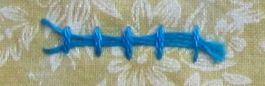
A tailed French knot with several additional wraps becomes a bullion knot. Well, sort of. To make a bullion, after bringing the thread to the front of the fabric at a point we’ll call A, insert the needle a distance away and back up at A, without pulling it through at all (it should be going through the fabric like a safety pin). Wrap the thread five or six times around the needle, from eye to point again, and then pull the needle through. This is one where tightening the wraps on the needle too much is problematic, because it becomes difficult to get the needle through. However, if you tighten them gently and put your thumb on them while pulling, they should still make a reasonable bullion.
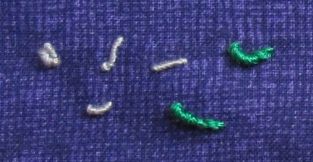
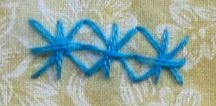
The second picture above was made with bullions and French knots. In the first picture, again, the green floss was four-stranded and the rest two-stranded, and the upper green bullion shows you what happens when you don’t put your needle in a full bullion-length away.
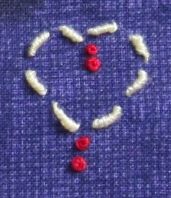
The colonial knot, on the left below, is supposed to be a larger knot than the French knot, and the Chinese knot, on the right, is a smaller one. I didn’t get an enormous difference among the three, honestly, but someone who’s worked more knots and has more consistency probably would. In both of them the thread is tacked down by the stitch. With thread on the front of the fabric and needle pointing toward the top of the work, the colonial knot is made by bringing the thread over the needle to the right, under the needle to the left and below (eye-side of) the first wrap, over the needle to the right again and under to the left and above (point-side of) the first wrap. Then the needle is inserted next to where the thread came up, the wraps tightened, and the needle pulled through.
The Chinese knot has a nifty feature where you can leave it untightened to get a loop. The thread coming out of the fabric is looped so the loose end is underneath the end coming out of the fabric, and the needle is inserted into that loop next to where the thread comes out of the fabric. The wrap can be tightened on the needle to make the simple knot, or left looser to get the loop effect.
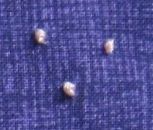
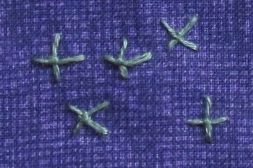
Finally, the four-legged knot is almost a woven stitch. Make a vertical stitch and bring the needle up at one end of the horizontal stitch. Hold the thread straight across, slide the needle under the vertical stitch and over the thread that loops back from the horizontal bar to the eye of the needle. Tighten that down on the middle of what will become the cross, and insert the needle through the fabric at the opposite end of the horizontal stitch.
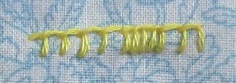
I don’t have a lot of patience for knots, but there are some who use them exclusively, such as in these commercial kits for small rugs and similar pieces. All in knots. They give an impressive texture.
Finally, we come to cross-stitch. My first ever needlework project was in cross-stitch, and I would guess it predated any of my sewing efforts as well.
A basic cross-stitch is made by making a diagonal stitch in one direction, and topping it with a diagonal stitch in the opposite direction. When you wish to make a row of stitches, it is neater and more efficient to make all the bottom stitches first, and then move back across the row with the top stitches. In fact, if you can stand it, make all the bottom stitches there are before making any top stitches (at least in a particular color). Cross-stitch definitely benefits from having all crosses made with the same diagonal stitch on top, and in fact you will be dinged for having stitches that don’t go the same direction if you enter a competition.
The method is to go diagonally down in front and straight up in the back. The back then ends up looking like a bunch of doubled vertical stitches (a vertical from laying down the bottom half of the cross-stitch, and a vertical from coming back across with the top halves).
As an aside, you have two options for starting the next stitch when moving across a row. Suppose you have made a diagonal from northwest to southeast. You could go due north or due east to start the next one. Embroidery stitches in general look nicer when you take the thread in right angles or tighter than when the angles are obtuse. In our example, going due north will take the thread 45 degrees from its previous direction, and going east will make the angle 135 degrees. Therefore, north is preferable.
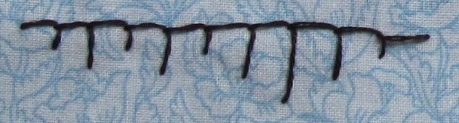
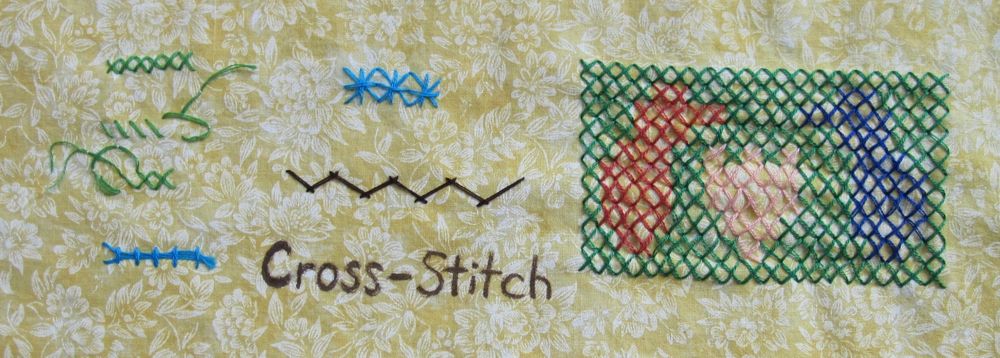
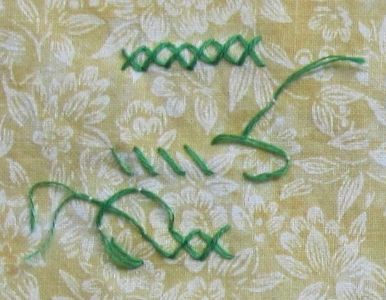
This leads us to double cross-stitch, which makes a star. This stitch, even when used in the same manner as cross-stitch, is made one star at a time. Make either the cross first or the plus first, but be consistent, and when you move from one to the other take the thread across the back, not to a neighboring spot. That is, if you make the cross first and end in the southeastern corner, go to the north or west spot to start the plus, not the south or east part.
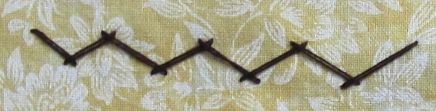
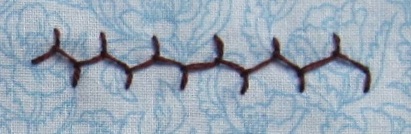
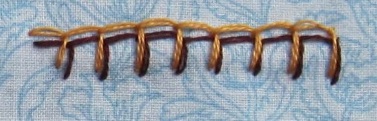
Finally, herringbone stitch. This relative of cross-stitch is not just a spread-out version – in fact you can make it quite tight together. The corners of your crosses no longer meet, and you alternate diagonal directions with each stitch. The method: make a diagonal stitch. Bring the needle back up horizontally behind where it went down, and make another diagonal stitch. Repeat.
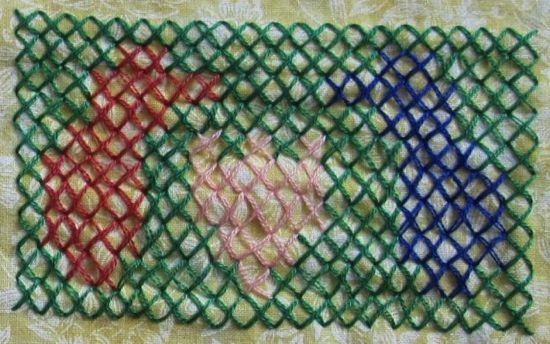
Of course cross-stitch is most often used to “color in” regions and make pictures. You can see I free-handed the one below, but you can cross-stitch successfully on plain fabric by making pencil lines to guide you.