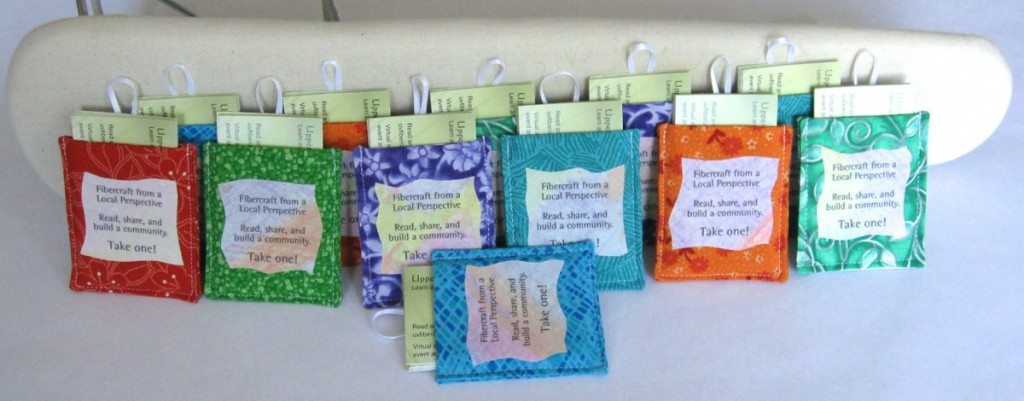
I’ve mentioned my involvement with a blog about the local fibercrafting scene several times now. Funnily enough, I’ve had more use for business cards for this hobby than I’ve ever had for a job. When I designed my business card it occurred to me that we could make a version that was not specific to an individual and use them to advertise the blog.
The idea of putting small stacks of business cards out naked didn’t seem so good. They aren’t really designed like advertising materials would be, so they need an introduction. What else than to make some kind of holder for them using fiber?
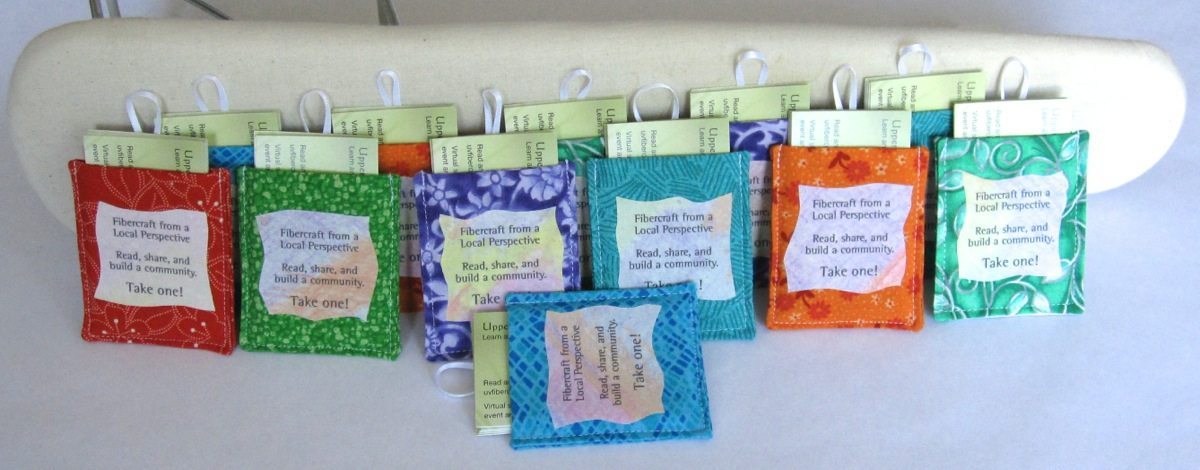
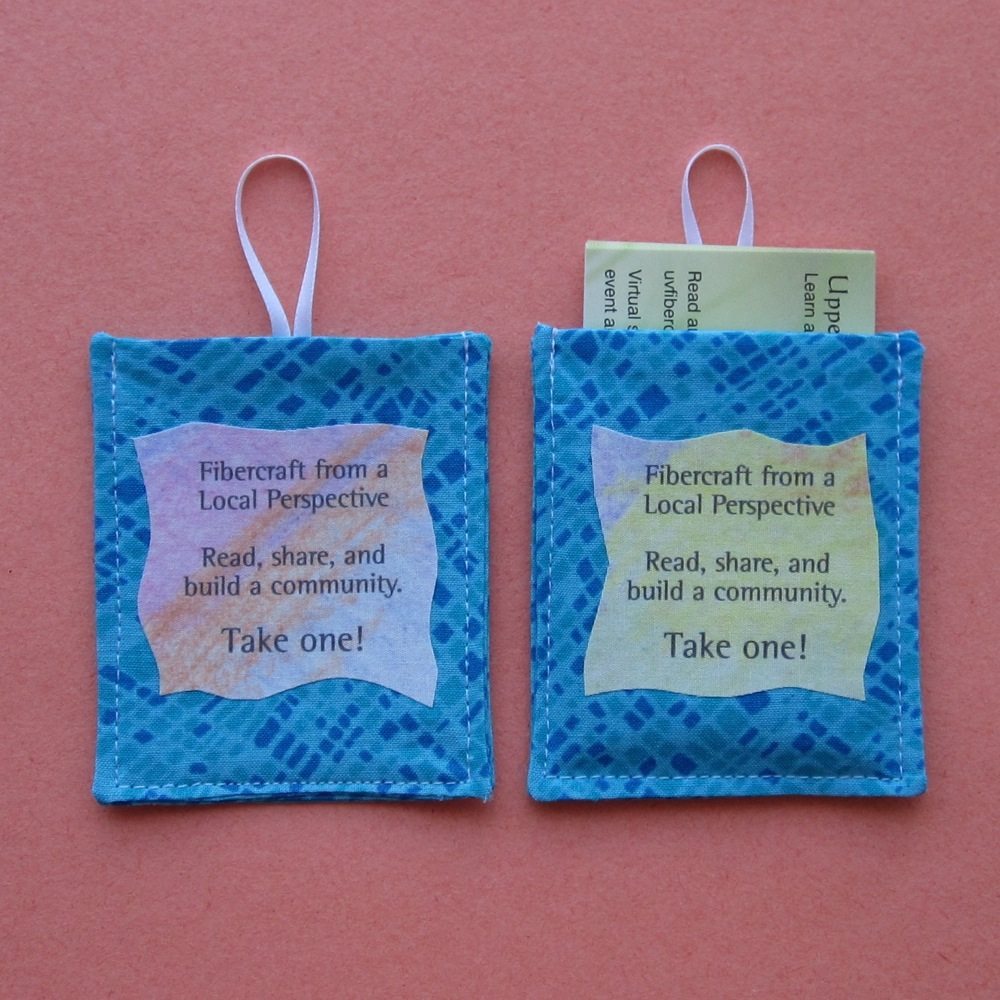
Here they are: small sewn pockets that the cards stick out of, with ironed-on intro text and a ribbon so they can be hung on bulletin boards as well as laid on tables.
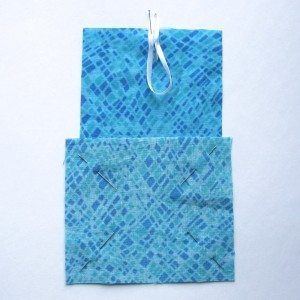
And here’s how to make them. Each sleeve requires four 3.25″ x 3.75″ pieces of fabric. I cut my ribbon, which was 1/8″ wide, to a bit over 4″ (I wanted to use tiny rick-rack, but didn’t have any on hand). If you’d like the sleeves to come all the way up to the top of the card, increase your fabric to 3.25″ x 4.25″.
I printed the advertising text onto fabric designed to go through an inkjet printer, colored a piece of paper with fabric crayons and ironed that onto the fabric as well, ironed fusible web to the back and finally cut out each square of text with wavy borders.
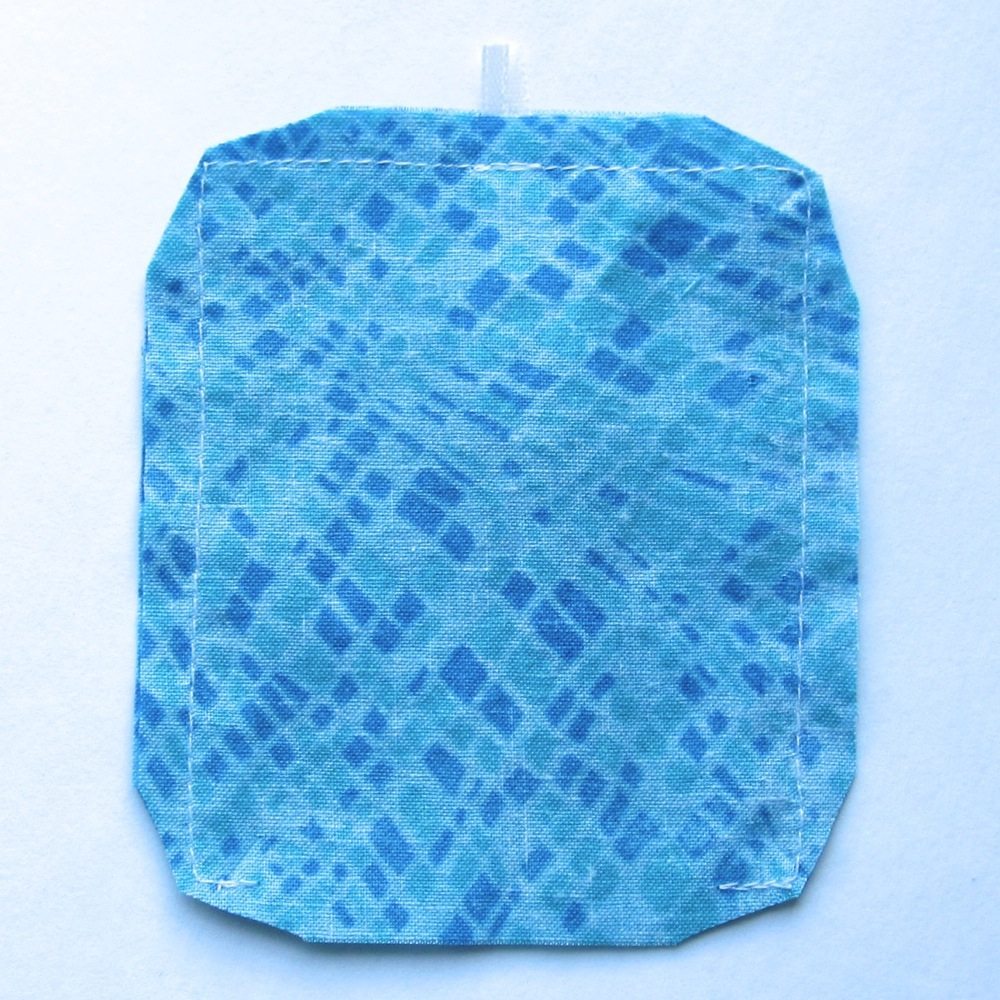
Pinch a center fold into one short side of one piece of fabric and then pin the ribbon ends on each side of the fold. Make sure your pinheads are the end hanging off the edge. I let the ribbon ends stick out by about 1/4″, so their cut end would be further from the stitching, but that’s probably unnecessary. Pin pairs of fabric rectangles right sides together (one pin in each corner should be plenty). Starting on a short end that does not contain a ribbon, stitch at 1/4″ a bit near the end, all the way around the other three sides, and another bit near the opposite end of the starting short side. Back stitch at each end and also across the ribbon where applicable. Trim the corners.
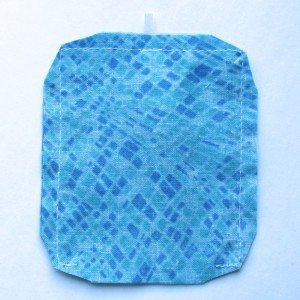
Press the open end’s raw edge up at the stitching line to give yourself a clean edge to sew shut. Turn each pair of rectangles right side out and use something pointed but not sharp to push the corners out. I used a pointy decorative chopstick. Be gentle because the clipped fabric will let you push right through the corner if you’re not careful (that happened to the unturned one below when I turned it; I had to make a new one). Press the edges nice and crisp. Avoid pressing the ribbon further out than, say, 1/4″ from the edge of the fabric, so it doesn’t get any creases.
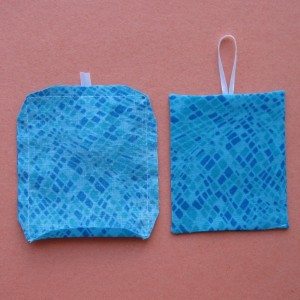

At this point, if you wish, you can topstitch all the way around each piece separately. This will stabilize the top edge a bit. This is also the point at which you should iron your text on to the front if you are using it. Stack the two on top of each other with the openings on the same end and stitch along the two long edges and the short edge with the openings, close to the edge of the fabric (I was lazy and did a probably-generous 1/8″, but you could definitely get closer).
Now we just have to post them!