Punk fish?

Escaping my work last night with a bit of crochet I decided to try to make a little Fizzgig kind of beast, but as I worked on it the design asked to be a punk with a mohawk. I’m not sure that would be anyone’s first guess on seeing it, but I am experimenting with new construction techniques and it was definitely useful for that endeavor. The pattern is below, anyway; apologies for the terrible pictures. My pattern conventions are here, and all decreases are made on right-side rows so you may use whatever technique you like, including invisible decrease. My guy is in scratchy acrylic worsted weight with an E hook; gauge is not important.
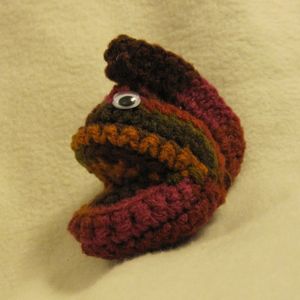
punk fish

Part A. Make 2.
1. Magic ring, ch 1, sc 4.
2. Ch 1, turn; 2sc across (8 sc).
3. Ch 1, turn; *2sc, sc, 2sc*, sc 2, repeat *…* (12 sc).
4. Ch 1, turn; in FL only: 2sc, sc 10, 2sc (14 sc). [rem lps will be on the outside of the piece.]
5. Ch 1, turn; 2sc, sc 12, 2sc (16 sc).
6. Ch 1, turn; 2sc, sc 14, 2sc (18 sc).
7. Ch 1, turn; 2sc, sc 4, dec, sc, dec, sc, dec, sc 4, 2sc (17 sc).
8. Ch 1, turn; 2sc, sc 15, 2sc (19 sc).
9. Ch 1, turn; 2sc, sc, dec, sc 2, dec, sc 3, dec, sc 2, dec, sc, 2sc (17 sc).

The first one you make, finish off the yarn and attach eyes between rows 7 and 8, centered and about 3 stitches (of row 8 ) apart. Leave the second half attached to the skein.
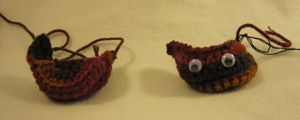
punk halves

B. Turn the second half inside-out and meet the corners. Sc row 9 to itself. I did this in inner loops only but it occurs to me now it should be outer loops only (FL of near row, BL of far row). This is 8 sc. Ch 1 and sc back again, putting an extra sc in the last st or on the side of the initial sc.

C. Open up the second half a bit and match the first half to it at the corners and magic ring. Sc them together: down the edges of the rows to the magic ring and back up again. In the following picture, step B is along the top right and step C goes around the equator.
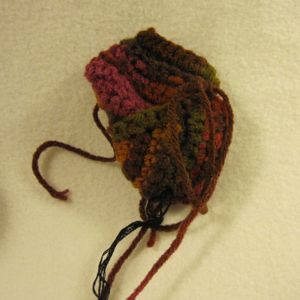
mostly sewn

D. If you want the mohawk to be a different color, FO. Otherwise ch 2. Turn right-side-out and stuff. Attach new yarn if applicable and sc closed (st row 9 of the first half to itself). Add additional rows with increases as necessary to get a good mohawk look.
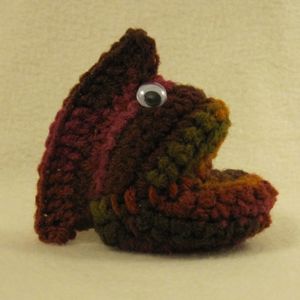
side view

In other news, I’m teaching a Sew-Op class on a parent’s birthday again – my second alterations class is tonight. Happy birthday, Dad!
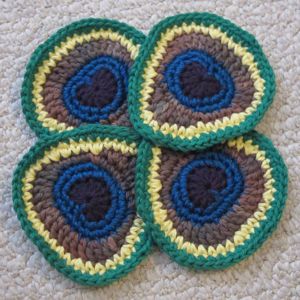
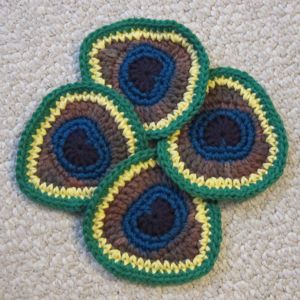
Peacock badges

My mother asked for crocheted potholders for Christmas, and I thought since she likes bright colors (especially teal) that I would see about making her something peacock-ish. Well, I developed a pattern, which I like, but the result is leaving me cold. Since they are supposed to be for potholders I don’t want to use acrylic, and natural fibers are hard to find in sufficiently vivid colors. Anyway, I’m going to put up the pictures of the two arrangements I considered for the potholders and ask for suggestions. Perhaps if they were used individually as coasters it wouldn’t matter if some of the yarn was acrylic (actually, the blue yarn is 75% acrylic, 25% wool; the rest of them are 100% cotton), though you’d still want most of it to be natural, for absorbance.

Anyway, without further ado…

configuration 1 configuration 2

Edit: Since I posted the pattern in a comment, I thought I would post a cleaned-up version here that abides by my pattern conventions. I noted that the coasters tend to cup a little at the edge, and adding a few extra sc in the outermost round might be a good idea.

Second Edit (Oct 2013): I don’t know what happened here (except that I never intended this to be a shared pattern and was therefore not careful), and have fixed the myriad pattern errors that became apparent to me on re-reading. I’ve also created a name-your-price pdf version for the store, which includes photos of round by round progress and where to attach the new yarns. If you like this pattern, would you consider supporting me with a dollar or more via that pdf?

Other notes:
Recall that my pattern conventions include using 2sc for “sc twice in next st” and sc 5 for “sc once in each of next 5 sts.”
The top teardrop that belongs to a stitch is slightly to its right for a right-hander, and slightly to its left for a left-hander.
“Bottom” means when the coaster is oriented so the purple round forms a heart.
The sl st at the end of any non-purple round may be replaced with a needle join.
My notes say I made these with an F hook (3.75mm), but nowadays I would need an E hook (3.5mm), if not smaller, to have this tension.

Purple:
Form magic ring, ch 2; dc 10 in ring, ch 2, sl st into ring.
Cut yarn and pull end through last st; pass cut end through magic ring to back of piece.
Tighten ring most of the way but leave space for another stitch.

Teal 1:
Make sl kn and place on hk.
Insert hk into 7th purple dc, sl st, and ch 1.
Starting in the same st, *sc, 2sc* twice, sc into first ch of final purple ch-2, dc into magic ring, sc into second ch of starting purple ch-2, *2sc, sc* twice, 2sc twice.
Keep yarn attached!

As soon as you have made the dc you can finish tightening the magic ring and FO the purple yarn; I would do so before beginning the bronze yarn.

Teal 2:
Partial round (3 sts of Teal 1 will be unused).
Sl st into starting teal ch.
Starting in next st, 2sc, sc 2, 2sc, 2sc, sc 5, 2sc, 2sc, sc 2, 2sc, sl st.
Cut yarn and FO.
Between dc, sc, and sl st, you should have 26 sts around.

Bronze 1:
Place sl kn on hk; sl st to attach in last teal sc.
Starting in final teal sl st, sc 5, 2sc, [hdc, dc] in next st, *dc, 2dc* twice, dc 2, *2dc, dc* twice, [dc, hdc] in next st, sc 4.
Final sc will be in same st as joining sl st.
Keep yarn attached!

Bronze 2:
Partial round.
Starting in first bronze sc (sk the joining sl st), sl st, 2sc, [hdc, dc] in next st, [dc, hdc] in next st, 2sc, sl st.
Cut yarn and FO.
Counting the sl st, you should have 37 sts around.

Yellow:
Place sl kn on hk; sl st to attach in bronze st just to the right of the bottommost point of the bronze rnd (to the left if you are left-handed).
Ch 1.
Starting in same st, sc, 2sc, sc 2, *2sc, sc 4* six times, 2sc, sc 2. Sl st in first sc; cut yarn and FO.
You should have 45 sts around.

Green:
Place sl kn on hk; sl st to join in the center of any straight side [if you want specificity, start counting with the bottommost yellow st and join in the 9th st in the direction you work (left for righties, right for lefties)].
Ch 1.
Starting in the same st, *sc 4, 2sc, sc 2, 2sc, sc 2, 2sc, sc 4* three times.
Sl st and FO.

Simple cross-stitch patterns

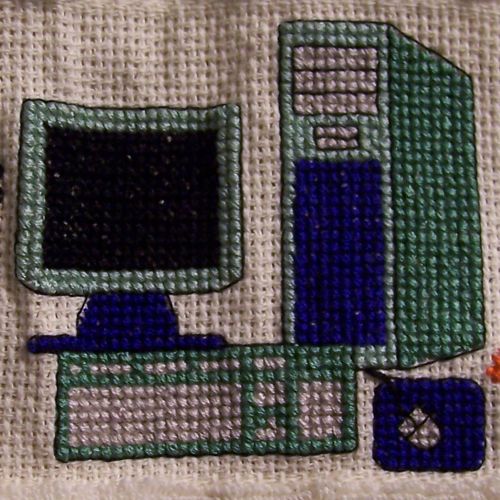
I went through a phase some time ago of cross-stitching personalized gifts for people, often with my own designs. Some were in-jokes, some I no longer have the patterns to, and some were not really good enough to share, but I have a couple to show you. The first is an old-fashioned desktop computer:

oh, the majesty

I have the pattern available as a jpg should you want to make one yourself. There are no markings for the solid-color regions; the backstitching and keyboard keys are shown, and the rest is filling in appropriate regions. I wrote a personal message on the screen in backstitch; you can make your message more or less subtle by varying the color contrast. All color numbers are DMC, and of course the selections should be adjusted to your taste.

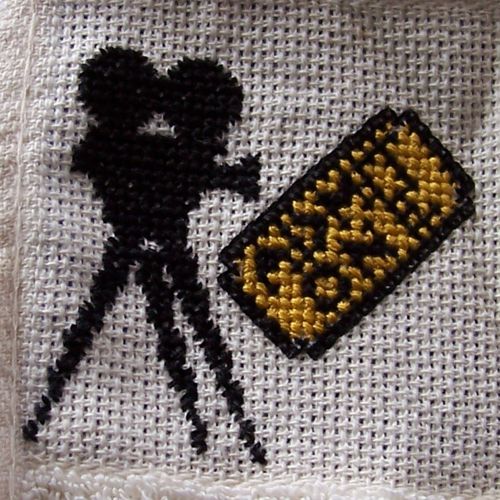
The one I have to share that I am more proud of, however, is the following.  

camera!

The camera and ticket may be stitched together or separately; the pattern specifies DMC color numbers, but you merely need black and dark yellow of some flavor.