Snowflakes for you

In the spirit of my emergency pumpkins, I have a brief seasonal pattern for you today.

snowflakes!
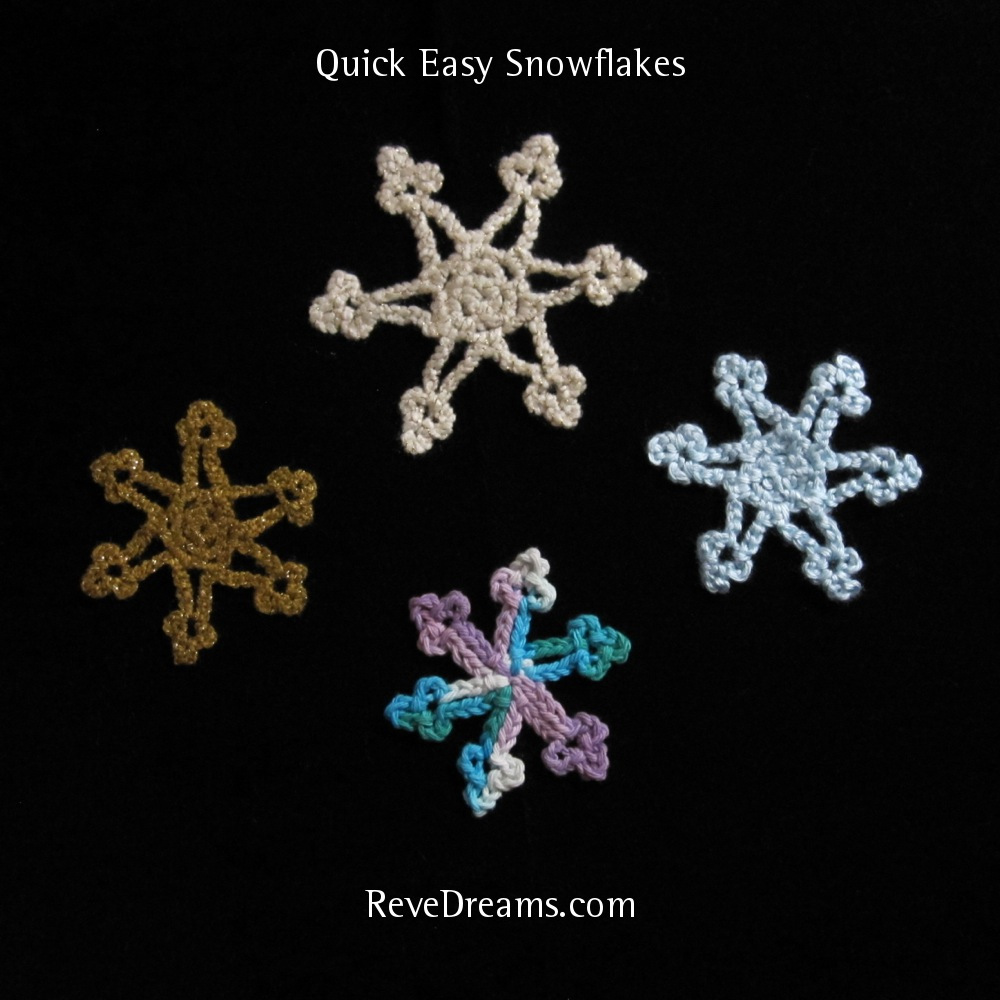
You like the fancy picture?

The pattern! Abbreviations and links to general instructions here.

Quick Easy Snowflake
Ch 4 and join with sl st into ring.
Ch 1. *sc into ring, ch 3* three times (3 sc, 3 ch sp made).
Join to first sc with sl st; ch 1. In each ch sp: sc, ch 2, sc, ch 2 (6 sc, 6 ch sp made).
Sl st in first sc to join. Sl st into next ch sp, ch 1.
*Sc in same ch sp; ch 8, sl st in 4th ch from hk. Ch 4, sl st in same ch as previous sl st. Ch 3, sl st in same ch as previous sl st. Ch 3, sc in next ch sp.* around (6 points made).
Last sc will envelop the sl st that preceded the first *…*; sl st into the ch 1 immediately after that sl st. FO.

[pardon my edit, here and below. that last ch 3 used to say ch 4; that was in error from a previous version of the pattern. the legs decidedly lean if you ch 4. apologies for the error!]

I like to pull that last yarn end to the back of the snowflake through the chain space that those first and last single crochets were made into. Weave in the ends, yank on opposite pairs of points to straighten them, tug the side nubs of each point apart. Sometimes the points want to lean a bit, which can be helped by holding down the beginning chain of each point while tugging the first side nub away from the center of the flake. If your snowflakes want to curl up, iron them (all snowflakes above were ironed). You can stiffen them like thread crochet snowflakes, if you want to hang them.

The yarns used above were Lion Brand Vanna’s Glamour (gold), Red Heart Holiday (off-white), Caron Simply Soft (light blue), and Lily Sugar ‘n’ Cream (variegated). All were made with an F/5 hook (3.75mm).

“But, Reve,” I hear you saying, “one of these things is not like the others!” I applaud your Sesame Street reference and reply with another pattern!

Quick Easy Snowflake – Variation
Ch 4 and join with sl st into ring.
*Ch 8, sl st in 4th ch from hk. Ch 4, sl st in same ch as previous sl st. Ch 3, sl st in same ch as previous sl st. Ch 3, sl st into ring* six times (6 points made).
FO. That’s all!

Mutant marshmallow bunny

My husband and I are in the habit of trading pet names of increasing ridiculousness, drawn from the grocery store. I occasionally like to crochet him representations of such names. This time, it was a chocolate-covered marshmallow rabbit. It came out a little stumpy, but since I wrote down the pattern as I went, here it is. As usual, crochet abbreviations and my pattern writing conventions may be found on the crochet reference page. Incidentally, I used sportweight yarn and a C hook (2.75mm). Note that I haven’t tested this at all.

front view side view

Ears:
1. sc 4 in magic ring
2. 2sc, sc, 2sc, sc (6)
3-6. sc around (4 rnds)

Cut yarn on first ear and pull through. Leave yarn connected to second ear and continue crocheting with it. First, awkwardly sc the ears together with one sc (see photo below).

attaching ears together

Head and body:
1. Sc around rem sts of ears to form one loop (10)
2. sc 4, 2sc, sc, 2sc, sc 2, 2sc (13)
3. 2sc, sc 2, 2sc, sc 6, 2sc, sc 2 (16)
4-5. sc around (2 rnds)
6. sc, 3sc, 3sc, sc 13 (20)
7. sc 2, dec, dec, sc 14 (18)
8. sc 2, dec, sc 13 (17)
9. sc around
10. *dec, sc 2* 4x, sc (13)
11. dec, sc 2, dec, sc 7 (11)
12. *2sc, sc* 5x, sc (16)
13-21. sc around (9 rnds)
22. sc 3, 3sc, sc 2, 3sc, sc 9 (20)
23. sc 6, dec, sc 10, dec (18)
24. dec, sc, sc3tog, sc, sc3tog, sc, sc 5 (12)
Stuff, sl st across bottom to close off.

Champagne gift bag

Tutorial! It’s been a while. I went with my favorite companion to a party this weekend, and had a bottle of champagne to bring. You will not be surprised to know I decided to sew a bag to adorn it, and perhaps also not surprised to learn I started the whole process a little too late to actually complete it before we had to leave. I was so close! I finished it yesterday.

top

This bag is very similar to the half-hour reversible drawstring bag, though it has more detail and so will take a bit longer. Start with two pieces of fabric each 12.5″ by 16.5″, and fold them long edge to long edge, right sides together. Sew that edge with a 1/2″ seam allowance, leaving an opening between 3″ and 3.75″ away from one end, which will be the top end. Below you can see my technique of doubling my pins on each side of the opening; it’s my special self-signal for “something different happens here.”

starting out leaving an opening

Continue reading Champagne gift bag