Fiddlehead fumbling

On my local fibercraft blog we’re having a craft challenge a la Iron Chef: craft something inspired by or about fiddleheads, the young fern coils that New Englanders like to eat around this time of year. More details and where you should comment with your project are here, and I would love it if you wanted to participate — whether or not you’re local and whether or not you would be working in fiber, in fact. It would actually be a big favor, helping populate this challenge.

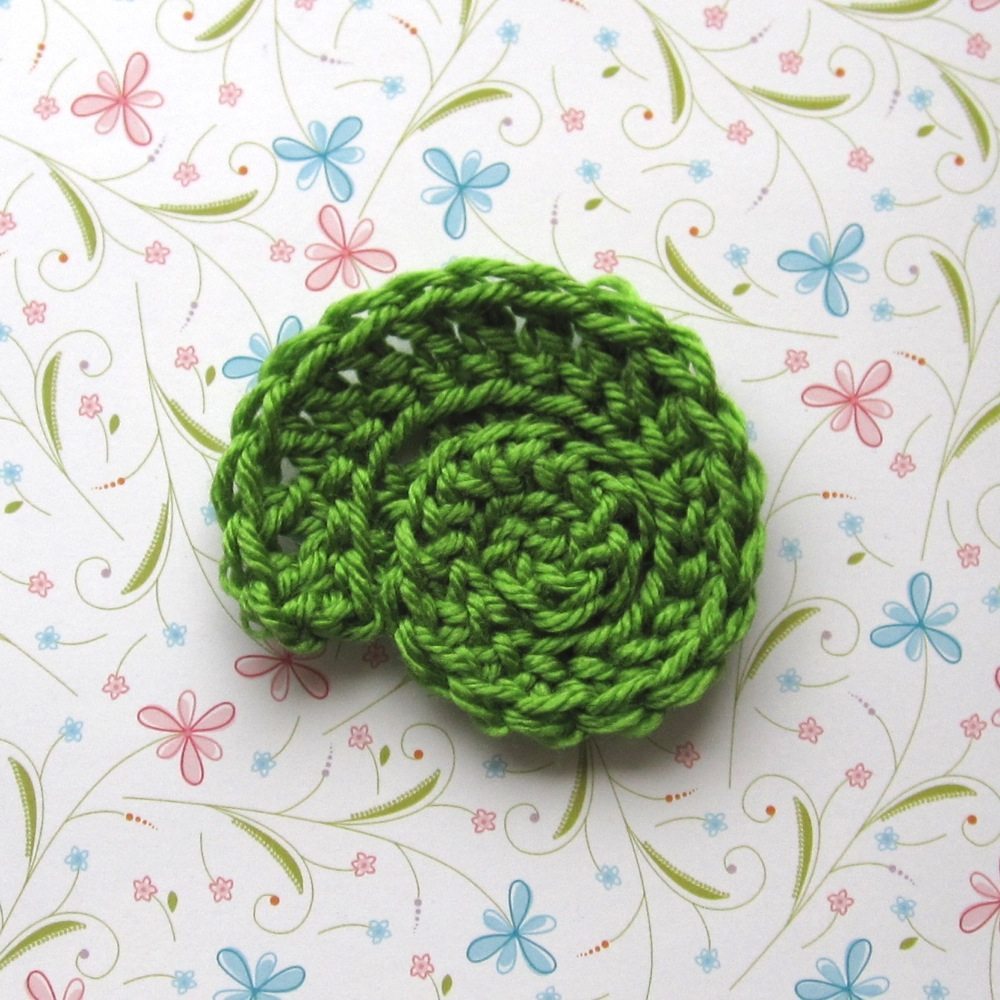
I started working on fiddlehead-themed crochet last night, and I must say, my blogging partner picked a tricky challenge theme. With all sorts of spirals on my mind, my first attempt was a two-strand spiral beginning with single crochet into a magic ring (with strand A, let’s say) and then alternating between slip stitch into back loop only with strand B and single crochet with strand A into the front loops of the slip stitches. The single crochet gradually grew to half double and then double. The result, which looks more like a seashell than a fiddlehead, is the first picture below.

playing with crochet fiddlehead ideas playing with crochet fiddlehead ideas

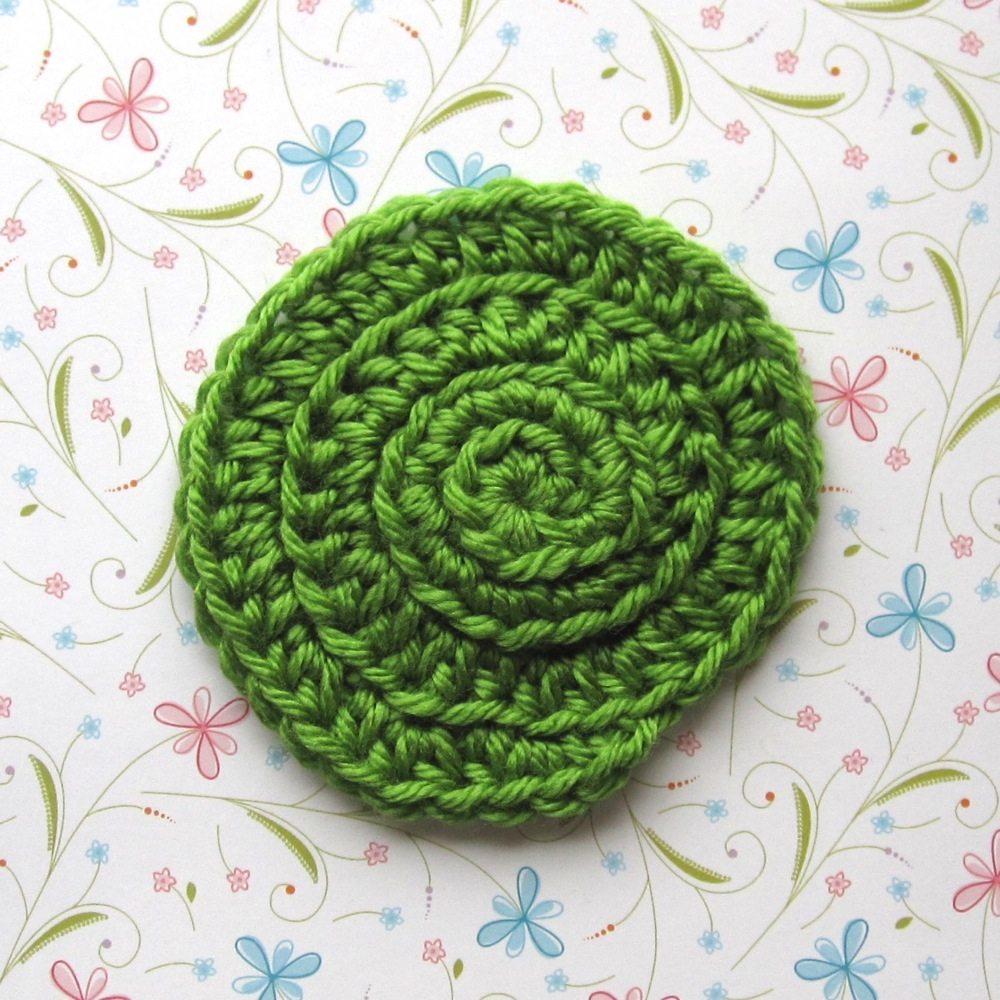
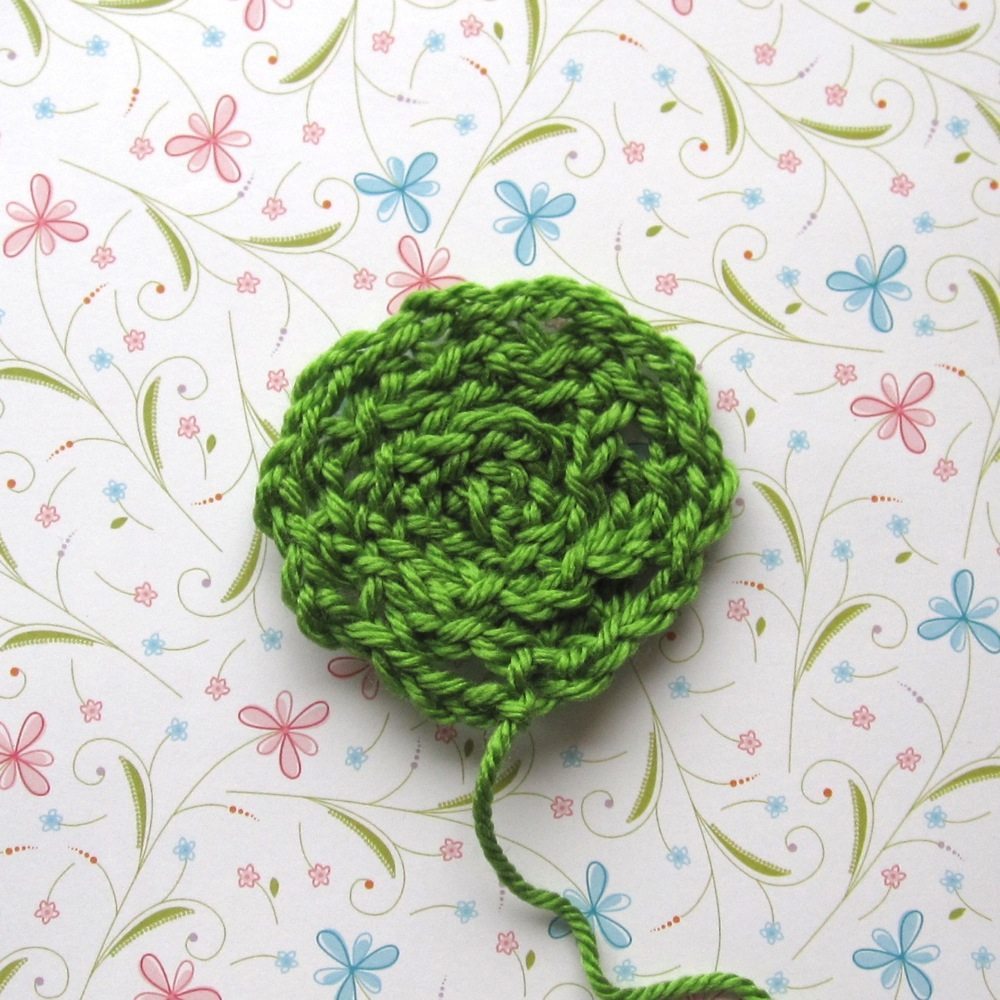
The second picture above is my second attempt, a strip of foundation sc (then fhdc, then fdc) that I then coiled up and sewed into a spiral. To me, this one evokes seashells even more than the previous one.

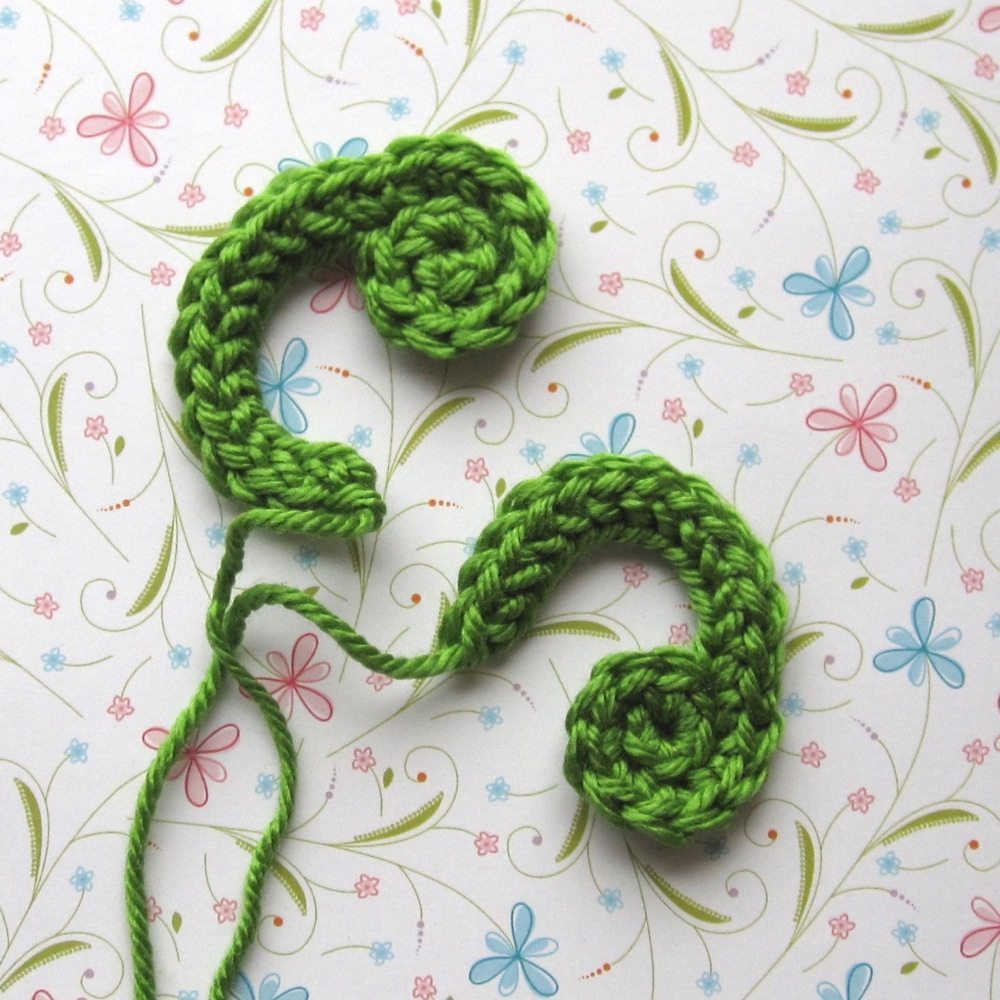
The commas below are my third attempt. Chain 2 and make 6 sc into the second chain from the hook. Increase around in back loops only, except the last (12th) stitch of this round was an extended sc that led into about a dozen foundation sc. Here and in the second coil I made sure *not* to pull the linking loop of the fsc out very far, so the strip would naturally curl toward the bases of the stitches.

playing with crochet fiddlehead ideas playing with crochet fiddlehead ideas

The last picture is of a mess. I chained for a while, then I slip stitched into a chain a little ways from the hook, and alternated ch 2 and sl st into somewhere further around the ring for a while. When I was only a few chain-lengths away from the previous linkage to the starting chain I slip stitched into it again, and went back into the ch-2/sl st pattern. Ultimately I think this is best described as a coil of ch-2/sl st going counter-clockwise on top, and a coil of a periodically-secured starting chain going clockwise on the bottom. It was an experiment.

The challenge goes until the end of the month and this won’t be my last attempt, but I’m going to change media for my next effort.

Ice cream and stained glass

Needle felting has become my go-to craft when I want instant gratification (instant craftification?). It’s low pressure and quick. I know eventually I’ll start working on larger scale and/or more detailed pieces and they won’t be done in a sitting or two, but right now I’m just experimenting. Today’s experiment #1 started with rolling some coarse wool into a cylinder and testing out the process of making an indentation around it by needling repeatedly on a line. It grew from there.

NF ice cream

Partly because I was having trouble making a flat piece with nothing under it, and partly because I am curious to experiment with nuno felting ideas, my next project was to needle felt colorful wool onto a piece of unbleached cotton muslin. I decided to add black wool in between, since I love stained glass, and after a trip to White River Yarns to acquire some, I immediately sat down and had this:

NF stained glass - front NF stained glass - back

I love how fuzzy the back is, but I’ll be applying some wet felting techniques to make it both more secure and thinner overall. I wish I had taken a picture before I added the leading so you could see the huge difference in appearance.

Next steps in needle felting

On the occasion of my mother-in-law’s birthday I took the plunge into needle felting with the llama fleece she gave me for Christmas. Using a small cookie cutter as a mold, this was the result:

leaf front leaf back

The stem is one-third of a length of cord (the cord I used for Stumpy’s belt when he was dressed as an Assyrian king); the rest is llama fleece. I am fairly pleased although it is a bit shaggy (and I even gave it a haircut). I acquired a three-needle pen but the needles were a bit fine for catching the smooth, slippery llama fibers, so then I got a set of heavier needles and made this little guy:

penguin 1 penguin 2

I started out trying to make a teddy bear, which is why he’s dark brown, but I couldn’t get the shape right so I changed direction. His eyes are coarse sheep’s wool, which was much easier to work with than the llama fleece, but the llama was easier on this one than the previous one. I think I’m getting the hang of the necessary manipulations.

After looking at an online preview of The Complete Photo Guide to Felting, I’m going to try to smooth the penguin-creature a little. She suggests four approaches: felting densely, applying the needle almost parallel to the surface, wet-felting by hand (dip your fingertips in warm water and rub the surface of the item until the loose strands are felted in), and giving the creature a haircut or a shave (with an actual safety razor). I think the middle two options are my best bet, especially as I already tried the haircut option. You’ll see him again in a while!