Century post!

Today is my 100th post on this blog. That includes the little nothing posts, of course, but I’m still going to count it.

Today I’ll share with you Craft Countdown item #6. It occurs to me this one was also not completely from scratch, as I had made the tracing and transferred it to wash-away embroidery paper prior to New Year’s Eve.

Lowly Worm!

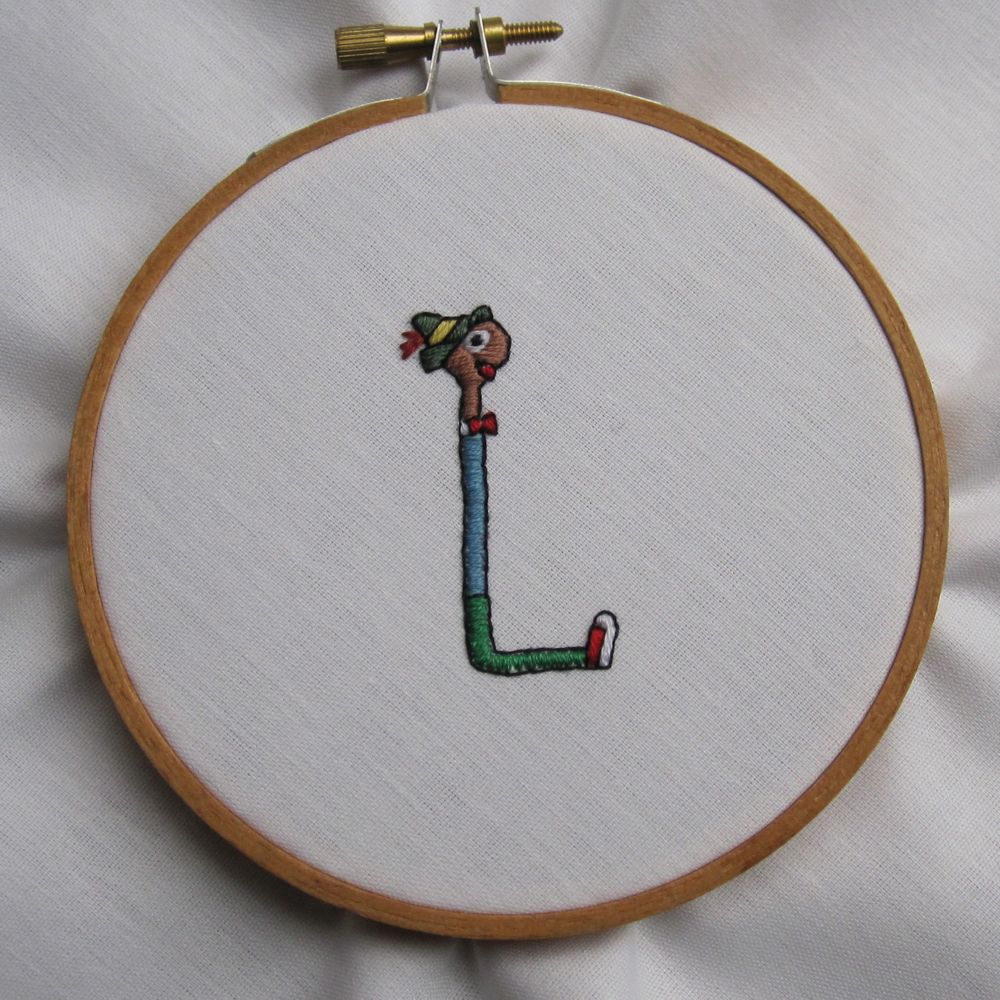
If you don’t know who that is, get thee to a library or book store and look up Richard Scarry, who owns the copyright. I couldn’t relocate the specific source of this particular Lowly Worm image, unfortunately, and the colors I’d written down didn’t really make sense to me, so I used a mishmash of the colors from the books I did have accessible. This was easily the most time-consuming of the ten projects, but well worth it.

Paint card notepads

Onward to Craft Countdown #4. I’ve been enamored of this idea since I found the tutorial for it on Whimsy Love a long time ago. The idea is to make little matchbook-like notepads out of paint color cards. My paint cards were all boring colors I’d actually considered using for decor, so I used different heavy paper instead: two cards from the Pilates Body Kit (not ones with exercises on them) and one former notebook cover. You need some things:

materials

The paper trimmer isn’t essential, but it would not have been possible for me to do this as one of my ten-by-midnight crafts without it. The sturdy stapler is definitely a must. I trimmed the notebook cover to remove a strip of black material that had formed the spine, and the opposite side to eliminate the rounded corners so it would be symmetric. To fold the covers, I scored the paper with a mechanical pencil – with the lead out on the bottom (3/4″) fold, and with the lead retracted to fold the top down. As recommended, I used 20 sheets of paper per notepad, cut 1/4″ smaller than the covers in each direction, and centered. That was about right – too much more and stapling would have been very difficult.

I didn’t worry much about getting my staples symmetric, but I definitely felt two would be necessary for notepads this size. Since the one notepad had a large stretch of plain blue, I applied some additional decoration.

front view back view

looking inside

Ulu knife sheath

I’ve shown my Ulu knife on here before. It’s fun but it is hard to store. For Christmas I asked for an Ulu knife sheath, but my mother decided to spend her Christmas budget on other things, so I got this:

ulu sheath kit

My father was still amusedly shaking his head at the whole thing, but he was conscripted to help. Mother included a tracing of an Ulu knife in the kit, so I cut that out, traced it onto the leather, and added a seam allowance to the curved edges. Dad cut the pieces out for me with a utility knife and lent me his leather punch. I used one of the purse straps to make a strap for holding the blade in.

The purse instructions said to use saddle stitch for most everything, which is just double running stitch (Holbein) simultaneously with both ends of the same thread. I followed those instructions and then sewed the strap on afterward. To make the open edge (necessary to get the knife in and out) look the same I did a double running stitch on each side individually.

leather punch sewn up

At this point I had to pause until I got home to my actual knife. I wanted the strap to hold it in snugly, so I didn’t want to guess on positioning the closure. Retroactively (by an hour or two) it became Craft Countdown #1. I determined where to cut the strap and epoxied black velcro to each side.

with velcro

It fits really well. Now I can stash it in a drawer!

how it fits all sealed away