I went a little overboard some time ago and tested six different air dry clay recipes, plus a second variation on two of the recipes. I never posted about it then, but I’ve come back to it recently and wanted to share my findings.
Sources for recipes (immediate sources – none of them indicate they are the originators) are listed with links; it’s been long enough since I saved these originally that several links have died and now point to the Internet Archive.
A little English-to-English translation: “cornstarch” = “cornflour” and “white glue” = “PVA glue” (= “school glue”).
Clay Recipes: The Winners
There were two recipes that came out head and shoulders above the rest. They are the only two on this list I will ever make again.
First Place: Cold Porcelain
(Puffy Little Things, Mashia Crafts)
This is the best homemade crafting clay of all the recipes I tried. It allows fairly intricate shaping, is resistant to cracking while drying, and doesn’t leave residue on your hands. You pay for those qualities with the amount of work to make it, the fact that includes non-edible (though still non-toxic) ingredients, and that it dries to a yellowish color.
Ingredients: 1 cup each white glue and cornstarch, 1 tbsp each lemon juice and baby oil; may substitute lime juice or vinegar for lemon juice and cooking or mineral oil for baby oil.
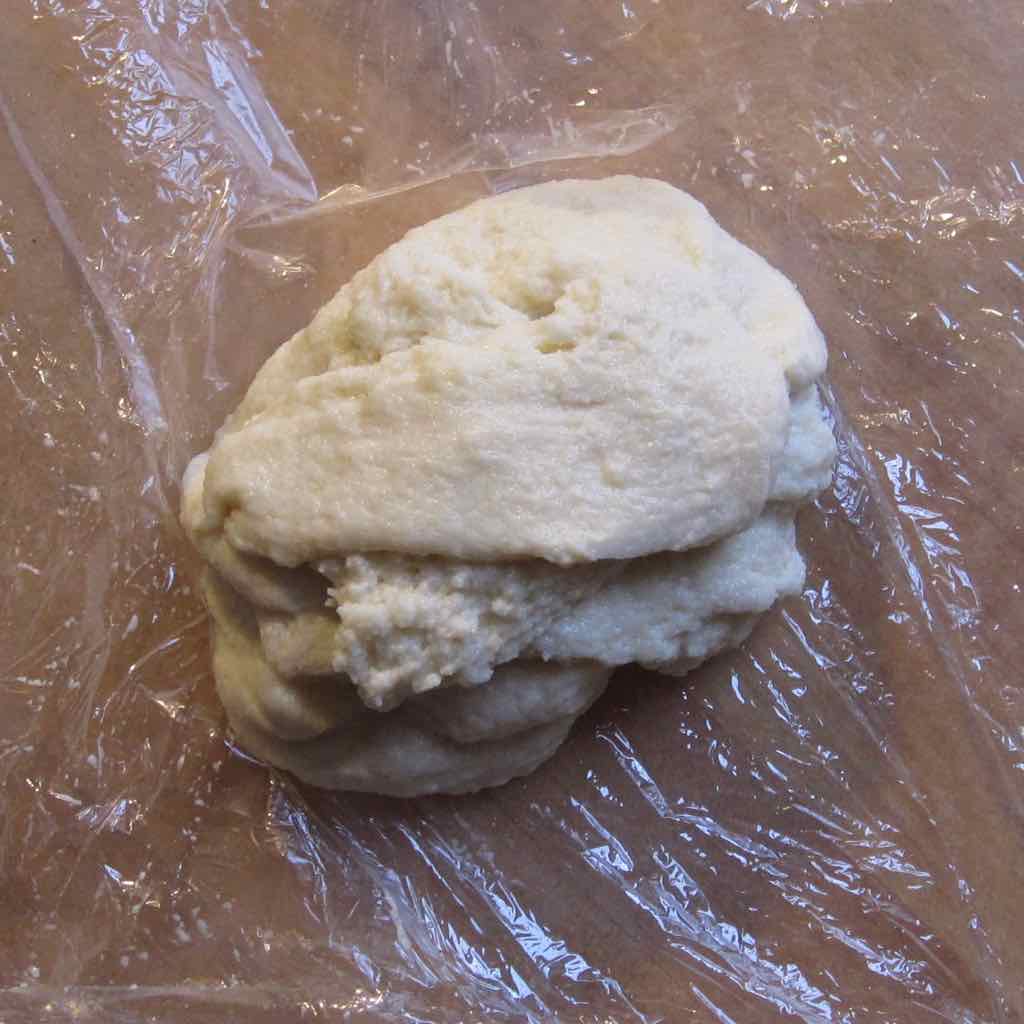
Instructions: Mix glue and cornstarch, then mix in oil and lemon juice. Microwave in 15-30 second intervals, stirring thoroughly in between, until there are no wet areas anywhere. It is possible to overcook this, so shorten the microwave times as you go along. Knead smooth and leave overnight in a sealed bag. Both sites recommend wearing hand lotion to make the clay easier to work, both for kneading and when you sculpt with it, but if it’s sufficiently cooked that’s not strictly necessary.
 Testing Notes: I’ve made this recipe four times now, and the instructions above are the result of my testing, not directly from either of the sites. The mixing instructions are to avoid lumps, and the real restriction is: don’t mix the lemon juice directly into the dry cornstarch. This recipe also does not reduce well – I made it successfully with 3/4 cup each of glue and cornstarch, but if you get down to 1/3 cup each it is nearly impossible to cook it enough without overcooking it into yellow rubberiness.
The two sites give different proportions for the oil and lemon juice – one of them says 2 tablespoons apiece when using a cup each of glue and cornstarch. In my testing I found that made it more difficult to cook it thoroughly, though I must admit I didn’t give it a completely fair trial. When I reduced to 3/4 cup I did not bother reducing the oil and lemon juice.
The blog instructions say to cook for 3 rounds, but my clay was never finished in that little time. The version with 3/4 cup of glue took a good 8 rounds or so; I never did it for more than 20 seconds, though, and if I’d begun with a couple of 30 second rounds it might have taken fewer total. I was concerned about overcooking it, but when you’re using a larger volume that is not as big of a risk.
Stir your hands off in between cooking rounds! This will avoid overcooking some parts while other parts are still wet, and will mean you need little to no kneading at the end.
My 3/4 cup version was the most successful of any, and although it may have been slightly on the soft side, it was workable, and didn’t stick (much). I made a few items, wrapped up some leftovers, and left them for a little over two weeks, and it was still completely usable.
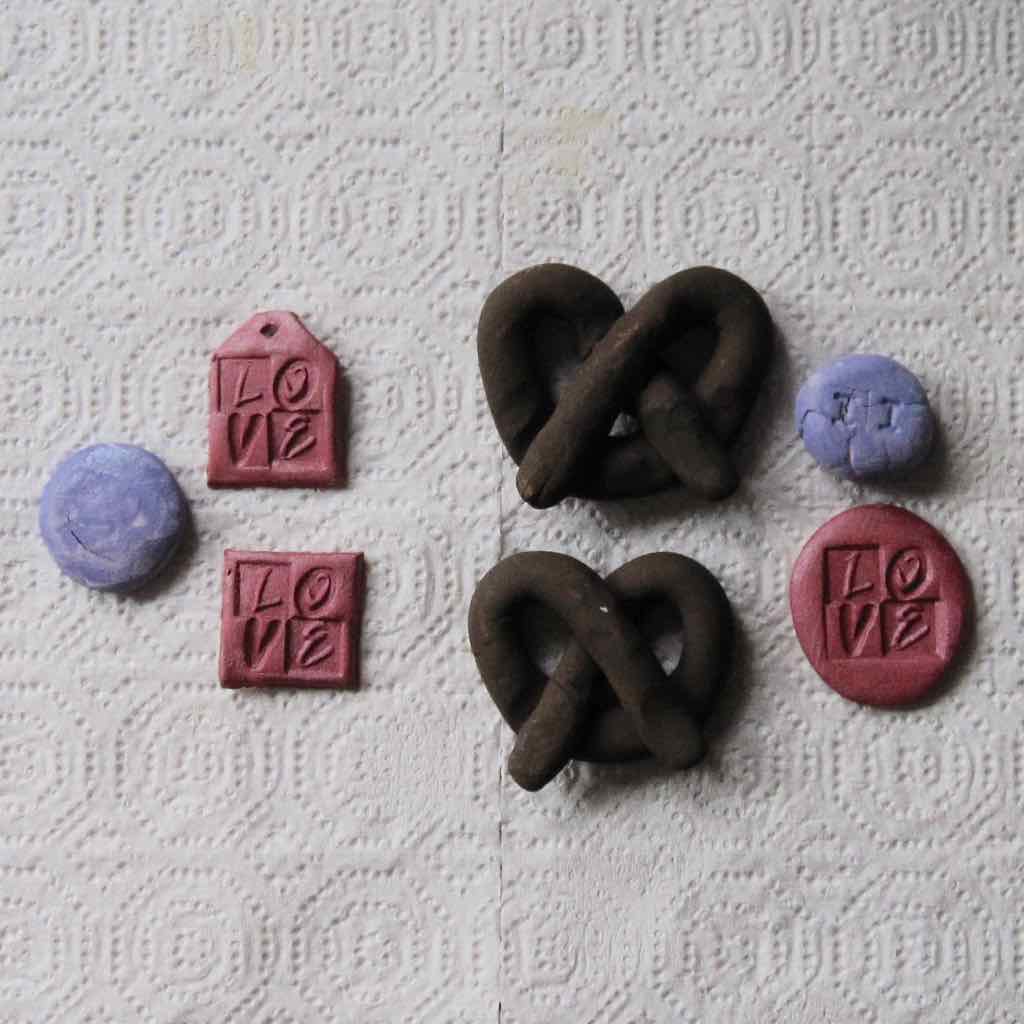
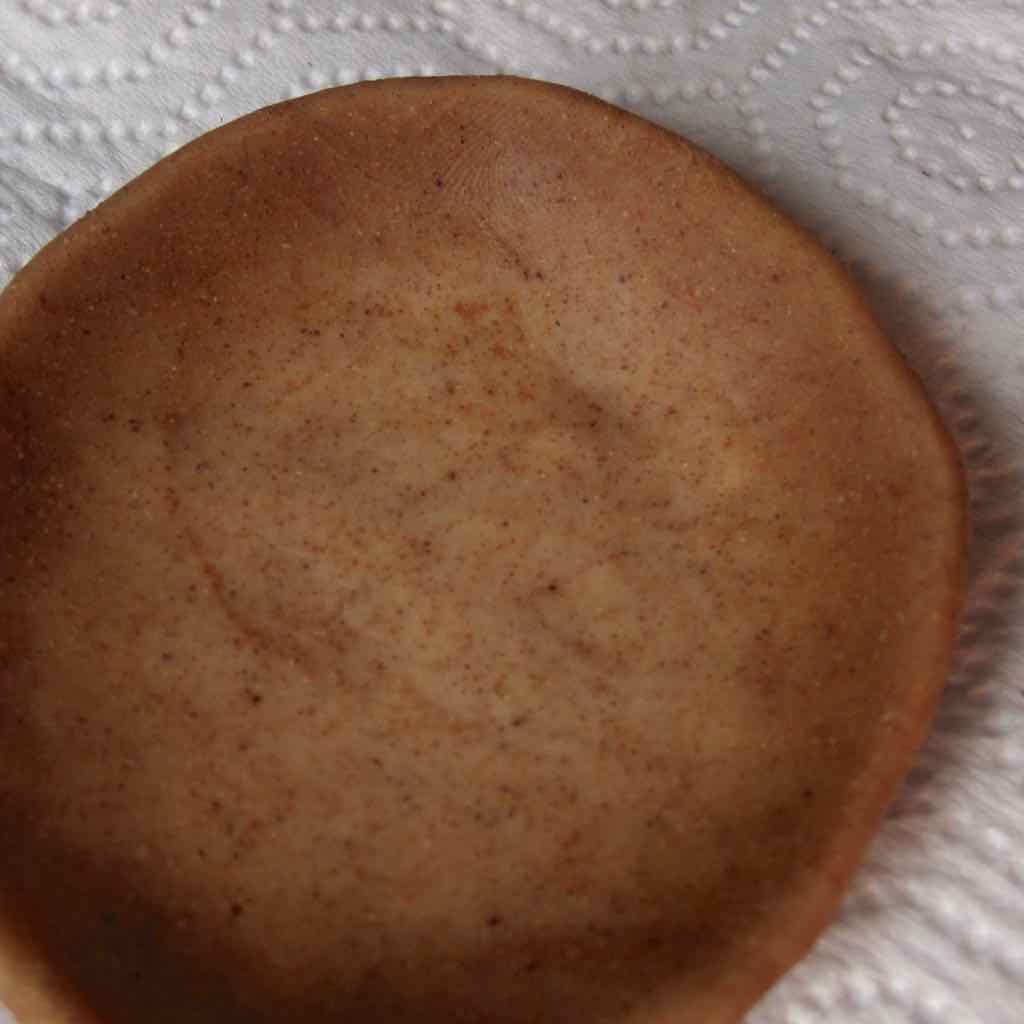
Items made with cold porcelain dry very smooth and rigid, and paint easily with acrylics. The photo above is all from the earlier testing rounds; there are photos below of the final batch, including of unpainted clay. The dry items are quite sturdy – long thin pieces can be broken, but even thin flat pieces are resilient. I tried hard to break the oval-shaped “love” item in the photo above and was unable to.
Cleanup: I used a cheap plastic storage container to make this, because I didn’t want to be microwaving glue in something I would then prepare food in. I was pleased at how clean it came, though – once it dried I was able to flake most of the clay residue off, and the rest washed away easily. I also used plastic knives to mix, and broke two in the process, so the next time I make it I will find something metal or wood to mix with and just designate it a crafting implement.
Other Notes: The recipes below are given in parts, but I gave this in measurements instead for simplicity – it would be 1 part each lemon juice and baby oil, 16 or 8 parts each white glue and cornstarch, depending on the version. The Puffy Little Things tutorial has a section on troubleshooting at its end. Etsy New York has a variation they call homemade polymer clay with different proportions but the same ingredients, cooked on the stove; I did not test that one.
Second Place: Cornstarch and Baking Soda
(found all over: Southern As Biscuits, Growing a Jeweled Rose, Show Tell Share (with reduced water), De Tout Et De Rien)
This is the best play clay. Compared to cold porcelain it is far quicker and easier to make, all ingredients are edible and very inexpensive, and it dries very white. What kept it out of first? I was unable to find a way to prevent many items from cracking as they dried. The clay also leaves a powdery residue on your hands when you sculpt with it, and has a baking soda smell that I find unpleasant.
Ingredients: 2 parts cornstarch, 3 parts water, 4 parts baking soda.
Instructions: Cook and stir till the consistency of mashed potatoes, cool under damp towel, knead smooth on a cornstarch-dusted surface.
 Testing Notes: This clay’s popularity is understandable: it’s easy to make and to work with. I have made it three times now. Use medium-low heat and stir frequently, scraping the sides and bottom of your pot. You want it fairly dry – not on the softer side of the mashed-potato spectrum. If you leave it softer it will be stickier to work with and curl more in the drying process.
If you cook it a little drier you can actually skip the cornstarch-dusted surface for the kneading step (in fact the kneading can be postponed until it’s fully cooled and you’re ready to work with it).
If I were really being careful with this I would throw the dry ingredients into a sifter and sift them into the pot – there are generally some little lumps when I make it, and sifting (and pre-mixing) the cornstarch and baking soda would probably help with that.
Items made with this clay dry with a white, powdery surface. Powdery in texture, that is – nothing comes off on your fingers when you handle dry items. It paints just about as well as cold porcelain; you can see items from my first two batches above and from the last batch below, unpainted. Items with this clay are slightly less sturdy than cold porcelain – I was able to break all of the “love” items in the photo – but still pretty resilient. Undercooked (wetter) clay seems to lead to more brittle results.
Cleanup: I used a stainless-steel pot and had trouble cleaning the residue off until I filled it with water and added a generous helping of white vinegar; after a little soak, it still needed the sponge but came right off.
Other Notes: Sand clay is a variation on this (these ingredients plus sand, with proportionally more cornstarch) that I have not tried.
What follows is general notes on air dry clay – specifically the two above but likely to translate to others as well – and a rundown of the other four recipes I tried and heartlessly rejected.
General Air Dry Clay Notes
The Drying Process


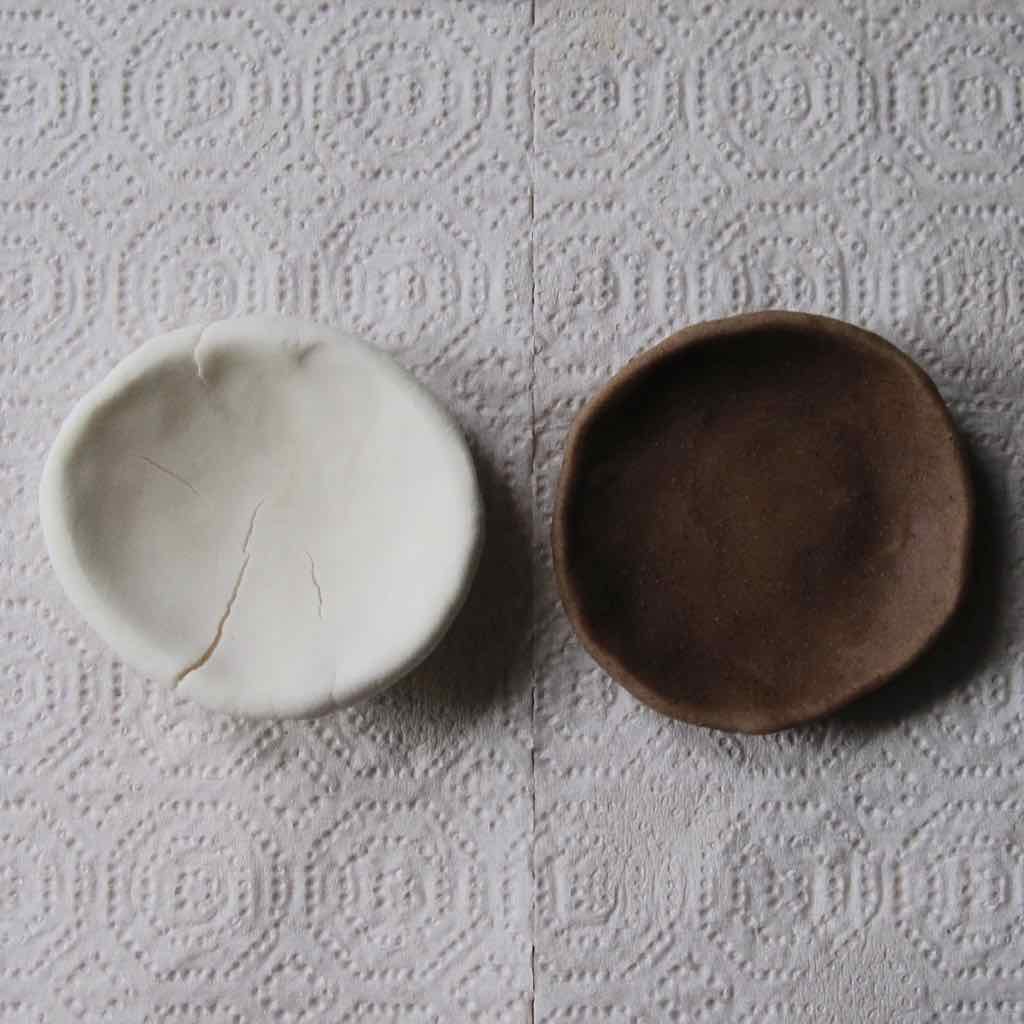
As your clay dries, it loses water volume, which is the source of the cracking and curling. There is no getting around the fact that items will shrink as they dry – you just have to take that into account, for instance making the sides of a bowl taller than you ultimately want them to be. The photos here are of cornstarch and baking soda clay.


You can reduce curling in two ways: by making the clay drier to begin with (this helps a lot in the cornstarch and baking soda case), and by helping the items dry more evenly. Setting them on a piece of paper towel instead of wax paper or plastic wrap to dry seems to be enough to make a big difference; lightly covering them with another piece of paper towel may help a bit more. If you do that, after 24 hours or so shift the items around – the cornstarch and baking soda will leave a slightly damp spot and the cold porcelain will stick a bit (but not enough to tear away any paper toweling). Having a double layer of paper toweling underneath larger items, especially with corn starch and baking soda clay, also helps. My photos above are of my tests of drying cornstarch and baking soda items uncovered (upper left) and covering them with wax paper (upper right) and paper towel (bottom).
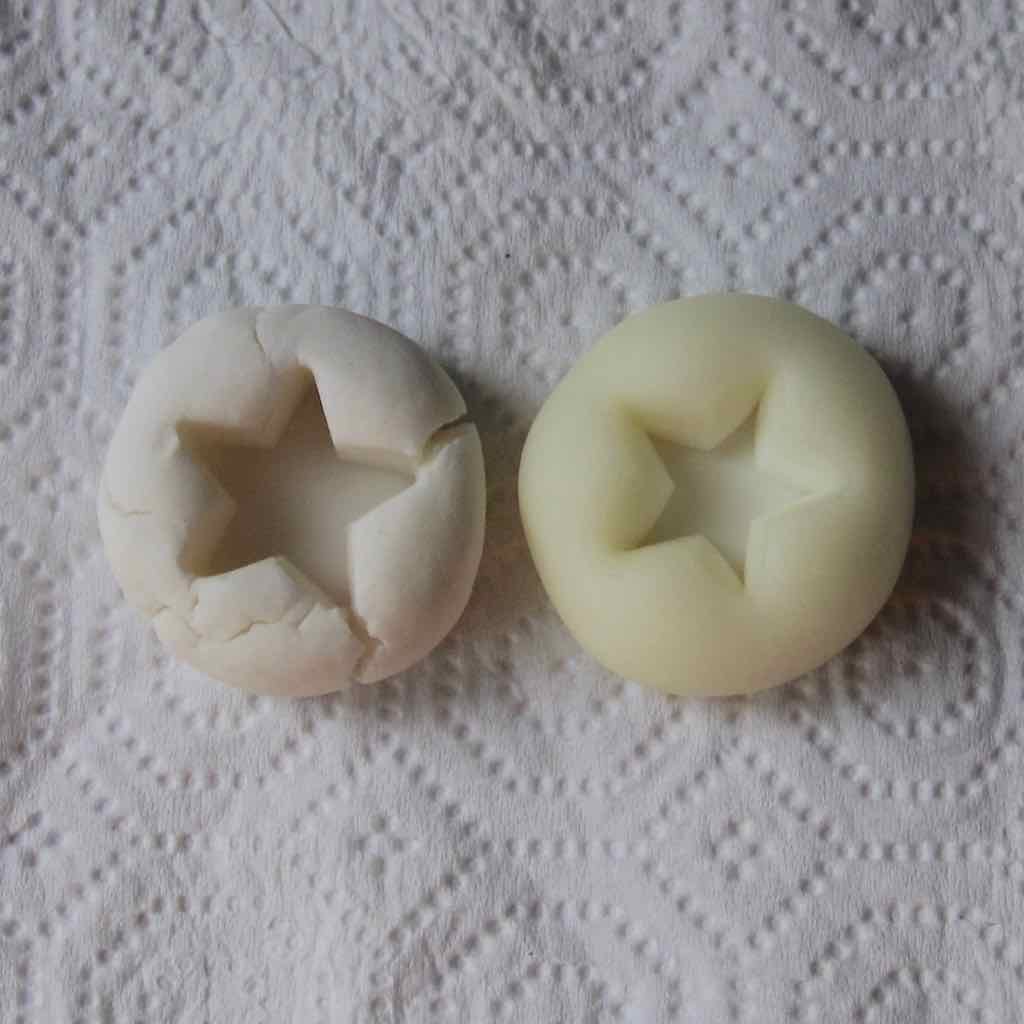
Cracking, on the other hand, is a more difficult question. Cold porcelain is not prone to cracking, but cornstarch and baking soda clay is very prone to cracking. Sifting the dry ingredients to mix them and remove lumps should help, and items you have carefully smoothed the surfaces of are likely to crack less. Thinner items are also more resilient – my little rods to test curling didn’t crack, for instance. I tried sandwiching some pieces between paper towels (both a single layer on each side and a double layer on each side) which doesn’t hurt, but it’s not clear to me how much it helped to prevent cracking – those pieces are shown above. The first two shots are of partly-dried items, one of each kind of clay in each picture (cold porcelain on the right). The last shot is fully dry, and I wanted to include both photos of those little star dishes because of how the cold porcelain changed shape as it shrank, and how the two clays shrink in different ways.
Coloring
You have several options for coloring your clay. After it dries you can paint it, of course, and to color the clay itself the blog posts suggest mixing food coloring into it; I imagine you could also use watercolor paint. I have not tried either.

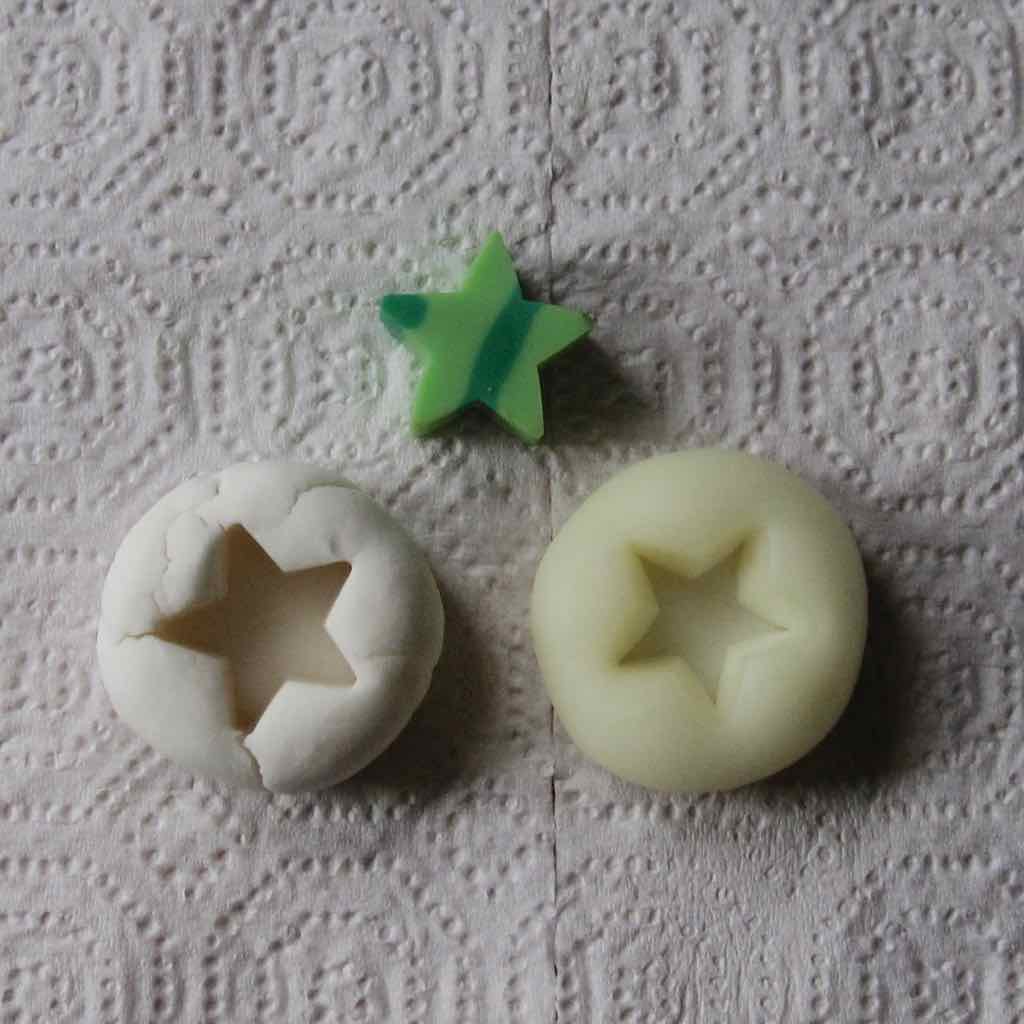
You can mix in spices as well, which I did try. Doing so changes the texture, of course, making it drier and potentially gritty. Cloves will give you a cool medium brown; paprika will give you a nice brick color; ground mustard gives a lovely bright yellow – at least when wet! They wash out a little when they dry; those are shown in the first picture above in the cornstarch and baking soda clay. I did not try everything in the cabinet, in particular staying away from hot pepper and from anything that’s more like a fleck of leaf than a powder. It seemed to me when I tried it out that it took more spice to make the same color difference in the cold porcelain than in the cornstarch and baking soda clay, but since glue dries translucent, the color got richer as the item dried. I failed to take a real “before” but the second picture above is of chai-spice-laden cold porcelain partially dried – you can see the drier edge is darker than the wetter middle.
As long as you use paint that doesn’t create a seal of sorts you can paint it while it’s still wet, as well. Pan watercolors, in particular, shouldn’t interfere with the clay drying process.
Sealing
If your items will be handled a lot or might get wet, you should seal them with something waterproof. If the item is small enough, you can use clear nail polish. You’ll find water-based polyeurethanes among the acrylic paints in your local crafting store, which are a good choice (or you can use paints that themselves are marked for outdoor use). Mod Podge also has a “dishwasher-safe” formula. I was introduced to it by someone who said they like it because it never remains tacky after drying, as Mod Podge can sometimes do. I don’t know whether it’s truly dishwasher safe but it should surely protect your items from humidity and hands.
No matter how well coated with a sealant, though, I would not recommend putting air dry clay where it will just sit wet.
Clay Recipes: The Also-Rans
Salt and Flour
Ingredients: 1 part each salt and hot water, 2 parts flour, small amount vegetable oil if desired (1 tbsp if a part is a cup).
Instructions: Mix thoroughly and then knead thoroughly once cool enough. May be baked, if desired, at 250 for 50 minutes or 300 for 40 minutes (latter browns the pieces).
Testing Notes: I made this on a hot rainy day, with the oil, and it was VERY soft though not sticky. That batch, unfortunately, I failed to work with for a few weeks and it turned brown and leaked some kind of fluid all around itself in the plastic wrap. The next batch I noticed was already a little brown compared to the other clays. That was on a day that was neither hot not rainy and it was soft and sticky-feeling, but not in a gunk-up-your-hands way. However, the following day it was too fluid to do anything with.
Salt and Cornstarch
 (two sets of proportions, from the blog of Factory Direct Craft and a book called Meaning in Crafts, by Edward L. Mattil)
Ingredients: Blog: 1 part each water and cornstarch, 3 parts salt. Book: 2 parts cornstarch, 3 parts water, 4 parts salt.
Instructions: Blog: Boil water, dissolve salt into it gradually, mix cornstarch in gradually. Remove from heat, knead smooth once cool. Book: Mix all ingredients in the top of a double boiler and heat, stirring constantly, until the consistency of bread dough. Remove from the pot and let cool; knead for several minutes before using.
Testing Notes: I tried the blog recipe twice and the book recipe once. The upshot here was that the salt never dissolved for me. The “clay” was gritty and sticky and stiff, and although it was also sparkly, it didn’t dry sparkly!
Glue and Cornstarch
Ingredients: 1 part white glue, 2 parts cornstarch.
Instructions: Mix and knead.
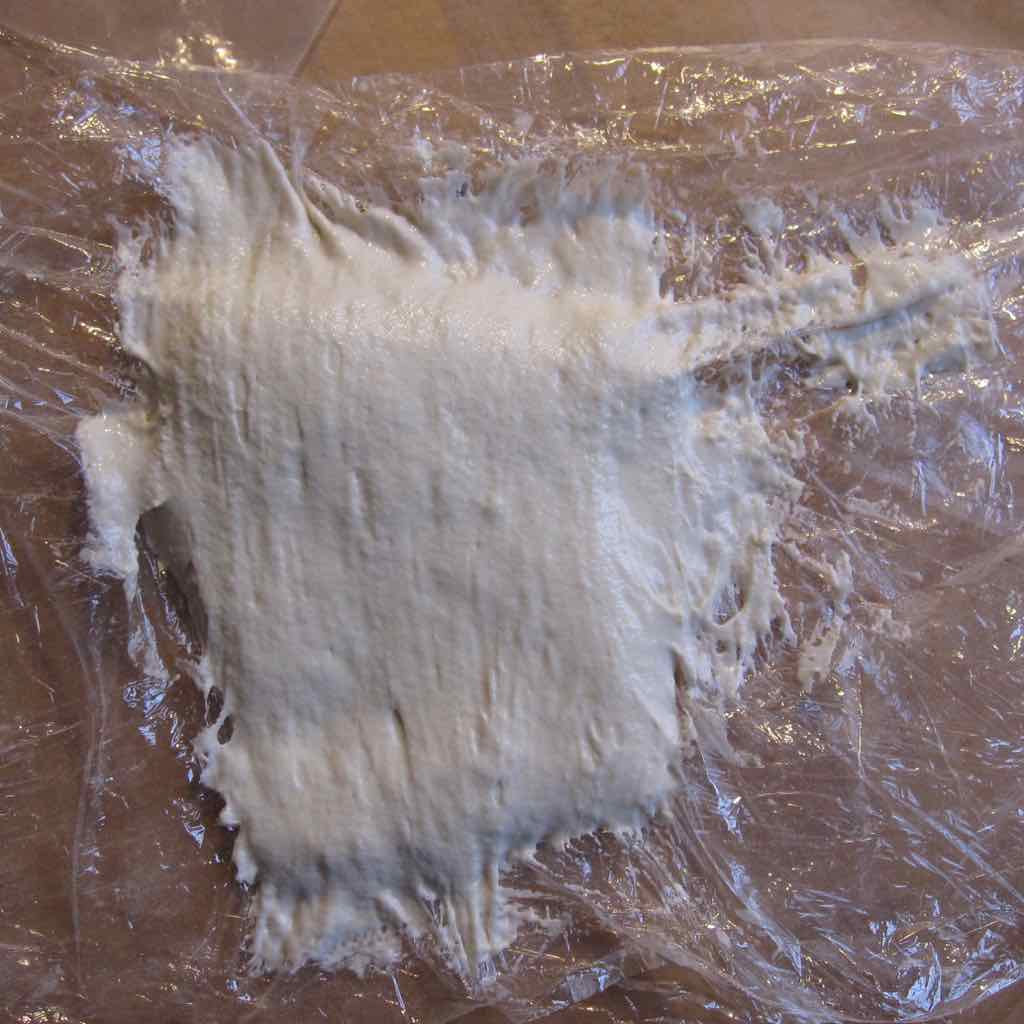
Testing Notes: This was underwhelming. It was simultaneously gummy and crumbly, and while some additional kneading helped with that, it still dried out very fast and became powdery. It was stiff and hard to work with, and while it was very smooth and white while working with it, it dried very off-white (of course, white glue doesn’t dry white) and despite my efforts had tiny but visible lumps of cornstarch. If you decide to try this I would recommend sifting the cornstarch, mixing it a portion at a time into the glue, kneading throughly, and using immediately. It will stick to whatever you lay it on to dry so make sure that’s something like a plastic bag or plastic wrap that can easily be peeled off.
Glue, Flour, and Cornstarch
Ingredients: 1 part each white glue and water, 2 parts each flour and cornstarch.
Instructions: Combine wet and dry ingredients separately and then mix together and knead on floured surface.
Testing Notes: WOW was this soft. Like overwet bread dough soft. And sticky as all get out – I could hardly knead it. The next day when I opened it up it was quite smooth, but far too wet to do anything with.
Hey, you made it to the end! You should get a prize. I don’t have a prize for you, but you should get one.
I really loved that u put all those recipes in one place. Thanks. I’m wondering if you have ever heard of an air dried clay that has hair conditioner in it.? I saw it somewhere and forgot to save it .
I’m glad it’s useful to you! I’ve never tried a recipe with hair conditioner, but it looks like one part conditioner or lotion + two parts cornstarch is a common mixture. You’ll also see it listed as a soft play dough, so I was skeptical, but those recipes have a larger proportion of conditioner/lotion. This was a good video for it: https://www.youtube.com/watch?v=XWxnmA6mF7Q
Maybe I’ll have to try it out too!