A little glamour in the morning

I’d been wanting a new lightweight robe for a while. My current one was a friend’s big pajama shirt originally, with the sleeves shortened. While it had a lot going for it, it wasn’t very long and it was flannel, so it was fairly warm. I was looking for something equally light or lighter and with a bit more coverage.

bathrobe, hanging up

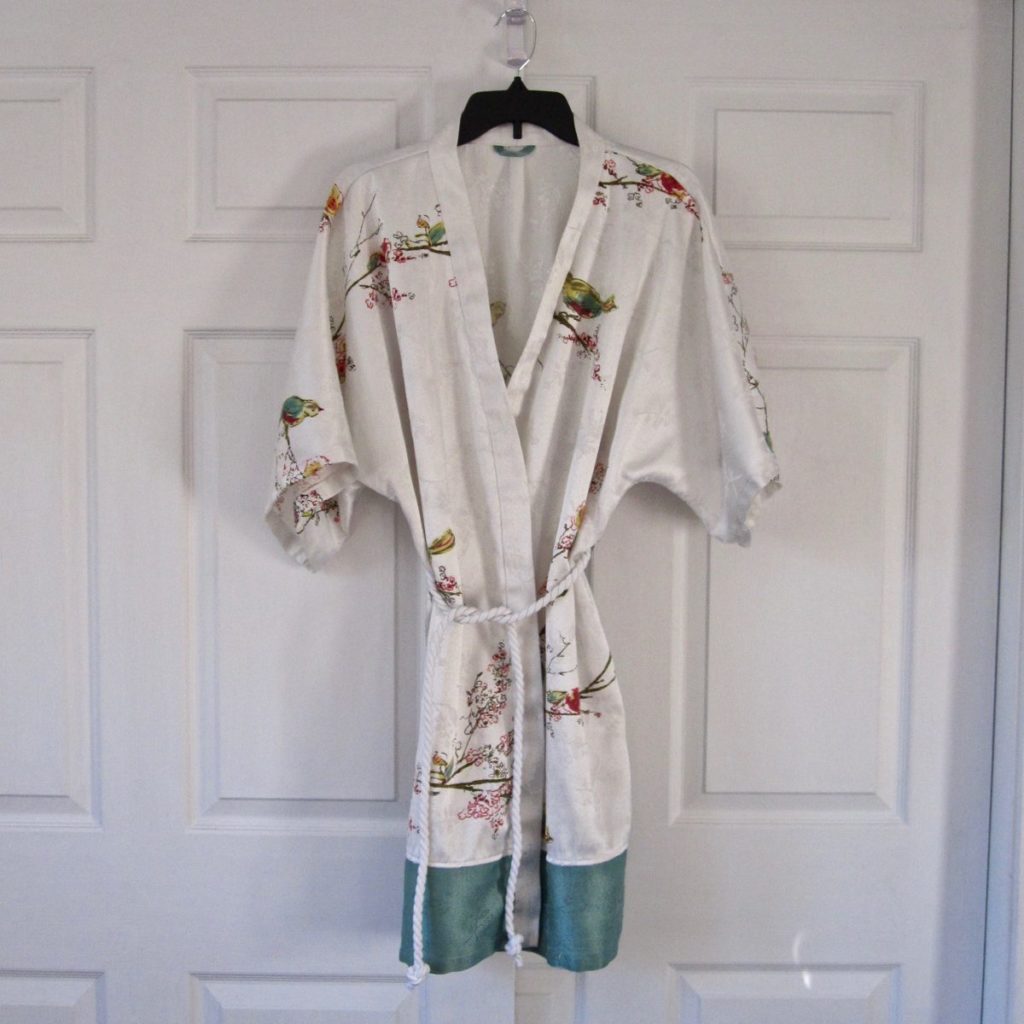
My first thought was to use up some of my excess stash by patchworking a bunch of fabric together confetti-style and using it to sew a robe. Such a robe would take a long time to make, though, and need to be double-sided or else have a million exposed raw edges. Before I ever got started on that project we went to the thrift store. After picking up a crayon-colored dinosaur bedsheet I found a beautiful fabric shower curtain.

shower curtain laid out

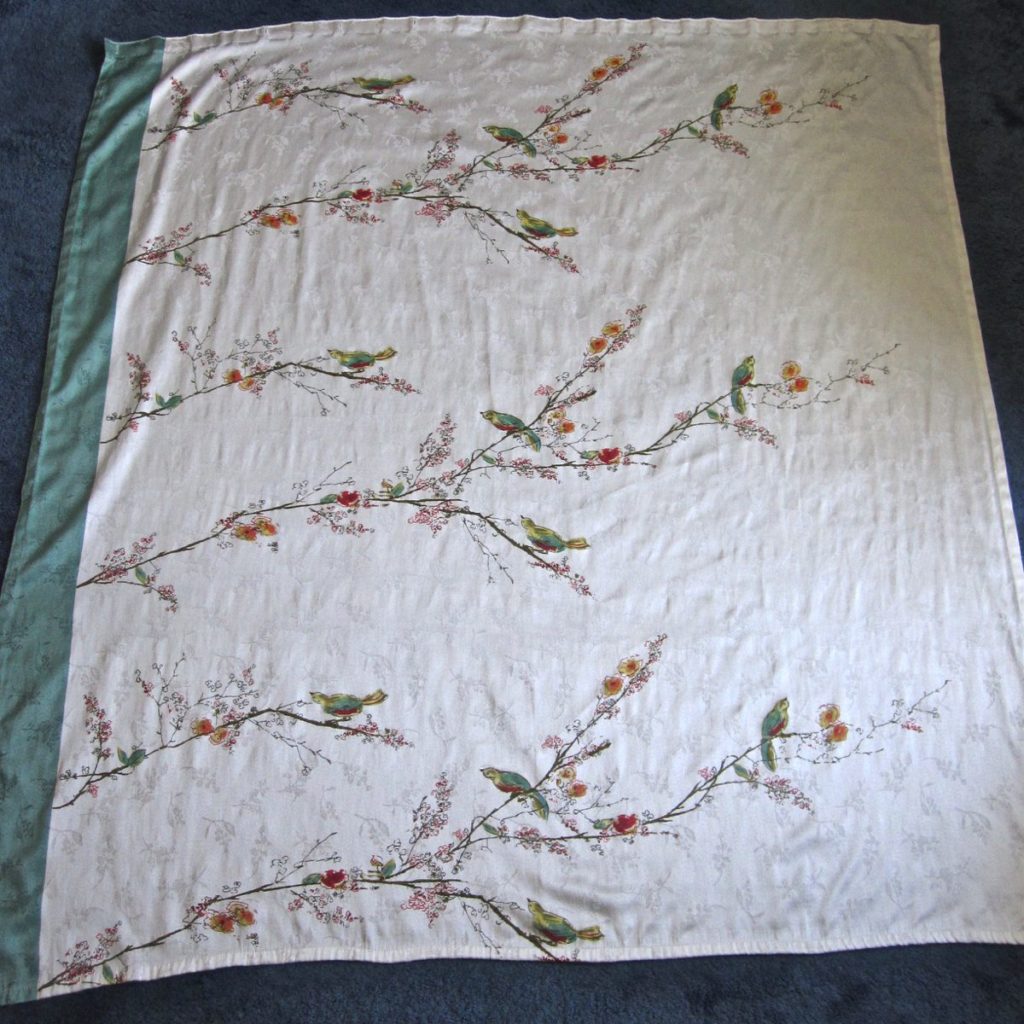
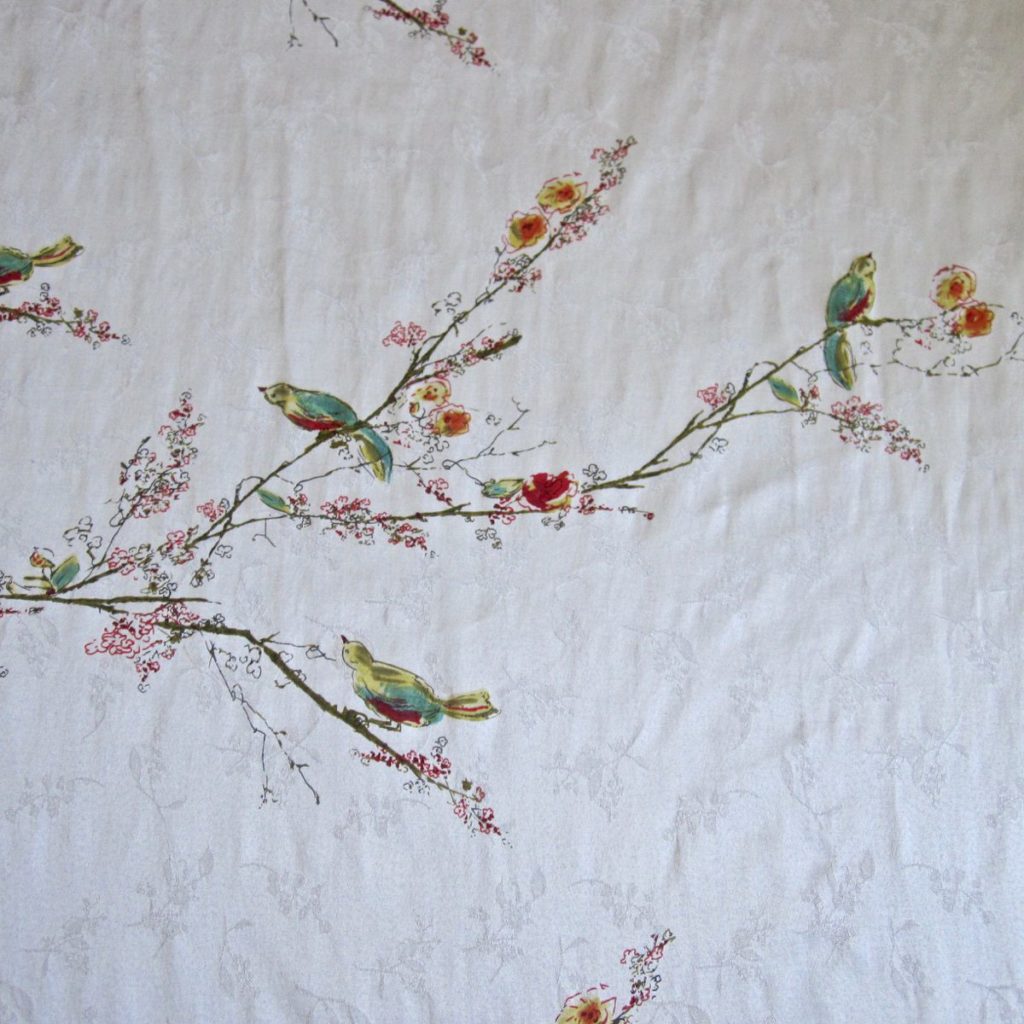
It had a little fade on the edge of the teal band but otherwise no damage or discoloration. And let’s get a closeup on those branches.

shower curtain detail

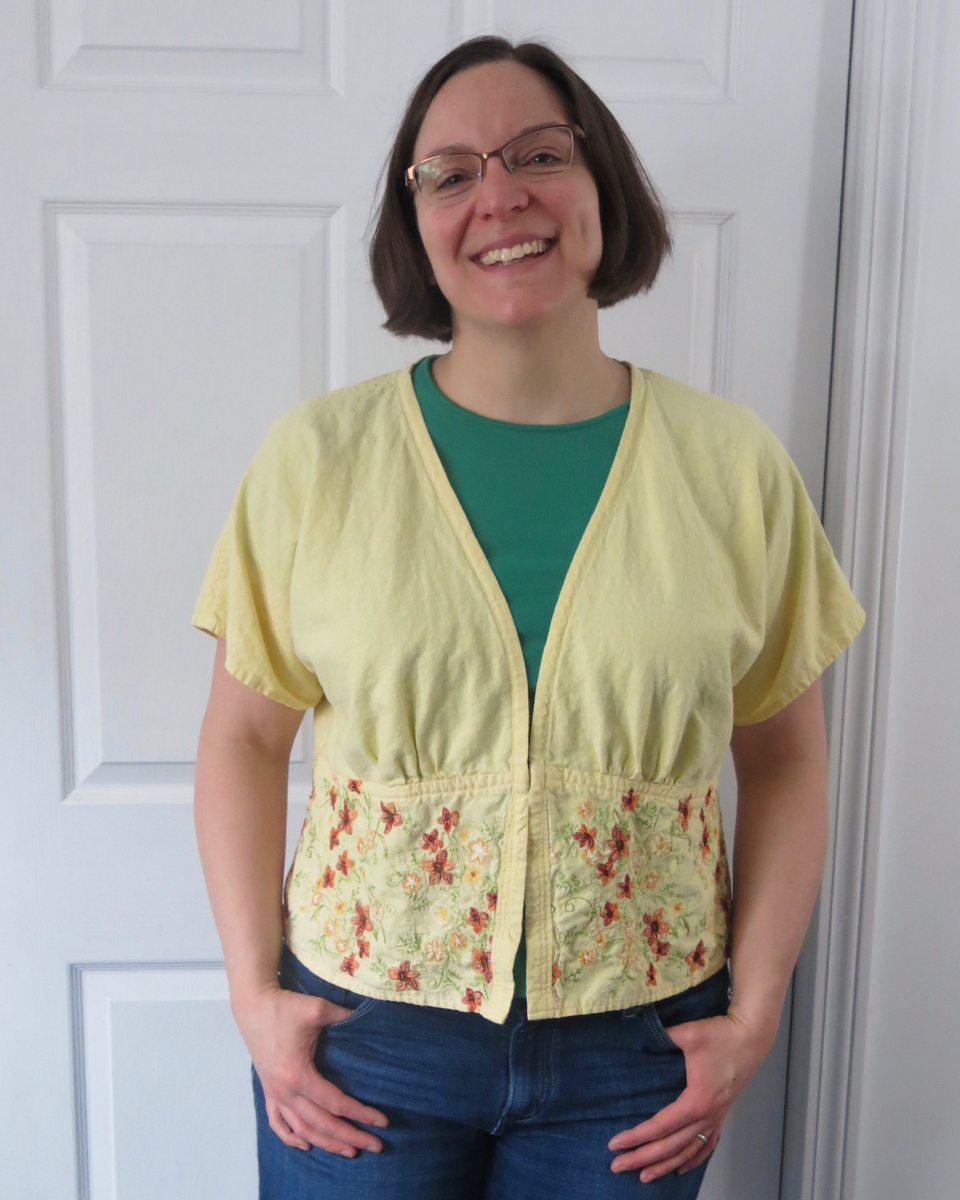
So lovely! I used it for the same pattern I would have used with the pieced robe idea, previously used for my beloved bird jacket. The back of that jacket is in two halves, perhaps because the kimono-style sleeves make it hard to fit the full thing on a standard fabric width, but I joined them into a single piece (making it slightly wider in the process – I box-pleated the extra in at the neck). One advantage to using a shower curtain is that you’d rarely find a standard fabric with a design this large.

bathrobe on, from the back

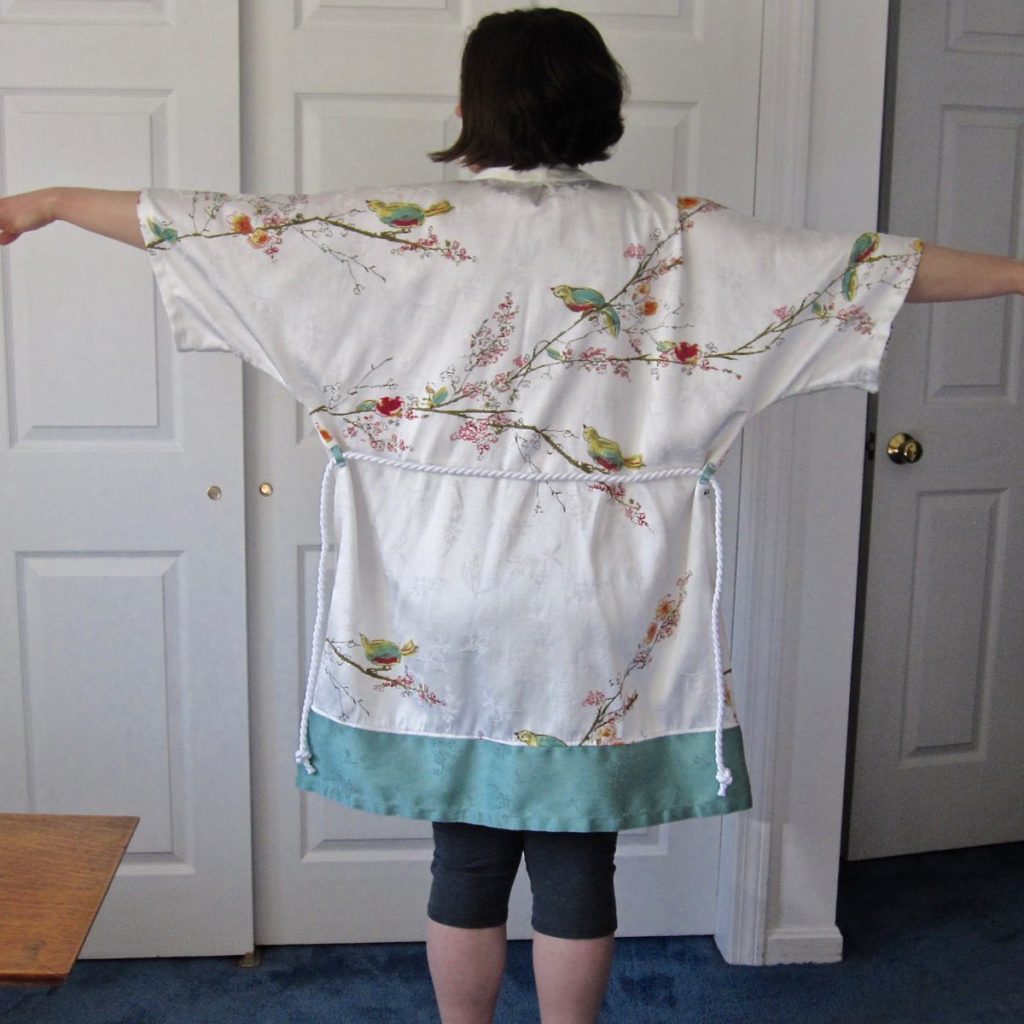
I was only able to extend the pattern pieces by about an inch and a half, but I added the teal strip onto the bottom and finished a good six inches longer than the pattern. Plenty long for me. The leftover fabric from the opposite side of the curtain made the front edge band, and leftover teal became belt loops and a hanging loop at the top back. I bought the belt cord new.

bathrobe on, from the front
Professional bedhead. Do not attempt.

Every once in a while you start a project with an idea of how good it could be, and the project exceeds your expectations. I’m thrilled with this robe!

Shrugging it up

Over the summer I sewed a lot. Clothing items, from commercial patterns – each of those somewhat rare for me (aside from boxer shorts). Specifically, I made myself a collection of lightweight shrugs and jackets to keep in my desk drawer for when I’m just a little cool at work. Once the weather got cool enough that a heavier cardigan was part of my all-day outfit, I brought the jackets home for a wash and a fashion show. Then it rained every single weekend until winter, so here we are.

The first one I made may seem familiar – or not, since it was five and a half years ago that I blogged a photo of some lovely embroidered fabric, matching thread, and tiny matching buttons, with the announced intention of making myself a summer hat with them (and that was more than two years after I posted that photo on Facebook, before I ever had this blog!). I did give an update on the project, but that was still four and a half years ago. In June I came back to it, made another muslin, and realized the probability of getting something worth the very large amount of effort remaining was exceedingly low. I have a wide-brimmed straw hat, and while it’s a bit of a sail when the wind picks up, it’s probable that any other hat that shades me as much as I’d like would also have that problem. Anyway, without further ado:

yellow coverup-style jacket

The pattern was for a swimsuit cover-up (Simplicity 4192); I changed the front tie to a hidden hook and eye. It’s not terribly “me”, to be honest, and after the photo it went into a bag for donation, but no matter.

The second one, this and the first both sewn in July, has given me a good bit of use: a shrug out of very lightweight navy fabric I picked up at the Sew-op. There was a ton of that fabric and I had first made a shrug of the simplest type: essentially a tube with a lengthwise slit down the middle for your shoulders. That was pretty sloppy-looking on, though; I think that sort of shrug is better made of stretchy fabric so it can be smaller around. This second one was assembled from multiple pieces of fabric and has much more shape.

navy shrug-style jacket

Third – I was cooking! – was also made from Sew-op fabric. Unfortunately the fabric had many flaws, tiny pinholes to big tears, and I didn’t notice all of them before cutting out, but I adore it and its funny little birds. Believe it or not, this jacket was out of the same pattern as the navy shrug (Butterick 5529). I made it in August.

black and brown bird fabric jacket

I have yet a third Sew-op fabric to make into a jacket, from a third pattern, but the jacket’s structure and the limited amount of fabric will require me making a muslin to adjust the pattern ahead of time. That would merit a separate post even if I had already made it. Later!

Jeans mending advice

jeans drawing by heidi jergovsky on pixabay I’ve mended a lot of jeans over the years – my hubby tends to tear a knee out midway through the jeans’ lifespan, and my jeans simply wear thin before I feel like they’re done with this world. Here’s some advice from my experience.

Tears:

The hubs’ jeans tend to get washed between injury and repair, so the edges of the tear fray out. My method is this:

  • cut out the frayed part
  • cut a large patch from matching material (saved from former jeans)
  • pin the patch onto the inside of the jeans (much less noticeable)
  • zigzag the edge of the hole onto the patch (prevents more fraying)
  • stitch with the grain of the fabric, in the ravines, with a somewhat shortened stitch length, in two rounds. First every 6 ravines or so in a large area centered on the hole (you’ll have to stitch across the ribs to get between ravines, but it will be minimally noticeable), and second every other ravine or so in an area that extends only an inch or so from the hole. This secures the patch out into good fabric as well as giving it a very sturdy connection in the weak fabric.
  • trim the excess patch fabric from the inside of the jeans.

Hubby’s jeans also tend to get holes just above the bottom hem, and I follow a similar but far less thorough method for those holes.

Wear:

My jeans rub thin, mostly on the inside of the thighs. Weakening of the fabric over a general area means the remaining life is limited, but can still be extended. Here’s this process:

  • iron fusible tricot onto the inside of the jeans, covering the worn area and extending well into the good. Tricot is good because it is very light and stretches but still gives you a solid foundation for your stitching.
  • stitch the tricot in place (otherwise wear and washing will peel it up) with straight stitching as far out from the worn region as you can stomach. Well-matched thread, short stitches, and stitching with the grain of the fabric will minimize the visibility.
  • cover the worn area, into the good again as far as you can stomach (probably not as far as with the straight stitching), with wide zigzag; be more thorough the more worn through it is.

With “as far as you can stomach” don’t be shy! You have to get well into the good fabric and be thorough over the bad or you’ll just have to do it again sooner. Stitching within the worn fabric is a double-edged sword – it holds it but simultaneously perforates it. Getting into the good fabric is a necessary anchor for your stitching and tricot.