Silver tie event

Remember this?

silver and velvet, ooh la la

Burly Hot-Pants has been with me or one of my former roommates since my senior year of college. I have no idea what sort of action figure he is, except it is not one of the major brands. I bought him at Wal-Mart, I think, and he became our mascot. We had photo shoots like “Burly Storms the Capitol!” (of Virginia) and “Burly in the Lost World!” (after Cha Cha brought home a bucket of plastic dinosaurs). We immediately gave him dark roots and tattoos. I don’t remember when we cut his pants off into short shorts, which eventually died and had to be replaced with new short shorts (those, I made in summer 2005). Originally he hung from the wire shelf in our fridge, a Cha Cha innovation, with a gun in his free hand. The guns disappeared long ago, leaving him only his boots and ammo belt. Near the end of senior year I bought him some Barbie accessories, though the only one that survives is a pearl necklace.

For Nickel’s wedding he acquired a silver Sharpie bow tie, and the necklace became a bracelet or anklet. That may have been when we gave him lipstick and nail polish, though we may also have done that earlier. Alas, the lipstick bled all over his mouth.

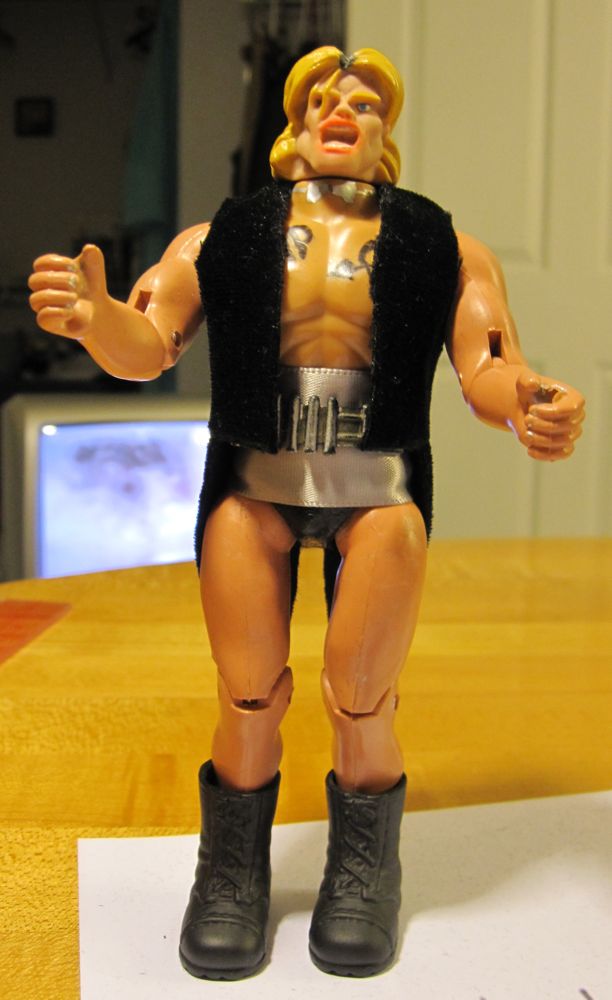
Naturally, he needed some new accoutrement for Dana’s wedding. What would be more natural than a Chippendales-style tuxedo jacket and cummerbund? He ditched his brown hot pants altogether in favor of his black plastic codpiece, but kept the boots and ammo belt (you never know what situations may arise at a wedding).

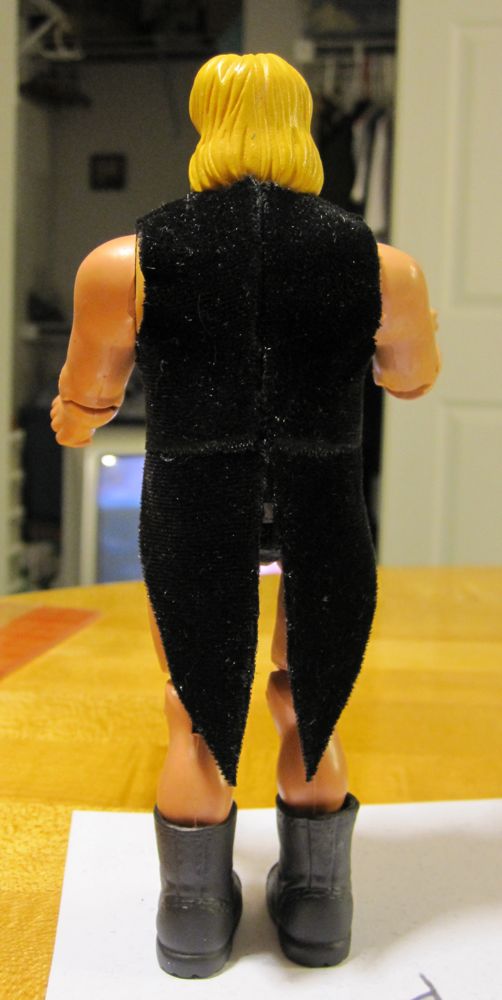
As BHP’s personal tailor and photographer, I present to you: Silver Tie Burly.

tux from front tux from back
You may be able to see in the back that I was watching Quest for the Mighty Sword, the greatest movie ever made.

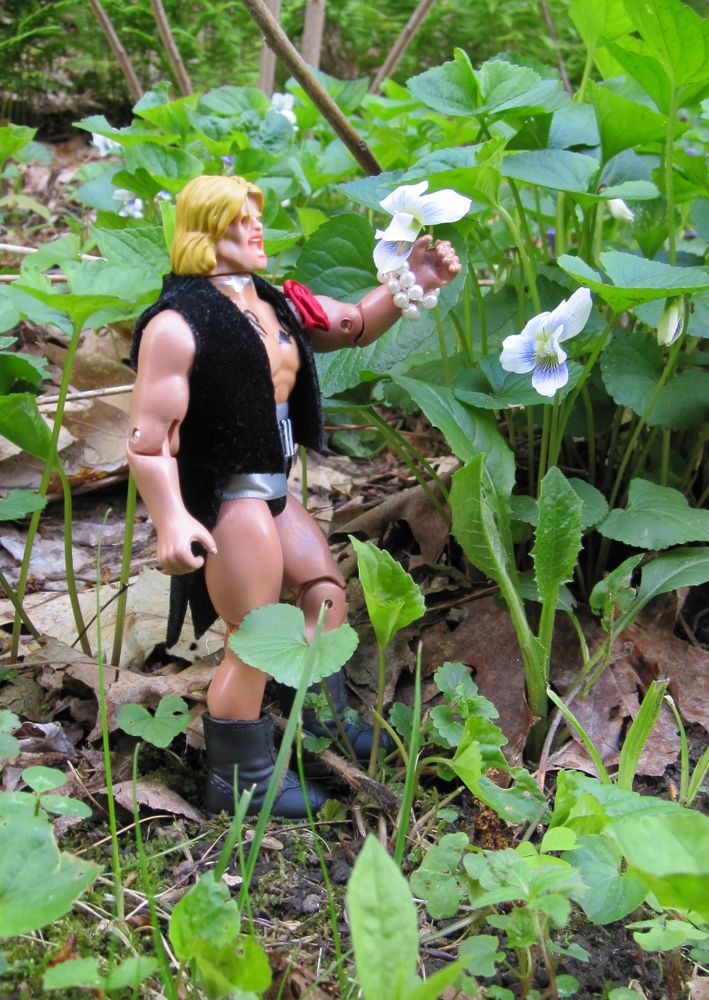
As tough as he is, Burly has a softer side.

Burly's softer side

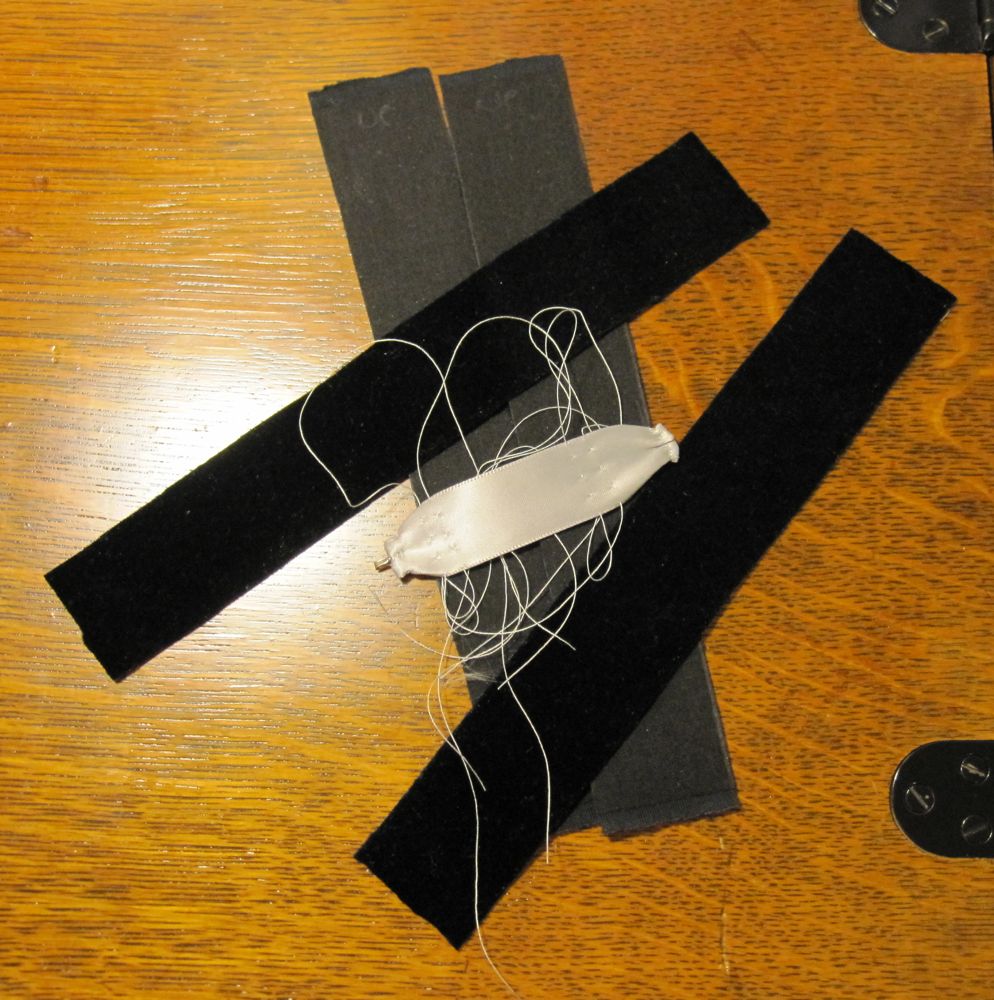
As you can probably tell, the cummerbund in the sneak peek picture was not the final cummerbund; I ended up just taking a length of ribbon and Stitch Witchery-ing velcro on each end.

Construction notes: I started by cutting a straight line across a strip of velvet and lining the bottom up with the top of BHP’s codpiece and the inside with the center of his chest or back, and gradually cutting the front and back pieces to shape. I used fusible interfacing both to stabilize the velvet and in place of sewing the seams (so it is far from the sturdiest item I’ve ever made). After cutting four pieces, to which tails would be attached, I realized it would be better to make two pieces that went around under his arms on each side and only had to be ironed together at the shoulder and center back. I also realized the heavier of the two interfacings I’d gotten to try (both Pellon, but one a lightweight standard-style interfacing and the other a sheer tricot) was the only one that worked – the tricot had too much stretch, which would be desirable in other settings but not when using it like tape. So I cut new pieces from wider velvet and used my tailor’s ham to aid in ironing (I could have used a smaller one! Perhaps I’ll make one). For the tails, I attached a strip of velvet to one side of the back hem, cut it to a nice shape, put another piece against it wrong sides together and cut it to match, and then ironed it on. I decided not to attempt a collar; I rather like the military-vest look of the front as it is, but admittedly the omission had more to do with thinking it would be difficult.

detritus

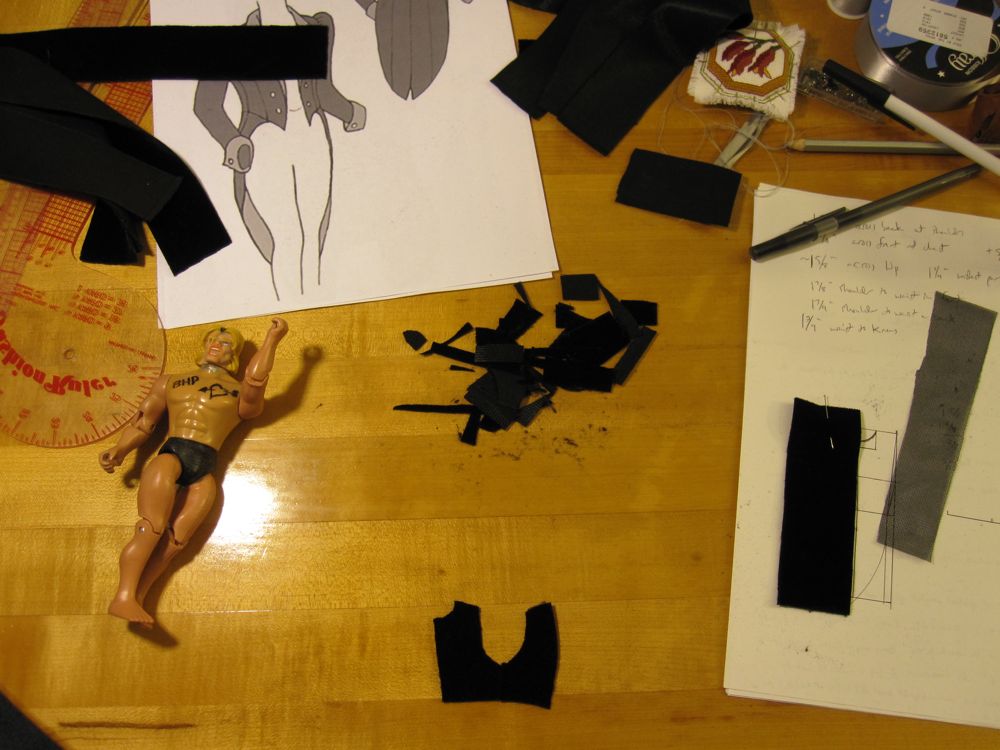
In the picture you can also see my primary inspiration.

Pinstripes

One of my college roommates is getting married on Saturday, and she and (especially) her fiance are big Yankees fans. I had thought of making them fabric coasters already, and in fact the Spider-Man coasters are for them (she used to shoot us with webbing in the dorm: “fffshhh! you can’t move for an hour!”). I got more ambitious, though, and added Yankees coasters to the list.

Edit: It has come to my attention that my ex-roommate is actually a Mets fan, and all the Yankees-related activities and decor I have seen have been her selflessly giving to her beloved. I hope she likes the Spider-Man coasters.

Navy blue fabric markers are hard to find. I thought I would have to go with acrylic paint, but finally found some at Create For Less, where I was glad to see the purchase multiple was just 1. A Yankees logo was easier to find; I decided on an old one because it was more interesting.

I acquired the logo before I was sure what I would do with it, so I printed it out 4-up at a reasonable coaster size. After my marker acquisition I traced the design onto strips of fabric that were two coasters big. At this point I hadn’t decided whether to make two coasters or four.

tracing the logo

After pondering the fact that I already had two Spider-Man coasters for them, and four of “ordinary” fabric, I thought a total of eight, four themed and four not, made more sense than a total of six, all themed but not half-and-half. After heat-setting the marker, I ironed on interfacing and sewed pinstripes. If I’d paid attention I would have lined the pinstripes up to mesh with the edge-stitching better (read: at all), but they turned out okay. Here they are ready to sew and ready to turn:

pinstripes inside-out

After a trip through the laundry and a press for neatness, they were ready to wrap! Here’s the whole family.

the whole group

Fabric coaster tutorial

A friend had a half-dozen or so thin fabric coasters lying around his apartment. He had bought them on Etsy and wished for more. They absorb condensation, cannot damage or be damaged by laptops and books laid on them, and aren’t thick enough to make such objects sit at an angle.

I have subsequently made a lot of these coasters, in various styles. They are extremely easy and utterly customizable. Whatever size square you want, add an inch in each direction to allow a half-inch seam allowance: a 5″x5″ fabric square will give you a 4″x4″ coaster, which is about the right size (the “originals” were 11cm square, which is about 4 1/3″).

Per coaster:
two 5″x5″ squares cotton fabric (matching or non-matching)
two 5″x5″ squares lightweight interfacing (fusible if you like)

Attach one piece of interfacing to the wrong side of each piece of cotton, by ironing on or basting with a long stitch and a 3/8″ seam allowance. “Quilt” each side individually if desired, stitching with a standard length stitch in some pattern you like: diagonal stripes, straight stripes, spiral, concentric squares or circles, freehand, cross-hatch. You may also quilt after putting the sides together. Pin the right sides of the cotton together and stitch with a 1/2″ seam allowance, leaving the middle of one edge open (but stitch all corners). Trim the seam allowance at the corners and turn right-side-out, working the corners to a proper point, and iron, with the fabric at the open edge folded inside. If you have an adjustable needle, move it to the right, and topstitch the coaster with the edge of the fabric lined up with the right edge of the presser foot. I usually start at the far end of the open edge and finish at the near end, so it is stitched across twice.

Some examples:

Spiderman coasters, front and back:

spiderman fabric coasters

spiderman fabric coasters

Inexplicable calico coasters, front and back:

vegas and chess fabric coasters

vegas

I’ve more recently found a blog post on cocktail napkins, which are basically the same as these except without interfacing or quilting, and with rickrack trim. Good ideas get around!