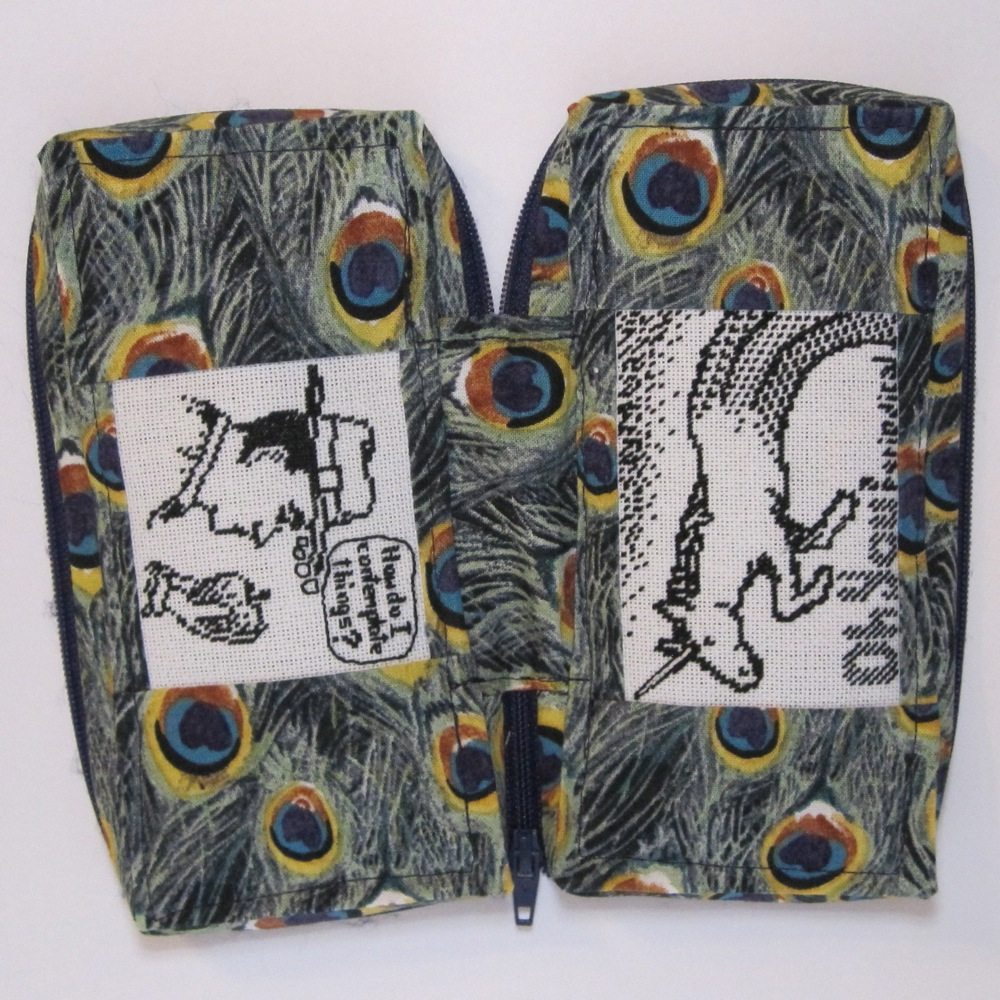
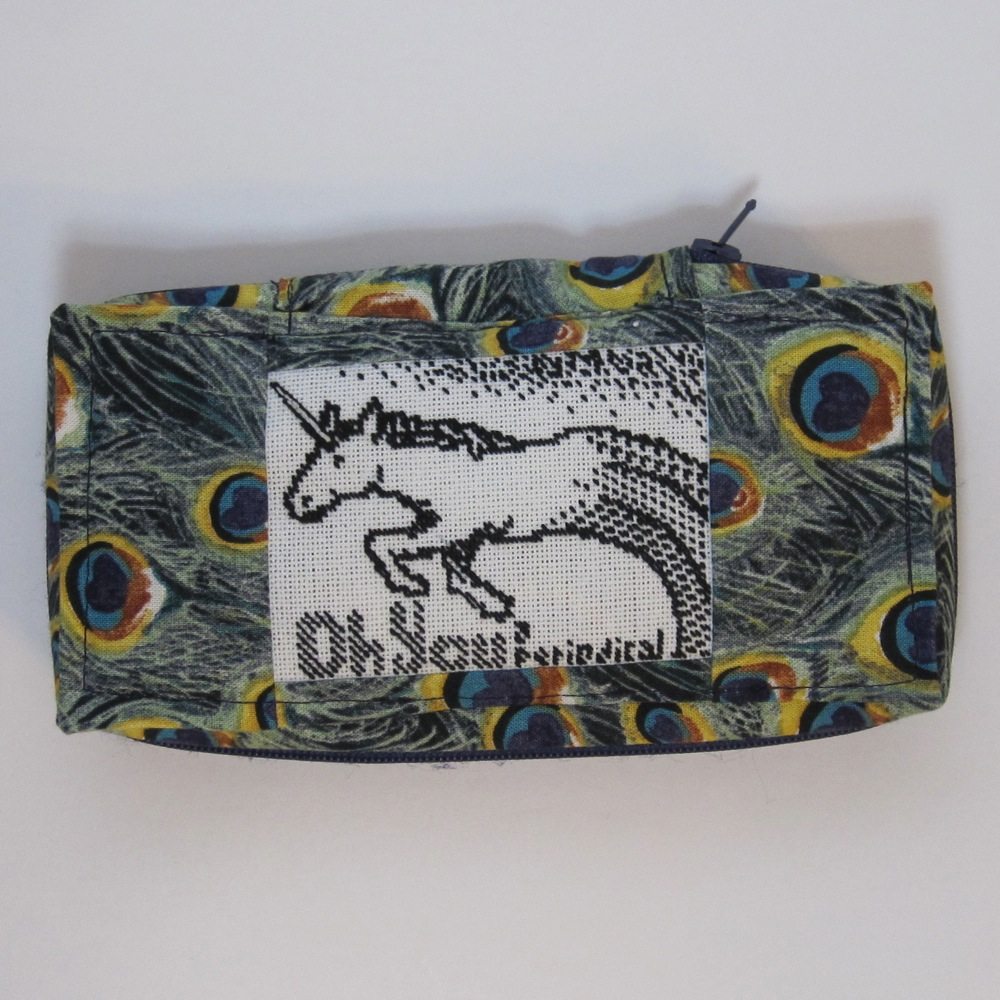
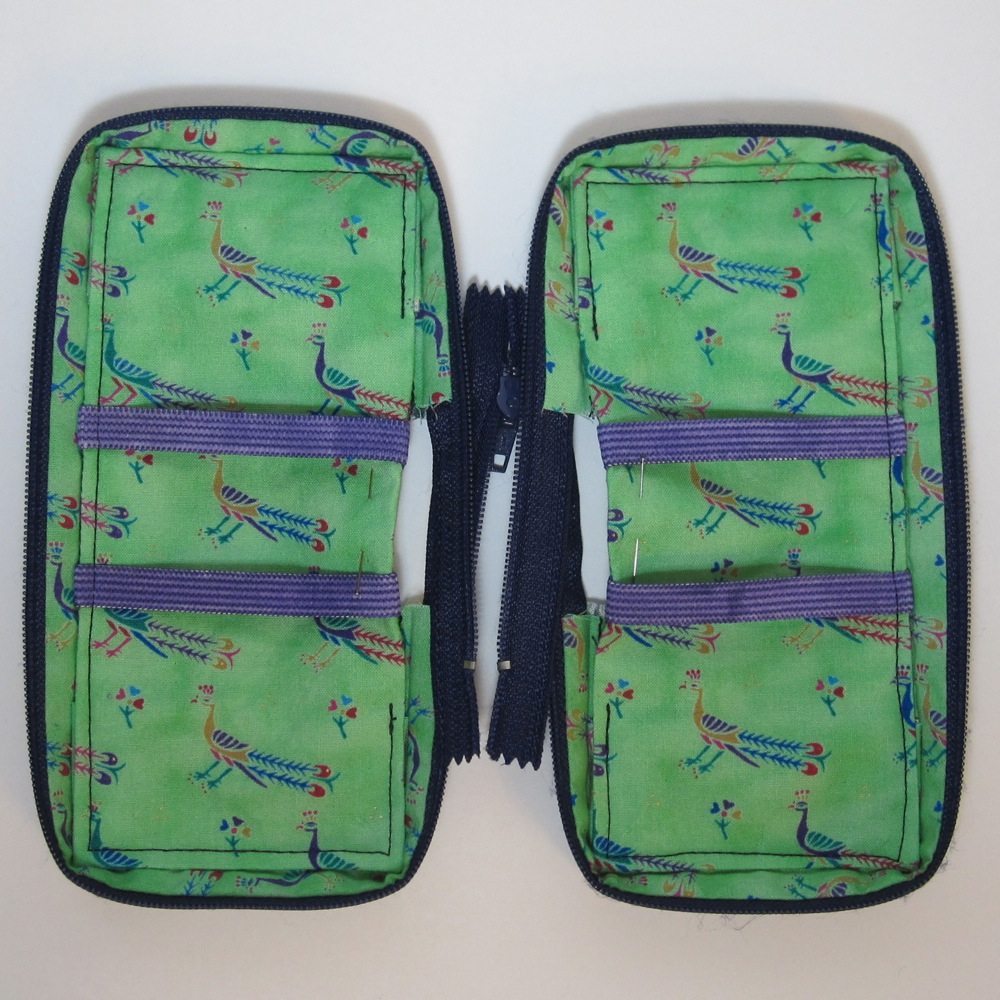
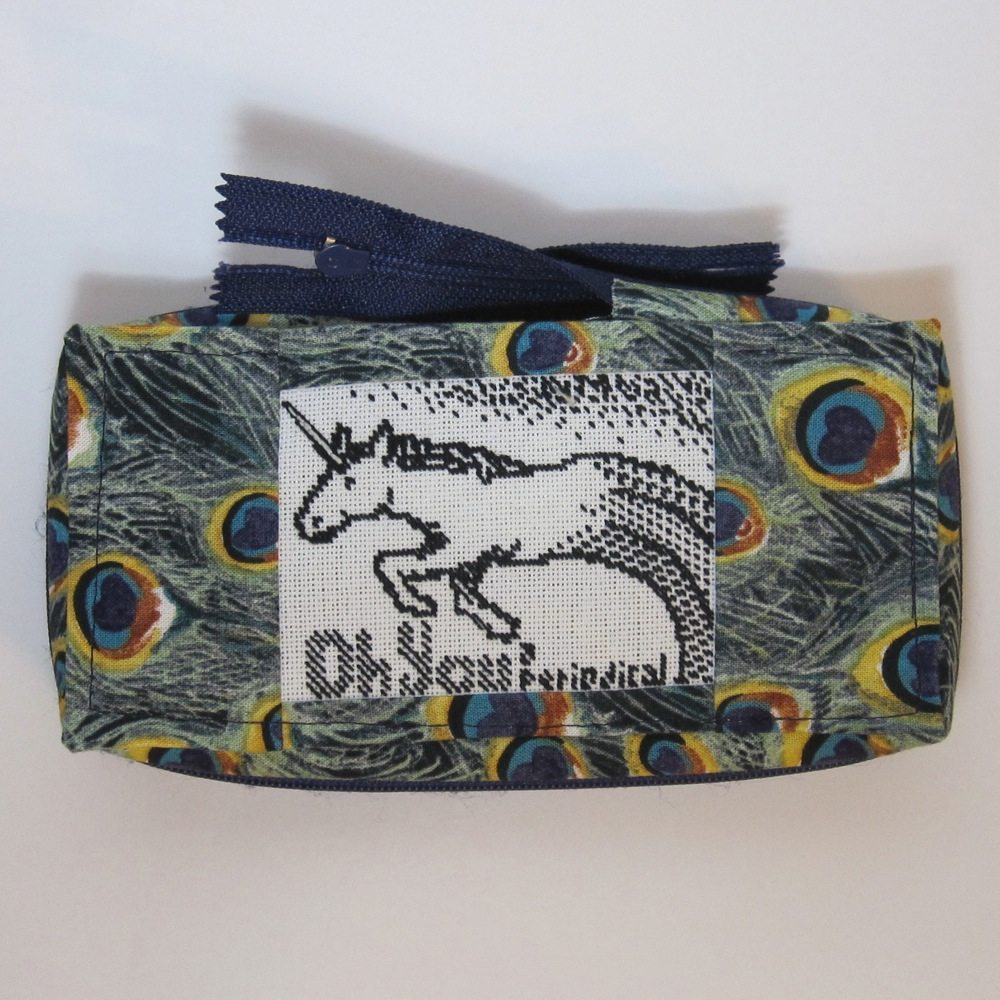
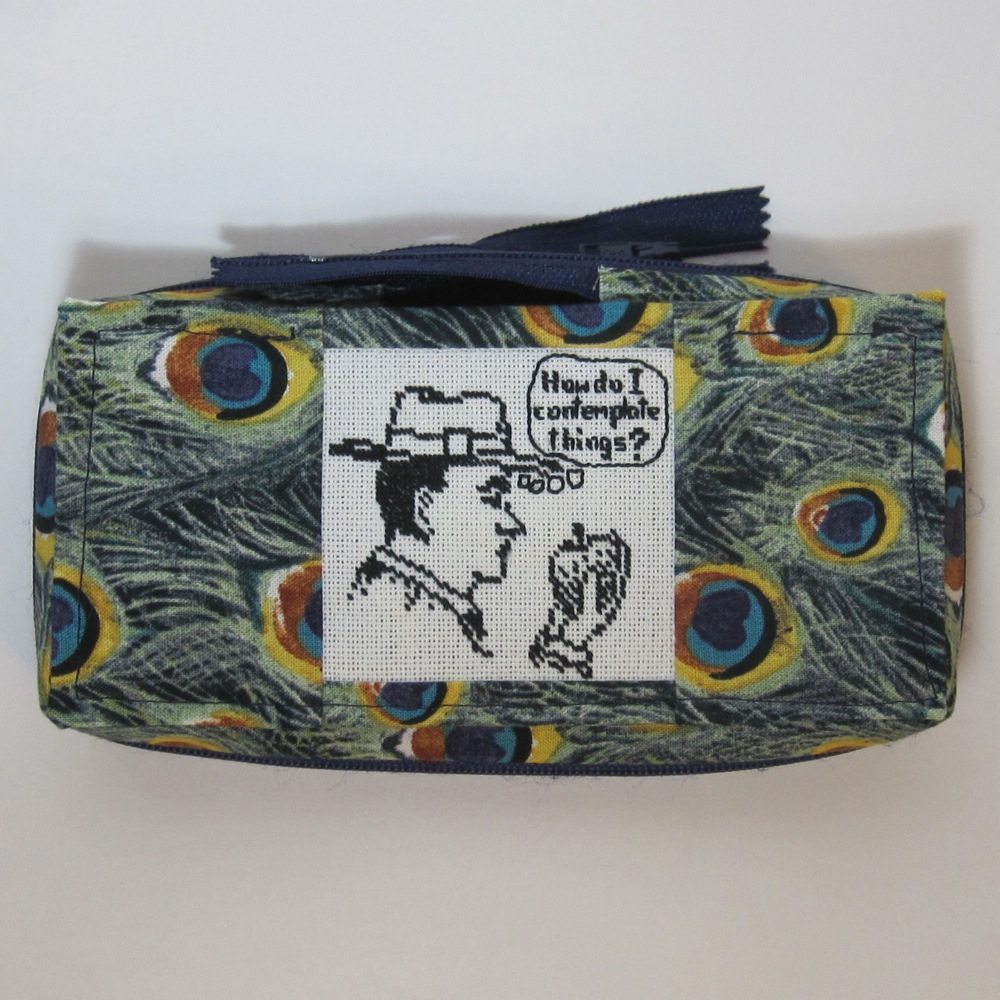
At last! I finished the pencil case for my dear husband, with the embroideries of his comics adorning the outside.
I’ll show you how I did it. I thought it out before beginning, but it was the first one I ever made and shows a certain amount of evidence of that fact. It is approximately 3″ by 6.5″ by 1″.
To make one just like this (sans comics) you will need:
1 zipper, 22″ long (a lot of that was cut off but the overhang was convenient in the making; it must be at least 15″)
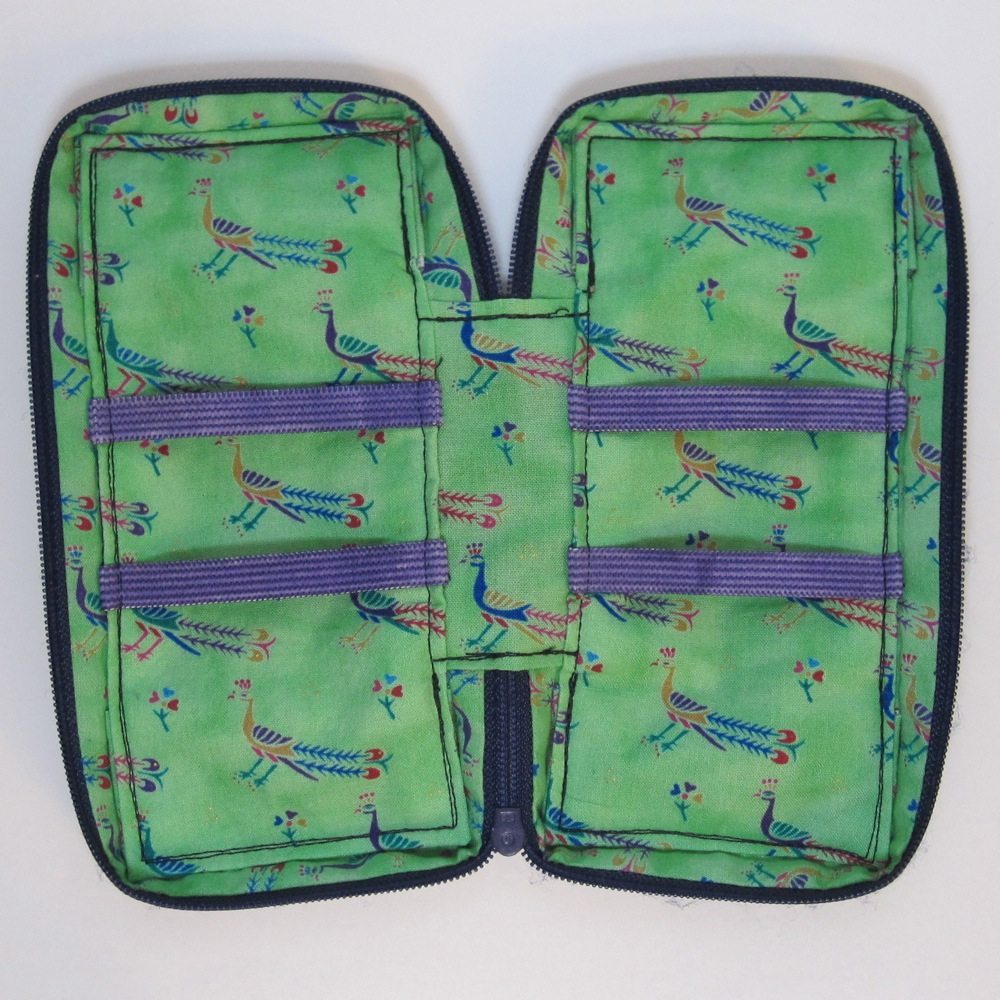
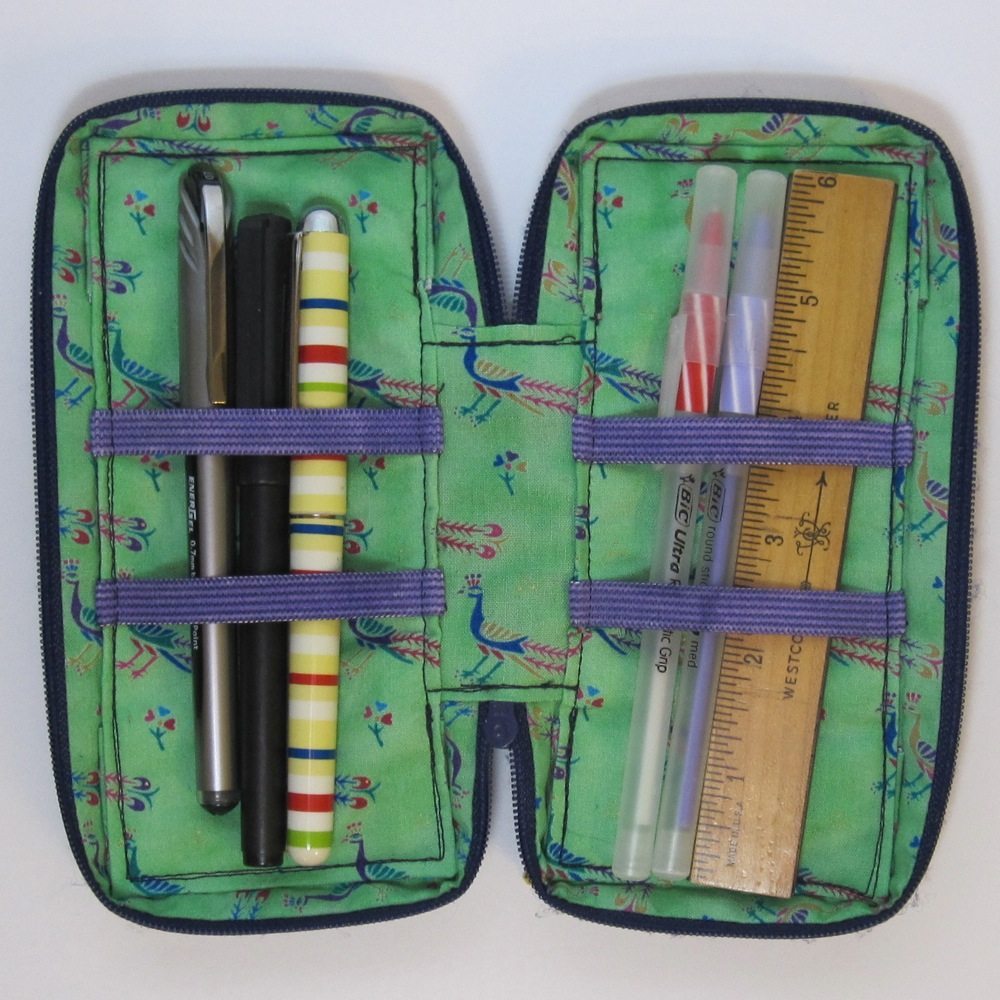
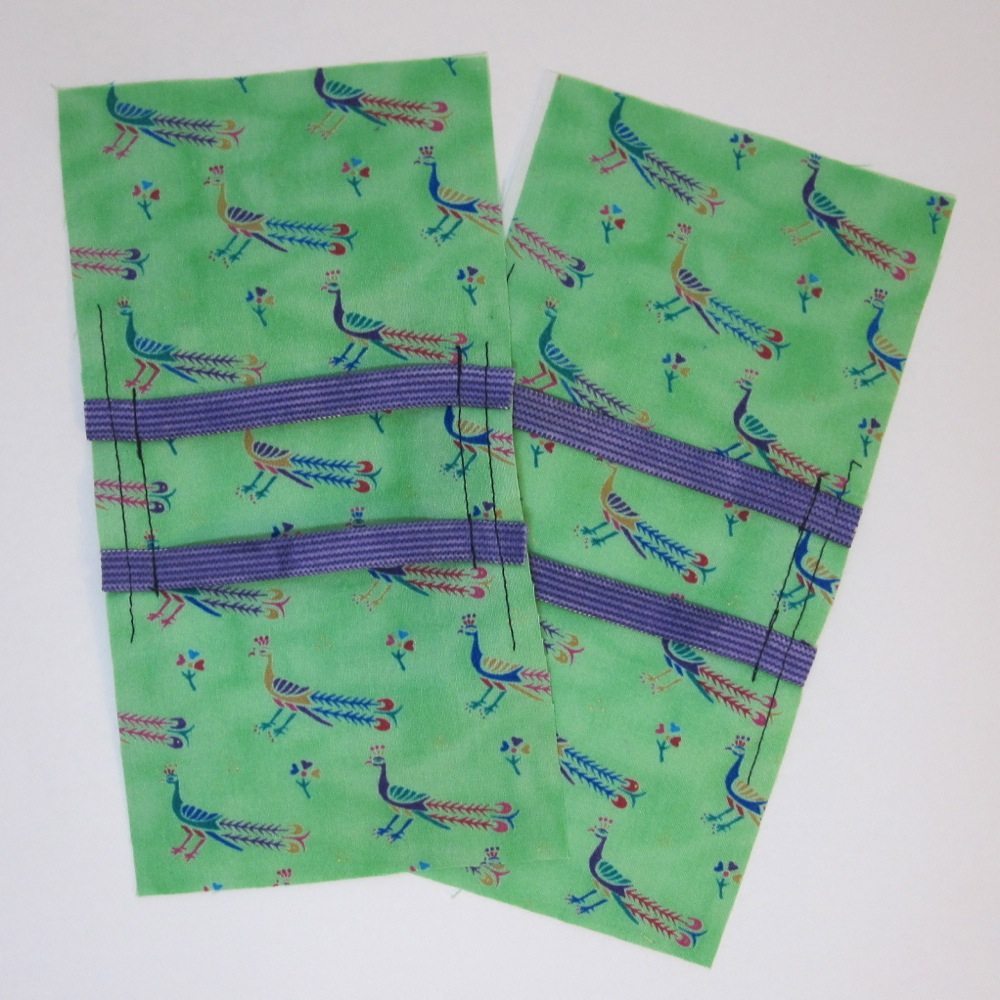
4 strips of elastic each 4″ long (mine was 3/8″ wide and I colored it purple with a Crayola fabric marker)
2 rectangles of fusible interfacing, 4″ by 7.5″ (I used a medium weight)
and the following five pieces in each of two fabrics, one for the outside and one for the inside:
2 rectangles 4″ by 7.5″ (the faces)
2 strips 2″ by 17.25″ (could be as narrow as 1″ and could be a bit shorter also)
1 rectangle 2″ by just over 4″ (if your zipper is closer to 15″ the 4″ measurement here needs to be longer, up to 6″; my shorter measurement was 2.25″ but that wasn’t a good idea)
Face Preparation:
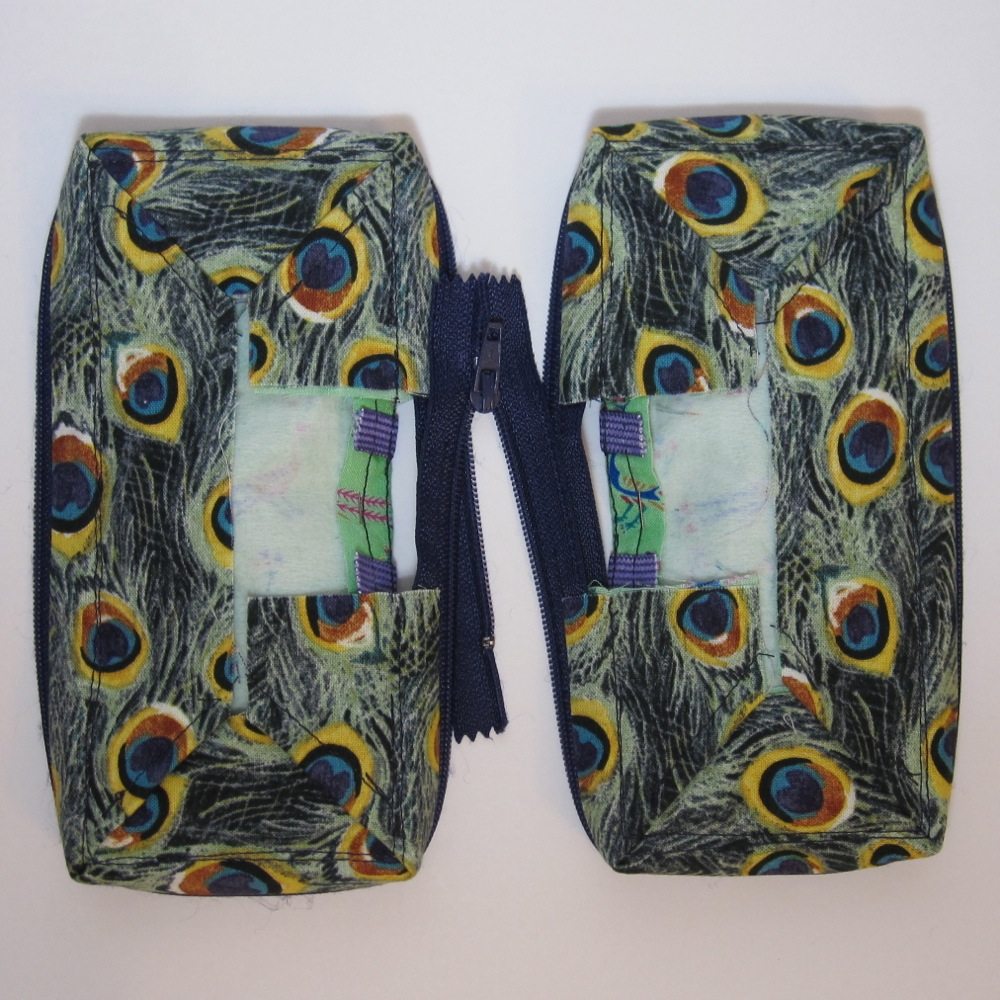
Other than piecing my outer faces, this was the beginning of the pencil case: iron the fusible interfacing onto the wrong sides of the inner fabric faces and then attach the elastic. Pin two pieces of elastic to each side, across the short distance, so they are centered and an inch apart. Stitch at just under 1/2″ from the edge and again at about 1/4″ to hold in place. The elastic can definitely be omitted or replaced with one centered strip, as desired.
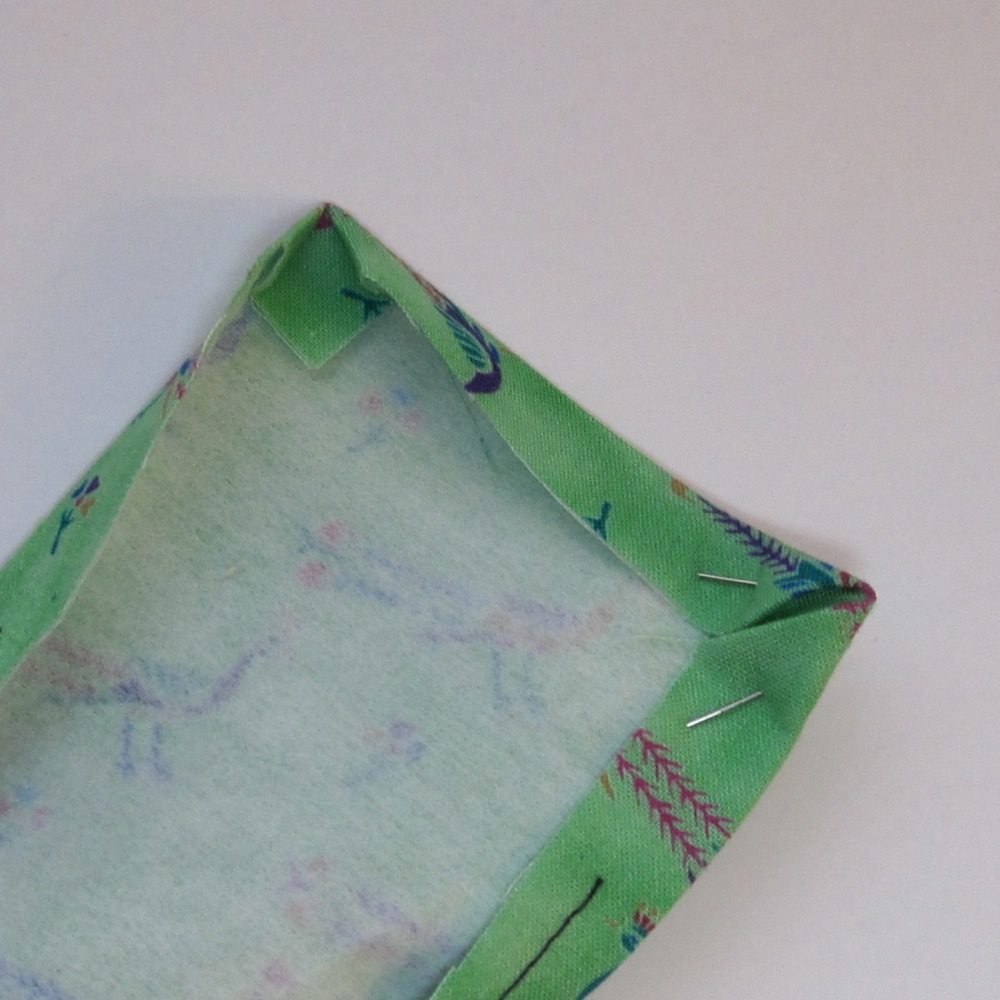
This last step might be postponed until after the zipper is prepared, so you can adjust sizes as needed. With inner and outer faces both, fold the edges to the wrong side at 1/2″ all the way around and press. I like to press the side folds and then open it up, fold in the corner triangle, and then fold the edges down so no exposed raw edges are near the outer fold.
Zipper Preparation:
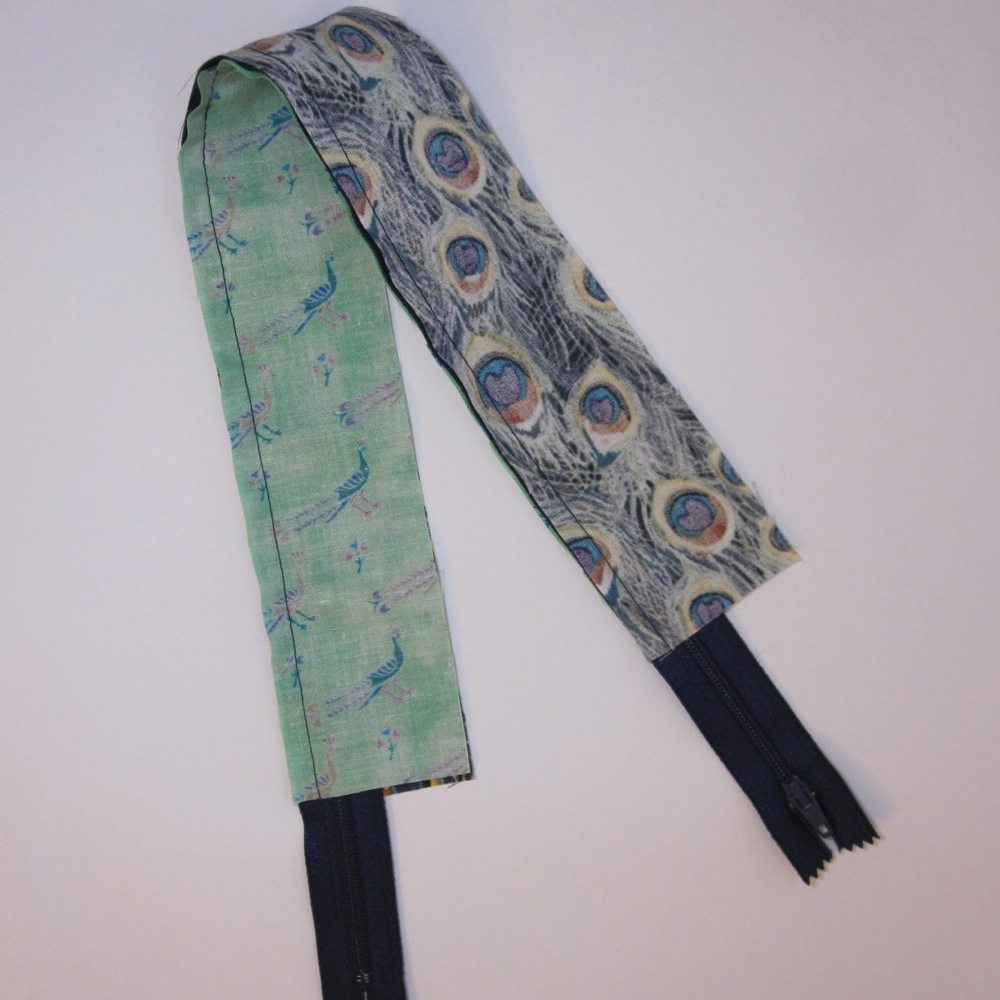
Sandwich the zipper between one outer and one inner fabric strip, right sides facing the zipper and raw edges lined up with the outer edge of the zipper tape. Center the strips on the zipper. Stitch about 1/4″ from the edge – I ran my regular presser foot along the teeth of the zipper with the needle shifted to the left, which was approximately 1/4″. The idea is to have a decent seam allowance while keeping the fabric away from the zipper pull.
Fold both strips out and press, then stitch together at least 1/8″ outside the zipper tape to hold them in place. Repeat this process on the other side of the zipper. Fold strips along edge of zipper tape so inner fabric is enclosed, outer fabric showing, and press a crease along the tape.

To make the corners, mark the center of the strips and then mark 3.25″ away from the center in each direction, and again 3″ beyond each of those points. Omitting the center, you should have four marks, the outer two each 3″ away from the closer of the inner two, and the inner two 6.5″ apart. Pinch at each mark to make a fold perpendicular to the strip, outer fabric enclosed, and pin to hold that fold in place.
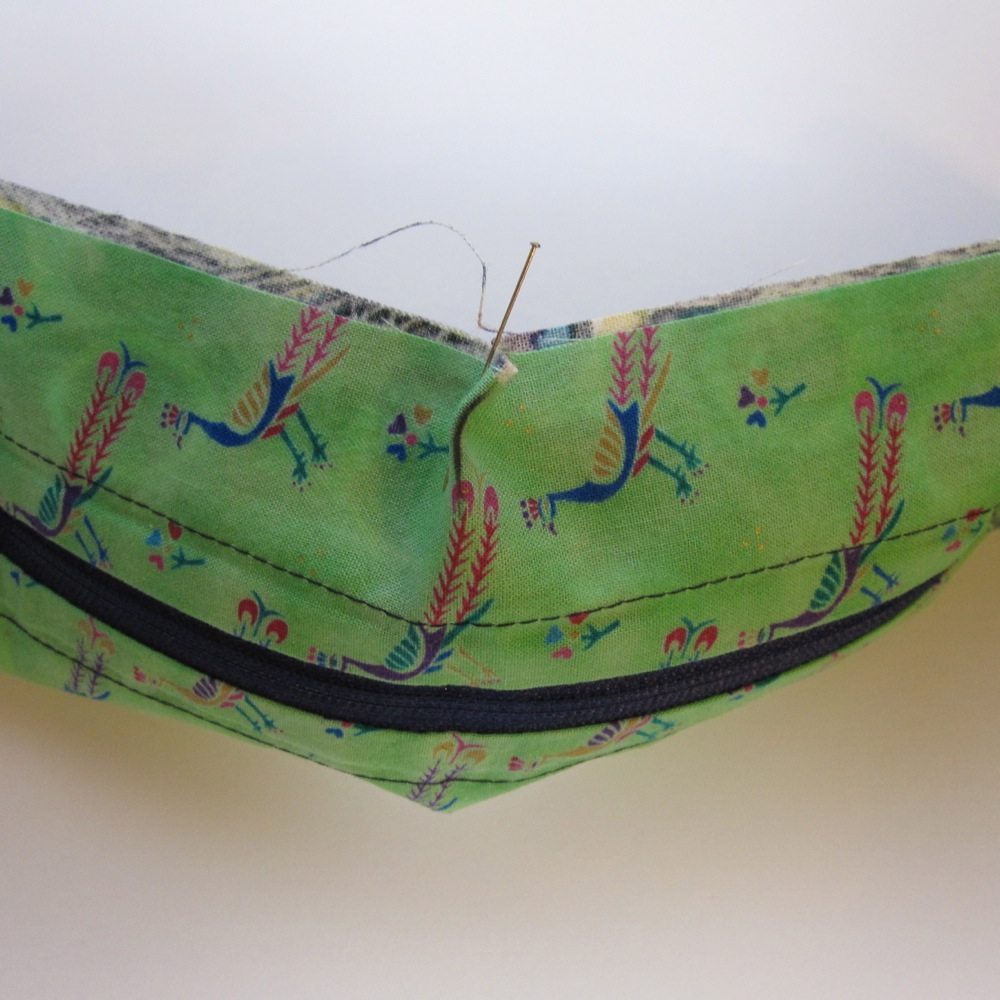
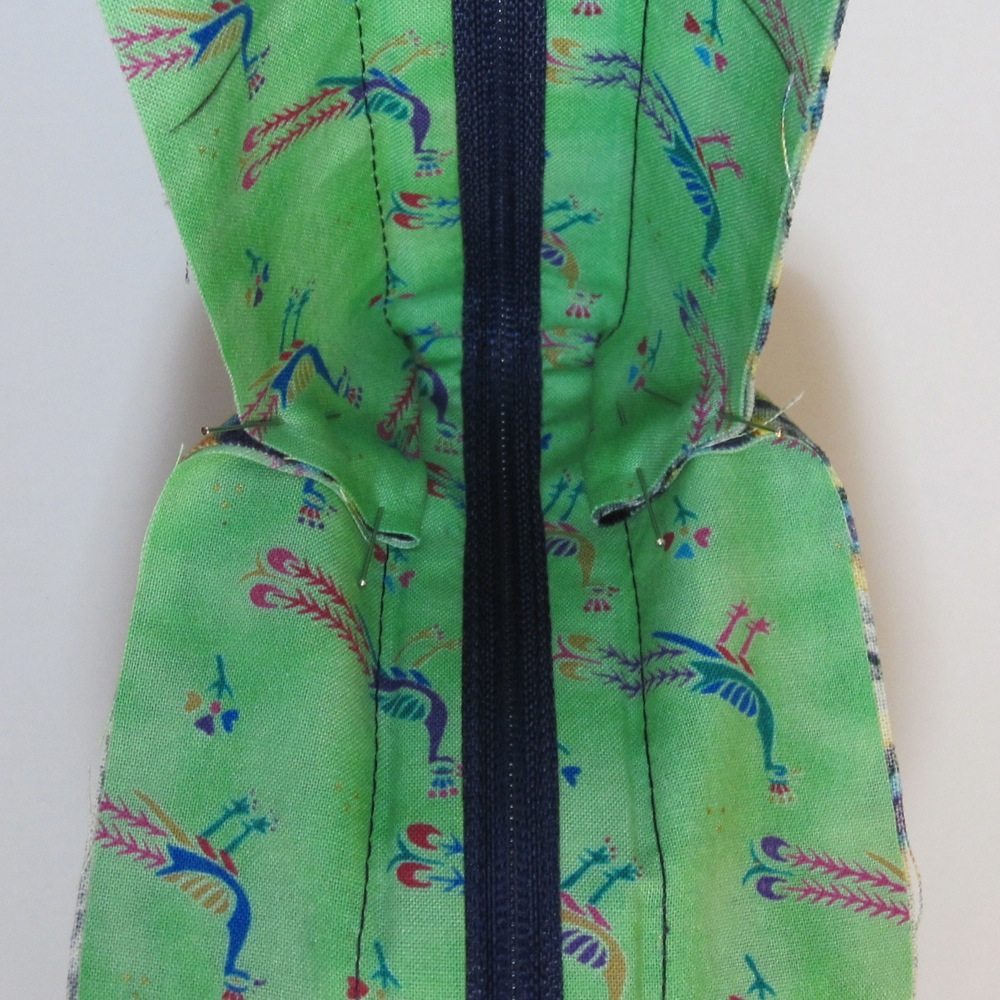
At this point life gets easier if you unzip the zipper. Bend the zipper the opposite direction from the fold you just marked (i.e., so the inner fabric is to the inside) and let that fold wrap to the inside until it meets the crease at the edge of the zipper tape. Baste in place.
Final Assembly:
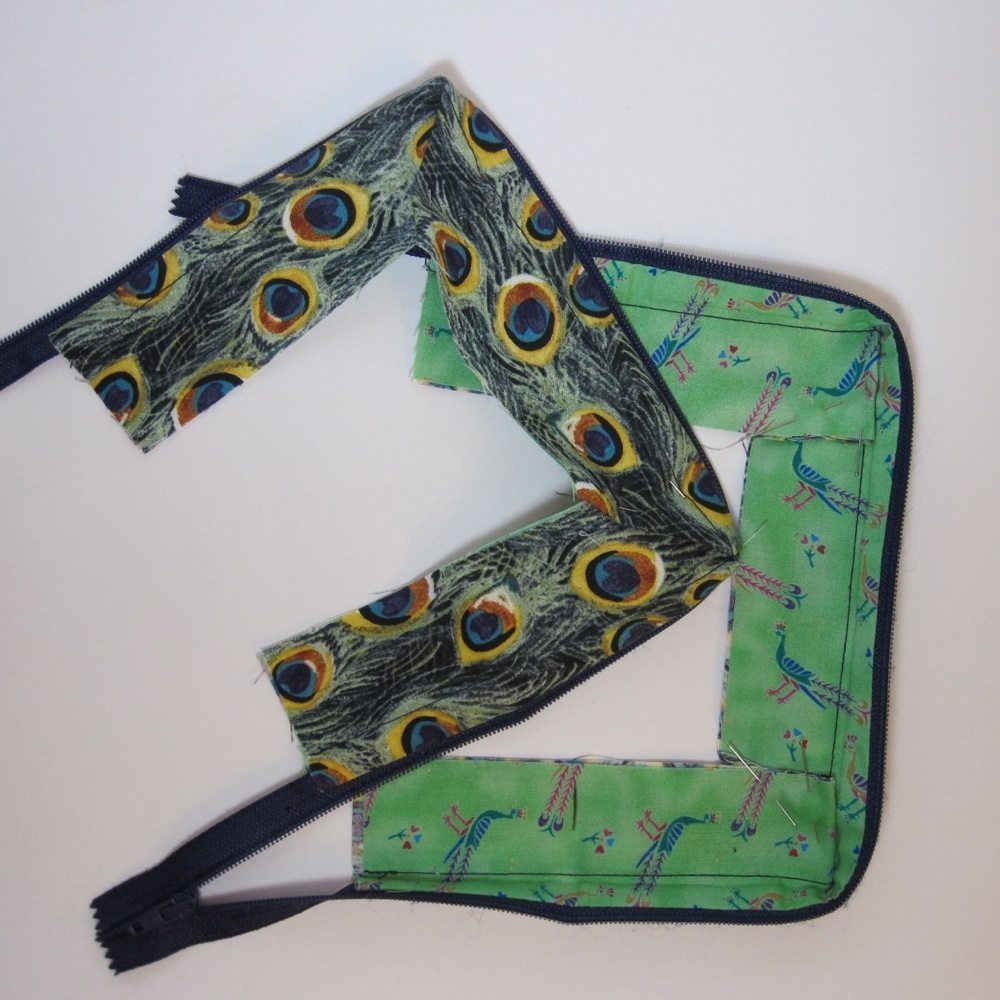
The folded-in edges of the fabric strips on the zipper will be sandwiched between the prepared faces and topstitched around, though at first you must leave an opening on the side where the ends of the zipper meet that is wide enough to accommodate that last unpaired piece of fabric. I found it easiest to sew just the inner face on first and the outer face on in a separate step.
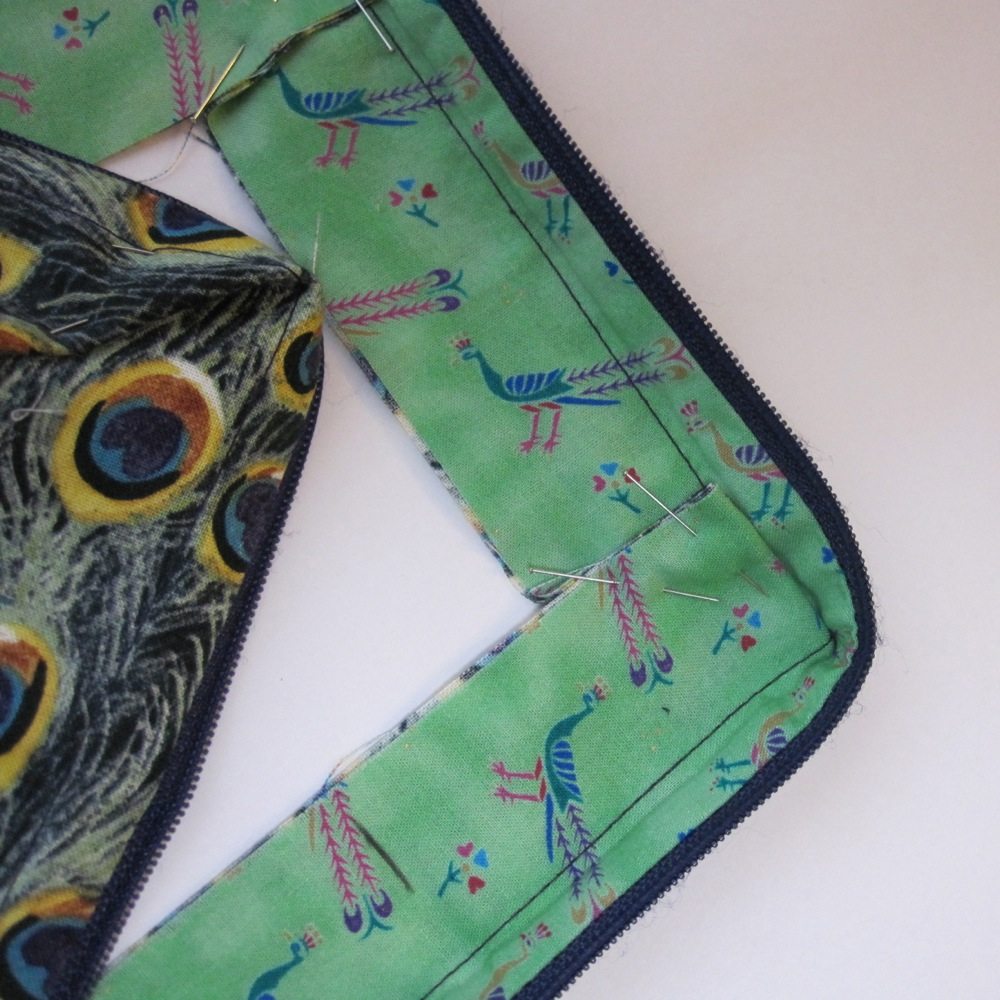
Zip the pencil case to the first corner and trim each end of the zipper just past the fabric strips. The remaining pieces of fabric will cover the ends of the zipper, sandwiching them, with the long edge parallel to the zipper. Fold the short edges of those pieces to the wrong side by 1/2″ (less if necessary to cover the zipper ends, more as desired if you have extra) and press.
Mark 1/2″ from each long edge with a pin. Slide each piece under the faces of the corresponding fabric, above everything else, so the pins line up with the folded edge of the faces. Topstitch along the edge of the faces, so the previous stitching now goes all the way around, and across the zipper near the folded edge of the fabric. Done!