My sister wanted me to retrofit some pants with belt loops, which meant constructing the belt loops from scratch. Always efficiency-minded (hahaHAHAHAHAHA), I tried to determine how to create them in as few steps as possible. What made sense was a long strip to be cut apart into individual belt loops.
I used my entire piece of fabric, selvedge to selvedge, and only cut the belt loop strip off after a few steps (none of my fabrics were much bigger than half a yard, though). This was nearly enough for two pairs of pants (it was 58″ including the selvedges and I needed a usable 60″), and would have been more than enough had I not been on the “lots” end of typical belt loop numbers per pair. Four inches per belt loop is more than enough, even counting a wide unusable selvedge.
Fold the edge of the fabric to the wrong side, if there is one, and press. I just folded over about an inch and eyeballed the straightness. Pin and stitch an eighth of an inch away from the fold. Trim off the folded-over fabric close to the stitching.


Fold your new finished edge to the wrong side of the fabric by exactly an inch. Press, pin, and stitch as before, trimming the bulk of the fabric away this time so you have an inch-wide strip with two finished edges.
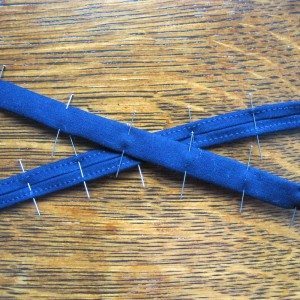
Now fold both finished edges to the wrong side of the fabric so they meet in (approximately) the center. This step requires lots of pins, and I like to pin from the smooth side so that I can capture both folds in one swoop. Press well, and stitch twice down the strip, 1/8″ or a bit more away from each outside edge. I did this by centering the strip under my presser foot and stitching with the needle to one side. There’s your strip of belt loops!


There are basically two ways belt loops are applied to pants. Dress pants typically have the bottom end sewn into the waistband seam; they may go downward from there before folding up to reach the top of the waistband with a finished end, which is topstitched on. Jeans typically have belt loops that are finished and topstitched at both ends. I did a little of both, though I didn’t tuck the ends of the belt loops into the waistband seam so I don’t think I benefited from it looks-wise.
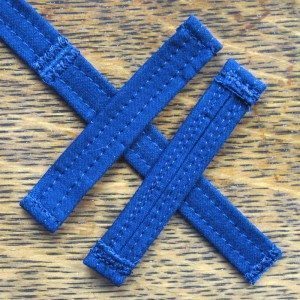
For the jeans version you want to add 3/4″ to the desired finished length of your belt loop to determine how long to cut them. Make chalk marks that far apart down your strip and make a medium-width tight zigzag on either side of each mark (well, not outside the outermost marks). Cut on the marks and you have your loops. Now fold each end down by a generous 1/4″ (the allowance is 3/8″ because you will lose a little to the u-turn since these are thick) and baste to hold. Pin the belt loops in your desired locations and topstitch with a tight narrow zigzag along your basting at each end. My sewing machine doesn’t give me any measurement/units for zigzag, but I used the same width for topstitch that I use for the sides of buttonholes, and for the zigzagging previous to cutting, I used a zigzag between the widths I use for sides and ends of buttonholes. Hope that helps. For both I set stitch length to 1.5mm.
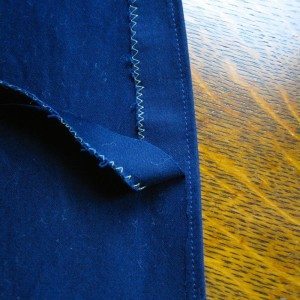
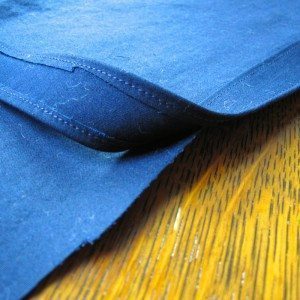
For the dress pants version you have two measurements to add. If your desired finished length is more than the width of your waistband (and if it’s not I recommend the jeans style), you have to add the difference. For example, if your waistband was 1.5″ and your desired belt loop length was 2″ you would need to add a half inch at this step, coming to 2.5″. Then you need either 3/8″ for the top turn-down or 3/4″ if you are going to tuck the bottom end into the waistband seam. For our example that would bring the total to either 2 7/8″ or 3 1/4″. Fold down and baste one end of each belt loop as for the jeans. For the less-tidy version, butt the other end against the waistband seam in the desired location, right sides together with the loop extending down the pant leg. Zigzag in place, fold the folded end up to the top of the waistband, and topstitch in place. For the more tidy version, pop open the stitching of the waistband in the vicinity of the loop, tuck it in by 3/8″, re-stitch the waistband, and then fold the loop up as before.
(Incidentally I chose my desired finished length by measuring some jeans belt loops. You can measure the widest belt you would ever want to wear with the pants and then add, say, 3/4 inch for the “nice” version or 1 1/4 inch for the jeans version.)