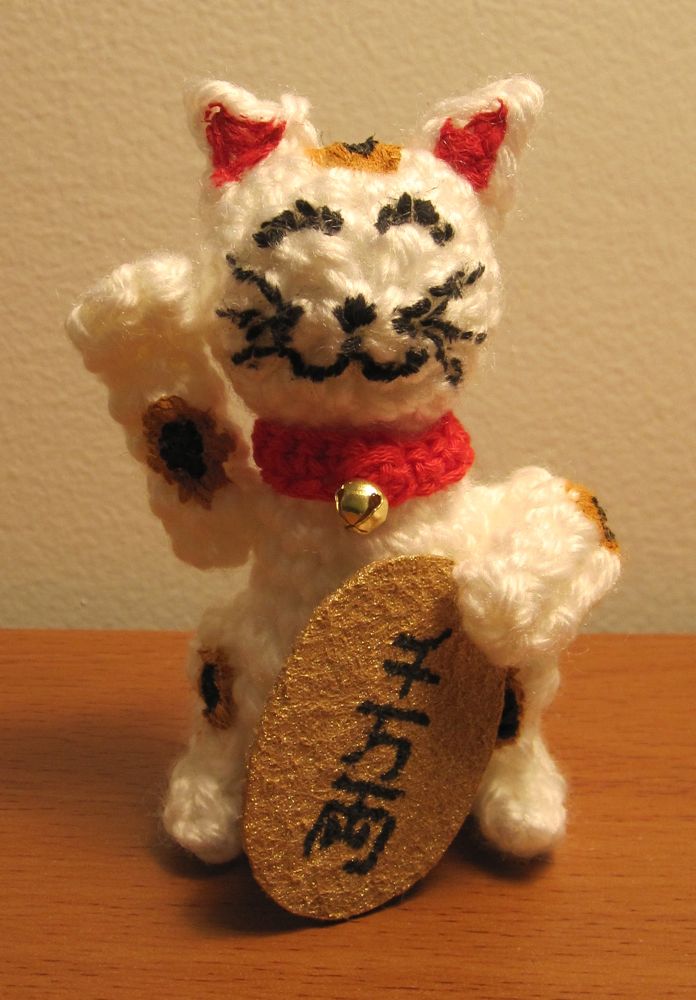
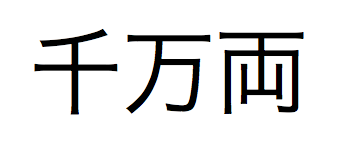
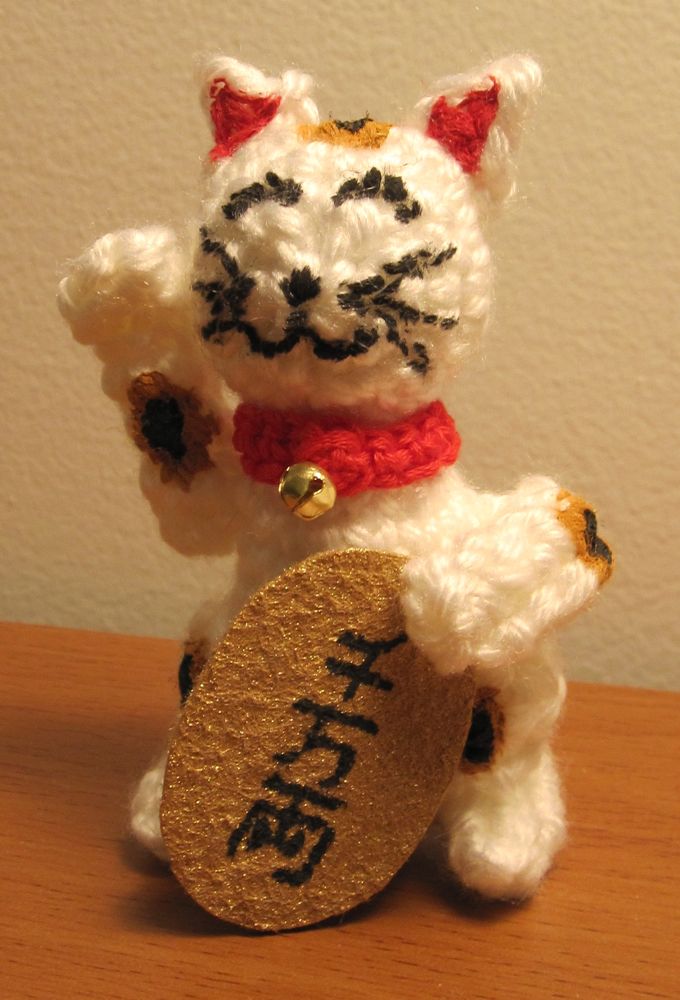
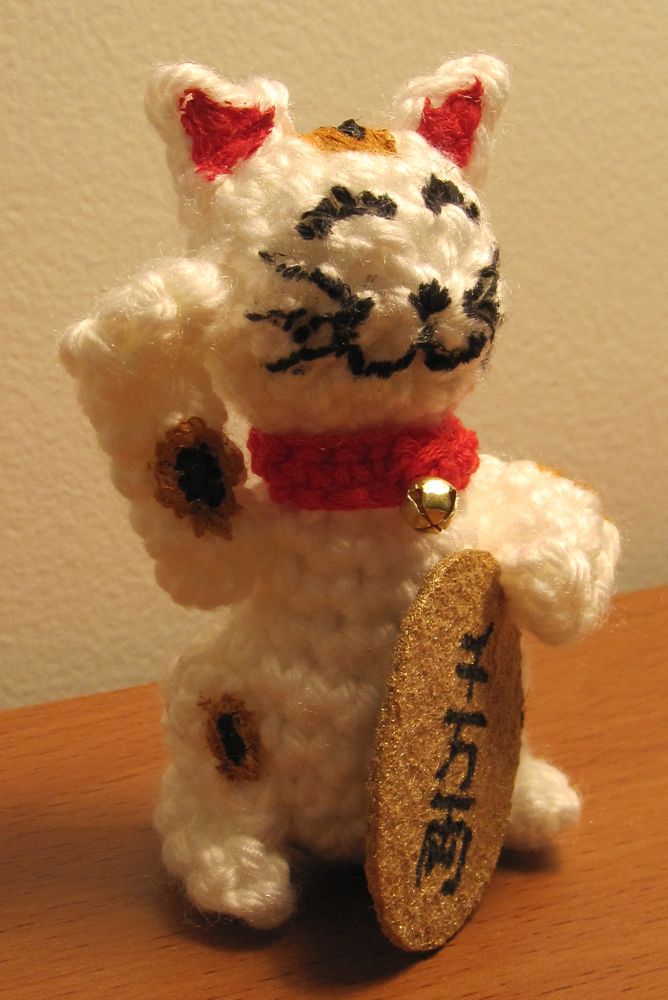
While trying to think of crochet patterns I would like, I looked at my little ceramic lucky cat, bought in San Francisco’s Chinatown many moons ago. Locale of purchase notwithstanding, the maneki neko (beckoning cat) is a Japanese sculpture to bring luck, customers, and/or money to the owner – the raised paw is beckoning good fortune. The coin is labeled “ten million ryō”, which is something like ten billion US dollars.
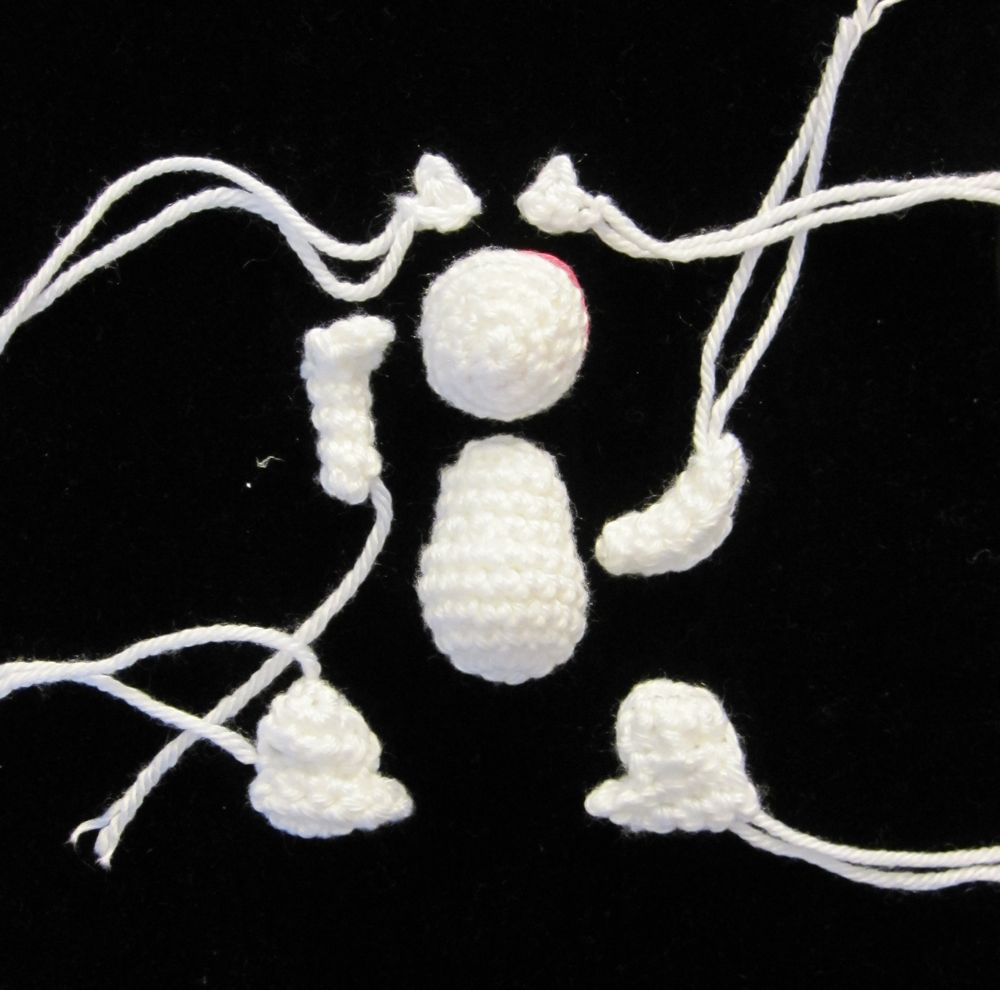
I started the design process before really looking for existing patterns. I found a few, but only one at the level of detail I wanted, and it was not the shape I was looking for, so I persisted. Three heads, four raised arms, five legs, two lowered arms, and three bodies later, I present to you the pattern.
Good Luck Cat (beckoning cat, maneki neko)
Use worsted weight yarn and an E or F hook, in white except for the collar, which is red. You also need:
* some stuffing
* a small gold bell for the collar
* yellow, gold, or gold-painted felt for the coin
* a black paint pen for the coin and optionally for the facial features (otherwise, black embroidery floss for the features)
* small amounts of red, black, and orange or tan felt, or the same colors in fabric paint (I used Tulip Soft fabric paint in gold metallic (on white felt for the coin), red velvet, ebony matte, and golden tan matte, and a DecoFabric paint pen in black)
Head:
1. sc 6 in magic ring
2. *3sc, sc, sc* 2x (10)
3. *2sc, sc, 2sc, sc, sc* 2x (14)
4. *sc, sc, 2sc, sc, sc, 2sc, 2sc* 2x (20)
5. sc around (20)
Top center is between sts 9 and 10 of rnd 5. Embroider face here (if embroidering).
6. sc, dec, sc, *dec* 5x, *sc, dec* 2x (12)
7. dec around (6x); FO (6)
Alternative (simplified head):
1. sc 6 in magic ring
2. *2sc, sc, 2sc* 2x (10)
3. *2sc, sc, 2sc, sc, sc* 2x (14)
4. *2sc, sc, sc, 2sc, sc, 2sc, sc* 2x (20)
5. sc around (20)
embroider face, if applicable
6. *sc, dec, dec* 4x (12)
7. dec around, FO (6)
Ears (make 2):
ch 3; sc dec (the second and third ch from hk; not inv dec); ch 1; FO
Body:
1. sc 6 in magic ring
2. 2sc around (12)
3. *2sc, sc, sc* 4x (16)
4-6. sc around (16)
7. *dec, sc, sc* 4x (12)
8-9. sc around (12)
stuff
10. dec around; FO (6)
Raised foreleg:
1. sc 5 in magic ring (5)
2-4. sc around (3 rnds, 5 sc)
Now proceed flat, turning after each row.
5-9. sc 2, ch 1 (omit ch in row 9), FO
Fold flap over opening of tube and then fold under so last row meets free edge of tube. Stitch flap to itself and to tube.
Lowered foreleg:
Worked in rows. Ch 6.
1. 2sc in 2nd ch from hk, sc across (6)
2. ch 1, *sc, 2sc* across (9)
3. ch 1, sc across (9)
4. ch 1, dec, dec, sc, dec, dec, FO (5)
Sew row 1 and 4 together to make a tube; slipknot end is paw.
Rear legs (make 2):
These start with a magic ring but proceed in rows, not rounds.
1. sc 3 in magic ring (3)
2. ch 1, 2sc across (6)
3. ch 1, sc, dec, dec, sc (4)
4. ch 1, sc, dec, sc, ch 3 (3 + ch)
5. starting in 2nd ch from hk, sc across (5)
6. ch 1, sc across (5)
7. [no ch] sl st in 2nd st from hk, sc across (3 + sl st)
8. [no ch] sc 2, FO
Fold bottom of leg so row 8 matches row 3 (fold line between rows 5 and 6) and sew. Make sure to fold one leg in each direction. Tighten the initial magic ring and puff the row 1-3 portion of leg out toward the smooth row 1-5 side (the outside).
Collar:
ch 14; optionally, sl st across.
or, in embroidery floss with 1.3mm steel hook: ch 17, sc across.
or, cut a narrow strip of red felt, 1/4″ by 2 1/4″.
Assembly:
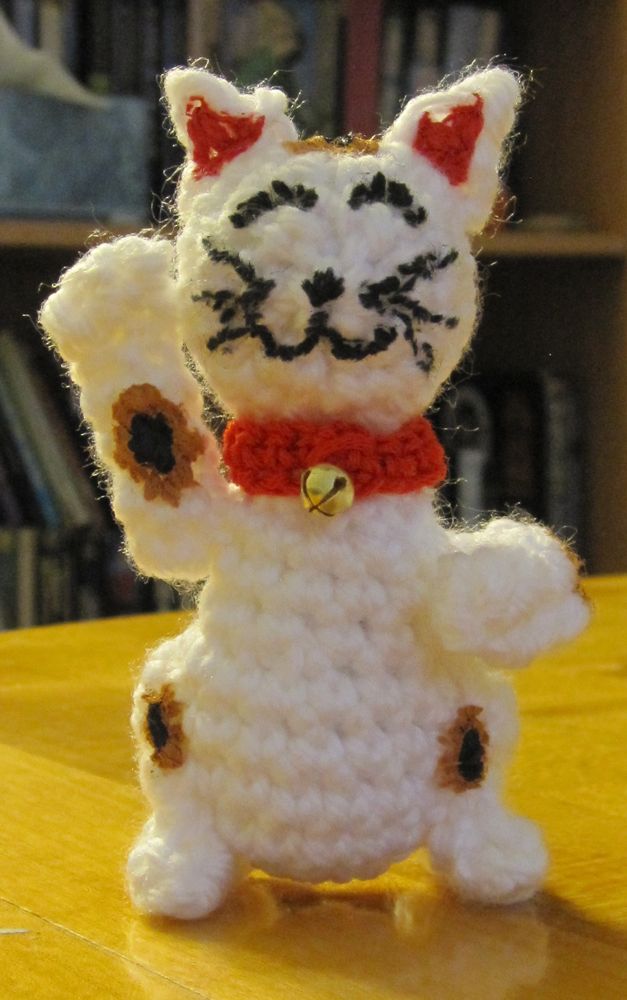
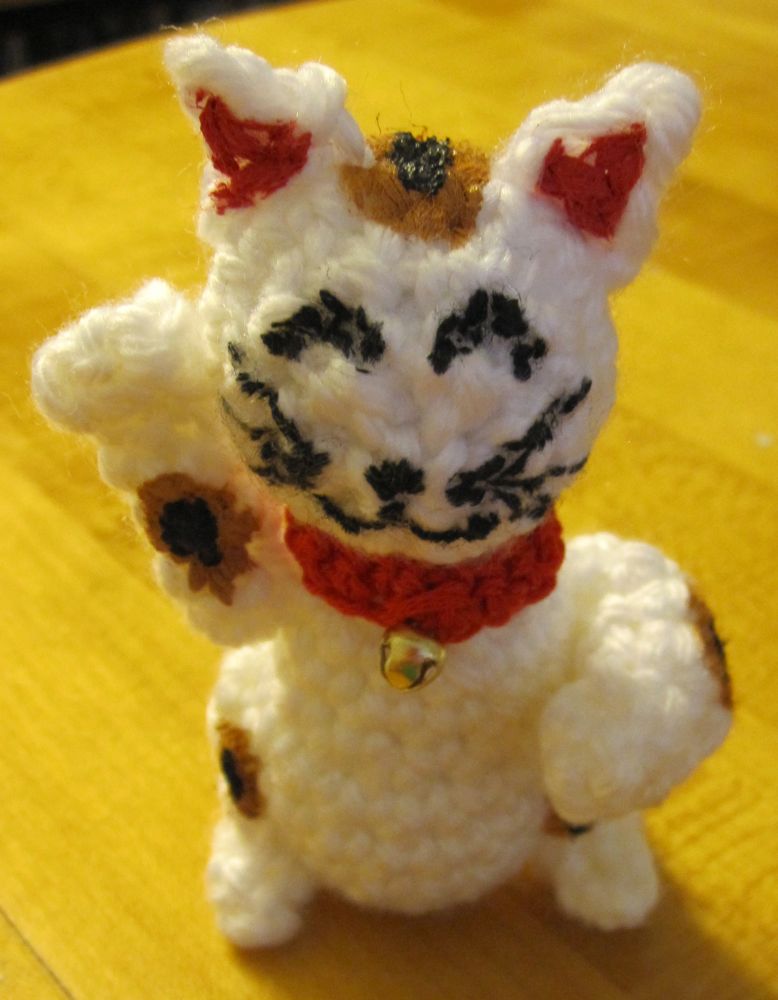
Following the picture, sew the forelegs and rear legs to the body. Paint the inside of the ears red, draw on the facial features, and paint the tan part of the calico spots. Once the tan part is dry, paint the black part of the spots. Alternatively, cut out small triangles of red felt, small ovals of orange/tan felt, and even smaller ovals of black felt and glue or stitch on. Paint some felt gold if necessary, and when that is dry draw on the “ten million ryō” characters. Sew the ears to the head, the head to the body, and the raised paw to the side of the head. Cut out the coin (if you are picky, paint the new edge and let dry) and sew or glue it to the lowered paw to hold it in place. Thread the collar between the raised leg and the neck and sew it around the neck, sewing the bell onto the overlapped edge and placing it center front.
3 thoughts on “Maneki neko”