Flat felt

I’d like to make a needlebook to keep my specialty needles, since right now they are insecurely occupying their original package. Needlebooks typically have wool felt pages, and I thought to make it particularly special I could make the felt and cut it into the pages. I found a straightforward tutorial on rosiepink, and I already had the materials.

It went fine, but definitely not as planned. I didn’t realize my bamboo sushi mat was comically tiny, and as it happened my netting wasn’t much better and I didn’t have a spray bottle to sacrifice to the cause like I thought I did. After I finished the first one I decided to try to make another, and be more tidy about it – the first one grew as I layered, giving it a large messy perimeter, and the middle layers of wool show through the outer ones quite a lot.

making flat felt making flat felt

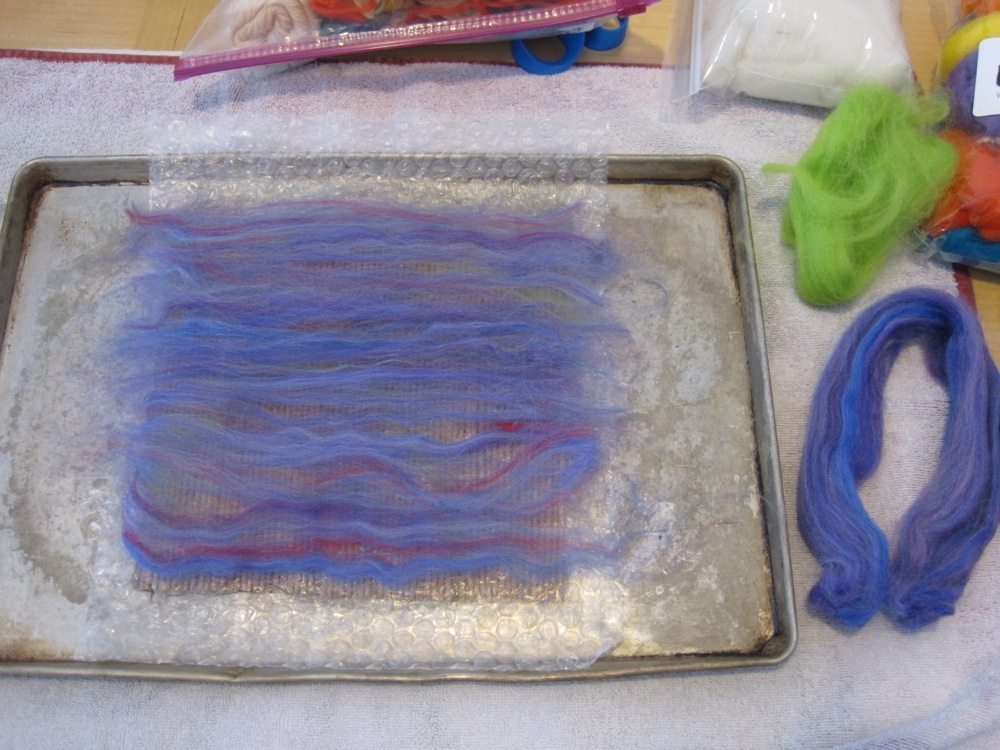
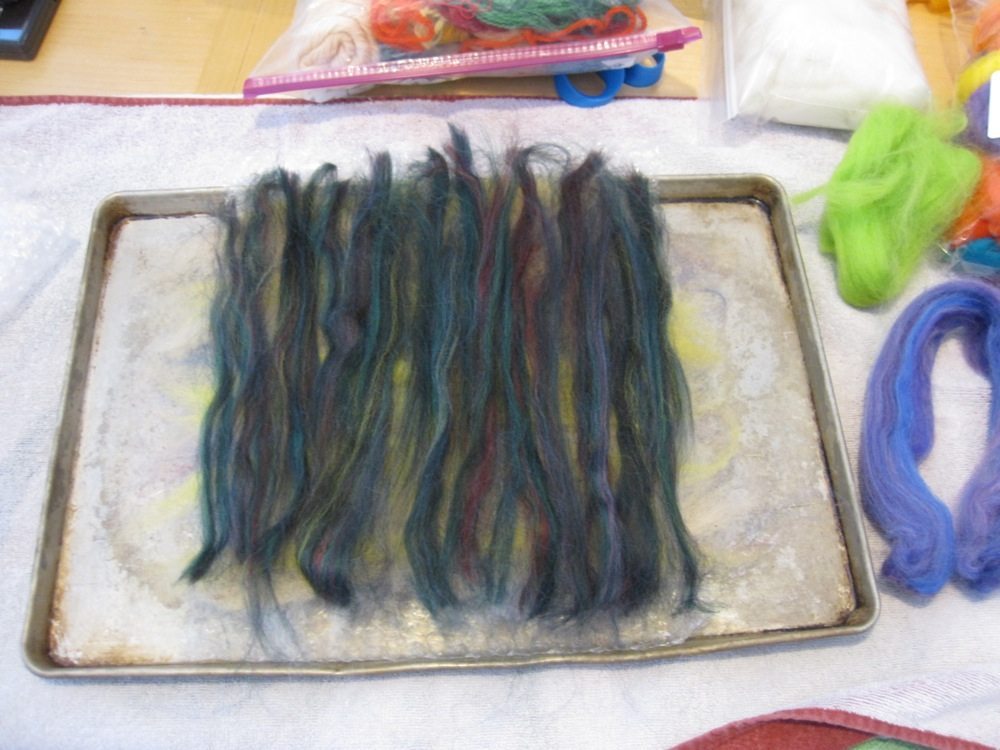
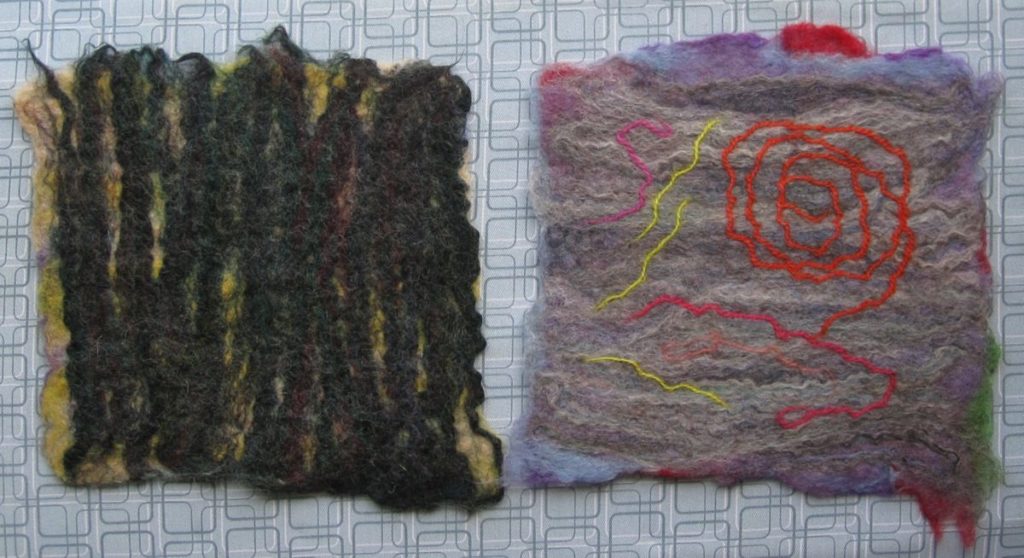
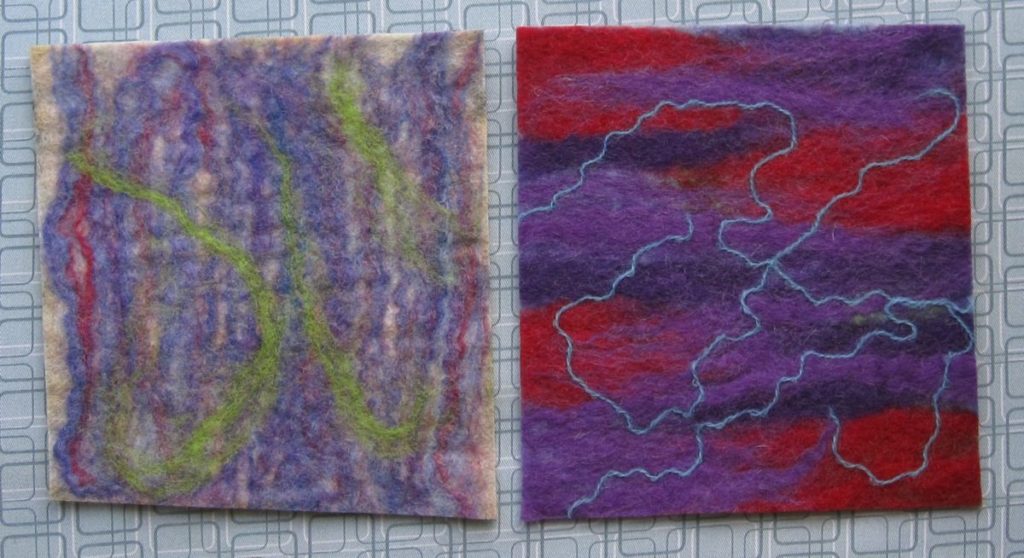
Tutorial modifications: I wanted to decorate the lower side, so I laid netting over the bubble wrap before starting to layer fleece, but in retrospect I’m not sure that was necessary. The netting is definitely desirable for the rubbing step, but you can always move it if you flip the piece (which I did, at least the second one). My needle felting stash has both smoother and coarser wool, so I sandwiched two layers of coarser wool between two layers of smoother wool. It seemed like a great use for some beautiful variegated fleece I’d been hanging on to – three of the sides use that. I only decorated one side of the first piece, with contrasting fleece at different angles, but I put strands of crewel wool on both sides of the second piece. They may need a bit of needle felting to fully stay put. Fortunately this felt won’t see rough handling.

making flat felt making flat felt

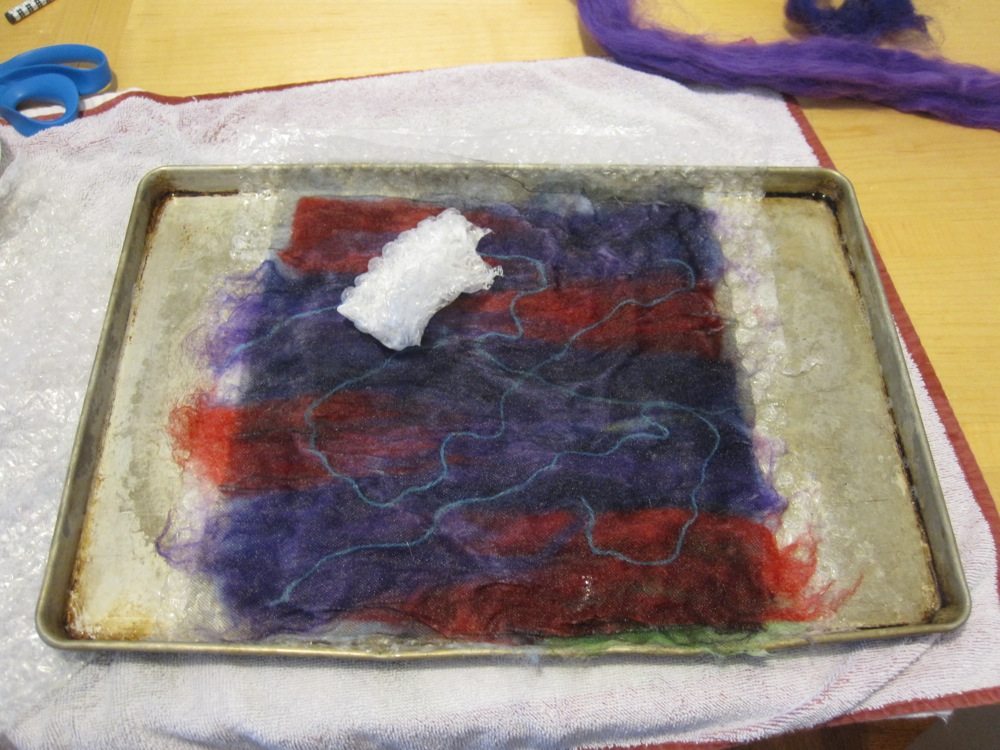
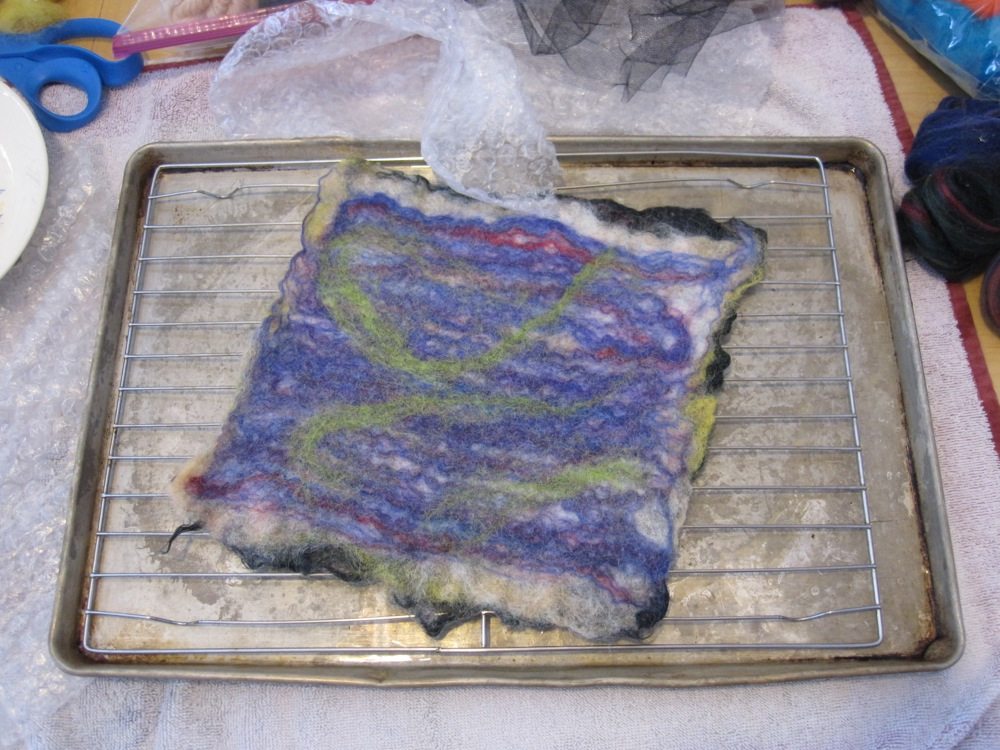
My whole sheaf was a lot larger than both the piece of netting and the bamboo mat, so while I did the rubbing with bubble wrap step (though I dipped it in soapy water rather than rubbing it on a bar of soap), after that I couldn’t make the original tutorial work for my setup. Instead, I laid the non-netted side of the wool against a piece of bubble wrap, laid both pieces of netting on top, rolled it up, and squeezed and turned it all along its length, with a hand motion similar to rolling up a sheet of gift wrap. I did make sure to rotate the felt 90 degrees occasionally and flip it at least once, and it worked! Here they are all nice and dry, after a touch of the iron while they were still wet. I know these pictures are somewhat small but you can click them into larger versions.

finished, untrimmed felt finished, untrimmed felt

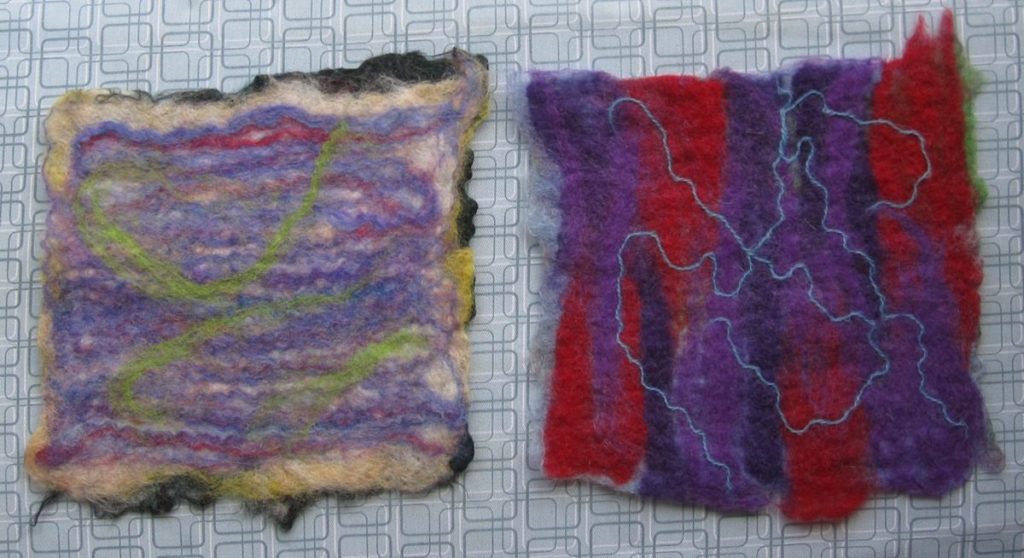
You can’t get the real effect, though, until you trim off the raggedy edges, so here’s that view:

finished, trimmed felt finished, trimmed felt

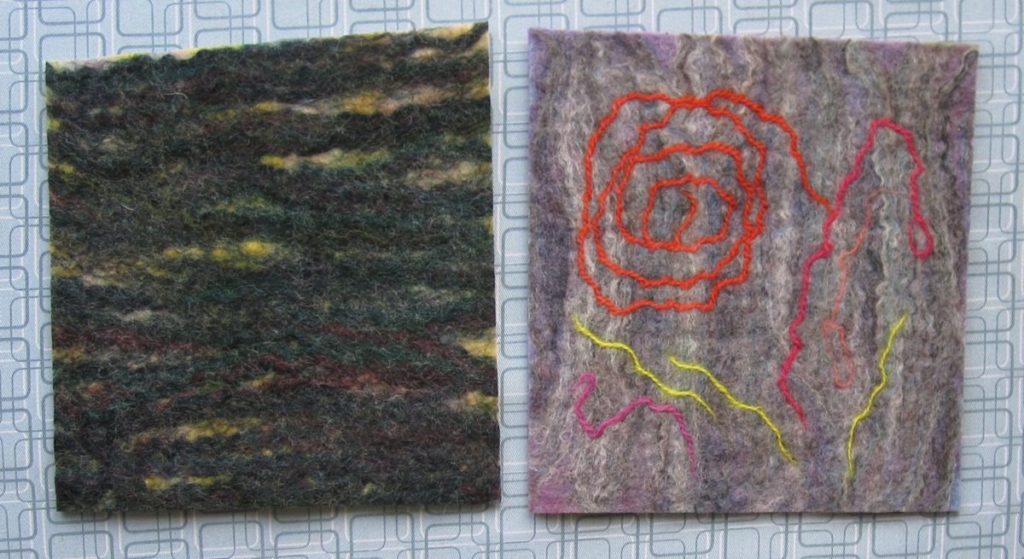
I got a little bit of dust from the dark green wool when I cut the edges off. Hopefully they are actually stable. I am not sure I have the necessary patience for hand-felting. Of course, I can always whipstitch the edges once I cut them down into squares, after I decide how large my needlebook will be. I plan to give it a fancy cover as well, so you’ll see this again.

Early comments on drawing books

It’s early in my drawing adventures, but I have two initial book reviews.

Book 1: For Rank Beginners

My loving sister, after conversing one night with a very frustrated me, ordered me a copy of You Can Draw In 30 Days, whose author, Mark Kistler, had (has?) a long-running PBS drawing show. After two lessons I was confident enough to draw my father’s birthday card, the first drawn greeting card of my adult life. Shading is where this book has been outstanding so far. Though I need a lot of practice with them, I already knew the principles that higher, smaller shapes overlapped by others look further away. His simple approach to “nook and cranny” shadows and the shadow that seats the image on the “ground,” on the other hand, was a revelation. I’m going slowly through the book; I’ve done four sessions with it, but finishing Lesson 3 and its bonus challenge may take up to 3 more.

My New Year’s resolution was to draw three times a week. After a disappointing start with an online course that was bald-facedly lying when it said it was for all levels, I dropped off for two weeks or so. I’m getting back on track by doing four drawings a week (which should have me caught up with where I would have been had I kept up 3/week around the end of March), but I wouldn’t be surprised if this book takes me over three months to finish. Especially if I take more breaks to draw non-lessons.

Anyway, there’s not guarantee you’ll like this book as much as I do, but if you find yourself feeling like drawing lessons are telling you what to do without telling you how to do it, try it out.

Book 2: Drawing Animals

I ordered a drawing book published by Dover because it was incredibly inexpensive and gets great reviews on Amazon. It’s called The Art of Animal Drawing, and it’s a 1950 book by Disney animator Ken Hultgren. The subtitle is “Construction, Action Analysis, Caricature,” which also caught my eye.

I’m nowhere near ready to use it, but he goes through some general principles and then talks more specifically about different kinds of animals. Nothing too exotic, and come to think of it no birds or sea creatures (maybe that’s not what he means by “animal”), but he covers all the standard non-bird farm animals, dogs, cats, rabbits, and significant wild animals: big cats, bears, camels, hippos, foxes, kangaroos, elephants, a few others.

There are two particularly neat things about the book. One is the caricature aspect: for each kind of animal, he discusses what traits to exaggerate for caricature and gives some examples. The other is that he shows his preliminary sketches, which are often just as beautiful as – though much more abstract than – the finished drawings. They remind me of Franz Marc, in fact, and since I aspire to be able to draw some Franz-Marc-esque pieces, that’s exciting. They’re almost architectural. You can see how he draws long smooth arcs connecting body parts that aren’t connected in the finished drawing, but the line gives cohesion to the motion of the body or the composition of the drawing. There was one drawing of two cats, the front one with its head toward the ground, the back one with one leg forward, and the arc of the back one’s back to leg was nearly parallel to the arc of the front one’s back to head, though both arcs were interrupted in the final drawing (by head and shoulder blades, respectively). I expect that once I can somewhat draw animals, this book will really help me improve.

Storing stickers

This fall I finally decided to break away from commercial greeting cards as much as possible. I’ll pay for wit, but if I just want sweet or pretty I’ll go the less expensive route and make them in-house. Of course, I got a die-cutting machine as a gift that I use for them, and if I had to count the cost of that in the cost of making them myself it would be a long time before the savings in card purchases caught up, but as-is I believe I can make a hundred cards for the price of a dozen in the store. My disintegrating sticker and card storage folder was due for replacing anyway, so I tried to figure out something to accommodate leftover die cuts.

the original expanding folder that was my sticker and card storage

I decided to put the cards in their own box and keep the stickers and die cuts together in another container. I thought about some kind of plastic envelopes in a binder, but found they were priced above my pain point. There were kinds that were a bit cheaper but didn’t have the panel with hole punches for a binder. Finally, when looking for ideas on making things “binder-able,” I stumbled upon an Instructables about making a pencil pouch. Essentially, you cover a shortened gallon zip-top bag with duct tape. I wanted to be able to see what was in the pouch, though, at least a little, so I bought generic unprinted bags and applied duct tape just around the edges. That should improve the longevity and help avoid the bags getting crumpled up.

my new sticker storage: taped bags in a binder

To make them the right size for a binder, instead of cutting off the bottom I folded it up: first to the top of the hole-punched panel, then that section in half, and then the whole folded section up again and taped near each end. That should keep any stickers or die cuts from getting pushed down into a sticky section. The small bags, of course, are just as-is, taped around the outside and with a duct tape extension at the bottom for the hole punches.

first gallon bag fold second gallon bag fold

third gallon bag fold taping the bags

The tape along each side is a single length folded over, and the tape along the bottom is full width, two lengths stuck to each other. I didn’t take a photo of it, but when I duct-taped the gallon bags, I made sure the tape came up a little above the folded part.

Note that if you use scissors on your duct tape you’ll be saying goodbye to them for the duration of the project. In fact, if you make as many bags as I did (20 of each size), you’ll need to clean the scissors at least once during the project, because they’ll get too sticky to use. I used Citrasolv, which worked wonders, and then dish soap because the Citrasolv left them oily.

One roll of patterned duct tape will do just over 9 gallon bags, or (I estimate) at least a baker’s dozen sandwich bags. Ten gallon and ten sandwich bags took most of two rolls – the photo below shows what I had after finishing the first 20 bags, done with most of two rolls of duct tape.

two new and one leftover roll of duct tape

Next up is my favorite part: reorganizing the contents. I also need to figure out a new storage system for my cards.