More Japanese ami secrets

In my kappa post I talked about the photos in the amigurumi books I bought from Japan. This time I want to address the techniques used. The books I got all worked in proper rounds, not in a spiral, which is something I’ve never gotten the hang of but tried hard on with my kappa. He has a visible seam down his back, but it’s largely covered by his shell.

The rounds begin with what I would call the double magic ring, something I didn’t hear about until over a year and a half into my crochet life, despite making amigurumi from the earliest point I was able. This is the only starting method given in any of the three books. The double ring is just like the magic ring you might already be acquainted with, except you wind the yarn twice to start instead of once. When tightened, it has enough friction to hold without weaving in the end at all. Tightening has to be done carefully, though: pull the cut end of the yarn and see which loop of the ring tightens. Stop pulling as soon as you determine that, grab that loop, and use it to tighten the other loop. Finish the job by pulling on the end of the yarn. The books say to put the cut end through the second loop before tightening it, which would lock it in place, but even without that I have never had a double ring work open on me later.

Here’s a video!

My second ever, and the reason this post is so long after the kappa post.

To close, the recommendation is a running stitch through the front loops of the last round. I was astonished to see how well this worked — there were fifteen stitches in the final round of the kappa, and he closed up neat as a pin. There is a certain ripple to his bottom end from the opening being gathered substantially, but even with that he looks nicer than a lot of my other amis which were closed after decreasing to only six or seven stitches.
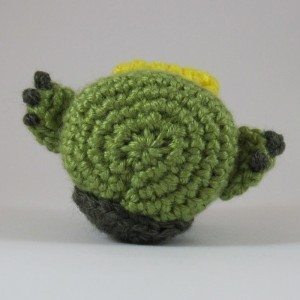
kappa bottom

Now, I went to look at June Gilbank’s blog post on amigurumi closure comparisons, because she recommends a different method: drawstring, yes, but after whipstitching outward through the front loop of each stitch in the final round. I decided to do my own comparison, on pieces with larger and smaller final rounds.

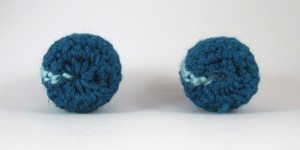
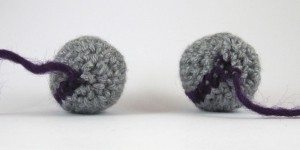
Here’s the result. The contrasting stitch is just to secure the contrasting yarn for the drawstring, so you can see how it was stitched. The running stitch (Japanese books) is on the left, and the outward whipstitch (perfect finish) is on the right. In the first picture I left some of the stitching loose so you can see how it goes. The second picture is tightened but not finished off, and the third is finished off.

Large opening (18 stitches in final round):
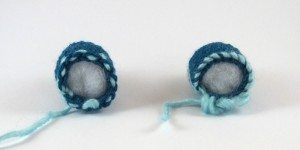
18 stitches - open 18 stitches - drawn tight 18 stitches - finished off

Small opening (7 stitches in final round):
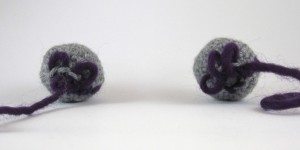
7 stitches - open 7 stitches - drawn tight 7 stitches - finished off

As you can see, I couldn’t even get the 18-stitch opening completely closed with the whipstitch technique – it has more friction due to the looped shape. Whipstitching lets the final round blend in better in the 7-stitch opening, but the score is close. I’m a running stitch convert – though I’ll admit part of the reason is that I’ve had trouble remembering which direction to whipstitch for the perfect finish!
Pressing matters

Last week we discussed one of my Christmas gifts, and this week’s post was precipitated by another: a new ironing board cover. My old one was scorched and stained, prone to iron dents, and had never fit particularly tightly to the board. But what to do with it when I removed it? It is difficult for me to take something so large and just throw it out.

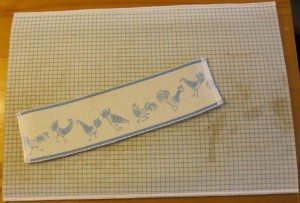
So I didn’t. I cut off the strip of little chickens that had drawn me to it in the first place, down at the wide end of the board, and then the largest piece I could get between that and where the board narrows.

board cover pieces

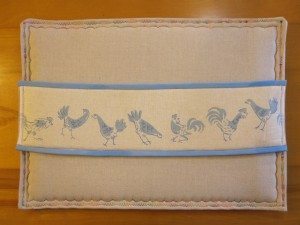
I covered the large piece with linen, and attached linen to the back of the small piece. Then I folded the large piece in half and stitched all the way around twice, with the same variegated thread and two different decorative zigzags. The small piece got wide single fold bias tape stitched to the front, folded around at each end to the back, then the long edge folded to the back and stitched down.

newboards

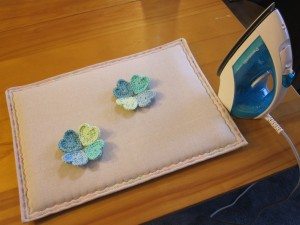
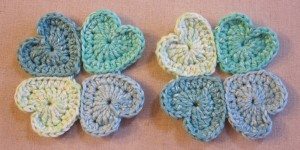
The larger board is the size of a generous placemat, perfect for pressing small crochet pieces, such as these coasters made out of the medium size of Planet June’s Love Hearts.

small board in use heart coasters

Knook review

I received a Knook kit for Christmas this year. This is a way to knit with a crochet hook; the hook has a hole through it near the foot, you thread a cord through that hole, and the cord acts as your left needle. To start, you chain as usual for crochet, but then yarn wrapping and hook insertion change to methods standard for knitting rather than crochet.

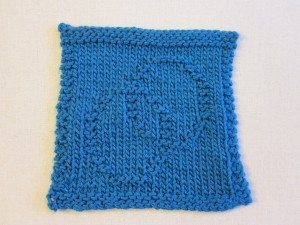
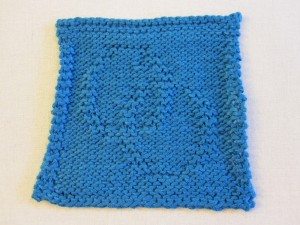
I made an entire project with the Knook, the Circle of Love Mini-Cloth. The included Knook instructions only tell you how to cast on, knit, purl, and bind off, not how to slip stitches, increase, or decrease, so the patterns you can make are somewhat limited. Fortunately there is a large community of people designing simple squares for knitting, to use as washrags and so forth – two others I really liked showed a bat and a squirrel.

knook project front knook project back

You can see blocking couldn’t cover up the tension change that happened as I proceeded.

Verdict? The Knook is good at what it does. The instructions are clear, the methods are pretty easy, the materials are good quality, and it really is knitting. However, I doubt I will ever use it again. I was faster at knitting when I was stumbling along with two needles and no real idea what I was doing. On the other hand, I believe that if I do try knitting again, I will be far better at it having used the Knook. I think it helped me understand how knitting works.

In sum, I would recommend the Knook as a gateway to actual knitting, a lesson allowing you to learn the motions of knitting and purling separate from the management of knitting needles. If you want to knit much of anything, however, I would say buck up and learn to do it the usual way.