In honor of my sister’s birthday, my first video post! I mean, the post is a post, but there’s a video at the end. Visit Kate’s blog for book reviews, art, and miscellany. Happy birthday, baby sister!
I have been experimenting more with soapmaking. I got a gift card for Jo-Ann Fabrics from my grandmother for Christmas, and I went to their (horrible) website and (with a great deal of pain and effort) ordered some clear glycerin soap and a soap mold. I already had some purple glycerin soap I’d bought at a winery, which was supposed to be wine scented but is really artificial grape flavoring scented.
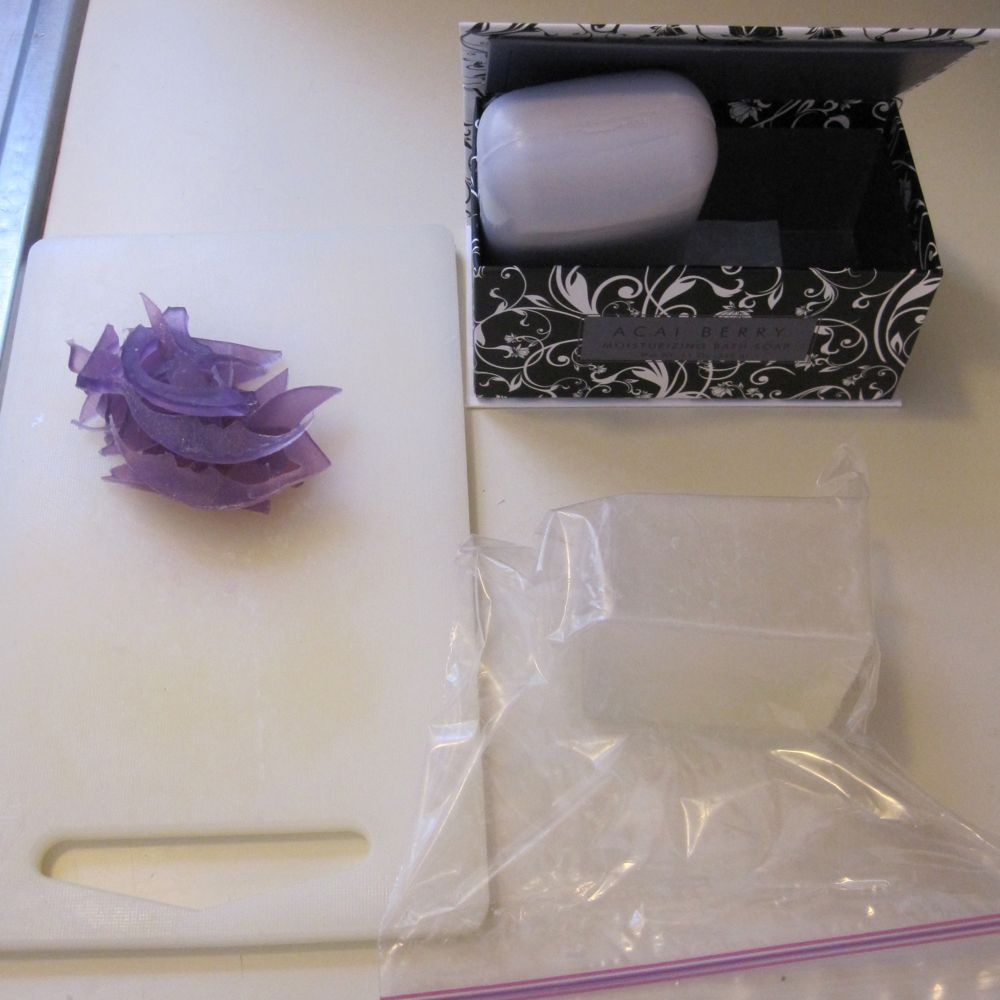
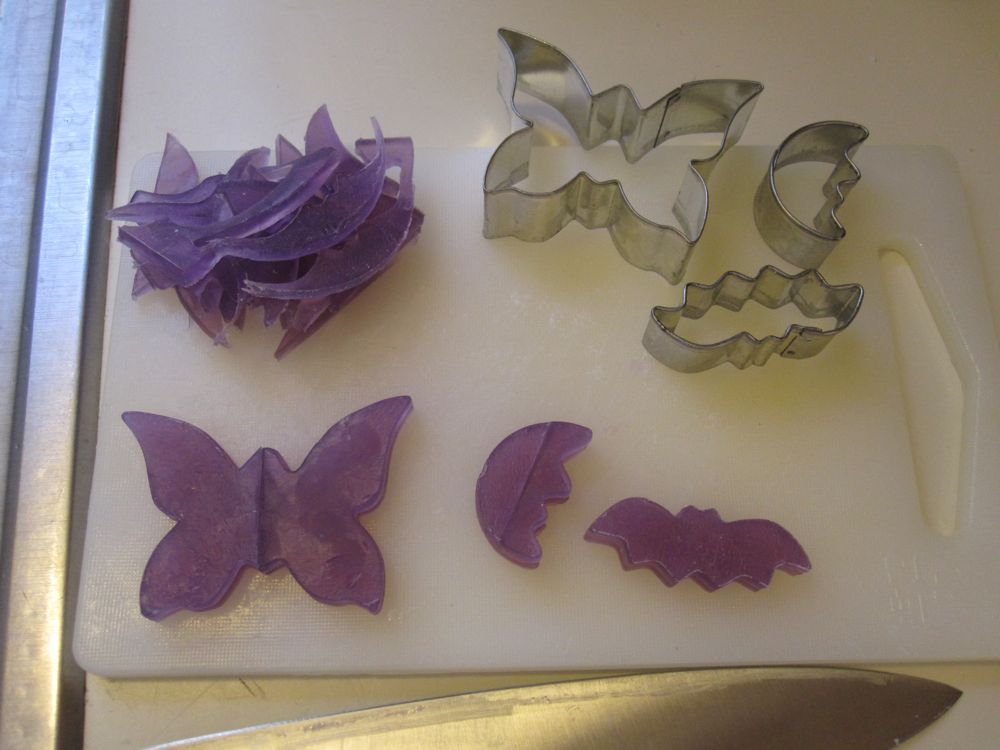
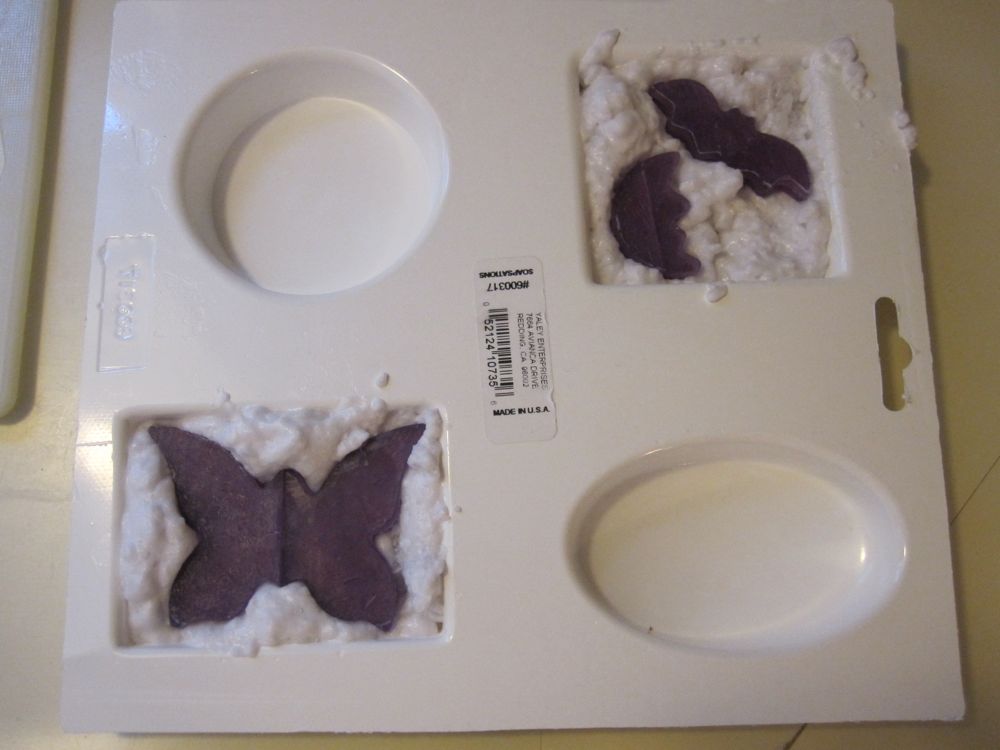
I had the brilliant idea that I would mix some non-glycerin soap with the clear glycerin to slightly tint and scent it, and after a little spree at TJMaxx, came away with some acai scented soap, which complemented the grape scent well. There was one problem: grossly different melting points. I was microwaving the glycerin, which works great, but the non-glycerin does not melt at temperatures the glycerin can reach without scorching. I did a lot of whisking, which introduced some foam but did not succeed in fully incorporating the soap bits. The foam rose to the top of the soap molds, which actually produced an interesting effect. I poured a bit, embedded some shapes that were half grape soap and half plain glycerin, and poured some more.
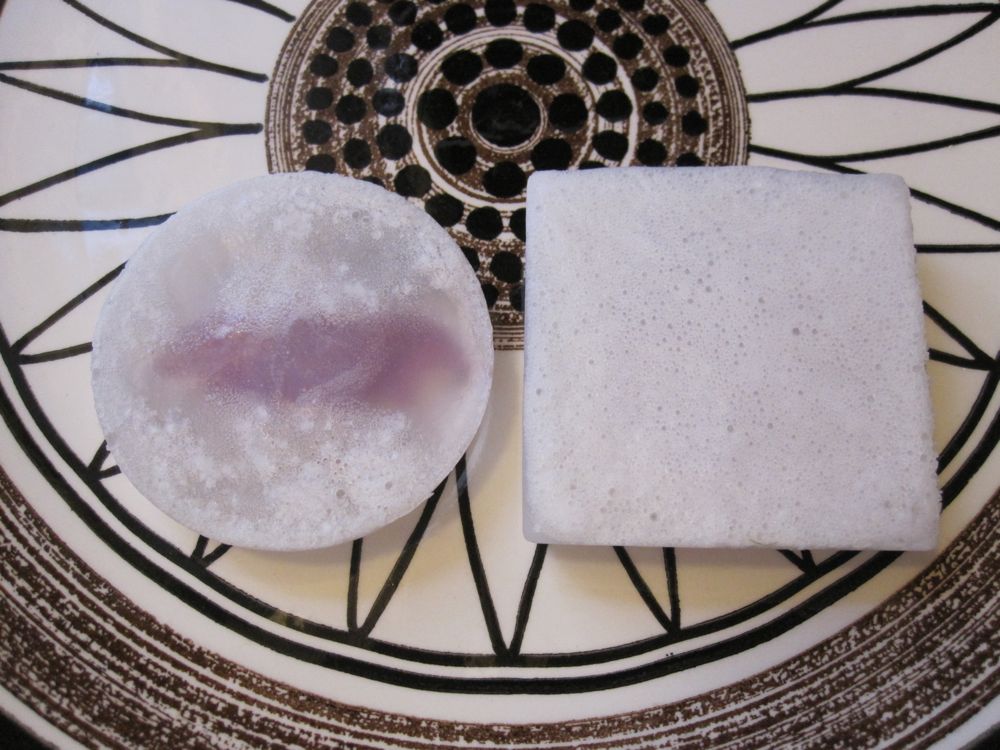
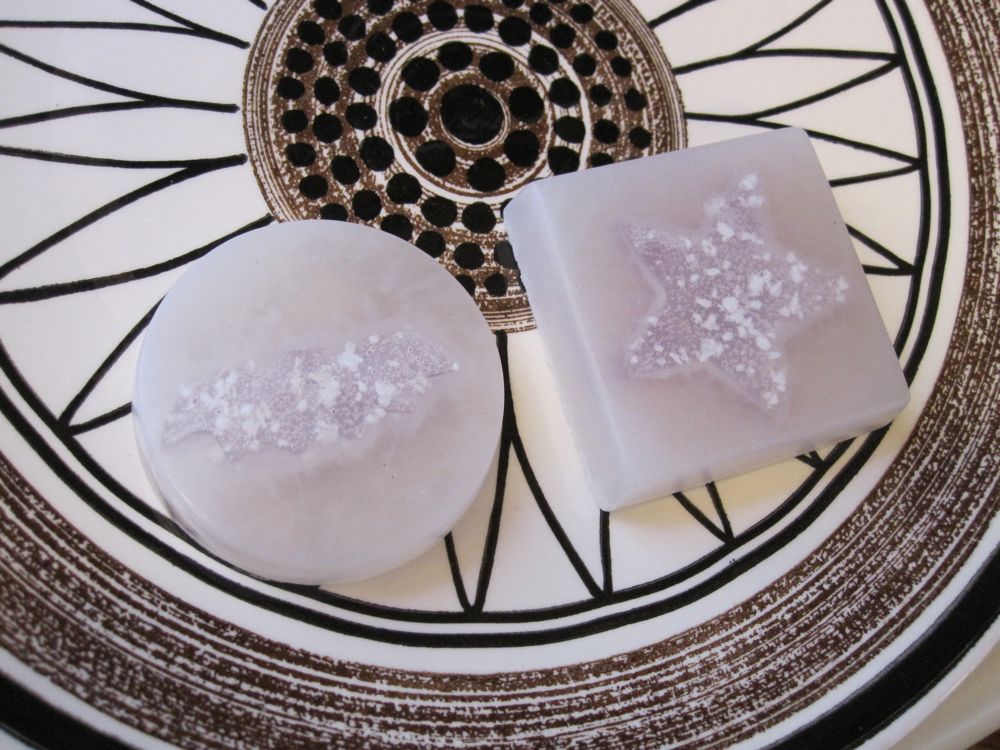
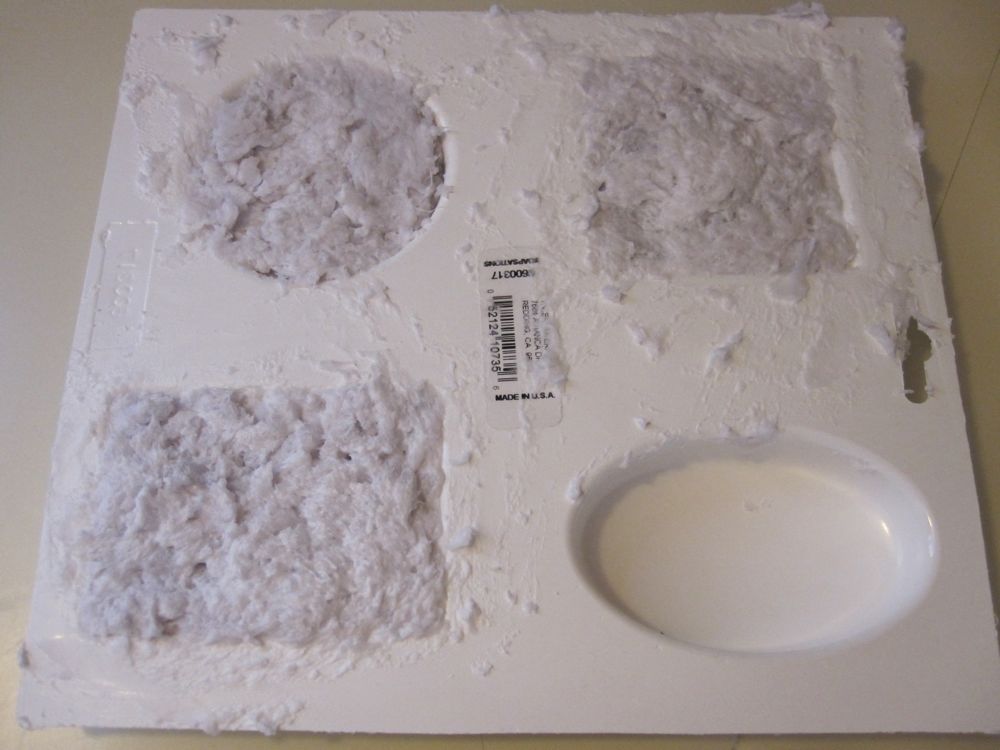
The first picture above is the top when the soap was in the mold, and the second is the bottom. You can see the embedded shape trapped some of the foam/soap bits, and the rest rose to the top. The bat soap is one of the two for which I had to melt some additional glycerin, which is why it is not completely covered in foam. I like that effect, actually. It’s kind of like the bat is flying through fog, or you’re seeing it in the clouds.
To make the shapes, incidentally, I sliced the soaps with a wire cheese slicer and then cut with cookie cutters.
That first run made four soaps, a triceratops soap that turned out like the bat soap and now resides at my boyfriend’s apartment, and a heart soap that didn’t unmold that well and was melted down for round 2: the foamination.
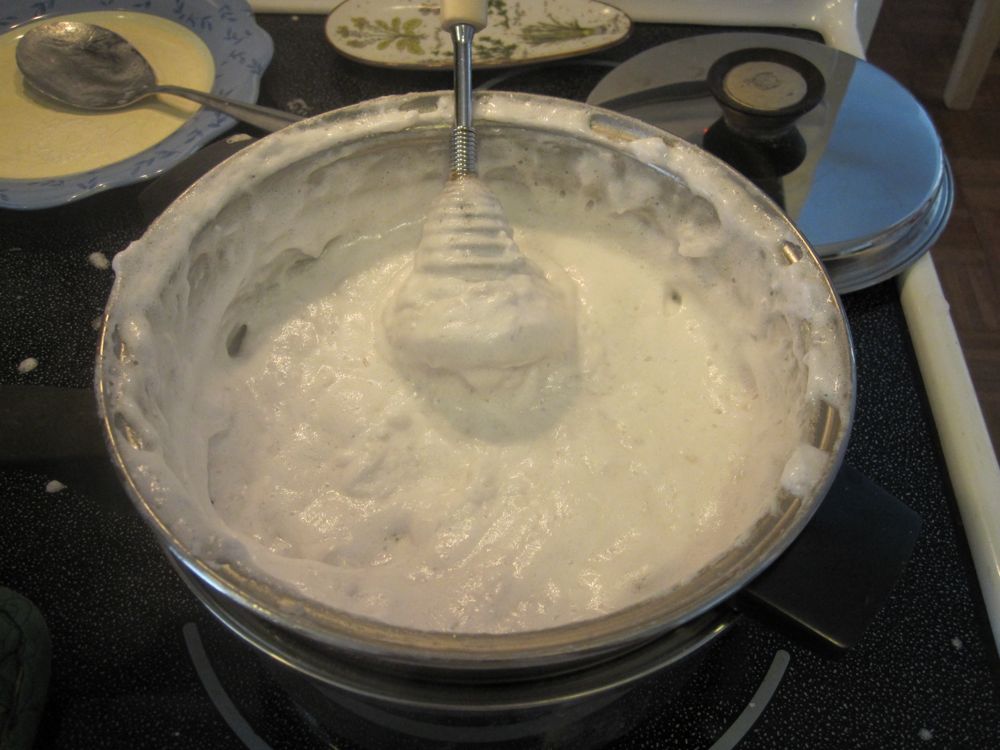
I thought it would be cool to intentionally get the foamy effect of the first set of soaps, and so I combined glycerin and non-glycerin soap with some water, put it in the top of a double boiler, added salt to the bottom of the double boiler so it would boil hotter, and whisked thoroughly. It didn’t get completely smooth, but it got very thick and foamy.
These came out quite soft and I was not convinced they would hold up to use without crumbling. I wrapped them in paper towels for a few days to try to dry them out a bit before testing the two square soaps with handwashing. Verdict? Unsurprisingly, the foamy soap produced better lather. It also held up solidly, though it kind of looks like it has the mange. The square is slightly large for my hands’ comfort, but fine (I might prefer a smaller footprint with a thicker soap). I’ll keep using them and see what happens when I reach the embedded shapes.
Clean-up was in two rounds, and round two contained a surprise. It’s not exactly vulcanization of rubber, but it was a happy accident. See for yourself (and don’t mind how subdued I sound in this video):