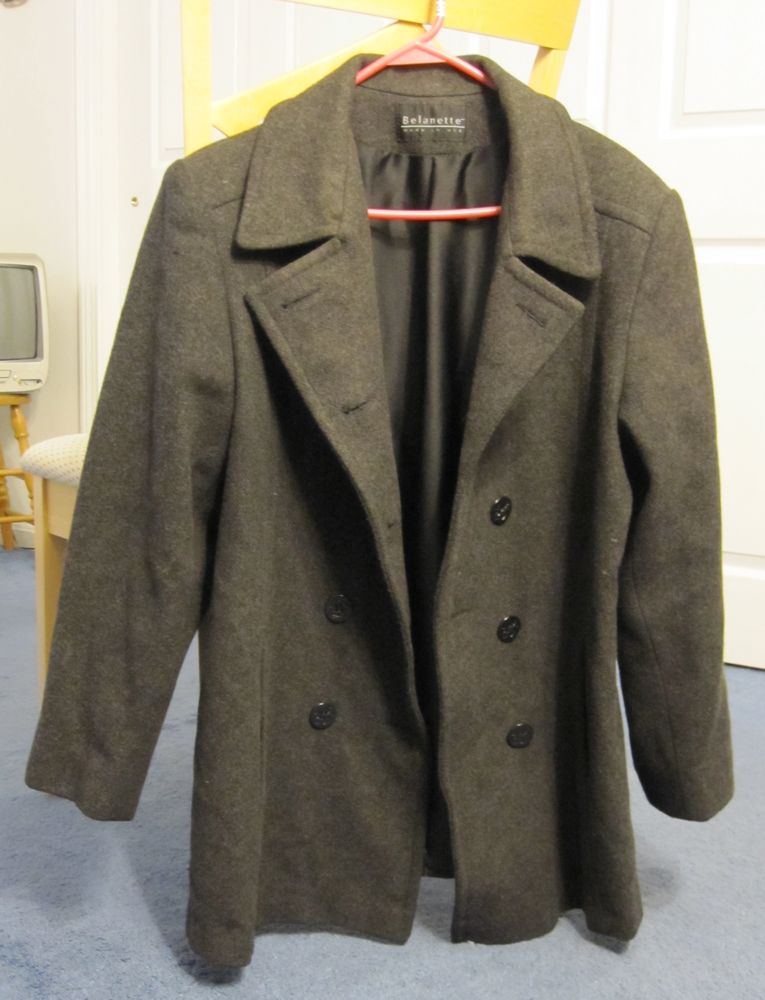
I have a gray peacoat that has been with me at least since the late nineties. I don’t remember exactly when I got it. It’s still around partially because it’s a well-made wool coat, but partially because I haven’t worn it in several years. Why?
Why, indeed.
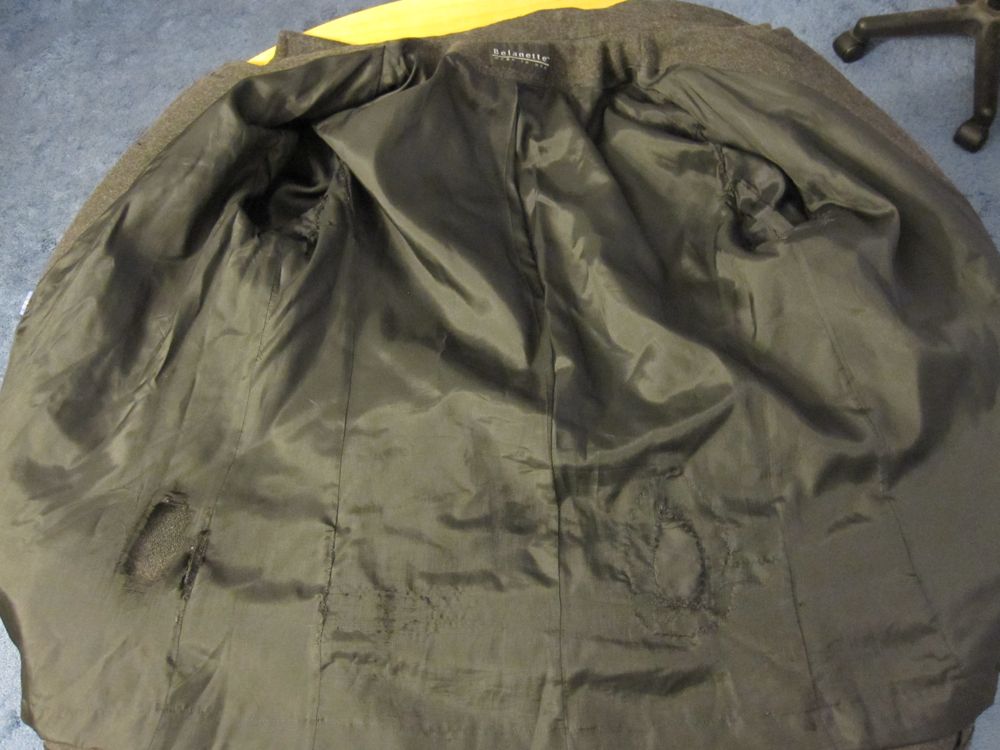
And that’s after I repaired it! Back pockets (and, I believe, a set of keys always kept in the same front pocket) are hard on coats. (And armpits are too.) A couple of years back I made a stab at adding a second layer of lining to the coat, but it didn’t go well. Here’s the “before before”, which has that lining in it, though you can’t see it well.
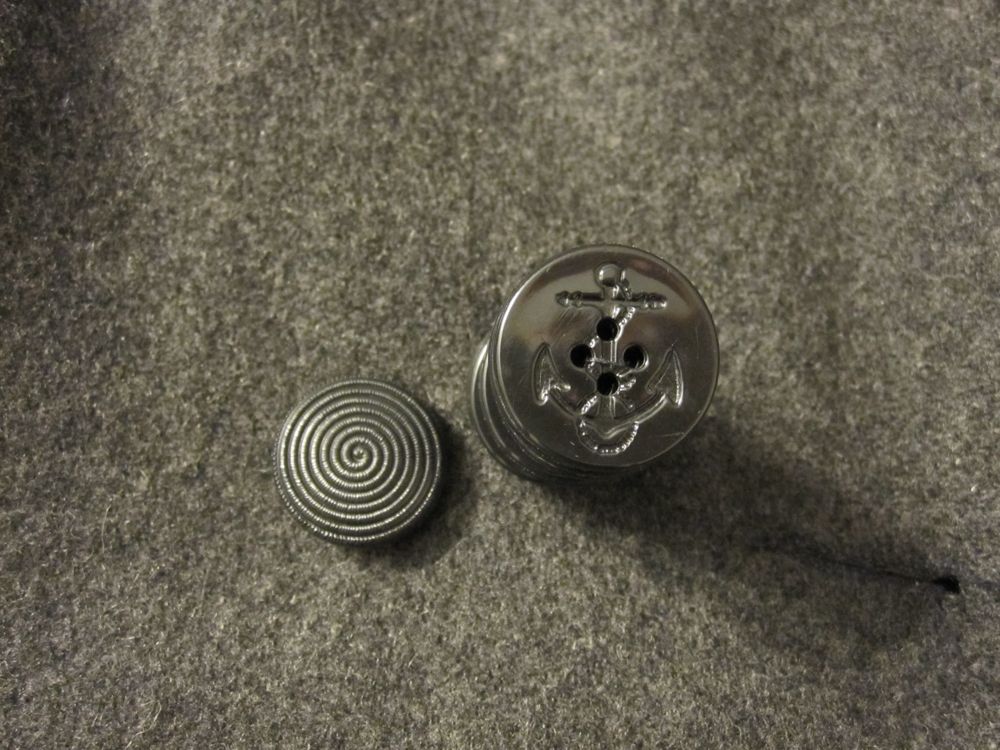
As a secondary issue, the coat was missing two buttons. I didn’t care for the originals enough to track down replacements, so some years ago I also bought ten new buttons to put on.
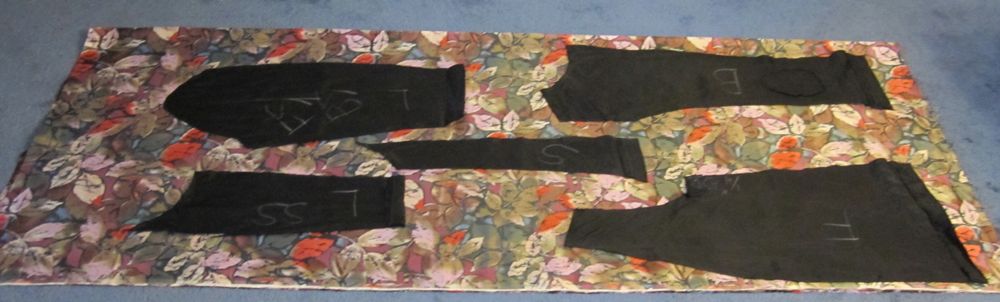
This fall I decided to do things properly and really get this coat fixed. I found some heavy satiny material in the clearance section of the store that I fell in love with, all rich watercolor leaves on a black background, and bought what was left of it (about two yards). Then I took out the lining of the coat and took half of it apart. Incidentally, I did some searching online for directions to replace a coat lining, and the one that had a yardage estimate said 3-4 yards. I figured the coat is only hip-length and if necessary I could use plain black fabric for the sleeves, but I don’t think that will be necessary.
This is wider than standard lining material, but really.
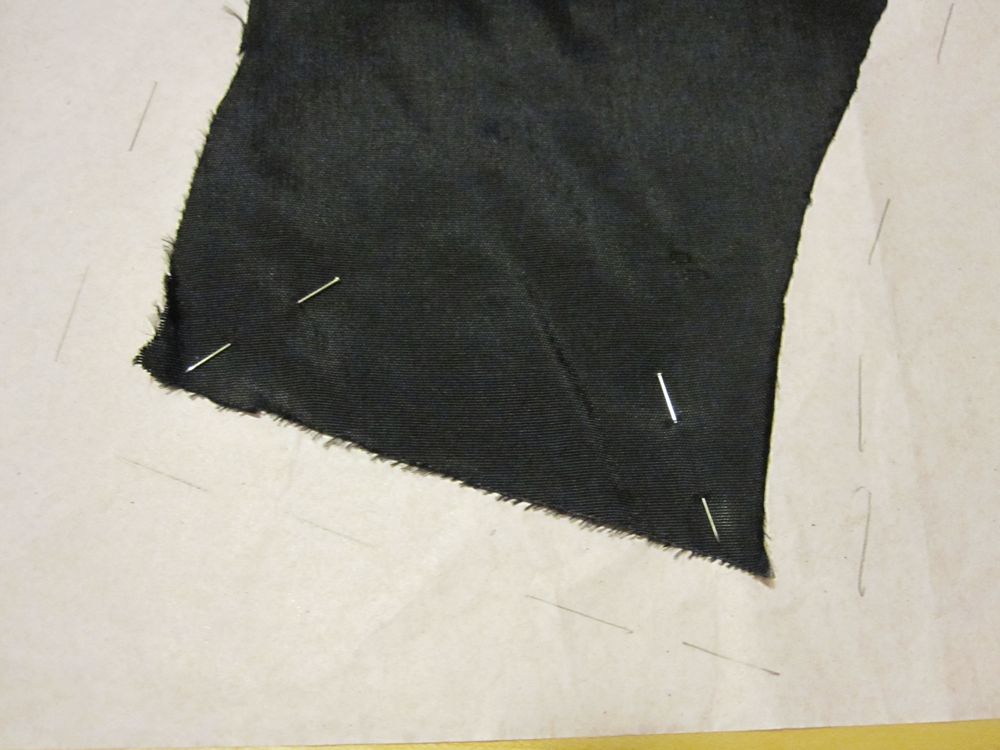
To replace a lining you have to make a lining. You can see the process in the picture above: take apart your original lining to make a pattern. I cut off the seam allowances (trimming at the stitch line) with the plan to make paper patterns with new seam allowances of known width. I only took apart half the lining, so the other half can show me the order the pieces go together, and I took a bunch of pictures of the coat before and as I took it apart. Digital cameras are a beautiful thing!
My sophisticated pattern-making setup:
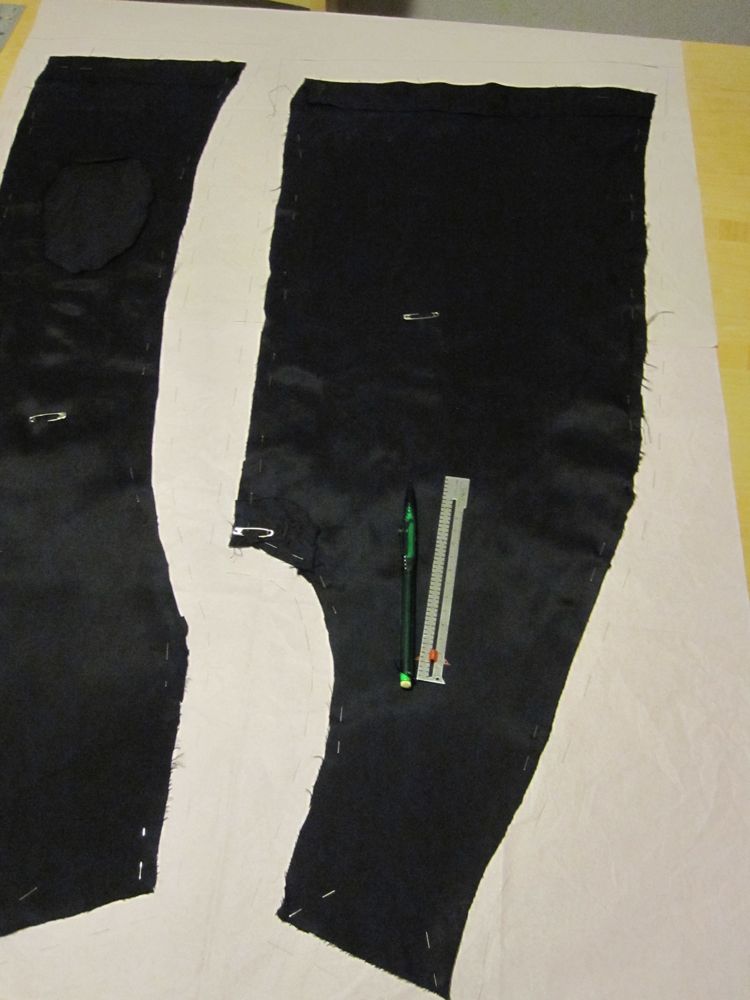
I added a half inch all around. The lining had sagged badly, then been folded and sewn up at the hem rather grotesquely, so I also measured how long I needed it to be and adjusted the length of the pieces accordingly. Incidentally, my pattern paper is almost all from TJ Maxx. It’s the paper they use generously to wrap anything that might be fragile before bagging it. It is perfect for patterns.
Before making and inserting the lining, I changed out the buttons and ironed in some flexible black tricot interfacing, to give the wool in the back some oomph and help keep future rubbing from wearing it out. I stitched along the stitch lines already visible from the outside to help the tricot stay in place. The buttons look much better – those old shiny ones were just too much.
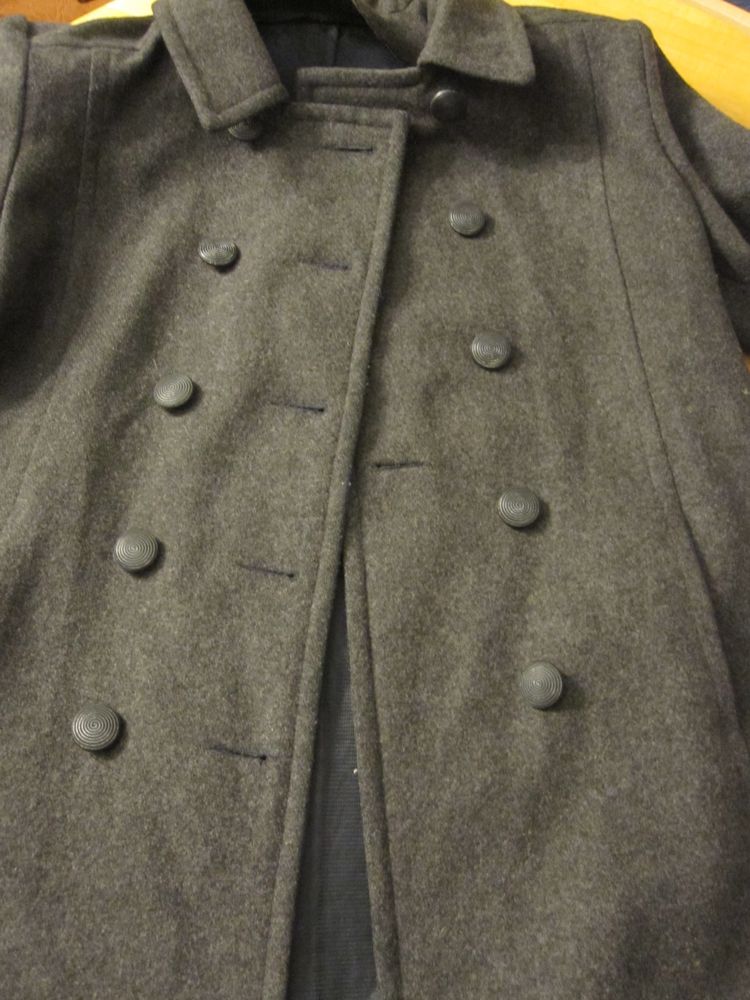
The new buttons are black, they just don’t look like it in the picture. There is a clear flat button for the solo buttonhole on the inside flap, but it cannot be sewn on until the lining is in.
I haven’t finished the project yet – there will be a sequel when I have the lining cut out, assembled, and inserted, and the last button sewn on.
Update: The thrilling conclusion is now posted.