Bright ideas

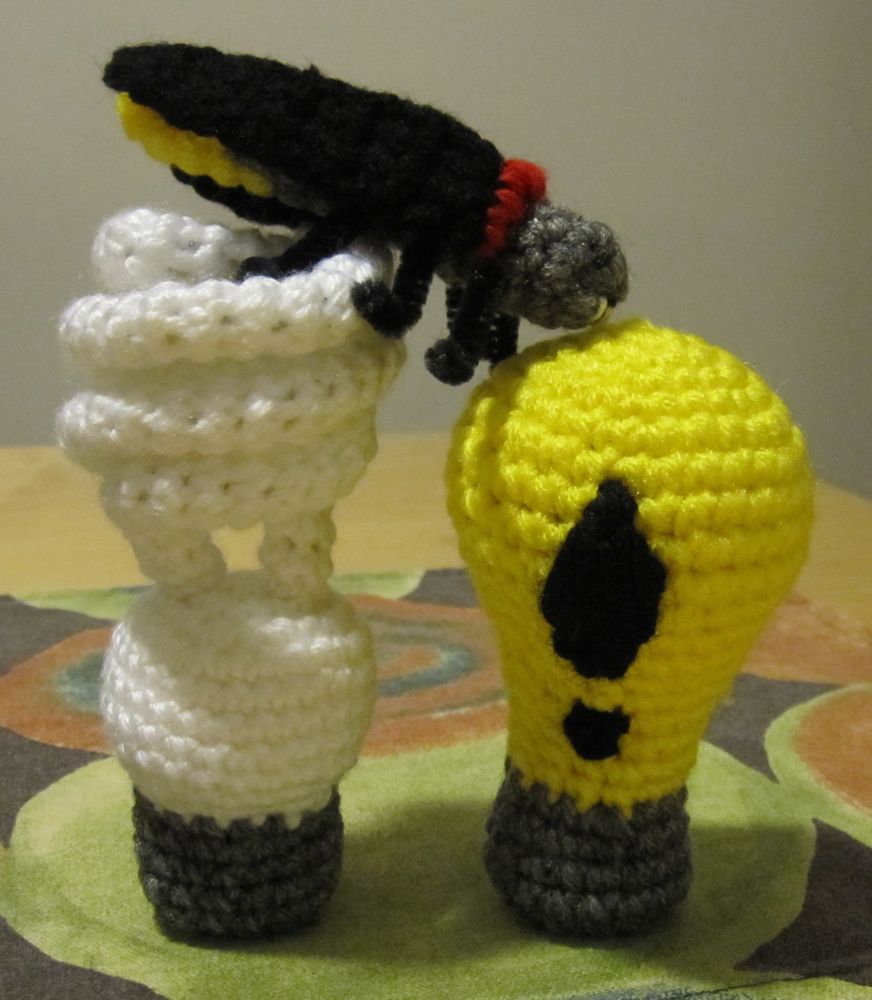
I was struggling for today’s blog post, because I have a lot of works in progress but nothing super-near finishing. I was concerned about deciding the topic and then having to stay up until midnight finishing the project! However, I found my way. The other day I finally started Planet M File’s firefly, which was a quick project.

from the front from the back

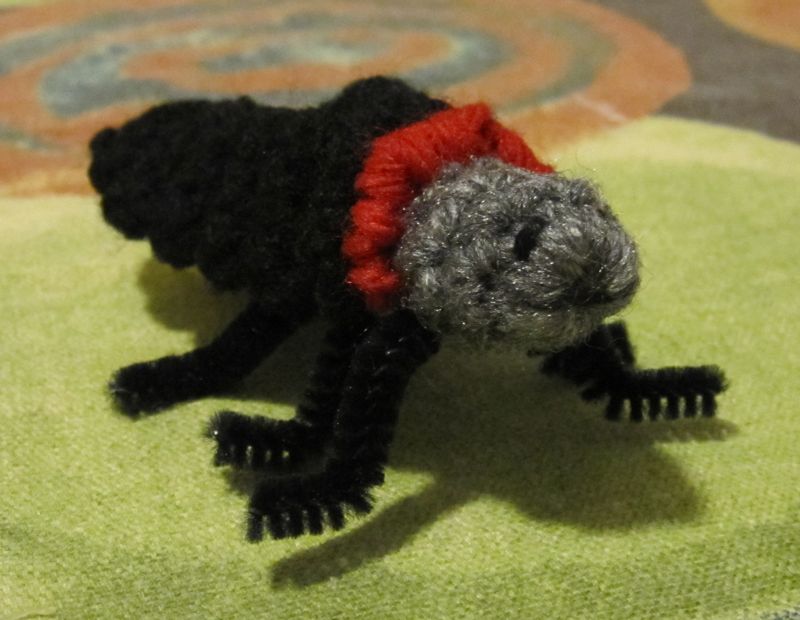
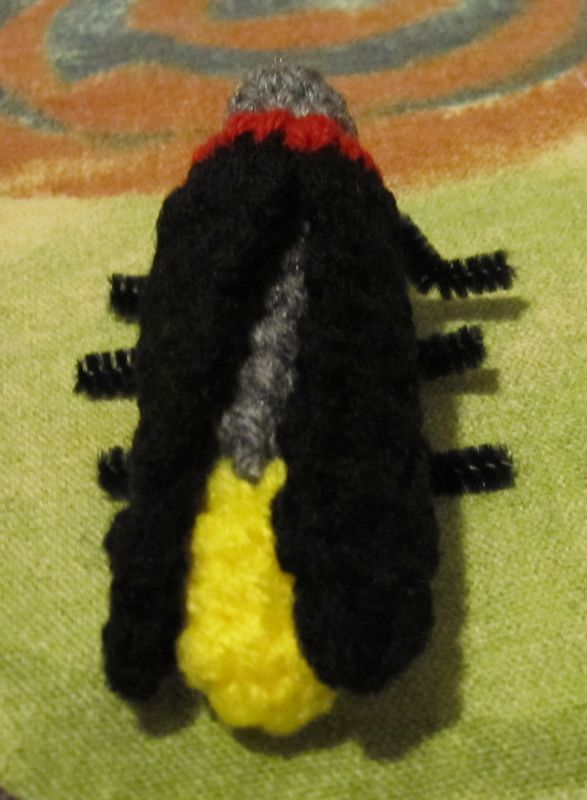
Using bright red instead of country red makes him look kind of like a vampire, to me, so I adjusted the facial embroidery accordingly.

I vant to suck your blood
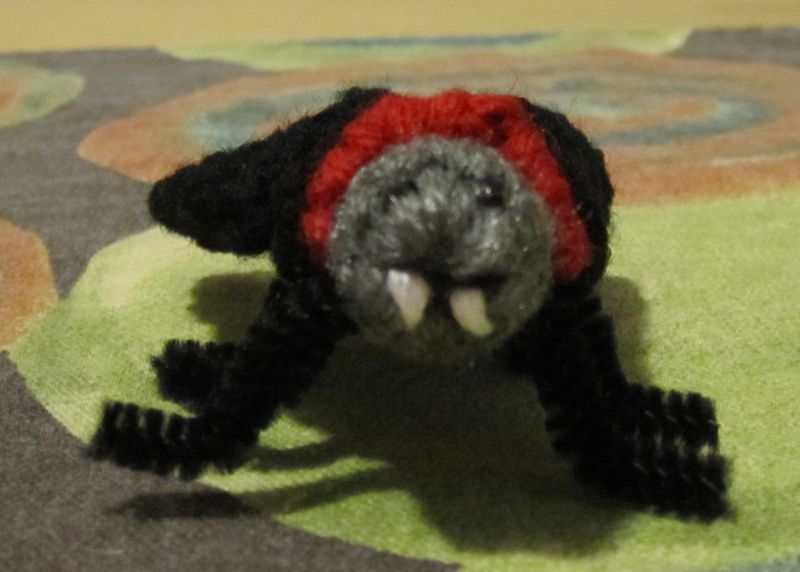
He vants to suck your blood.

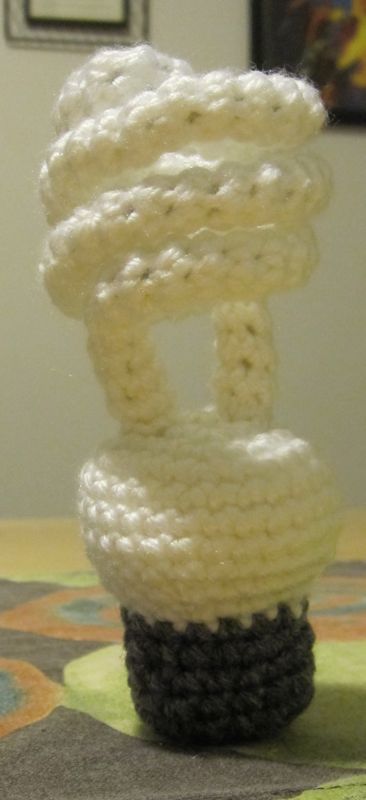
Thinking of ways to make this a longer blog post, I brainstormed other things that light up. I figured there was no way that starting on Tuesday evening I would finish another animal that lights up, but I could do a lightbulb. So I did. A compact fluorescent lightbulb, in fact.

eco-friendly

And then I made an incandescent light bulb to be his friend. I don’t know why cartoon lightbulbs are traditionally yellow, but I have a huge amount of mildly nasty-feeling yellow yarn so I went ahead and used it.

traditional

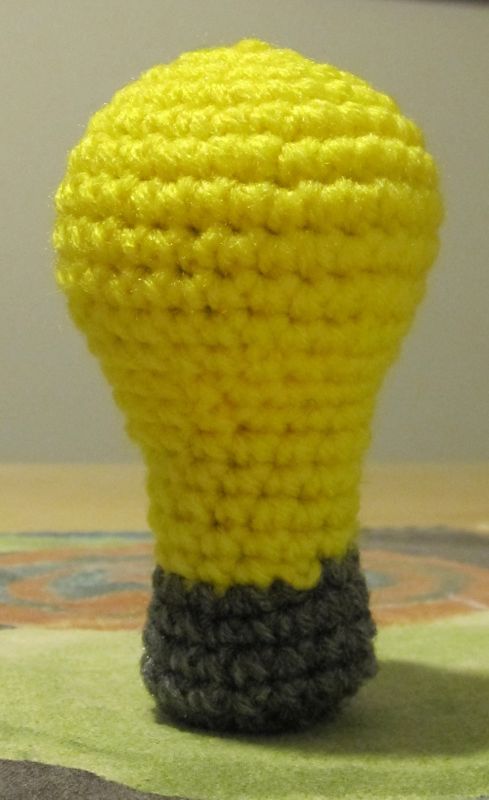
The incandescent was freehanded to match the CFL in size (which did not quite happen), but I have a pattern for the CFL.  

Compact Fluorescent Lightbulb (modeled after a 60 Watt equivalent, but is larger):

» A cleaned up version of this pattern is now available with two other lightbulbs (incandescent and LED) as a name-your-price pattern in the store.

You need: small amounts of white and gray worsted weight yarn, appropriate hook for a tight stitch (I used E/3.5mm), two white (or silver or beige) pipe cleaners, and a small amount of stuffing. I also used small rocks in the bottom of both bulbs to get them to stand up.

In white: sc a tube 20″ long and less than 1 1/2″ around. This will depend on your gauge; for me with soft worsted weight yarn and an E hook, 5 sc around gave 1 3/8″ circumference. It does not matter how you start the tube because the ends will be hidden; magic ring, ch 2 and sc in first one, ch and join with sl st. Dealer’s choice.

After about 12″, stop and insert the first pipe cleaner. Your tube should be barely big enough for it. I like to fold the end over so the cut end can’t snag the yarn, and I recommend cutting about 1 1/2″ off the pipe cleaner to put the join closer to the middle of the tube. You will find that you can only push the pipe cleaner in from the end for so long, and then you have to scrunch the tube onto it. Finish the 20″ and leave a long enough yarn tail to sew the tube ends to the base of the bulb. Insert the second pipe cleaner to meet or slightly overlap the first, scrunch the end of the tube down a bit, cut the loose end off (should be about 3″, or 1 1/2″ if you cut the first one) and unscrunch the tube.

There is only so much you can do to get the tube into shape before it’s sewn onto the base, but to have the ends in the right places and orientation for sewing you should twist it now and fix it up later. At about 3/4″ from each side of the center point, fold the tube in opposite directions. You are looking at the top when it makes an S shape. Now coil the long ends around; each will make 1 1/2 rotations, interleaved with each other, before folding down to meet the base.

from the top

I’m not completely thrilled with the base, but as long as you shape it by hand it’s okay.

Edit, October 2014: I’ve cleaned up the pattern a bit to improve the shaping.

In white:
1. Form magic ring, ch 1, and sc 7.
2. 2sc around (14).
3. *Sc, 2sc* around (21).
4. *2sc, sc 2* around (28).
5. Sc 6, dec, sc 12, dec, sc 6 (26).
6-8. Sc around (26 sc; 3 rnds).
This is a good time to sew the bulb onto the base. Center the ends of the tube on row 2, across the center point from each other.
9. *Dec, sc 3* five times, sc (21).
10. *Dec, sc 2* five times, sc (16).
Needle join in 2nd st from end; FO white.

In gray:
Put slipknot on hook and sl st to row 10.
11. Beginning in the st after the sl st, *dec, sc 2* three times. Sc in same st as sl st (12).
12-15. Sc around (12 sc; 4 rnds).
Stuff! I used fiber until I got the the gray part and then switched to rocks.
16. *Dec* around (6).
FO. I had to stick some more rocks in before doing the final drawstring. Shape by hand; you could get a better form on the bulb if you stitched the coils together but I didn’t feel like it.

all together!

Quilted potholder tutorial

The description of the construction of potholders ended up rather long. The outline: make 7″x7″ fabric faces, quilt them to 7″x7″ pieces of fleece, zigzag the two halves together, stitch extra wide double-fold bias tape around the edge, attach a loop of bias tape, and hand-sew the free edge of the bias tape down. The instructions will be for a pair of potholders.

Some related posts: Potholder examples 1, potholder examples 2, Embroidery for Edge Finishing (good choices for sewing down the binding).

Making faces:
The simplest way to make the fabric faces is to find a fabric you like and cut four 7″x7″ squares. There are a huge number of variations, though: you could stitch (heat safe) ribbon along a plain piece of fabric, or applique other fabric onto it, or employ any quilting technique. The two sets of potholders I made most recently were patchwork and confetti piecing.

For patchwork, I was rather imprecise: I have several 7″x7″ squares of paper, and I folded one in rough thirds diagonally, using a ruler to make sure the folds were parallel, and cut fabric with a(n unmeasured) 1/4″ seam allowance along the folded edge or edges. I had four kinds of fabric so I cut one inside third and two outside thirds of each, matched them up so no two faces had the same combination of fabrics, and sewed them together with a 1/4″ allowance. Then I pressed the seams open.

patchwork pieces patchwork faces

Confetti piecing may take longer but requires no measuring. You need more fabric for it than the total surface area of the finished faces, but you can also add more later if you discover you didn’t cut enough. I usually cut five to six faces’ worth of material for the four I am making. The different pieces should be sewn together with a 1/4″ seam allowance, but not necessarily squarely. You may lay one diagonally across the other, sew along the diagonal, and trim off the excess beyond the seam allowance. That excess may then be lined up with some other part of the material and sewn on. Press the seam allowance open after every seam, to minimize bulk. You may also cut a straight line across the material and stitch the halves together in a different orientation. Repeat until there is some region that looks like a good potholder face, cut out a 7″x7″ square, and sew the remainders together again as before (I think of this as “rolling out the scraps”). You can see why this takes a lot of material: lots of seam allowance, and little pointy bits sticking out unusably from the edges.

starting confetti pieces back of confetti piecing

cutting a face
Try to continue the straight line of the template all the way across the fabric, to make using the leftover fabric easier.

rolling out the scraps
“Rolling out the scraps.”

confetti faces

Construction:
I use fleece remnants for my padding. Any color is fine, so long as you line thinner/paler fabrics with muslin or white cotton to keep the fleece color from showing through. Cut four 7″x7″ squares and pin your fabric faces to them. Stitch around the edge at about 1/4″ and quilt them down the center in some way. My butterfly potholders had a stitched triangle somewhere in the middle, my patchwork potholders are stitched along the two seams, and my confetti-pieced potholders are stitched along some assortment of seam lines.

If the faces have an upper corner, align them so those match when you pair the halves up. Zigzag around the edges of the potholders. You could also straight stitch, but zigzagging keeps the edge from puffing unattractively under your bias tape and makes straight stitch unnecessary.

pinned for quilting
I cut a 14″x14″ square of fleece and pinned all four faces at once. I don’t think I recommend that, since it is still advisable to stitch around the edges of each face.

ready for binding

Edge binding:
Each pair of potholders uses about two yards of binding, or 2/3 of a package. You want extra wide double fold bias tape. Unfold it and pin one raw edge along the edge of the potholder (if the tape is folded unevenly, use the narrower half), curving around the corners. This takes a fair number of pins. Make sure you start a bit away from a corner so you don’t have to join the cut ends on a curve; to make the join, fold the right-hand raw edge (with the edge of the potholder facing away from you) in on itself and overlap the left-hand raw edge over it. See the pictures below: you want the exposed tape ends to point toward you when you sew the seam on your machine.

pinned for machine sewing

pinning the overlap
You want your raw edges downstream.

Stitch in the fold line all around the potholder. I often have to walk the machine with the handwheel around the corner curves, and even with that I sometimes have to redo one or two. Afterward, trim the potholder corners to match the curve of the bias tape, and zigzag around the edge again. Cut a 5″ to 5 1/4″ length of bias tape to be the hanging loop. If you have a desired top corner, make sure you pin the loop to it. Fold the bias tape in half so the open edge faces out (see picture) and pin to the opposite side of the potholder from the edging. I usually pin the edging down so it can’t get caught in the stitching. Sew the loop on in a straight line close to the corner edging stitch. Trim any bits that stick out past the edge and zigzag the loop ends down.

pinning the loop

Fold the edging over to the loop side and pin down. At the join, unfold the original bias tape folds so that the outer layer of tape is completely wrapped around the inner layer. You may need to change the original fold on the inner layer, making the strip a little narrower, in order to get a smooth line.

pinning the last edge

There will be a separate post with my thoughts on choice of embroidery stitch for the loose end of the binding [edit: here it is!], but whatever stitch I use I proceed in the same way: start at the near edge of the loop and stitch the binding down underneath it. Proceed around the potholder until you reach the near end of the loop again. Pin the loop up, stitch across the base, and then stitch up the far side of the loop, around, and back to where you started (this is why the open edge of the bias tape should be outward: your stitches will seal it off).

I also wash the potholders in a mesh laundry bag and give them a press before wrapping them. As long as your embroidery is sturdy, there should be no problem machine-washing the finished project.

finished confetti potholders finished patchwork potholders