Red and gold metallic floss! It gleams! I have a love/hate relationship with metallic floss (in contrast to my just-hate relationship with satin floss). It’s so attractive, and such a pain to work with (crochet or embroidery… as long as you’re not comparing it to satin floss). The floss is made of a fiber core with a metal strip coiled around it; as you work with it the edges of that strip poke out and turn into snag factories. That’s trickier with embroidery than crochet, fortunately for us here, but it can cause difficulties. I have some advice for crocheting with this material, with the ornament instructions below.
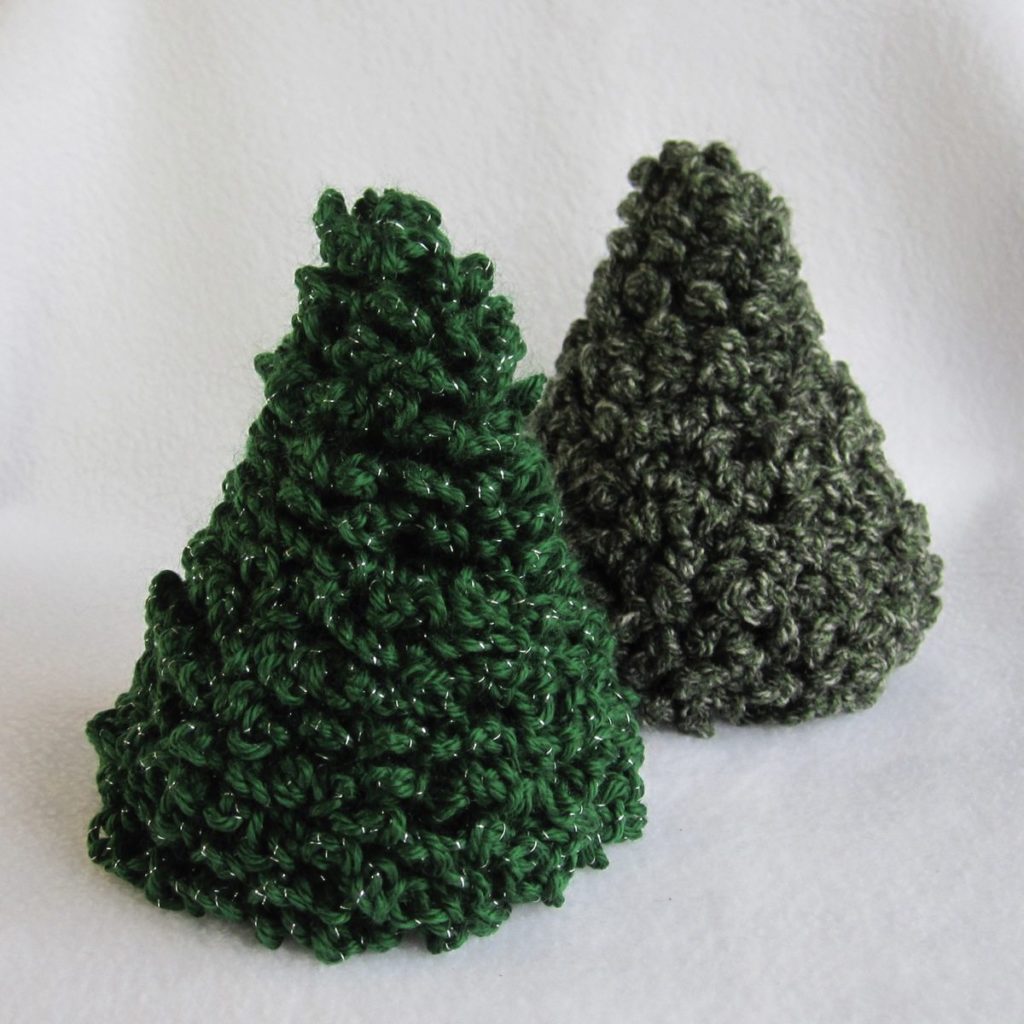
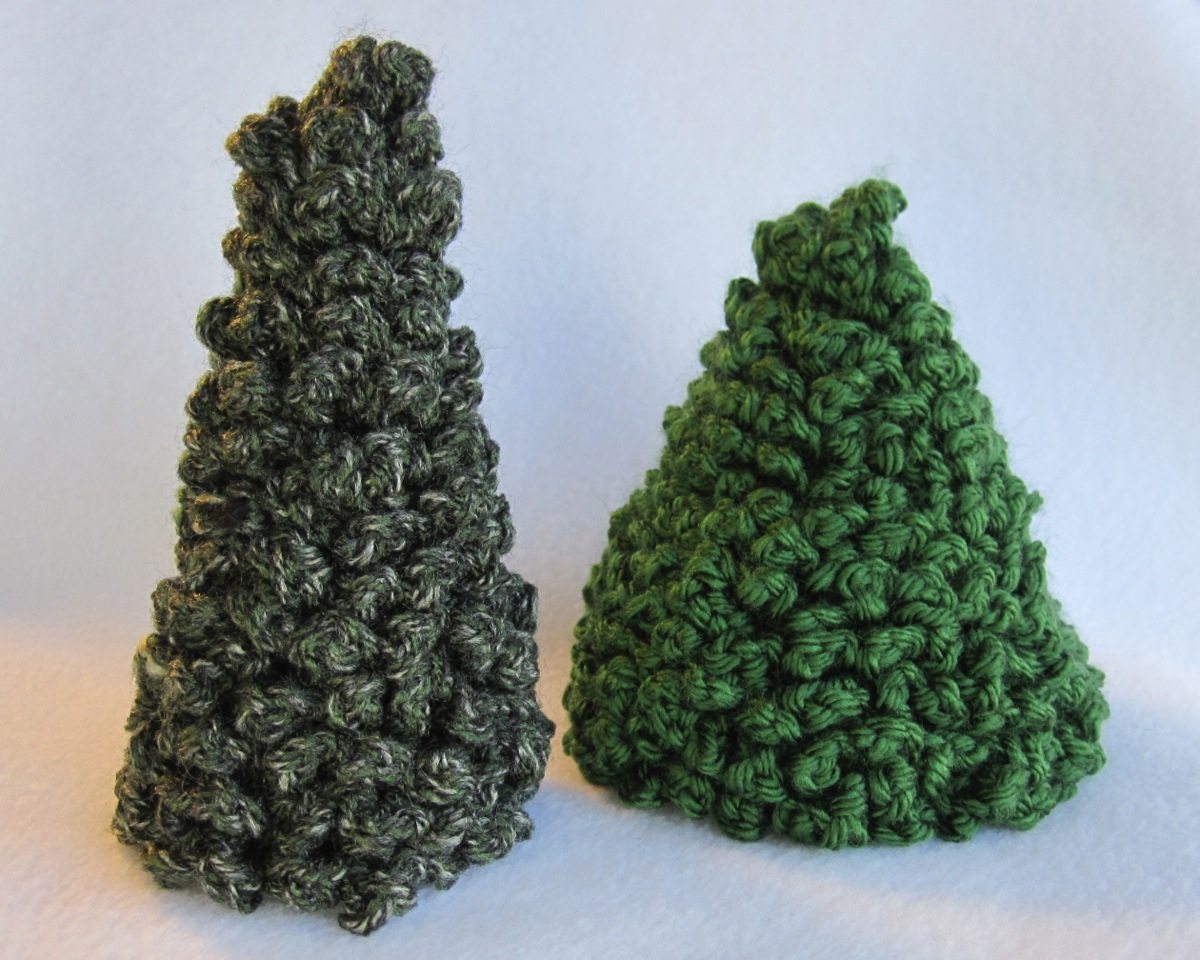
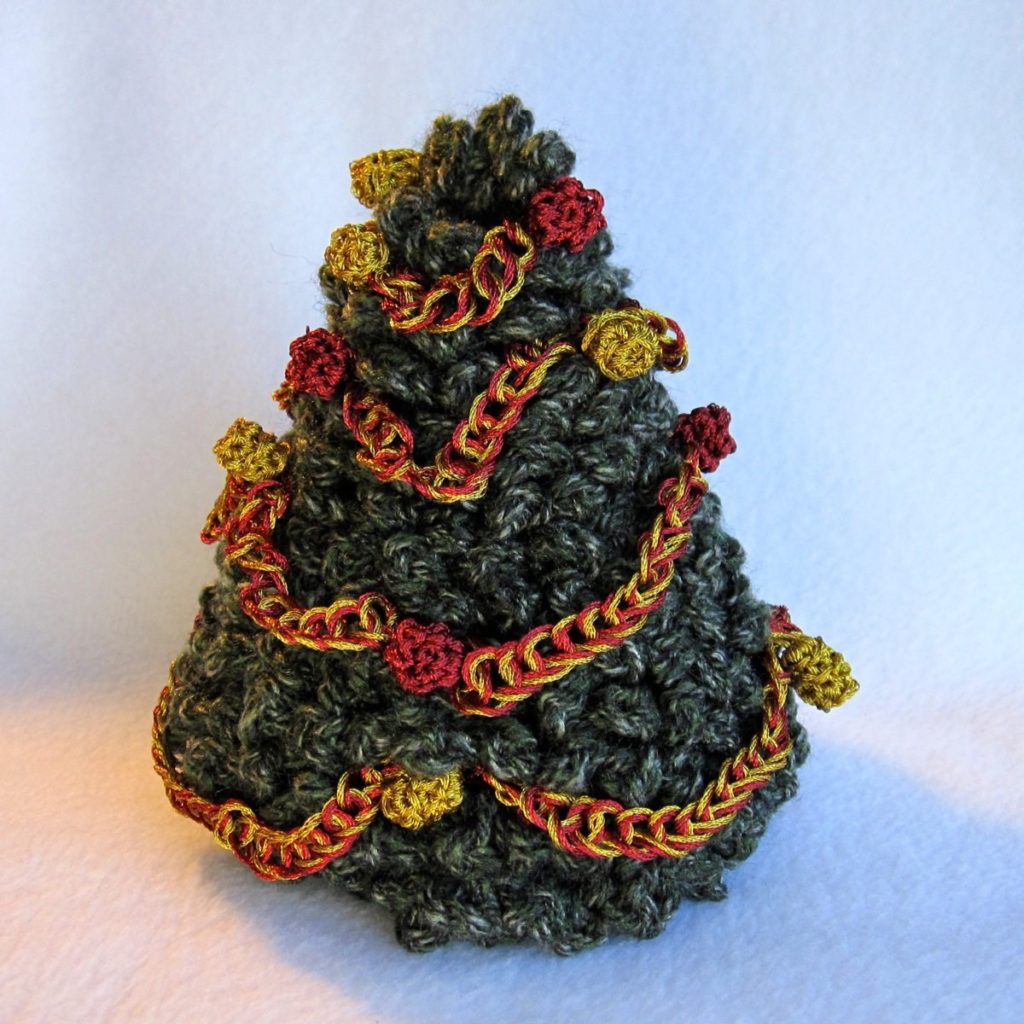
This tree is my Tabletop Tree made in Red Heart Tweed “Camo” yarn, through and through. It is denser and smoother than the other tree.
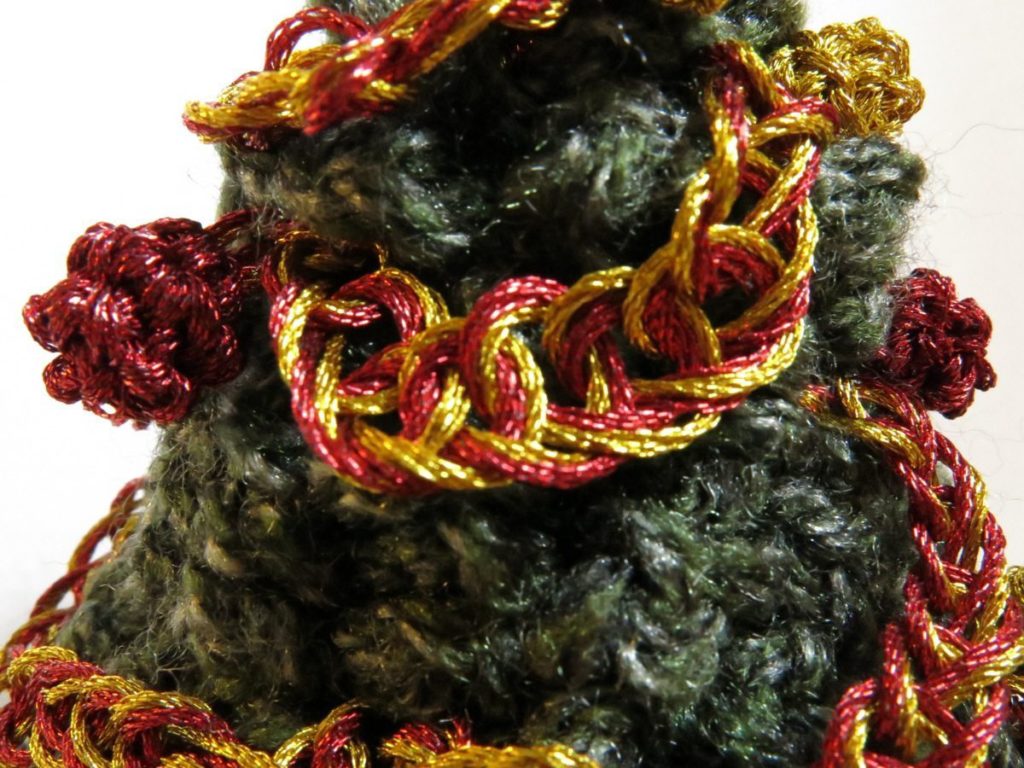
Garland: This tree also has a chain garland, made using the better part of a skein of each color, but not a magic one this time. I found the strands of the two colors were too intermingled – at least at first – to make a magic chain. I used an E/4 hook (3.5mm) and chained with both colors together, instead. A double thickness was too much for even the roughness of metallic floss, and the slip knot and knot at the end did not want to stay put. I augmented them with overhand knots. If I had knotted each color separately, I would have solved both the problem of the slippery slip knot and the strands intermingling.
Decorating: To put the garland on the tree I wound it around in a spiral, trying to tuck the chain into the branches from time to time to mimic how garlands are placed on real trees. I used a yarn needle to hide the floss ends inside the tree. The ornaments were hung by stitching through the tree, as before, and placed at the tucks of the garland to help hold it in place. I stitched straight through and then down and out the foot of the tree.
General floss crochet instructions: The two decorations below were made with embroidery floss and a size 4 steel hook (2mm). For these my abbreviations and conventions are relevant, though the only one you haven’t seen before is likely “2sc” for single crochet increase. “Dec” means sc decrease. I highly recommend the double magic ring to begin, since it does not require any additional floss-end securing. I also recommend the trick of inserting your hook into the first stitch of the round before tightening the ring so it does not get tightened down along with the ring (shown in the video at the link), under both loops even if you won’t be using both loops. After the second round of stitching, make sure the piece is fully right-side-out, rolling the rim up with your thumbs and index fingers if needed. Metallic floss needs encouragement to change position, which is also an advantage.
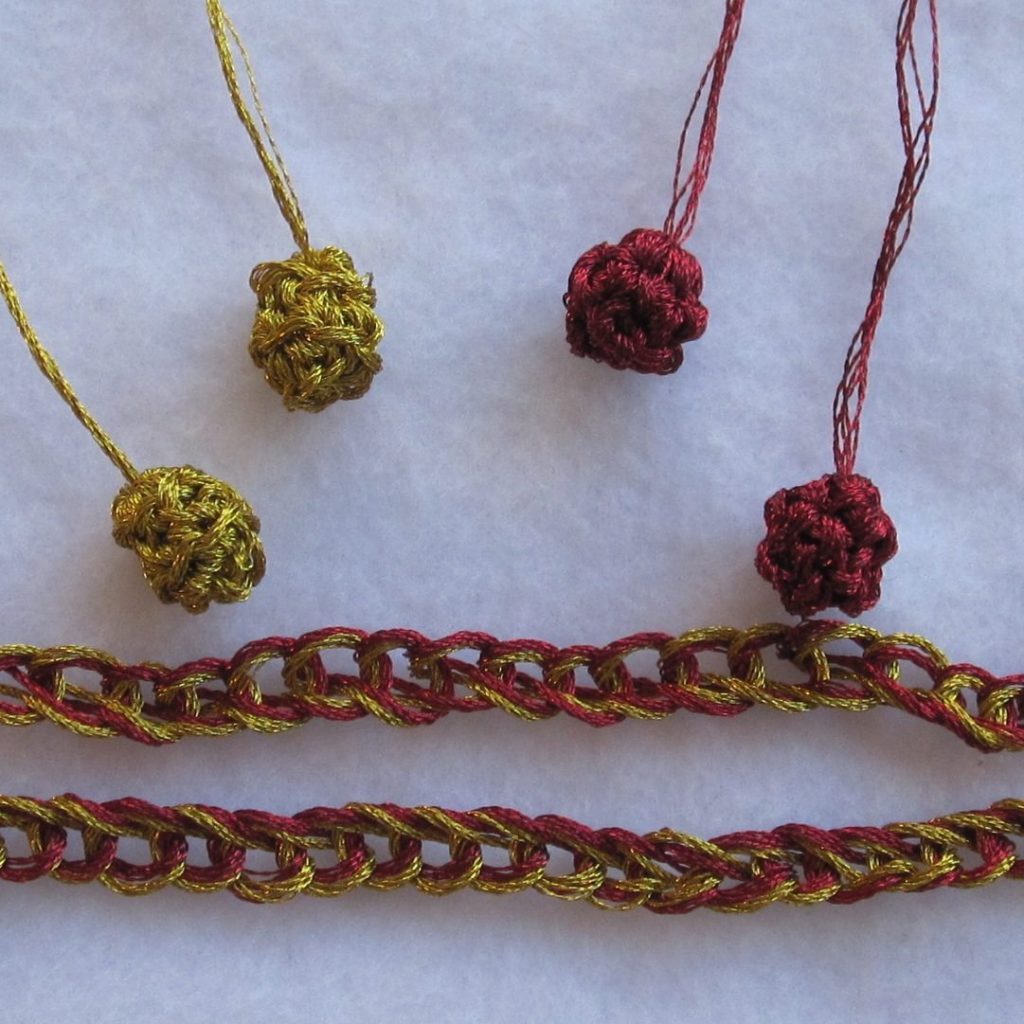
Ornament balls (red): One skein of floss will comfortably make 7 of these.
1. Form magic ring, ch 1, and sc 5.
2. 2sc, sc, 2sc, sc, sc (7). Make sure the work so far is fully right side out. I like to loosen the current loop so I can take the hook out and roll the rim up with both thumbs and index fingers.
3. Sc, dec, sc, dec, sc (5).
This should not need stuffing beyond perhaps wadding the initial floss tail (and maybe not even all of that) into the ball. Cut floss leaving a long tail. Stitch a drawstring through the opening: up under the front loop of the first stitch, down through the first loop of the second, alternating to end with up through the front loop of the last stitch. Put the floss through the ball and out the middle of the magic ring. Pull the drawstring tight and roll the ball between your fingers as needed to round out the shape.
Pine cones (gold): One skein will easily make 8.
1. Form magic ring, ch 1, and sc 6.
2-3. Sc around in BL only (6 sc; 2 rnds).
As above, the initial floss tail should suffice for stuffing. Cut floss leaving a long tail and stitch a drawstring through the back loops only of the last round; I like to go from inside the round to outside under each stitch’s back loop. Pull it closed but don’t tighten too much. Put the floss through the pinecone from the center of the last round through the center of the magic ring. Roll the pinecone between your fingers if necessary to make the rounds taller and narrower (increase the distance between magic ring and drawstring).
Additional tips: A stuffing tool will be very helpful, a small fork of sorts to push the floss into the item. I use a plastic yarn needle with the back of the eye snipped off and the two resulting prongs sanded smooth. I have seen a stuffing tool of two pointy toothpicks taped together, but a wider end on the tines would be more helpful – perhaps two flat toothpicks, with half of a third one in between for spacing if needed, using the wider ends for stuffing. I also had a much easier time stuffing after I tried twisting the end of the floss until it was all coiled around itself – it gave me more to push against and I didn’t have the problems with individual plies looping up, impossible to hold onto with the stuffing tool. I had no problems with the drawstring staying closed, even though I didn’t secure the tail (well, except for stitching it through the tightly-stuffed item and out the tight magic ring).
I hope you’ve enjoyed this little post blitz! Here’s a final close-up glamour shot courtesy my husband:
I’ve made the decorations above and in the previous post, as well as my tips for working with embroidery floss, available as a name-your-price PDF for easy printing.
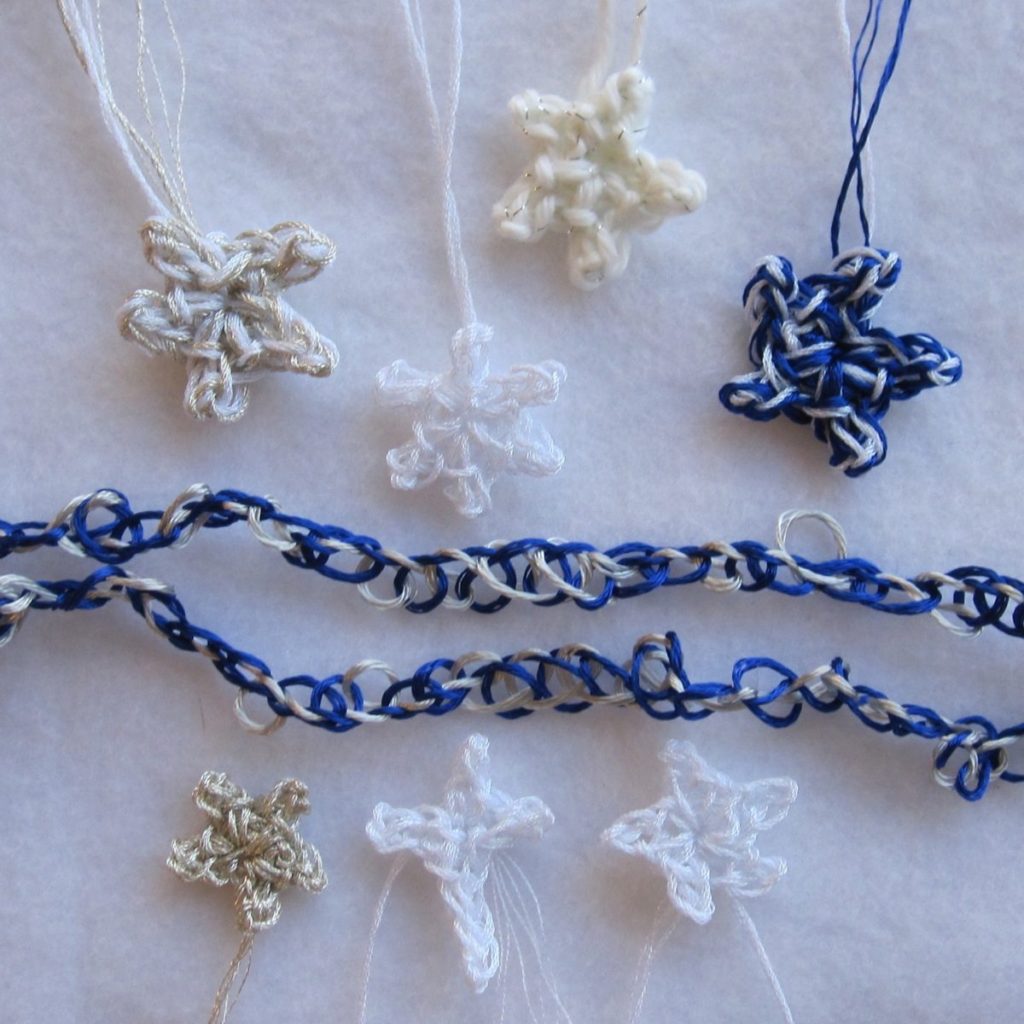
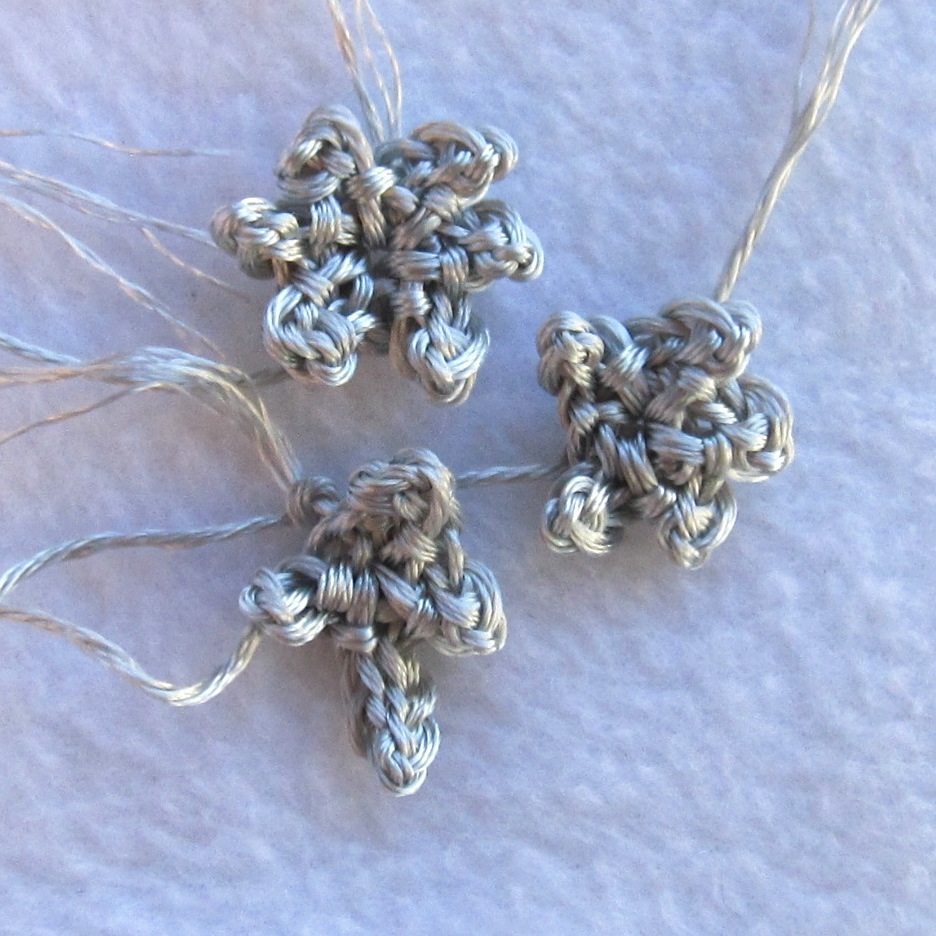
❄ Blue, silver, and white decorations ❄ Red and gold decorations ❄