Travel Craft Case

Beginning a monthly (or perhaps twice-monthly) craft night at the Sew-op gave me the urge to sew up a travel craft case that was more of a hussif than a bag. This was the spur for making my host of little felt patches, since I wanted one instead of a cushion for needles and pins. After I finally set out to work on it, it didn’t take too long to get this:

photo of craft case interior laid flat

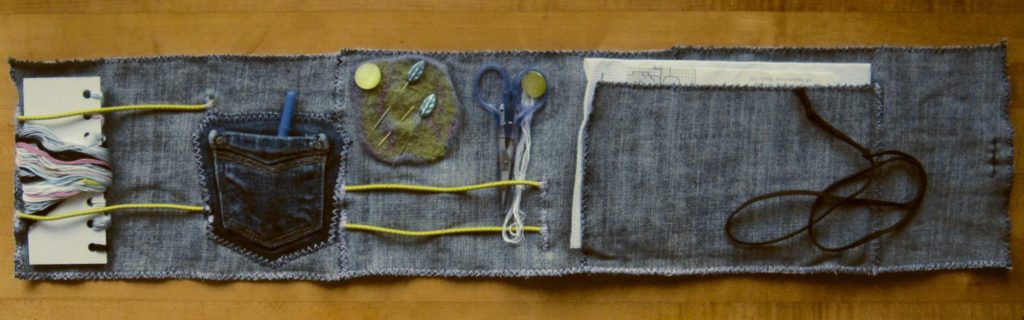
I chose the felt for it based on liking the color contrast and shape of the patch. After that, by coincidence, I found I had both bright green buttons (from my late grandmother’s stash) and bright green elastics (the cut off ends of no-tie shoelaces). The denim is the last remains of my wedding jeans, including the coin pocket.

photo of craft case rolled up 
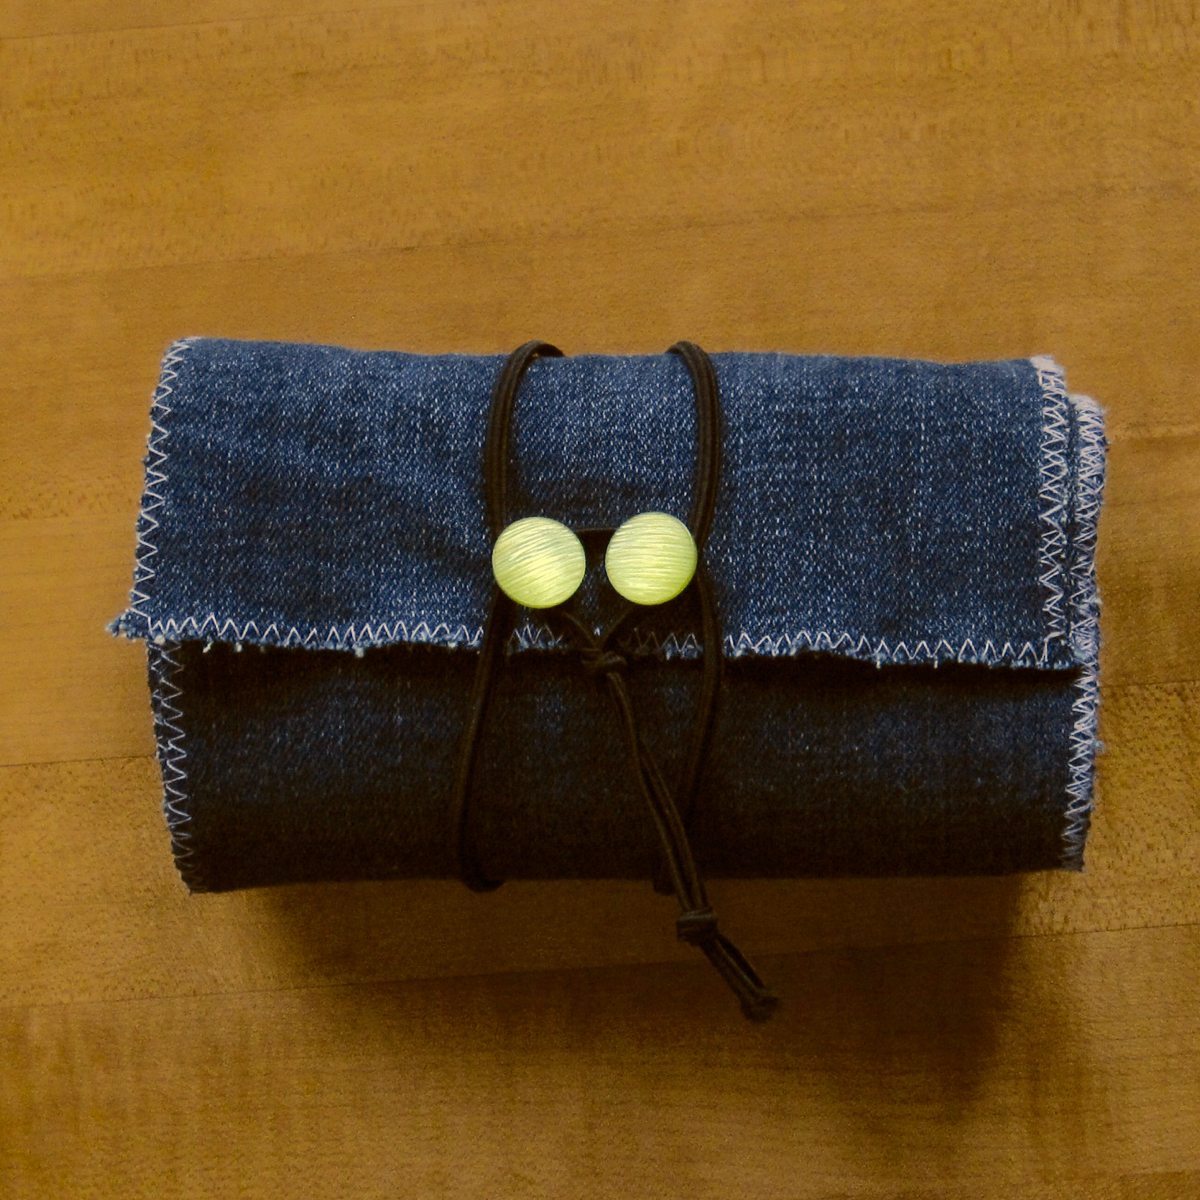
It is messy and where the elastic ends are stitched down there are wads of top thread on the wrong side, but it works for me. The main body is three 6″ x 9″ pieces zigzagged individually, butted end to end and joined by zigzag, and then zigzagged around collectively in a sort of double figure 8. Everything else is stitched flat on top of that. The inside button that doesn’t hold the felt is mostly there for decoration; I don’t know that it accomplishes anything in terms of holding in the scissors. I may find a use for it later. The elastic that holds it all shut has two knots so it can be strapped around the roll at multiple sizes – tuck four full-size spools of thread into the innermost end and you’ll need a longer strap than with a few embroidery floss bobbins.

I always seem to have more than enough crochet to fill the evenings my husband and I spend hanging out and doing nothing, so with some exceptions embroidery and hand-sewing get postponed indefinitely. I’m hoping craft nights will help me get through more of my handwork.

Storing stickers

This fall I finally decided to break away from commercial greeting cards as much as possible. I’ll pay for wit, but if I just want sweet or pretty I’ll go the less expensive route and make them in-house. Of course, I got a die-cutting machine as a gift that I use for them, and if I had to count the cost of that in the cost of making them myself it would be a long time before the savings in card purchases caught up, but as-is I believe I can make a hundred cards for the price of a dozen in the store. My disintegrating sticker and card storage folder was due for replacing anyway, so I tried to figure out something to accommodate leftover die cuts.

the original expanding folder that was my sticker and card storage

I decided to put the cards in their own box and keep the stickers and die cuts together in another container. I thought about some kind of plastic envelopes in a binder, but found they were priced above my pain point. There were kinds that were a bit cheaper but didn’t have the panel with hole punches for a binder. Finally, when looking for ideas on making things “binder-able,” I stumbled upon an Instructables about making a pencil pouch. Essentially, you cover a shortened gallon zip-top bag with duct tape. I wanted to be able to see what was in the pouch, though, at least a little, so I bought generic unprinted bags and applied duct tape just around the edges. That should improve the longevity and help avoid the bags getting crumpled up.

my new sticker storage: taped bags in a binder

To make them the right size for a binder, instead of cutting off the bottom I folded it up: first to the top of the hole-punched panel, then that section in half, and then the whole folded section up again and taped near each end. That should keep any stickers or die cuts from getting pushed down into a sticky section. The small bags, of course, are just as-is, taped around the outside and with a duct tape extension at the bottom for the hole punches.

first gallon bag fold second gallon bag fold

third gallon bag fold taping the bags

The tape along each side is a single length folded over, and the tape along the bottom is full width, two lengths stuck to each other. I didn’t take a photo of it, but when I duct-taped the gallon bags, I made sure the tape came up a little above the folded part.

Note that if you use scissors on your duct tape you’ll be saying goodbye to them for the duration of the project. In fact, if you make as many bags as I did (20 of each size), you’ll need to clean the scissors at least once during the project, because they’ll get too sticky to use. I used Citrasolv, which worked wonders, and then dish soap because the Citrasolv left them oily.

One roll of patterned duct tape will do just over 9 gallon bags, or (I estimate) at least a baker’s dozen sandwich bags. Ten gallon and ten sandwich bags took most of two rolls – the photo below shows what I had after finishing the first 20 bags, done with most of two rolls of duct tape.

two new and one leftover roll of duct tape

Next up is my favorite part: reorganizing the contents. I also need to figure out a new storage system for my cards.

Found project bag

The hubs and I are thrift store fanciers, and the main thrift store in town closed its main location a while ago for a huge renovation. They reopened two weeks ago or so, and we finally made it this Sunday. It was lovely! So much room to move around! I just want to show you the purse I found, which is to be my main project bag.

new bag - beads new bag interior
Parquet….. butter.

There are two pieces of velcro sewn inside, and when I clean it I will remove the hook side. I plan to leave the loop side in, just in case I want to attach something to it later.

I wasn’t sure at first I wanted to drop a fin on it. What finally convinced me to get it was the goose on the left. It looks like the beading was done by a robot – on the unbeaded side you can see there is a wide white line around the goose, but what human would outline it like that?

new bag - bare

It goes well with my travel tool kit, a small clutch I bought eons ago because I liked the stripes (fine irregular stripes are my favorite color). It’s long enough to hold hooks and pens, and just the right size for everything I need, including a few skeins of floss when I’m embroidering.

new bag with kit

My old project bag was a freebie from Self magazine (my mental junk food for several years), but in conjunction with my travel tool kit I looked like I was obsessed with pink stripes, and they didn’t even coordinate well. The new bag has more internal pockets and is roomier.

old bag with kit new bag with old

You can often see my hubby’s thrift store finds on his zine blog, including a winner from this week.