Plannerama

I have a crafty new planner. Previously, I’d gotten a hardbound planner that had 2-page months between sets of 2-page weeks. However, it was too large for my purse, and I found myself failing to consult it on a very regular basis. When I get busy I just want to have a piece of paper lying out with my to do list. It occurred to me I might be able to have my cake and eat it too with a planner in a mini binder.

diecut mini binder cover insert

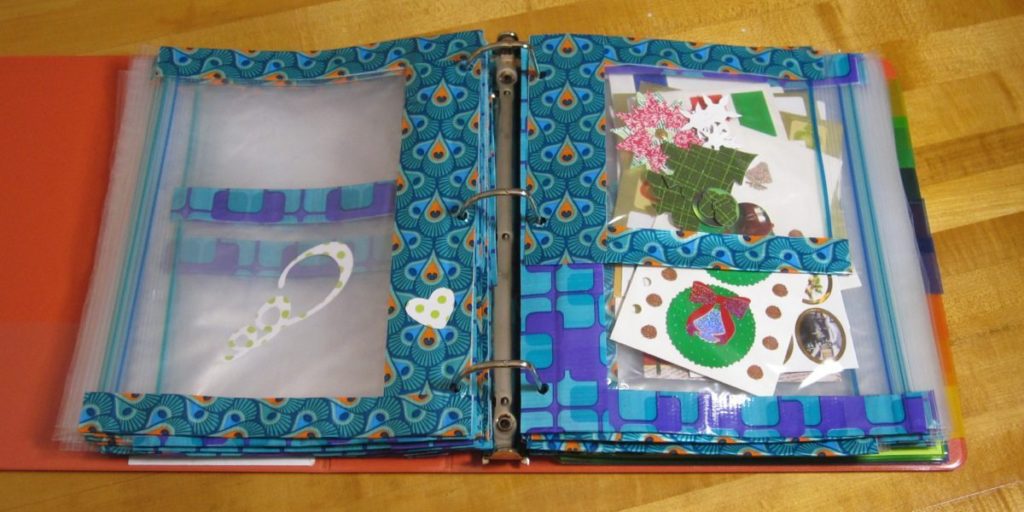
That cover is two sheets of pearly scrapbook paper cut to size, with the diecuts in the top layer made with my Cricut machine. You can see a strip of elastic – my previous pen holder was a pocket that hung onto the front of the planner with two elastic loops. It’s been a while since I switched to the binder and I only just finished my new pen holder. Meanwhile I got used to taking out the current planner page and sliding it under the elastic on the outside of the binder, so when I replaced the pocket I turned one of its elastics into a separate loop.

Pen holder for mini binder

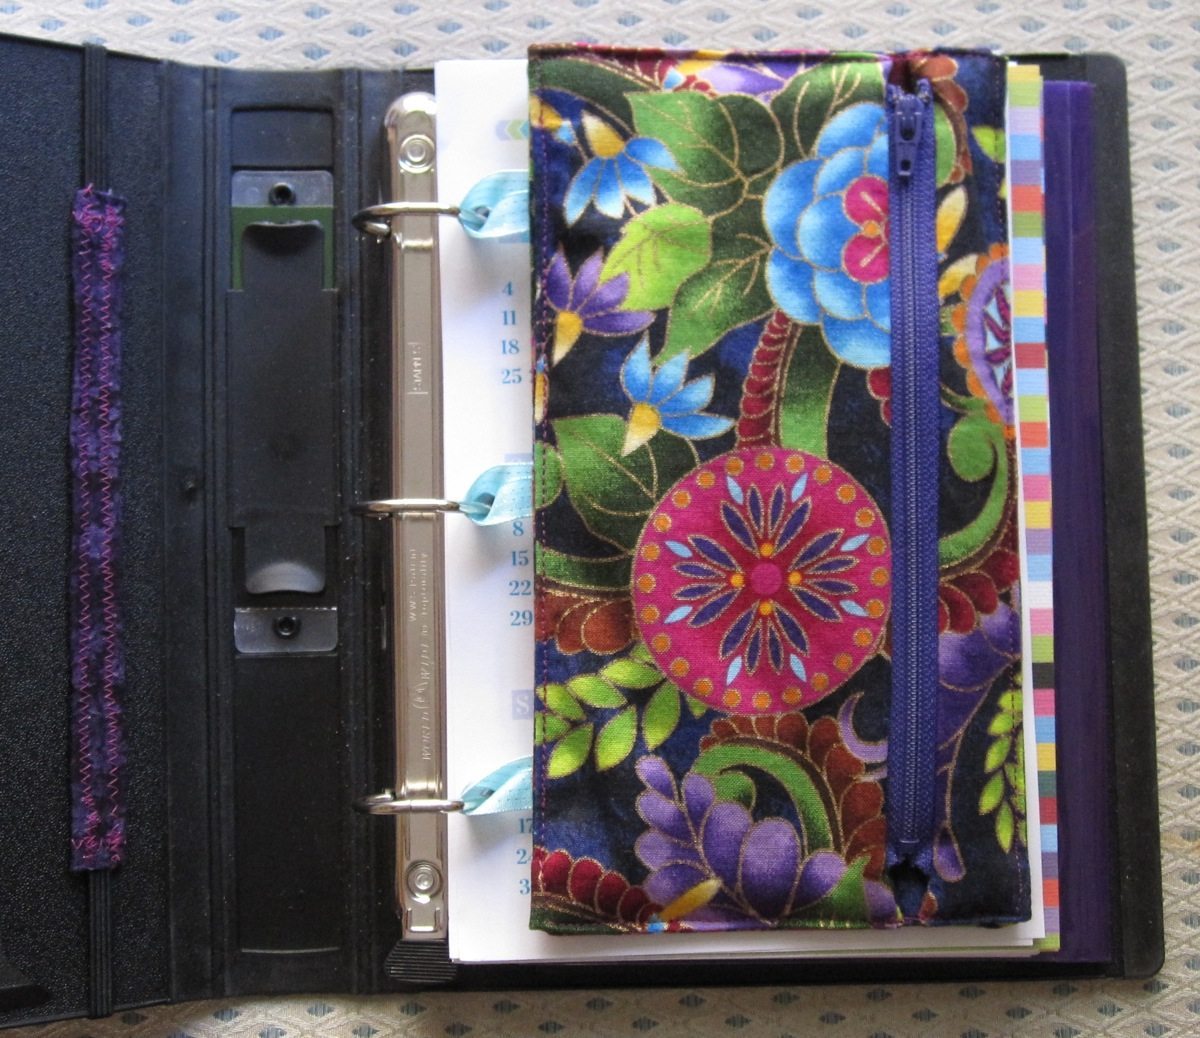
Here’s the new pouch! It’s basically two flat pieces, each double-sided, one with a zipper and the other with a layer of heavy interfacing and some ribbon loops. It didn’t come out well enough to be worth sharing a pattern for, but I’m happy with it. The striped dividers are more scrapbook paper, cut to 8.5″x5.75″ so they stick out a bit.

And finally, here’s a highlights reel of my binder’s contents, so I can share the sources of my printables.

Oh, and you may be thinking, “if her previous planner didn’t fit in her purse, there’s no way this one does!” You’re right. I got a little staple-bound two-year monthly planner to use for that. It is full of silly animal pictures.

Rubber stamps from fabric paint

Every once in a while you come across a tutorial that is truly different from the herd and makes you think “What an interesting idea!” Such was my reaction when I came across a post on Mel’s Own Place about making rubber stamps with puffy paint and plastic bottlecaps. Amazing! I’d been wanting some custom stamps but didn’t think cutting them out of erasers with X-Acto knives was going to go well.

Making stamps from bottlecaps and 3D paint.

The stamps I wanted were planner stamps: a recycle symbol to mark recycling pick-up days, and an envelope back to make occasions for which I want to send cards. That way they could be large and visible without really taking up space, because I could write over them easily. I indentured my husband to play with paint with me.

I had two kinds of 3D paint in my stash: Tulip dimensional fabric paint and Scribbles 3-dimensional paint. The taller bottle of the Tulip was easier to control (more in squeezing than aiming), but the Scribbles seemed to keep its shape better while drying – Tulip flattened out a bit. We found we needed 3 rounds to get truly good images. The papers in the picture below show the images after 2 rounds (rectangular) and 3 rounds (hexagonal) of painting – the third round was really just local touch-ups.

Stamps made from bottlecaps and three rounds of 3D paint; impressions after 2 and 3 rounds of paint shown.

As you can see from the Oh You stamp on the hexagonal paper, you still have to be careful and press on all areas of the cap to get a good impression. If you catch the paint at the right moment you may be able to flatten it down a bit while it’s dry enough not to stick but still soft in the middle; I was able to do that to some extent with the recycling symbol.

All in all, though, it’s a great idea – quick, easy to correct errors (more than just heightening low spots: you can see the giant smear of paint in the first image, and there were others on different sheets of newspaper), and fun.

Storing stickers

This fall I finally decided to break away from commercial greeting cards as much as possible. I’ll pay for wit, but if I just want sweet or pretty I’ll go the less expensive route and make them in-house. Of course, I got a die-cutting machine as a gift that I use for them, and if I had to count the cost of that in the cost of making them myself it would be a long time before the savings in card purchases caught up, but as-is I believe I can make a hundred cards for the price of a dozen in the store. My disintegrating sticker and card storage folder was due for replacing anyway, so I tried to figure out something to accommodate leftover die cuts.

the original expanding folder that was my sticker and card storage

I decided to put the cards in their own box and keep the stickers and die cuts together in another container. I thought about some kind of plastic envelopes in a binder, but found they were priced above my pain point. There were kinds that were a bit cheaper but didn’t have the panel with hole punches for a binder. Finally, when looking for ideas on making things “binder-able,” I stumbled upon an Instructables about making a pencil pouch. Essentially, you cover a shortened gallon zip-top bag with duct tape. I wanted to be able to see what was in the pouch, though, at least a little, so I bought generic unprinted bags and applied duct tape just around the edges. That should improve the longevity and help avoid the bags getting crumpled up.

my new sticker storage: taped bags in a binder

To make them the right size for a binder, instead of cutting off the bottom I folded it up: first to the top of the hole-punched panel, then that section in half, and then the whole folded section up again and taped near each end. That should keep any stickers or die cuts from getting pushed down into a sticky section. The small bags, of course, are just as-is, taped around the outside and with a duct tape extension at the bottom for the hole punches.

first gallon bag fold second gallon bag fold

third gallon bag fold taping the bags

The tape along each side is a single length folded over, and the tape along the bottom is full width, two lengths stuck to each other. I didn’t take a photo of it, but when I duct-taped the gallon bags, I made sure the tape came up a little above the folded part.

Note that if you use scissors on your duct tape you’ll be saying goodbye to them for the duration of the project. In fact, if you make as many bags as I did (20 of each size), you’ll need to clean the scissors at least once during the project, because they’ll get too sticky to use. I used Citrasolv, which worked wonders, and then dish soap because the Citrasolv left them oily.

One roll of patterned duct tape will do just over 9 gallon bags, or (I estimate) at least a baker’s dozen sandwich bags. Ten gallon and ten sandwich bags took most of two rolls – the photo below shows what I had after finishing the first 20 bags, done with most of two rolls of duct tape.

two new and one leftover roll of duct tape

Next up is my favorite part: reorganizing the contents. I also need to figure out a new storage system for my cards.