Single Crochet Shaping 3: polygons

If you want to crochet a smooth disk, you should stagger the increases round to round. If they stack up on top of each other they tend to make corners. If you want something with corners, though, can you figure out how to make it without pure trial and error? In particular, if you want to make regular polygons of various numbers of sides, how do you figure out how to increase?

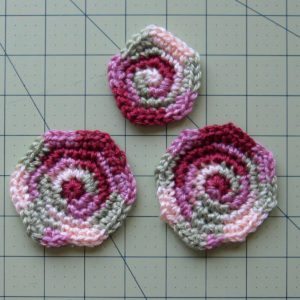
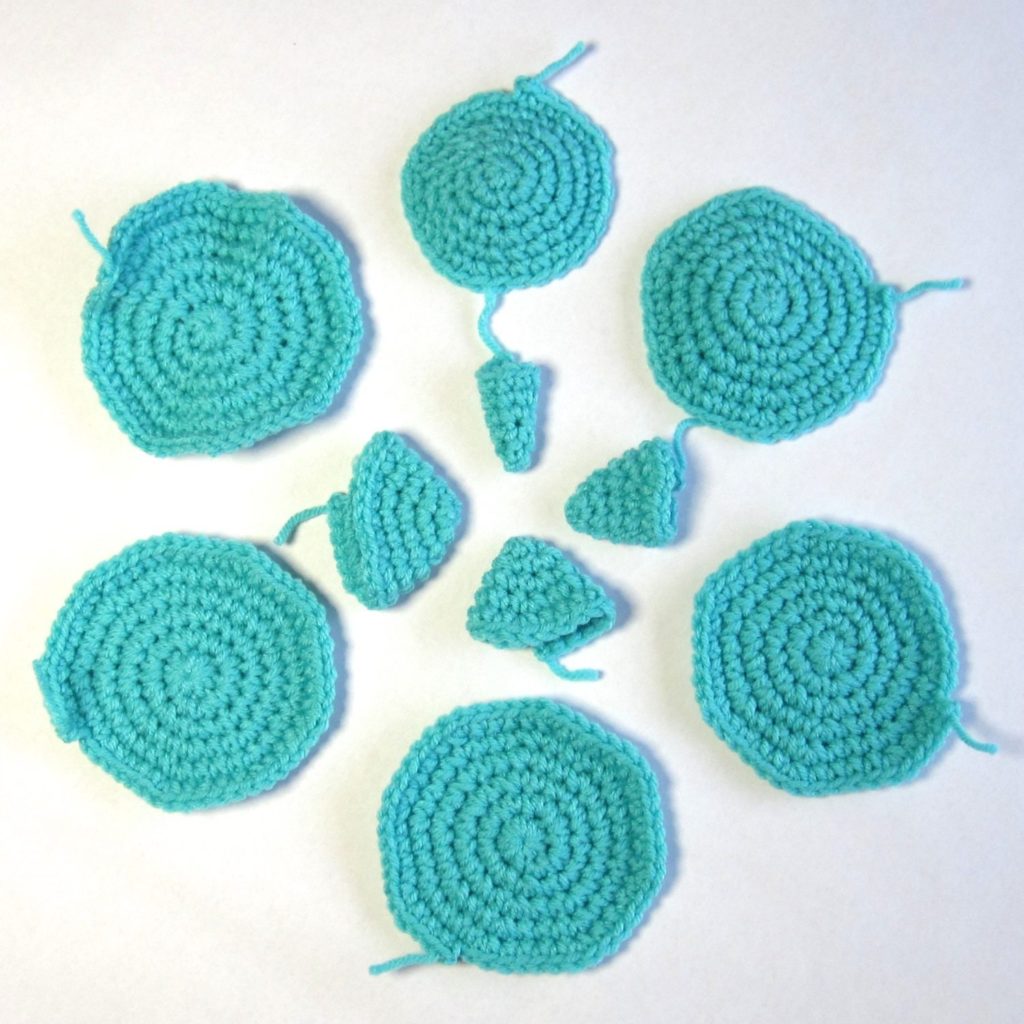
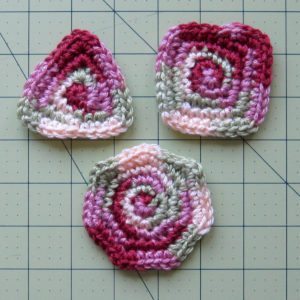
crochet polygons from three sides to eight

Being who I am, I began with geometry. A disk takes 6 or 7 increases around because when you increase the radius of a circle by 1 unit (i.e. by one round) the perimeter increases by 2π units, 6.28ish. We have to fudge a little, of course, since an sc doesn’t add exactly the same amount to circumference as to radius and we can only increase by whole stitches, but it works out; we are able to make disks.

For a polygon, there are two distances that could play the role of the circle’s radius: center to corner (radius), and center to edge midpoint (apothem). We have formulas that tell you how much the perimeter increases when the radius or apothem increases by 1, depending only on the kind of polygon you’re expanding.

Shockingly, I’ve decided not to go into the algebra here; you can read all about it Math Open Reference. My previous knowledge says you need 8 extra stitches for a square, and that number should be larger for fewer sides and smaller for more sides (you need more stitches to get around pointier corners). Those both matched the apothem calculation and not the radius calculation.

polygon extra stitches per round from apothem formula
triangle 10.4
square 8
pentagon 7.3
hexagon 6.9
heptagon 6.7
octagon 6.6

The apothem numbers leave a lot to be worked out: how to round, what to do when the increases aren’t a multiple of the number of sides, and whether an octagon could even be made when it called for fewer increases per round than corners. I made all six polygons more or less successfully, but they broke out into half easier, half harder.

the easier three polygons to make: triangle, square, heptagon

The easy polygons were the triangle, square, and heptagon.

Triangle: This didn’t go how I expected – I thought I would need to round up to 12 extra stitches per round, but I actually dropped down to 9. I started with 6 sc in a magic ring, and every corner got 4sc. Increases made into previous increases went into the third of the four sc.

Square: As I said, I already knew to put 3sc into the corners to make a square. I started with 6 sc, increased around, and then started making concentrated increases for corners. Increases made into previous increases were made into the middle sc.

Heptagon: Since for me, seven increases is appropriate for making a flat disk, the heptagon was straightforward. YMMV. I started with seven stitches, increased around, and then increased in the second stitch of each previous increase. To improve the point of the corners, in the last round I made 3sc into the second stitch of every previous round increase.

the three more complicated polygons: pentagon, hexagon, octagon

Pentagon, hexagon, and octagon were more difficult, but they did work reasonably well.

Pentagon: The pentagon formula called for 7.3 new stitches per round. Since five 2sc increases would add 5 and five 3sc increases would add 10, I alternated between them: start with 5 sc in a magic ring and make 3sc into each of them. Next round, put 2sc into the center of each 3sc increase; round after that, put 3sc into the second of each 2sc increase. Continue alternating, ending on a 3sc round. I did attempt mixing 2sc and 3sc increases within individual rounds, but it was a mess to keep the side lengths equal.

Hexagon: Like the pentagon, I used a combination of 2sc and 3sc increase rounds. The hexagon’s apothem number was lower and the number of increases per round higher (6 or 12) so I made two 2sc increase rounds for every one 3sc increase round. It perhaps would be even better to make three 2sc rounds per 3sc round, but I worried about maintaining the flatness of the piece. Start with 6 sc in a magic ring, make 3sc into each of them, and then make two rounds of 2sc increasing and one of 3sc. Put your increases into the second stitch of a 2sc predecessor or the middle stitch of a 3sc predecessor, and for best results end on a 3sc round.

Octagon: How can one even make an octagon if even one increase per corner leads to too many stitches around for the piece to stay flat? I suspect the best answer is to make a disk large enough to naturally hit a multiple of 8 stitches around and then do something like (sc, hdc, sc) in each corner on the last round. I wanted to try to stick to the size and methods of the other polygons (though I didn’t quite) and ended up with this: 7 sc in a magic ring; 2sc around; *2sc, sc* around. You’re at 21 stitches. Make a big jump to 32: *2sc, sc* 10 times, 2sc. Last round: sc 2, *(sc, ch, sc), sc 3* 7 times, (sc, ch, sc), sc. The chain in the middle of the last round’s increases gives it a little bit more point without adding even more extra bulk than we already have.

There you have it: all the polygons from 8 sides down rendered in crochet, for your freeform delight. I did these all in spirals and ended with a needle join in the second stitch; the ultimate perimeter would be smoother if you worked in joined rounds.
Single Crochet Shaping 2: spheres

For our second episode of Single Crochet Shaping I stitched a whole bunch of crochet spheres.

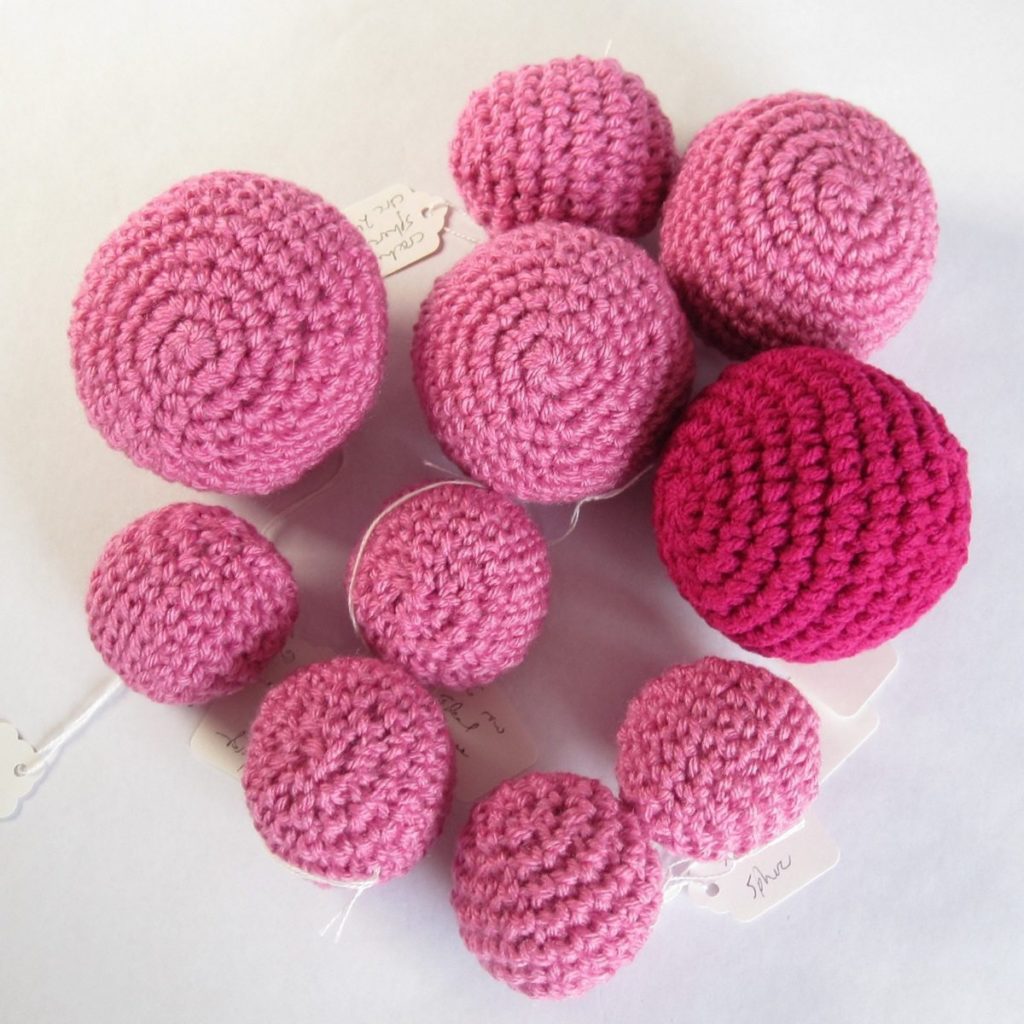
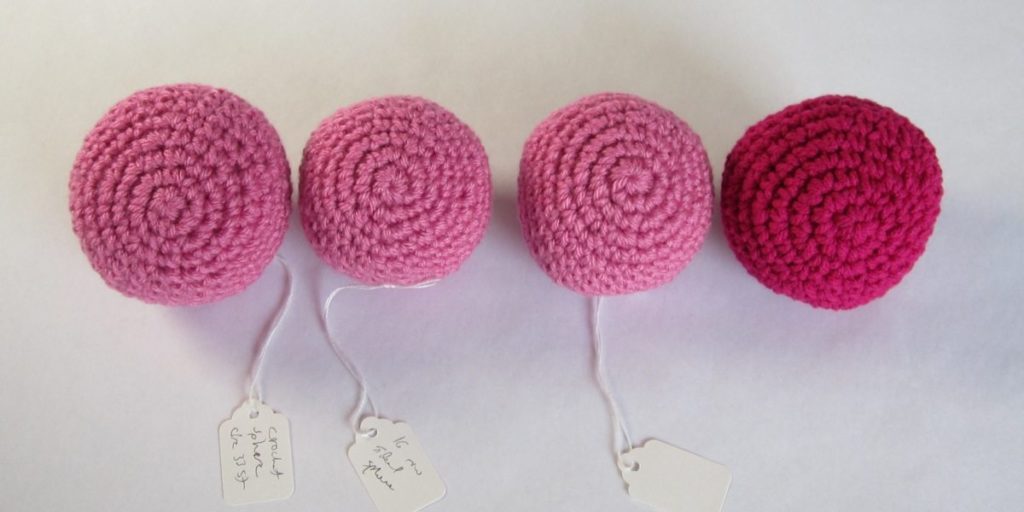
crochet spheres all together

Here’s the punch line: stuffing matters more than stitching. At least after a point, of course. All of my spheres were pretty well spherical, and I think the lumps were due as much to my stuffing job as to the shaping.

example of differences in stuffing spheres

Some stuffing differences were extremely obvious, as in the spheres above. Those were the same pattern, but the right-hand one is stuffed more fully than the left.

I used four design bases: two from sites that were trying to embed geometry and trigonometry into the design, and two very simple repetitive designs. Those latter two were to increase by either 6 stitches per round or 5, work even for some number of rounds, and then decrease by the same number of stitches as you increased. In both cases I made one adjustment for the larger sphere, which I’ll detail with their patterns, at the end of the post.

The first mathematical approach was the Crochet Sphere Calculator. Its method of calculating the stitch counts is not given, but you tell it the desired circumference in stitches and it gives you a pattern. It may or may not give you a pattern with the exact number of stitches at the largest point that you asked for, I found, but it tells you how to place the increases and decreases. Those placements frequently require significant paying attention to your counting, however. I had one quibble with it, which was that starting with 5 stitches (which is what it means, though it says 0) and then increasing in four and doing a double increase (3 in 1) in the fifth seems less desirable than starting with 6 and then increasing in 5 of them (making a single sc in the sixth). Likewise, but even more so, having a penultimate round of 11 stitches and then decreasing 4 pairs and a trio to get to 5 seems less desirable than decreasing 5 pairs to get to 6 (with or without a single sc in the remaining stitch). Triple decreases, even done by the invisible method, are clumsy and obvious.

The second mathematical approach was the Ideal Crochet Sphere. This is based on viewing each round as a latitude line and calculating its circumference from its angle to the “north pole.” There is a separate pdf with two larger spheres and a blog post with a form that calculates the pattern for a sphere of your desired size, though by telling you only the number of increases or decreases in the round. You must decide on their placement. However, you can certainly place them so that there is as much repetition in the counting as possible, to minimize the need for going back in your round and counting to remember what you’re doing next. The pre-made patterns are arranged to have as much repetition as possible without stacking increases and decreases on top of each other round to round.

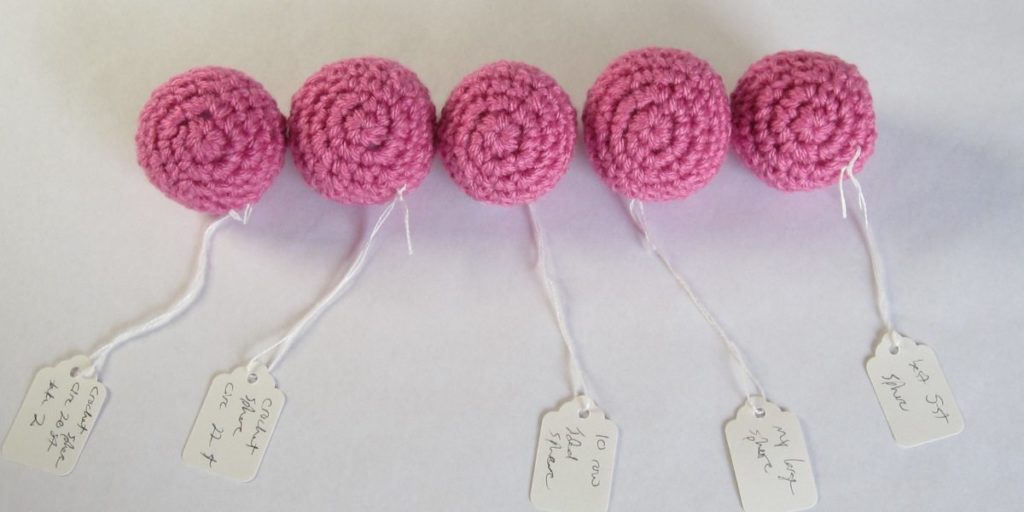
small crochet spheres, front view

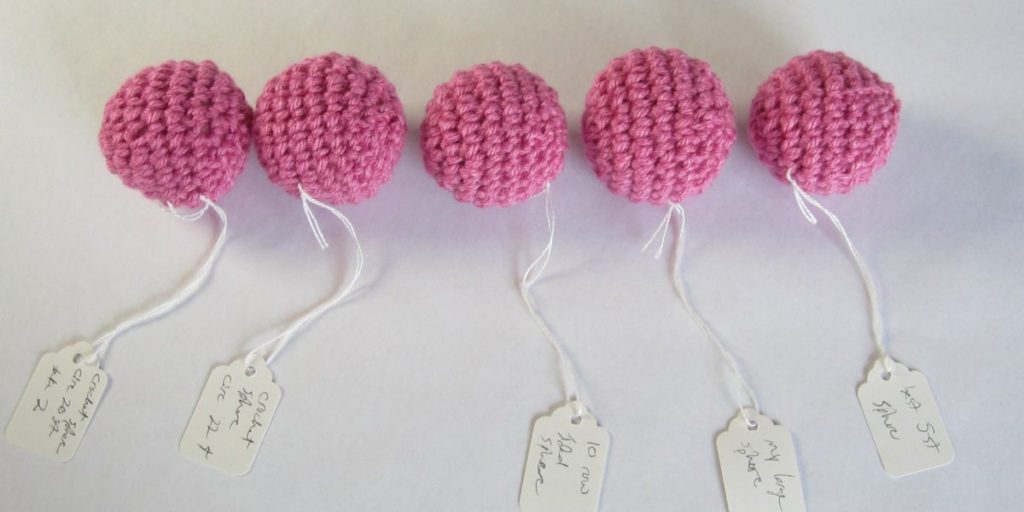
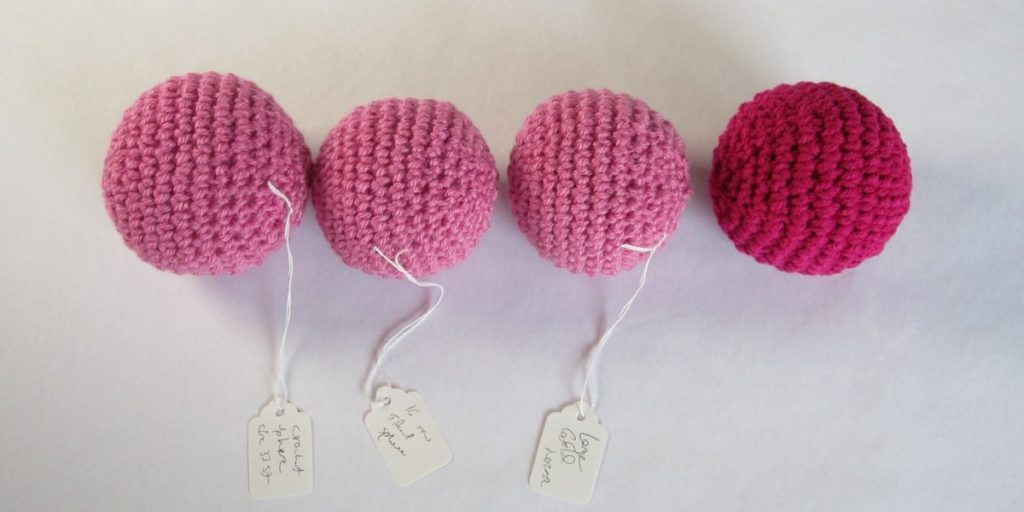
small crochet spheres, side view

Above, left to right: Sphere calculator 20-stitch circumference (this is the one shown in the stuffing picture above), sphere calculator 22-stitch circumference, 10-round ideal sphere, 6-increase sphere, 5-increase sphere (patterns for last two at bottom).

large crochet spheres, front view

large crochet spheres, side view

Above, left to right: Sphere calculator 33-stitch circumference, 16-round ideal sphere, 6-increase sphere, 5-increase sphere (patterns for last two below, again; last sphere in different yarn because I ran out).

You can see that they are all more or less equivalently spherical. I didn’t make any effort to offset my increases and decreases in the 5- and 6-increase spheres, and doing so would have made them smoother. The large 5-increase sphere is fairly lumpy, but you should have seen what it looked like before stuffing! A strawberry. It looked pretty much just like a strawberry (at least before too many decrease rounds).

My recommendation if you don’t want to have to work out, say, how many rounds to work even in a 6-increase sphere, is to use the Ideal Crochet Sphere. It gives good results with the least effort.

Patterns for my spheres after the cut… Continue reading Single Crochet Shaping 2: spheres

Single Crochet Shaping 1: cones to ruffles

I’m setting out to systematically explore shaping in crochet, at least as it pertains to amigurumi: fairly small hooks for the yarn and single crochet almost exclusively. The first installment is the effect of quantity of increases made when working in the round.

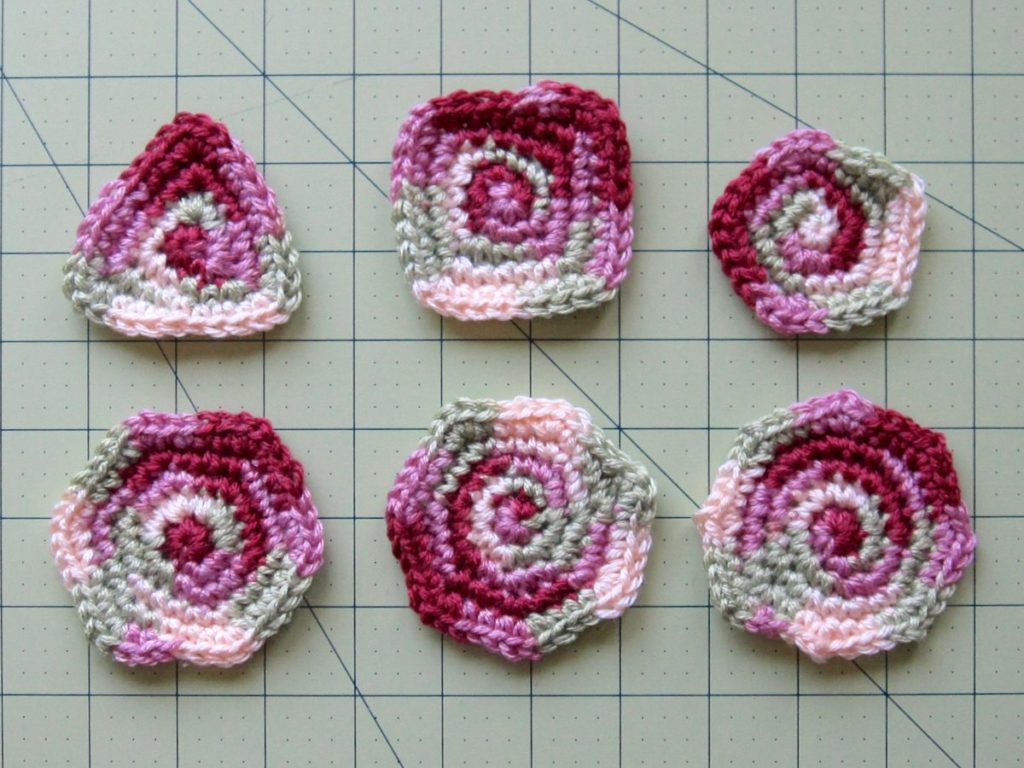
single crochet increase quantity comparison samples

The samples were worked for six rounds, and were increased by the same number of stitches in each round. They are in order by number of increases, from the top of each ring around clockwise, 1-4 in the inner ring and 5-10 in the outer. The 1-increase sample was begun with 3 sc in a magic ring and the 2-increase sample was begun with 4 sc in a magic ring; otherwise the beginning number was equal to the number of increases per round. In every case the increases were evenly spaced and the first was in the first stitch of the round.

You can see that increasing by 1 to 4 stitches per round produces a cone (I posted a lot more about cones last winter). As of 5, though, it shifts to a cupped shape. 6 is also somewhat cupped, but 7 is flat. 8 is also flat and not terribly crowded. 9 starts to get crowded and want to ruffle, but real ruffling doesn’t kick in until 10, which refuses to lie flat. Since I used worsted weight yarn with an F/5 hook (3.75mm) the ruffles are rather stiff, but with a larger hook for your yarn they would be soft and malleable. It could be a nice effect for the edge of a doily.

Increasing by six stitches per round is used for both flat disks and cupped ends; the recipe I learned long ago for making a sphere is to increase by six stitches per round until it’s as broad as you want, sc even for some suitable number of rounds, and then decrease by six stitches per round to close off. I wonder looking at these samples whether 5 increases would also make a good sphere (you won’t have to wait too long for that – two sphere samples are already done, though not this one yet). For me, 7 increases per round is a more reliable disk.

Math sidetrack: why 6 and 7? Because of pi. Or tau, I suppose. To be flat, a one-unit increase in the radius of the disk (i.e., an additional round) must be accompanied by a 2π-unit increase in the circumference. If single crochet stitches added exactly the same amount to the circumference as to the radius, you would need 2π additional stitches per round (which would work out pretty well to 7 every fourth round and 6 otherwise). However, for me at least, they add less to the circumference than to the radius, so I need a skosh more. How much of this is due to them being squished together at the base and how much to my particular stitch gauge I can’t say, although it is certainly possible that 7 is overkill for you and your 6 is perfectly flat, or that with a different hook:yarn size ratio I myself might want 6 or even 8.

One last note: You can see slight corners on some of these pieces, and in person they all have a bit of cornering. This is due to stacking the increases on top of each other round to round. An increase produces a slight bump out (more on this in another shaping post as well) and that’s been allowed to shine through. The easiest fix is simply to offset the increases in every other round. When the number of non-increase stitches between increases is odd, begin the round with an increase. When it is even, begin the round with half that number of stitches and then do the first increase. You’ll end the round by making the same number of non-increase stitches as you began with.