First overlay project

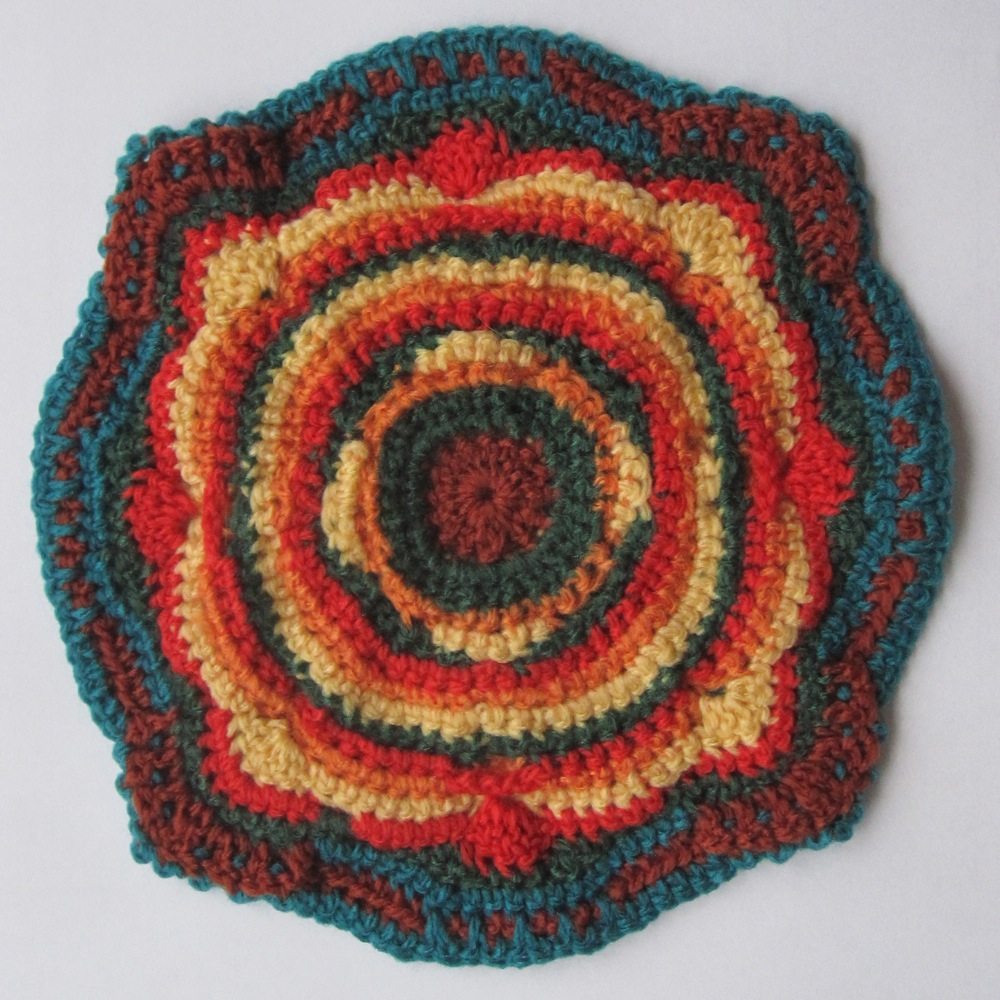
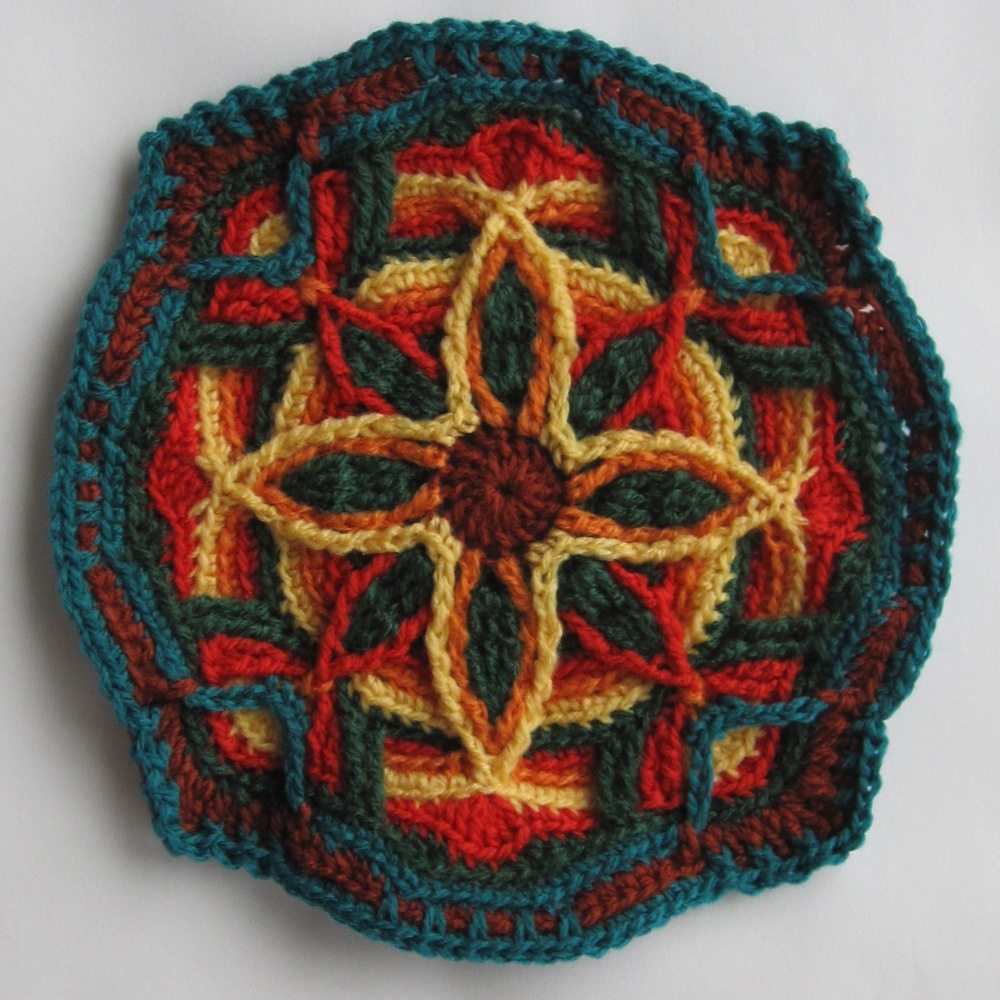
I made the CAROcreations overlay crochet project I mentioned in a recent First Friday post.

blocked overlay A blocked overlay B

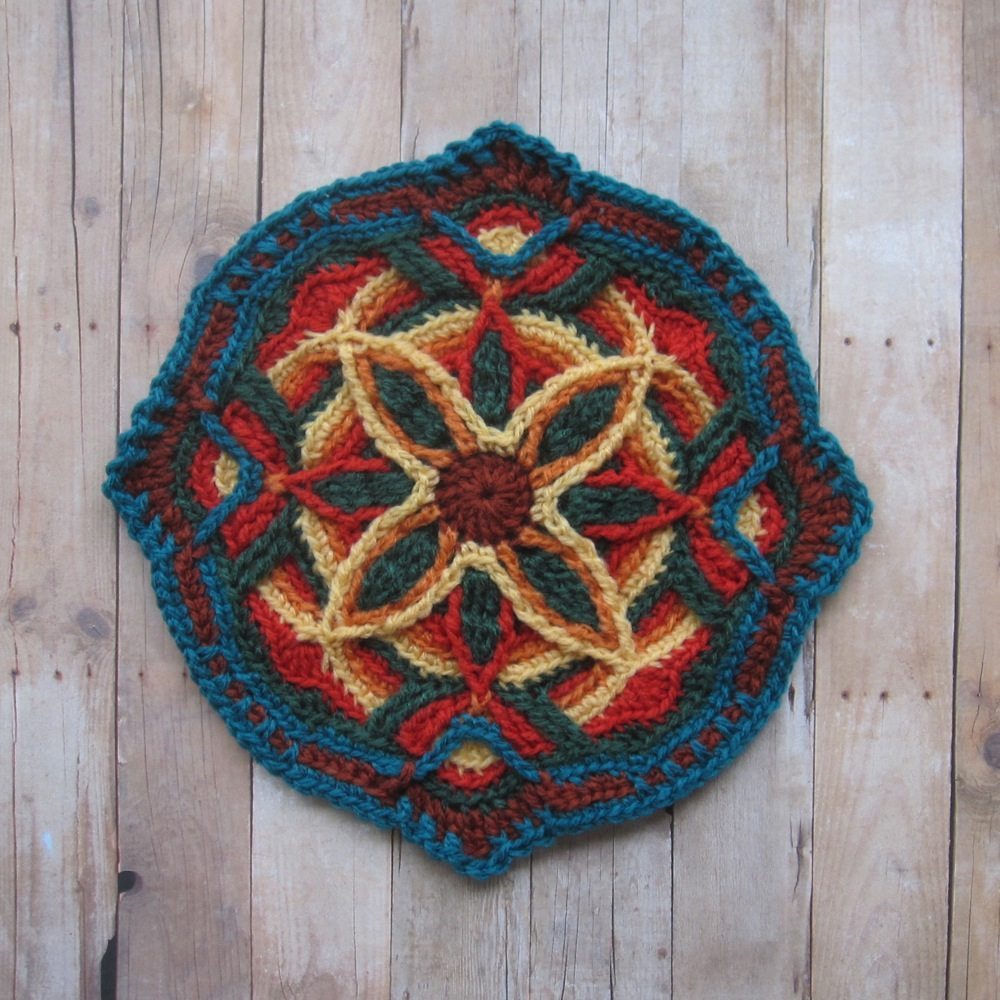
It’s on weathered wood because it reminds me of a hex sign on a barn.

I used Herrschner’s 2-ply afghan yarn, a sport weight acrylic, and just picked colors I liked. Looking at the two color variations shown on the pattern, I assigned the new colors to old ones and wrote them in throughout the pattern.

I don’t think I can say enough good things about the pattern. I did have to rip and start again a few times, especially early on, but that was all me. If any of the directions seem ambiguous, there is a picture you can compare with, clear enough to count the stitches and verify your interpretation. At first I was worried things were askew, but I couldn’t fix them. As it turned out, they were fixed by subsequent rounds.

There was one thing I had to translate. Carola uses “behind” to mean “stitched after” (for the right-hander, “to the left of”). It’s a valid use of the word but opposite of my natural interpretation. There are also a couple of uncommon stitches that aren’t given in the pattern, but they are easily figured out from the ones that are.

There’s something almost luscious about overlay crochet. Tall stitches made into the unused front loop of earlier round stitches are extended by tall post stitches in a later round of the same color, the whole melding into one long braid of yarn. Begin with an increase of tall stitches, continue with tall post stitches on each, and conclude with a post stitch decrease and the whole is like some kind of esoteric weaving.

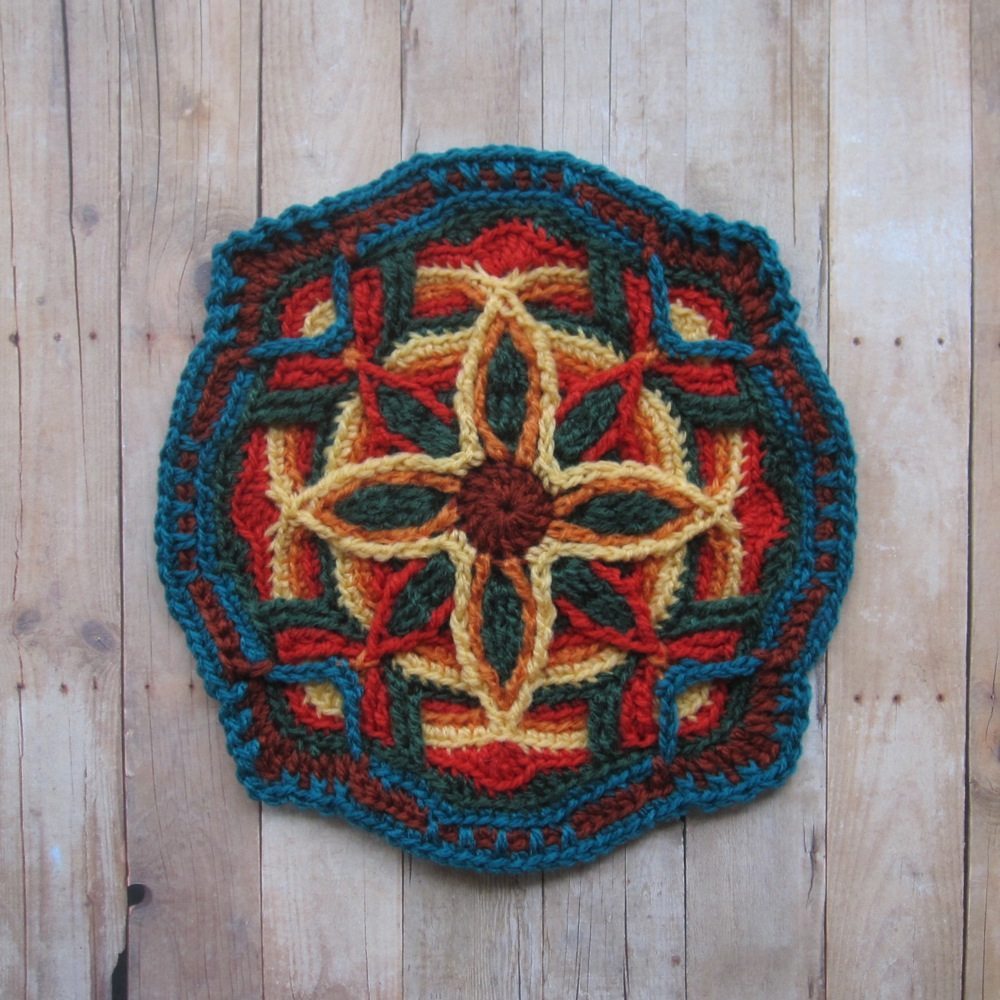
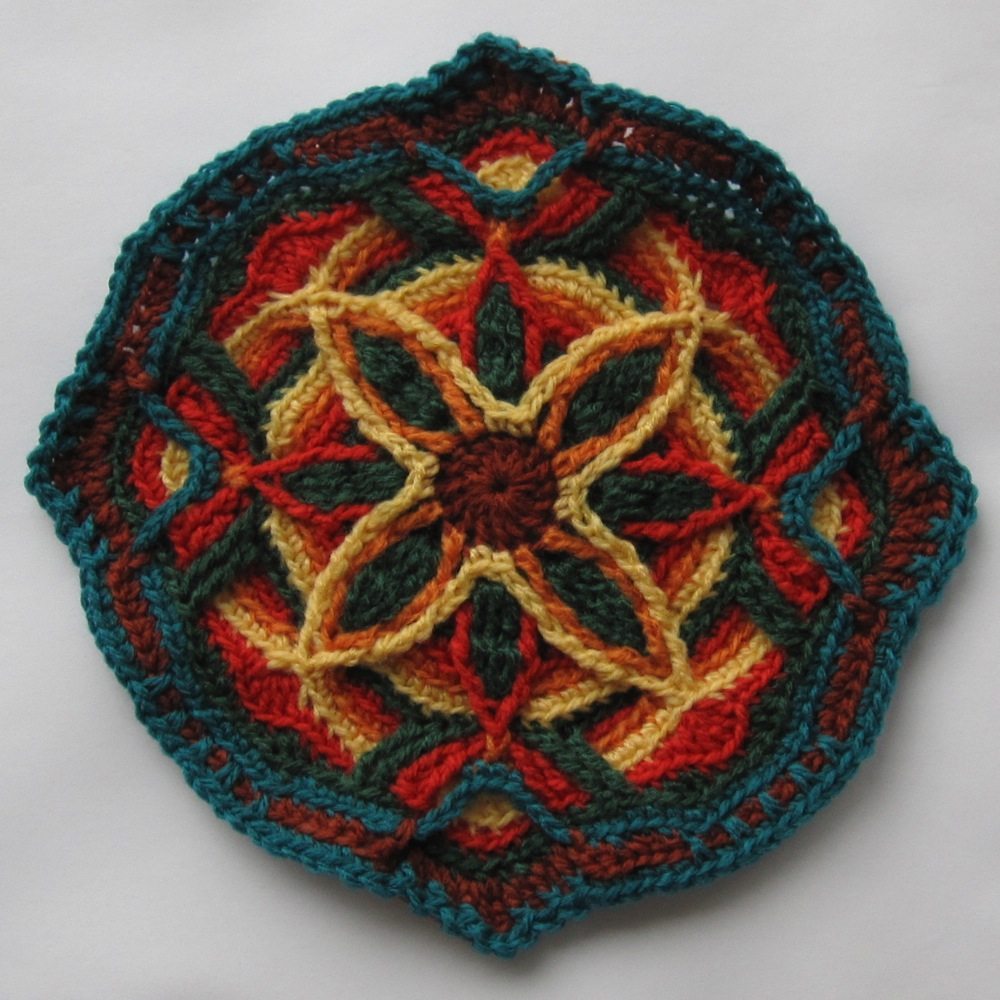
Here are pictures of the unblocked piece.

unblocked overlay A unblocked overlay B

A few words of advice: Use strong light. Weave as you go – I stitched around the beginning tail at the start of every round, and since you needle join the end it’s already threaded and you may as well finish the job. If you don’t, there will be a depressingly huge number of ends to finish after the crocheting is done. However, once you’re done, even the back is lovely!

overlay back

Knook review

I received a Knook kit for Christmas this year. This is a way to knit with a crochet hook; the hook has a hole through it near the foot, you thread a cord through that hole, and the cord acts as your left needle. To start, you chain as usual for crochet, but then yarn wrapping and hook insertion change to methods standard for knitting rather than crochet.

I made an entire project with the Knook, the Circle of Love Mini-Cloth. The included Knook instructions only tell you how to cast on, knit, purl, and bind off, not how to slip stitches, increase, or decrease, so the patterns you can make are somewhat limited. Fortunately there is a large community of people designing simple squares for knitting, to use as washrags and so forth – two others I really liked showed a bat and a squirrel.

knook project front knook project back

You can see blocking couldn’t cover up the tension change that happened as I proceeded.

Verdict? The Knook is good at what it does. The instructions are clear, the methods are pretty easy, the materials are good quality, and it really is knitting. However, I doubt I will ever use it again. I was faster at knitting when I was stumbling along with two needles and no real idea what I was doing. On the other hand, I believe that if I do try knitting again, I will be far better at it having used the Knook. I think it helped me understand how knitting works.

In sum, I would recommend the Knook as a gateway to actual knitting, a lesson allowing you to learn the motions of knitting and purling separate from the management of knitting needles. If you want to knit much of anything, however, I would say buck up and learn to do it the usual way.

Patterns and puppets

I got a new toy this week! Ursa Software puts out a cross-stitch pattern making program, with versions not only for Windows but also for Mac (unusual!). I’ve only just begun using it but it is fun so far. There is a bit of a learning curve, though. I would like to read through the manual and see if I can reset some things – like making only the corners of each square available for French knots and the ends of backstitches, instead of a grid of nine points on each square. The image uploader/converter is quite good, as far as I can tell from playing with it, and there are a few built-in alphabets and motifs. I got the Premium version (only $5 more than Standard, and I definitely didn’t just want Lite, which can’t do French knots or make pdfs), which is the only version that allows you to preview the work matted and framed.

I made one little pattern that I’ve started stitching and tweaking, so more on that later, but with one of the included alphabets I made the following:

ReveDreams on the marquee

Click the picture for the pattern in pdf. There is no overlap between the pieces of the pattern, which unfortunately is not indicated.

While you’re waiting for my full review, enjoy this little guy I whipped up last night:

kodama-inspired