Quilted potholder tutorial

The description of the construction of potholders ended up rather long. The outline: make 7″x7″ fabric faces, quilt them to 7″x7″ pieces of fleece, zigzag the two halves together, stitch extra wide double-fold bias tape around the edge, attach a loop of bias tape, and hand-sew the free edge of the bias tape down. The instructions will be for a pair of potholders.

Some related posts: Potholder examples 1, potholder examples 2, Embroidery for Edge Finishing (good choices for sewing down the binding).

Making faces:
The simplest way to make the fabric faces is to find a fabric you like and cut four 7″x7″ squares. There are a huge number of variations, though: you could stitch (heat safe) ribbon along a plain piece of fabric, or applique other fabric onto it, or employ any quilting technique. The two sets of potholders I made most recently were patchwork and confetti piecing.

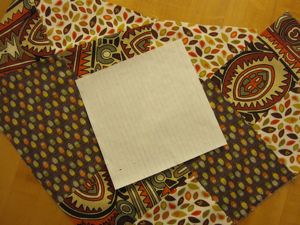
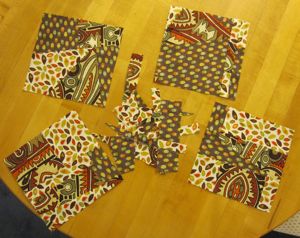
For patchwork, I was rather imprecise: I have several 7″x7″ squares of paper, and I folded one in rough thirds diagonally, using a ruler to make sure the folds were parallel, and cut fabric with a(n unmeasured) 1/4″ seam allowance along the folded edge or edges. I had four kinds of fabric so I cut one inside third and two outside thirds of each, matched them up so no two faces had the same combination of fabrics, and sewed them together with a 1/4″ allowance. Then I pressed the seams open.
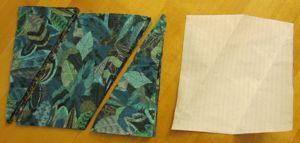
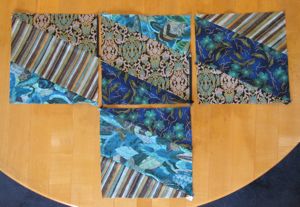
patchwork pieces patchwork faces

Confetti piecing may take longer but requires no measuring. You need more fabric for it than the total surface area of the finished faces, but you can also add more later if you discover you didn’t cut enough. I usually cut five to six faces’ worth of material for the four I am making. The different pieces should be sewn together with a 1/4″ seam allowance, but not necessarily squarely. You may lay one diagonally across the other, sew along the diagonal, and trim off the excess beyond the seam allowance. That excess may then be lined up with some other part of the material and sewn on. Press the seam allowance open after every seam, to minimize bulk. You may also cut a straight line across the material and stitch the halves together in a different orientation. Repeat until there is some region that looks like a good potholder face, cut out a 7″x7″ square, and sew the remainders together again as before (I think of this as “rolling out the scraps”). You can see why this takes a lot of material: lots of seam allowance, and little pointy bits sticking out unusably from the edges.
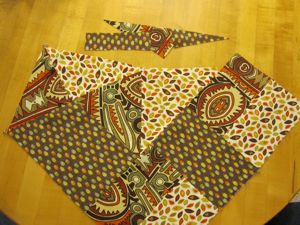
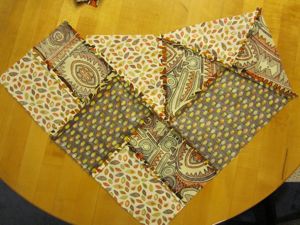
starting confetti pieces back of confetti piecing

cutting a face
Try to continue the straight line of the template all the way across the fabric, to make using the leftover fabric easier.
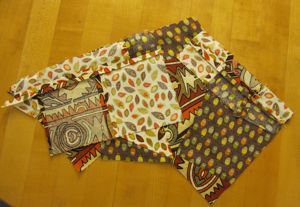
rolling out the scraps
“Rolling out the scraps.”

confetti faces

Construction:
I use fleece remnants for my padding. Any color is fine, so long as you line thinner/paler fabrics with muslin or white cotton to keep the fleece color from showing through. Cut four 7″x7″ squares and pin your fabric faces to them. Stitch around the edge at about 1/4″ and quilt them down the center in some way. My butterfly potholders had a stitched triangle somewhere in the middle, my patchwork potholders are stitched along the two seams, and my confetti-pieced potholders are stitched along some assortment of seam lines.

If the faces have an upper corner, align them so those match when you pair the halves up. Zigzag around the edges of the potholders. You could also straight stitch, but zigzagging keeps the edge from puffing unattractively under your bias tape and makes straight stitch unnecessary.
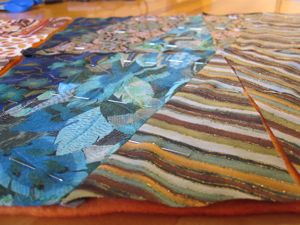
pinned for quilting
I cut a 14″x14″ square of fleece and pinned all four faces at once. I don’t think I recommend that, since it is still advisable to stitch around the edges of each face.
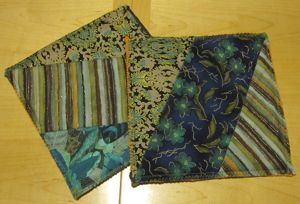
ready for binding

Edge binding:
Each pair of potholders uses about two yards of binding, or 2/3 of a package. You want extra wide double fold bias tape. Unfold it and pin one raw edge along the edge of the potholder (if the tape is folded unevenly, use the narrower half), curving around the corners. This takes a fair number of pins. Make sure you start a bit away from a corner so you don’t have to join the cut ends on a curve; to make the join, fold the right-hand raw edge (with the edge of the potholder facing away from you) in on itself and overlap the left-hand raw edge over it. See the pictures below: you want the exposed tape ends to point toward you when you sew the seam on your machine.
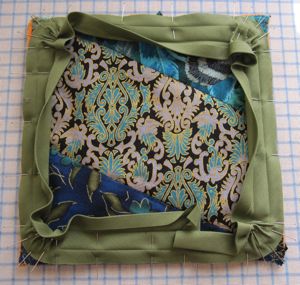
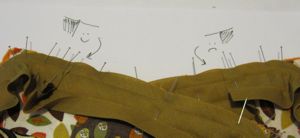
pinned for machine sewing

pinning the overlap
You want your raw edges downstream.

Stitch in the fold line all around the potholder. I often have to walk the machine with the handwheel around the corner curves, and even with that I sometimes have to redo one or two. Afterward, trim the potholder corners to match the curve of the bias tape, and zigzag around the edge again. Cut a 5″ to 5 1/4″ length of bias tape to be the hanging loop. If you have a desired top corner, make sure you pin the loop to it. Fold the bias tape in half so the open edge faces out (see picture) and pin to the opposite side of the potholder from the edging. I usually pin the edging down so it can’t get caught in the stitching. Sew the loop on in a straight line close to the corner edging stitch. Trim any bits that stick out past the edge and zigzag the loop ends down.
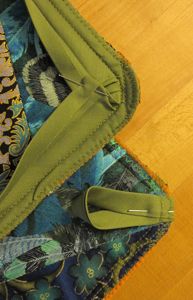
pinning the loop

Fold the edging over to the loop side and pin down. At the join, unfold the original bias tape folds so that the outer layer of tape is completely wrapped around the inner layer. You may need to change the original fold on the inner layer, making the strip a little narrower, in order to get a smooth line.
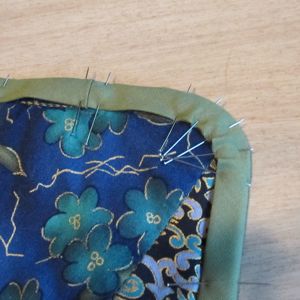
pinning the last edge

There will be a separate post with my thoughts on choice of embroidery stitch for the loose end of the binding [edit: here it is!], but whatever stitch I use I proceed in the same way: start at the near edge of the loop and stitch the binding down underneath it. Proceed around the potholder until you reach the near end of the loop again. Pin the loop up, stitch across the base, and then stitch up the far side of the loop, around, and back to where you started (this is why the open edge of the bias tape should be outward: your stitches will seal it off).

I also wash the potholders in a mesh laundry bag and give them a press before wrapping them. As long as your embroidery is sturdy, there should be no problem machine-washing the finished project.
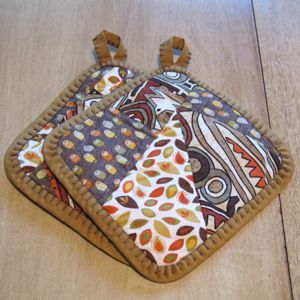
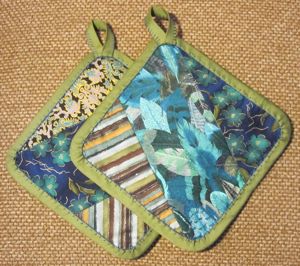
finished confetti potholders finished patchwork potholders

Luggage tag

When I made my new weekender, I made a little matching tag that had my name, number, and address written on muslin in fabric pen. I didn’t have time to make a little strap to hang it from the handle, but in the meantime I decided if I were going to keep the bag for as long as I hoped and put a lot of effort into constructing an attractive tag, it should be one for which the information was changeable.

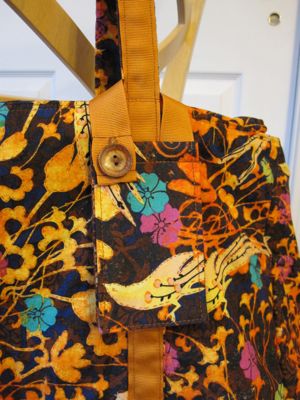
When I returned from the inaugural trip with my bag, I did just that. The tag buttons onto the handle of the bag so that it can be removed for bag-laundering purposes, and inside there is a clear vinyl pocket slightly larger than a business card.

You need small amounts of fabric, interfacing, and clear vinyl, and a button and ribbon that coordinate with your fabric. I had the vinyl on hand from a project I did ages ago, pulled a lovely wood button from my late grandmother’s button box, and had the rest leftover from bagmaking.

Cut two pieces of fabric and one of interfacing, 10 1/2″ by 3 3/4″. Cut one piece (or two pieces, if desired) of vinyl, 3 7/8″ by 2 5/8″. If your button is between 3/4″ and 1″, cut 10 1/4″ of ribbon of comparable width; if your button is much larger or smaller, lengthen or shorten the ribbon by twice the difference in button diameter (or don’t; the strap will be longer or shorter but there’s give to it).

Pin the fabric right sides together with the interfacing against one wrong side and stitch together with a 1/2″ seam allowance, leaving an opening on one long side for turning. Trim the corners. I pressed the seam allowance out before turning it so it would be easier to get crisp edges when I turned.

inside-out tag

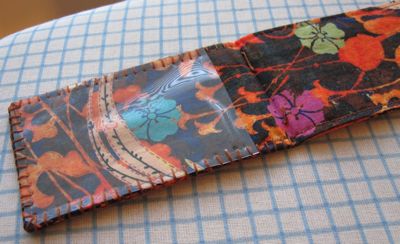
Once you’ve turned, topstitch around the edges, fold it in half, and press a crease into it. The next step is to stitch the vinyl on to one or both sides. If you are only doing one pocket and have a preferred front side to your tag, put the vinyl on the back side. First make sure it fits, with about 3/4″ clearance between it and the fold line. Trim as needed. I used a nail to perforate the vinyl so I could use my regular light needle without trouble. The nail had a big flat head and I was able to make the holes pushing it with my thumb. I also trimmed a tiny bit off of two corners that shared a short edge, to be at the corners of the fabric. I made a template for the holes and scanned it in before poking holes in it. I used blanket stitch to attach it to the fabric, going only from fold to fold because I am lazy. I didn’t bother being neat by the fold because the last half inch will be hidden away.

tag with vinyl pocket

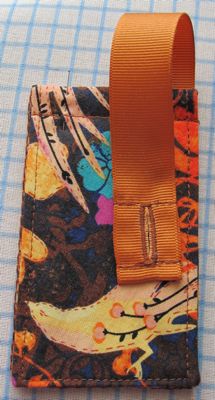
Fold the tag in half and stitch a half-inch from the fold to make it want to stay shut. Now prepare the strap. Since my button was 7/8″, I turned one end of the ribbon 1 3/8″ and then folded it in again. You want your button diameter plus 1/2″ to be the depth of the first fold. Stitch it a quarter inch from each fold line. On the other end, fold it 1/4″ and then fold it again, and stitch very close to the first fold line. You can decide whether to fold them toward the same side of the ribbon or opposite. I did the same side, but opposite would be more standard for how it’s going to attach to the tag.

tag strap

Make a buttonhole on the side with the deeper fold, essentially down the center of the ribbon from stitch line to stitch line. It will be a snug fit for your button, most likely, but you don’t want this to come off accidentally. Pin the opposite end of the ribbon to the back of your tag (the side with the pocket, if there is only one) so that it lines up with the outside edge and slightly overlaps your original stitch line, and restitch along that line to attach it. Line the other end of the ribbon up with the opposite outside edge and mark how far in the center of the button should be.

tag with strap

Finally, sew on the button, centered just above your original stitch line and at the marked distance from the edge. Button the tag onto your bag!

finished product

Nonorientable crochet

Do you want a yarn Möbius strip? Of course you do – who doesn’t?

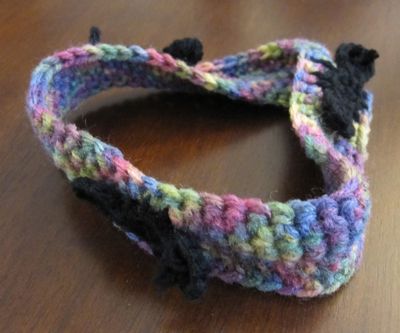
mobius with ants
Every Möbius strip needs ants.

One of the crochet techniques I have yet to master is working in the round when the beginning is an open hole instead of a magic circle or a chain that is worked on both sides. I can’t connect the ends of the starting chain to my satisfaction; there is always a big wonky bump at the join.

However, some experimentation has led me to the following discovery: it is easy to make a crochet Möbius strip that requires no sewing. This is hardly news, as the internet will tell you, but I think my instructions are easier, or at least more specific, than the ones I’ve seen online.

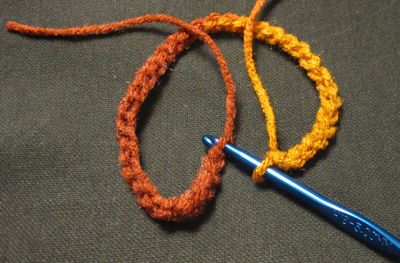
Crochet Möbius Strip: Make a chain as long as you want. There will be a natural way for the chain to come off the hook to the left with the back bumps facing up and the front teardrops facing down. With the back bumps facing up the whole length of the chain, bring the slipknot end toward you and to the hook to make the chain into a loop. Insert the hook from outside the loop to inside the loop through the back bump closest to the slipknot, and slip stitch to join the ends.

starting the strip
The back bumps go around the top when it’s set down like this.

Now, crochet around, using the back bumps, until you get back to the slipknot. Crochet into your initial slip stitch. It should be natural to make your next stitch in the front teardrop of the chain closest to the slipknot. Now the next time you get back to your slipknot it should be natural to crochet into the first stitch you made after slip-knotting the chain into a loop. Keep going until the Möbius strip is as wide as you want, making sure when you end, the rows are aligned on each side of the slipknot.

I found that my yarn tail was a useful indicator – if it faced toward me after I had put crochets on each side of the starting chain, then I needed to finish with it facing toward me.

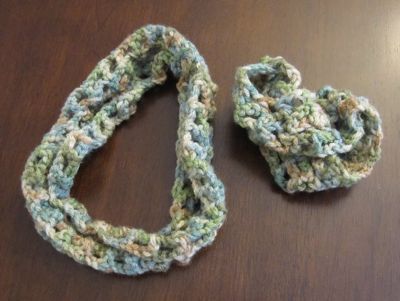
Of course, this method makes the Möbius strip curl a bit into an S cross-section, since stitch rows tend to lean forward or back. I tried to change direction for the last row, but as you can see I ended up with a little nub at the turning (bottom center):

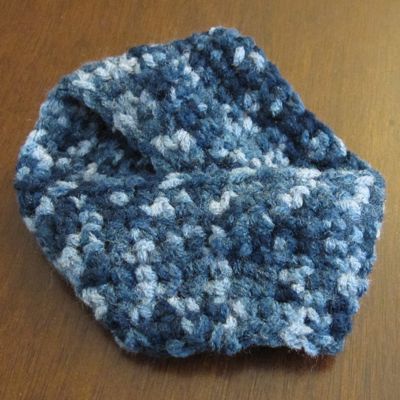
compact mobius strip

I tried a second time but didn’t come up with a solution that satisfied me.

Mesh Crochet Möbius Strip: Looking at the Escher picture made me think of crocheted mesh, so I tried that as well (see the crochet abbreviations). For this you must chain a multiple of 3 – it is better here to use the same size hook throughout. Slip stitch to join as described above, and chain 5. Skip two chains and dc into the next, in the back bump. (ch 2, sk 2 sts, dc in back bump) until you get back to your slip knot. This is a bit wobblier than sc, so make sure it is not twisted, ch 2 and do the next dc into the front teardrop of the first ch you made – it seems like you’re skipping 3 sts, but the joining slip stitch and initial chain are really the same stitch. (ch 2, sk 2 sts, dc in front teardrop) around, until you get to the ch 5. Ch 2 and sl st into the middle ch of the ch 5.

Now, *turn if desired, ch 5, (sk 2 sts, dc, ch 2) around (i.e., twice around initial chain), sl st in middle ch of ch 5; repeat from * until the Möbius strip is as wide as you like.

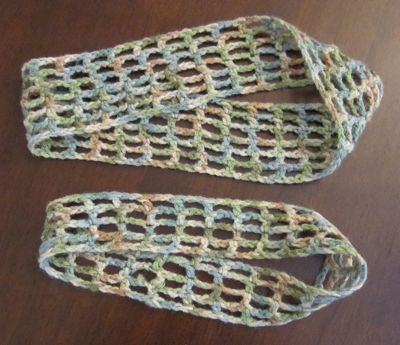
I washed these to see if the mesh would even itself out a little; the ch-5 squares and the squares on the starting chain didn’t really match the others. Of course, they crumpled up.

crumpled mobius strips

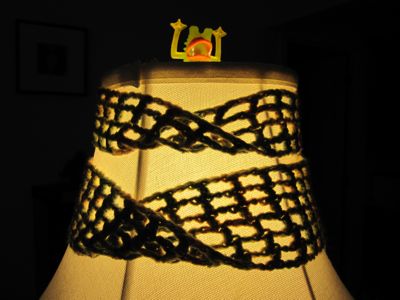
Q. How does one block a Möbius strip? A. With an iron. They smoothed out nicely. And are very decorative on my lampshade.

ironed mobius strips lampshade mobius strips