Let’s just accept I only crochet baskets now

Nine more baskets have come off my hook since the last batch I posted about; with the original basket post we’re at 19… and during the writing of this post and its sequel (it was too much for one) I’ve completed another, started one more, and wound three or four balls of yarn for yet more.

What began as an unaccountable impulse has turned into an exploration of edgings, shaping, colors, and surface design that I’m excited to continue. Eventually I hope to make a post or two extracting the patterns for the best of the edgings, for easier reference – but I would want to feel like I am closer to the end of this period of my crochet life before then.

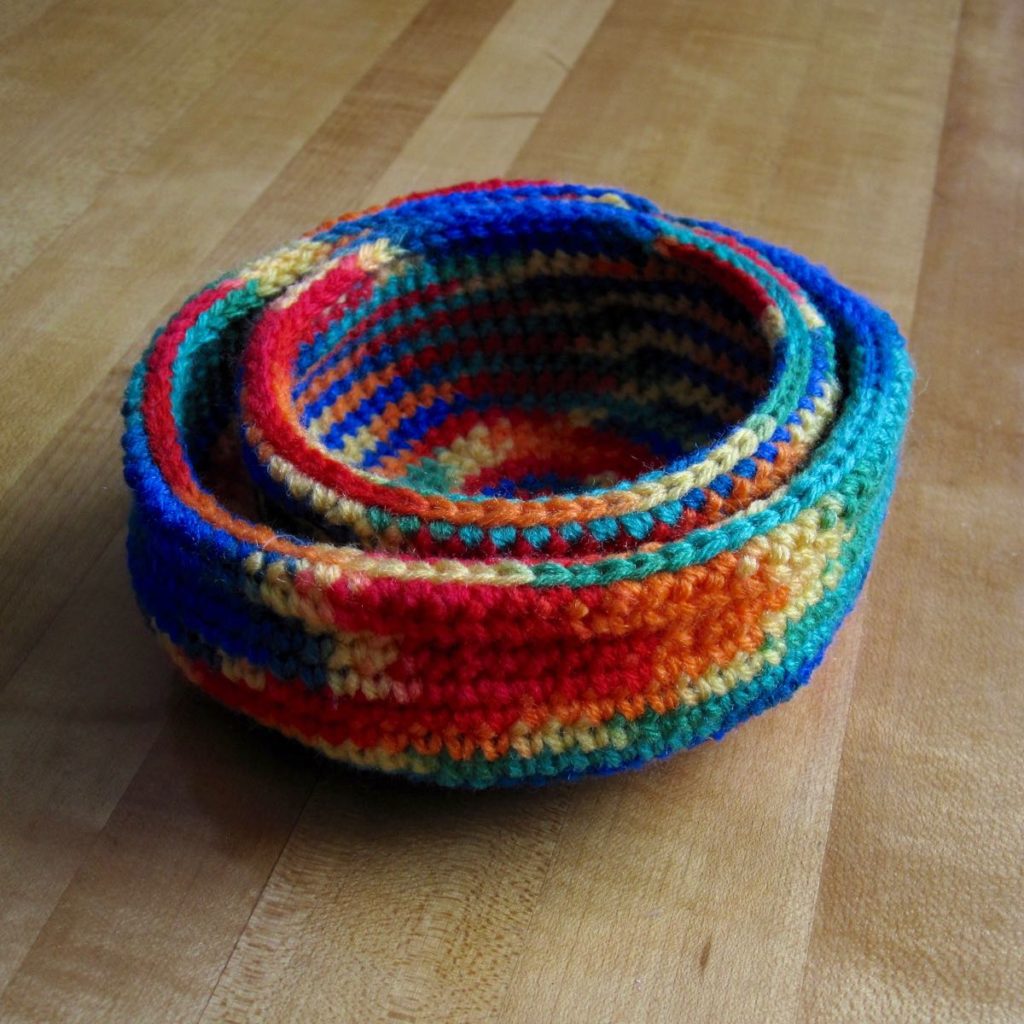
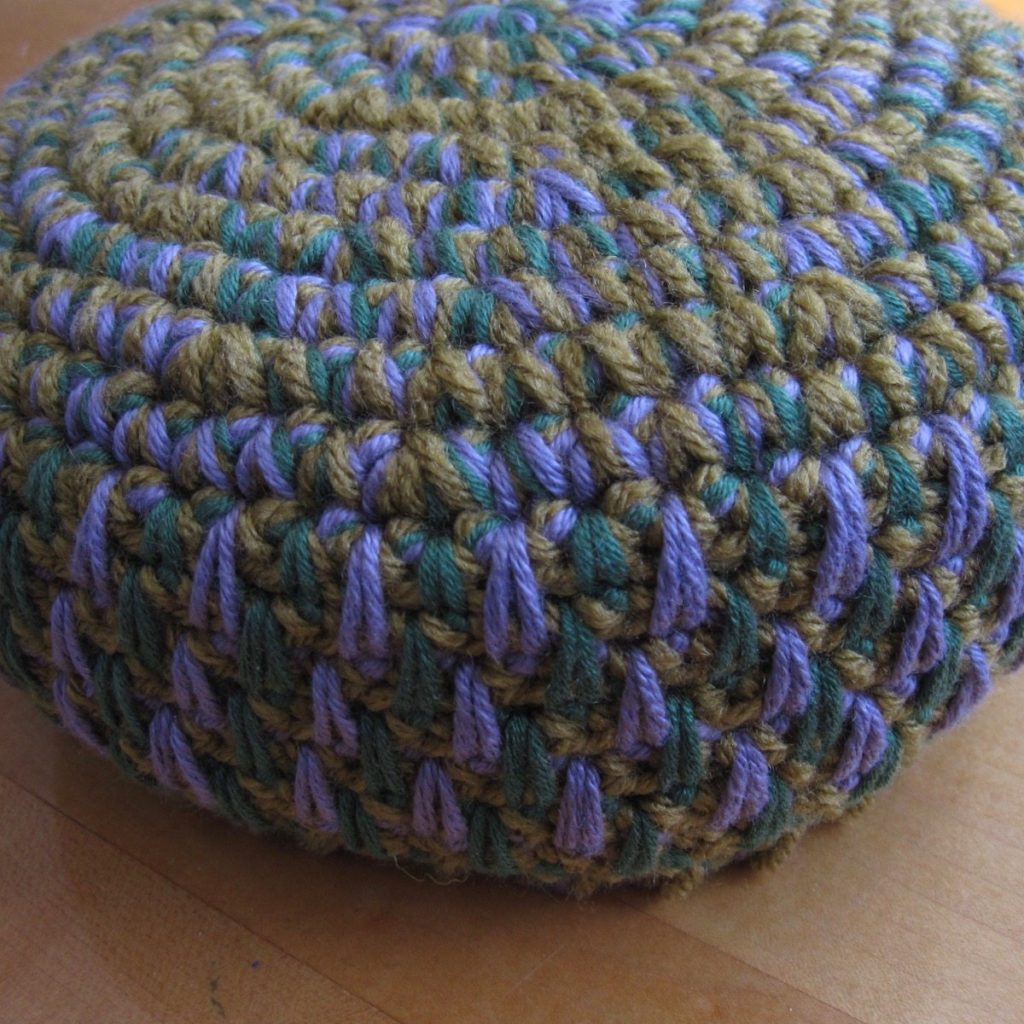
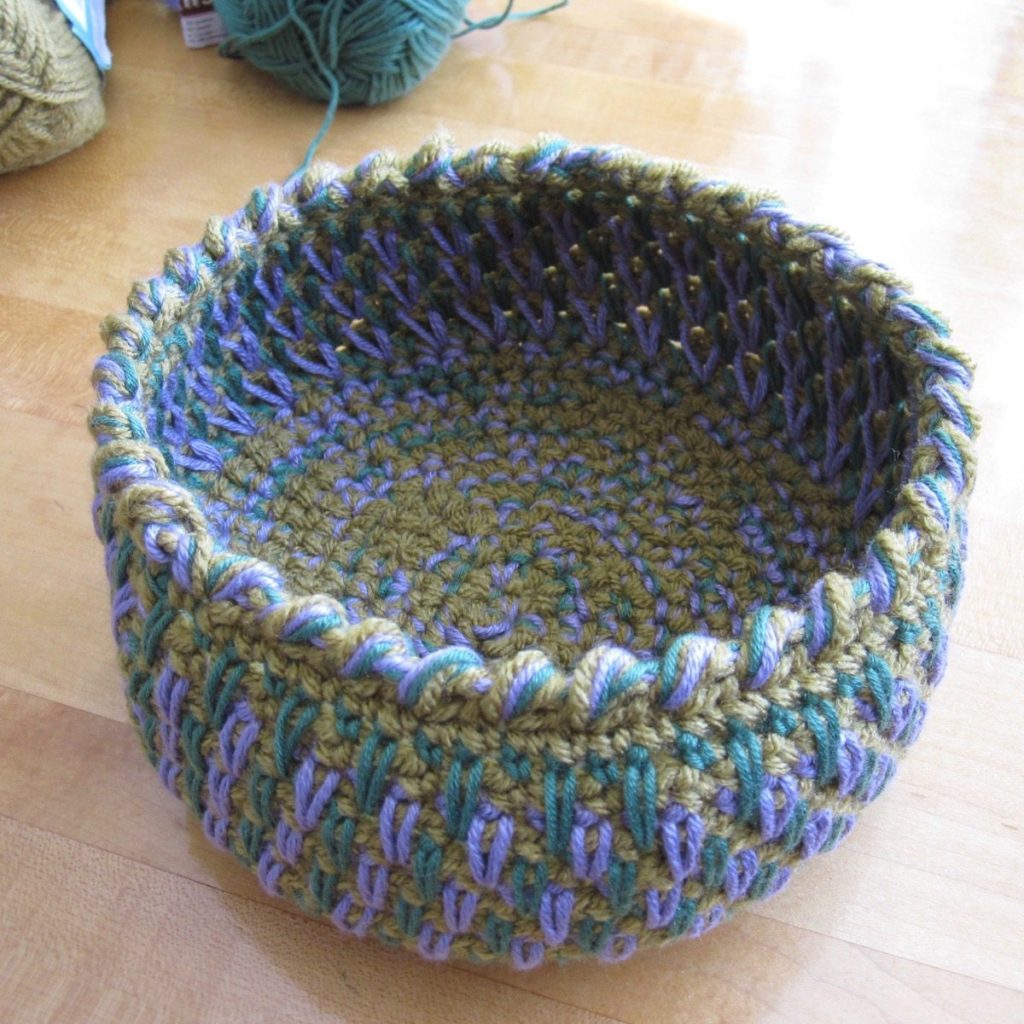
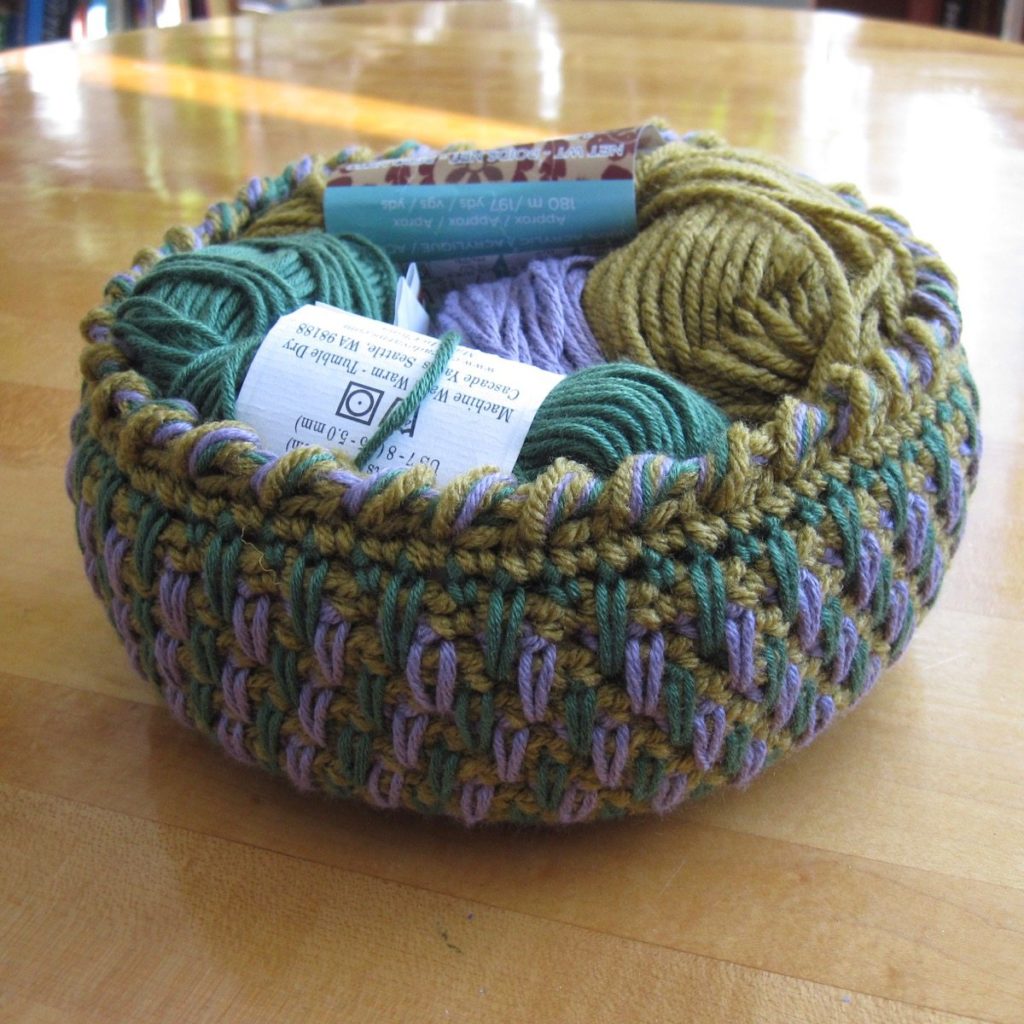
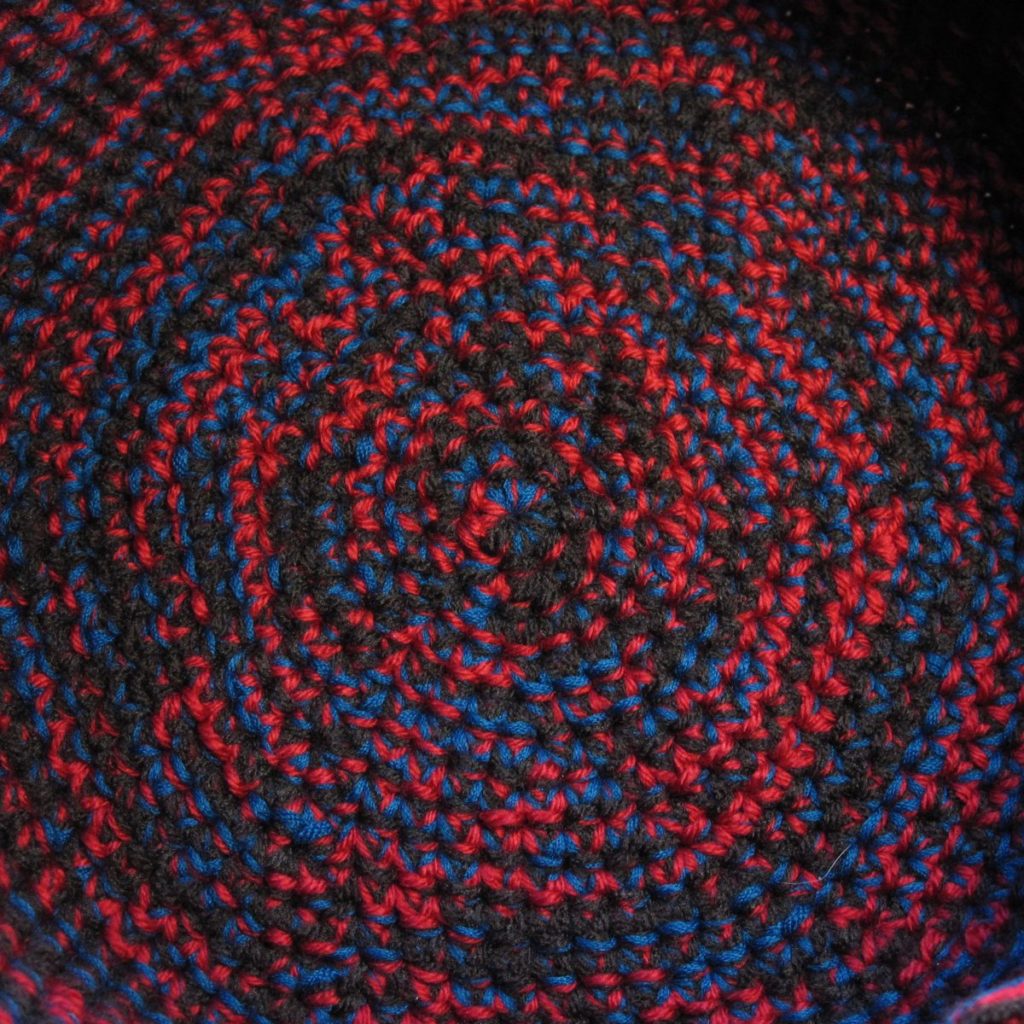
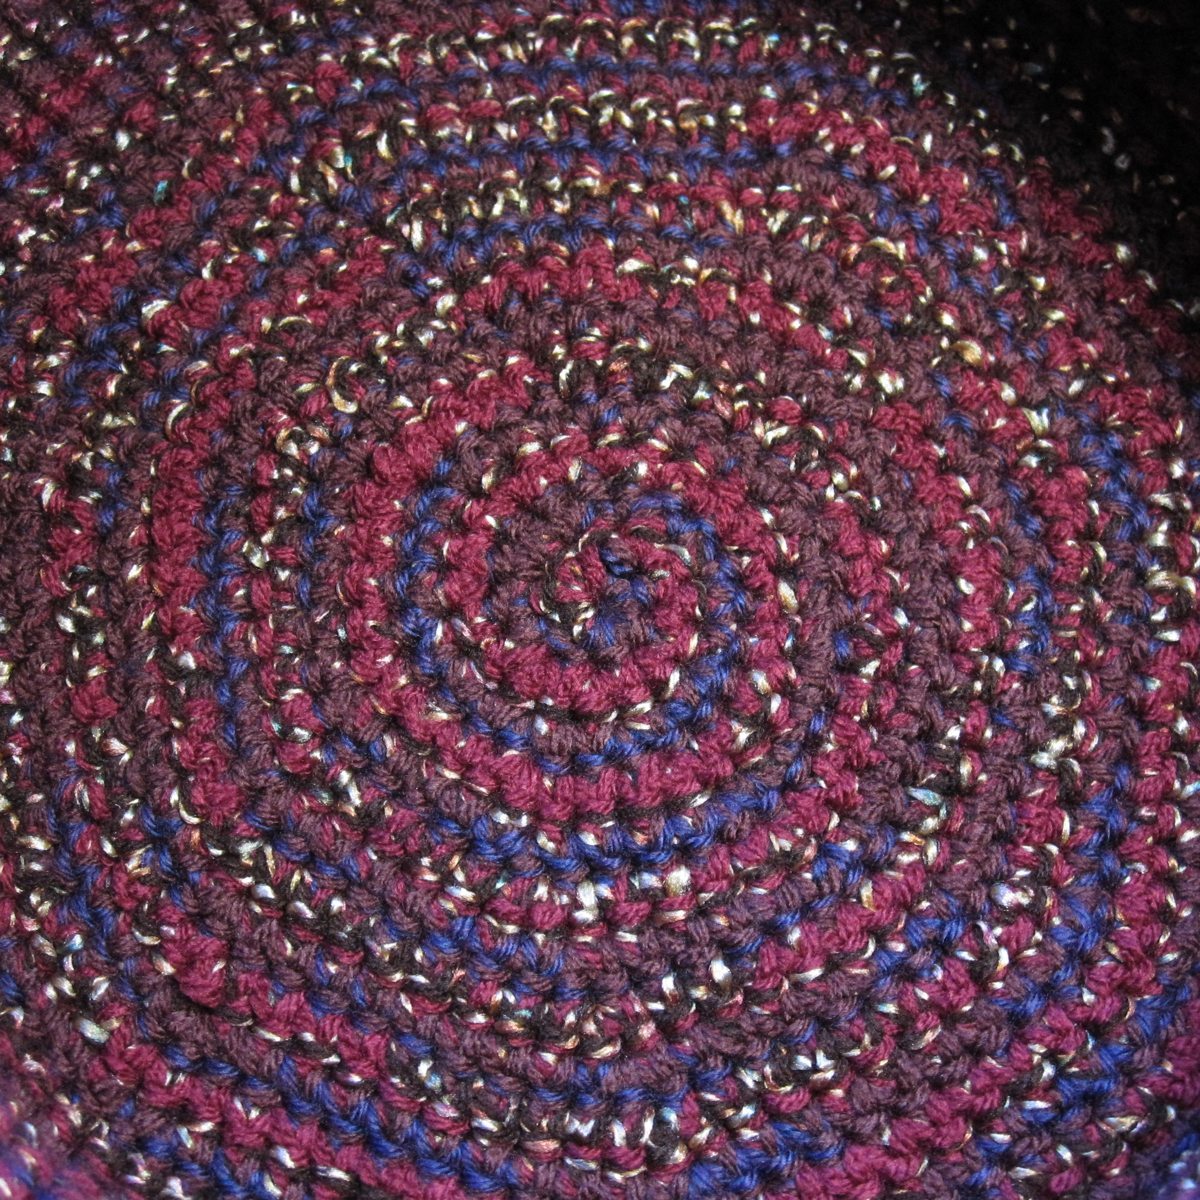
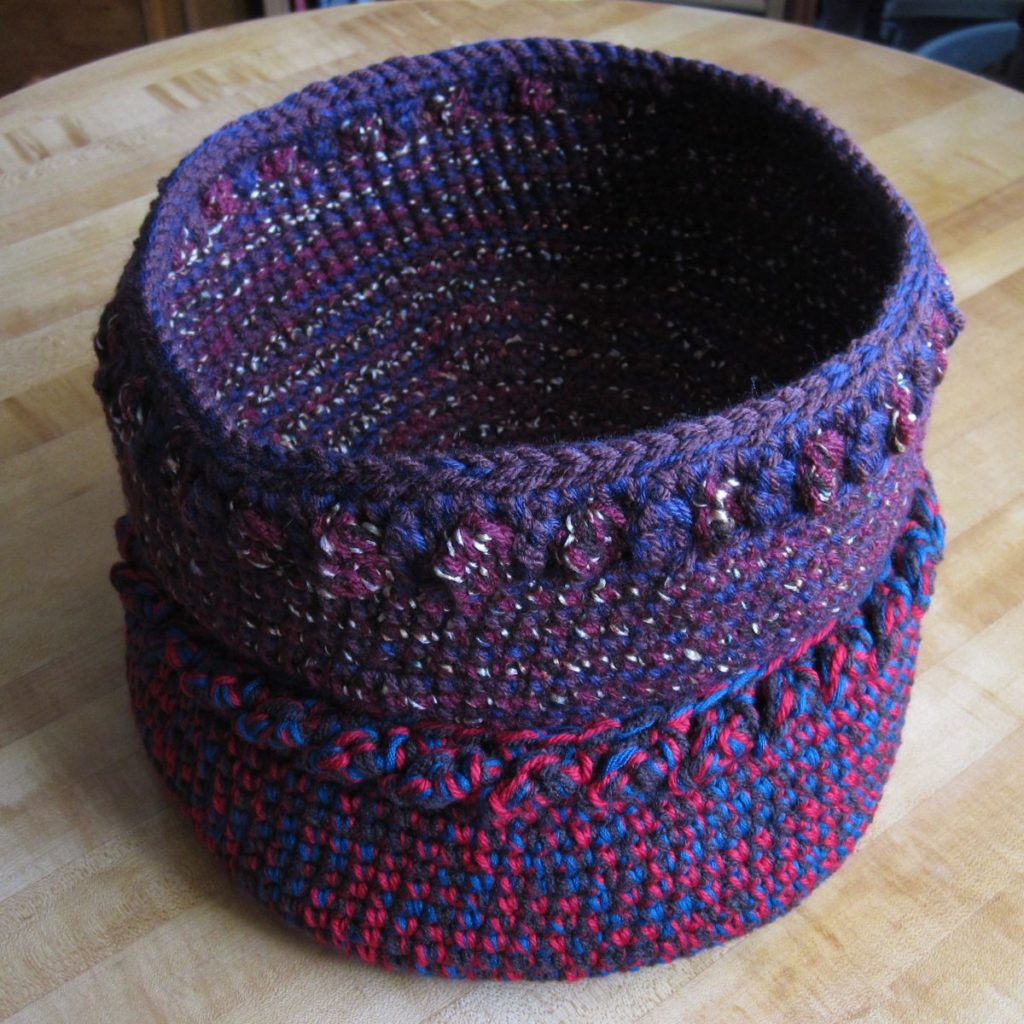
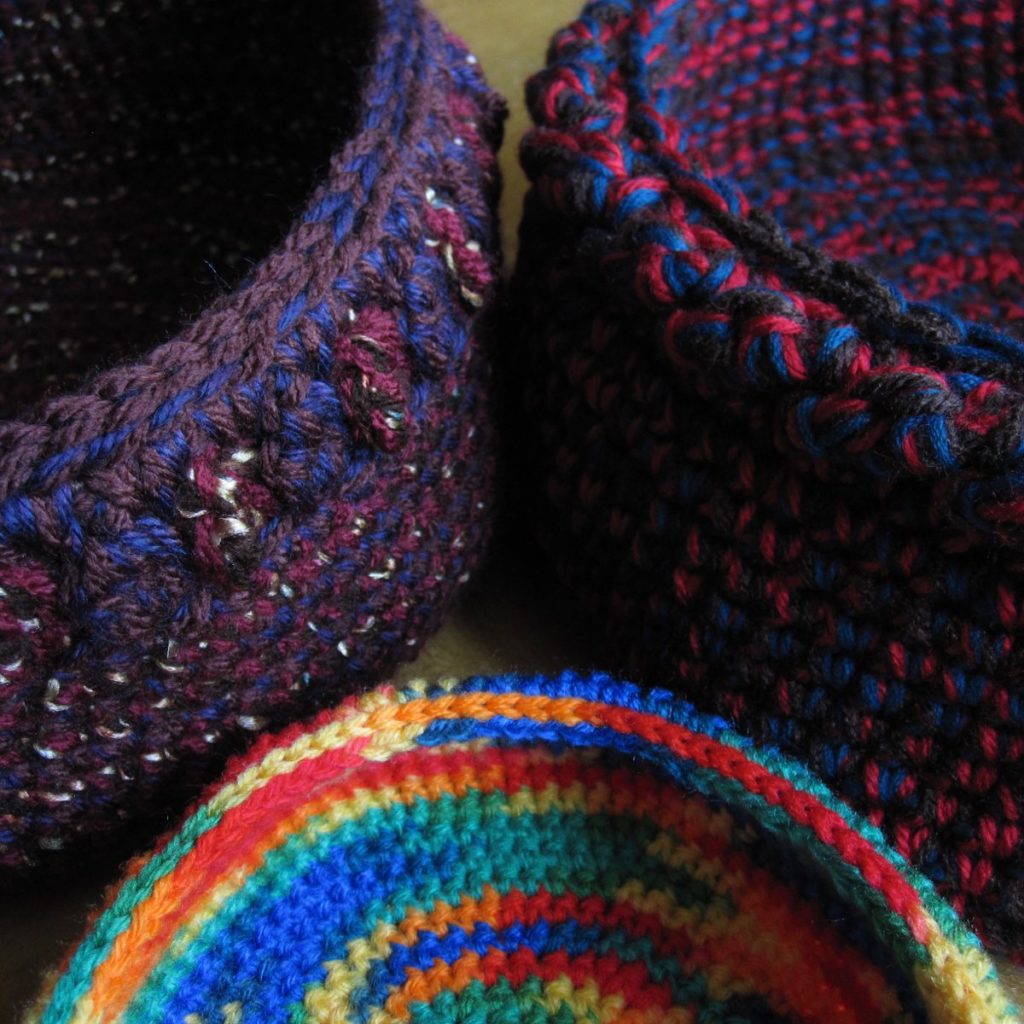
Tapered Spring Basket

spring basket from side

So many strands! This was my first – and so far only – five-strand basket. The body of it is straightforward; just single crochet with more decreases on the outside edge than I would have made had I know how they would turn out. Most of the yarns change from beginning to end, though, and there’s a strand of variegated yarn; the combination gives it some extra visual interest.

To be honest I should just give in and call this the Easter basket. The photos are dim; in real life this is bright and candy-colored.

spring basket, top edge detail

For the top edge I made a round of single crochet in the back loop only, and then a round of alternating single crochet in the previous single crochet, and double crochet in the unused front loop below. It’s simple but finished-looking, and the unused loops between the double crochets set it off from the rest of the basket nicely.

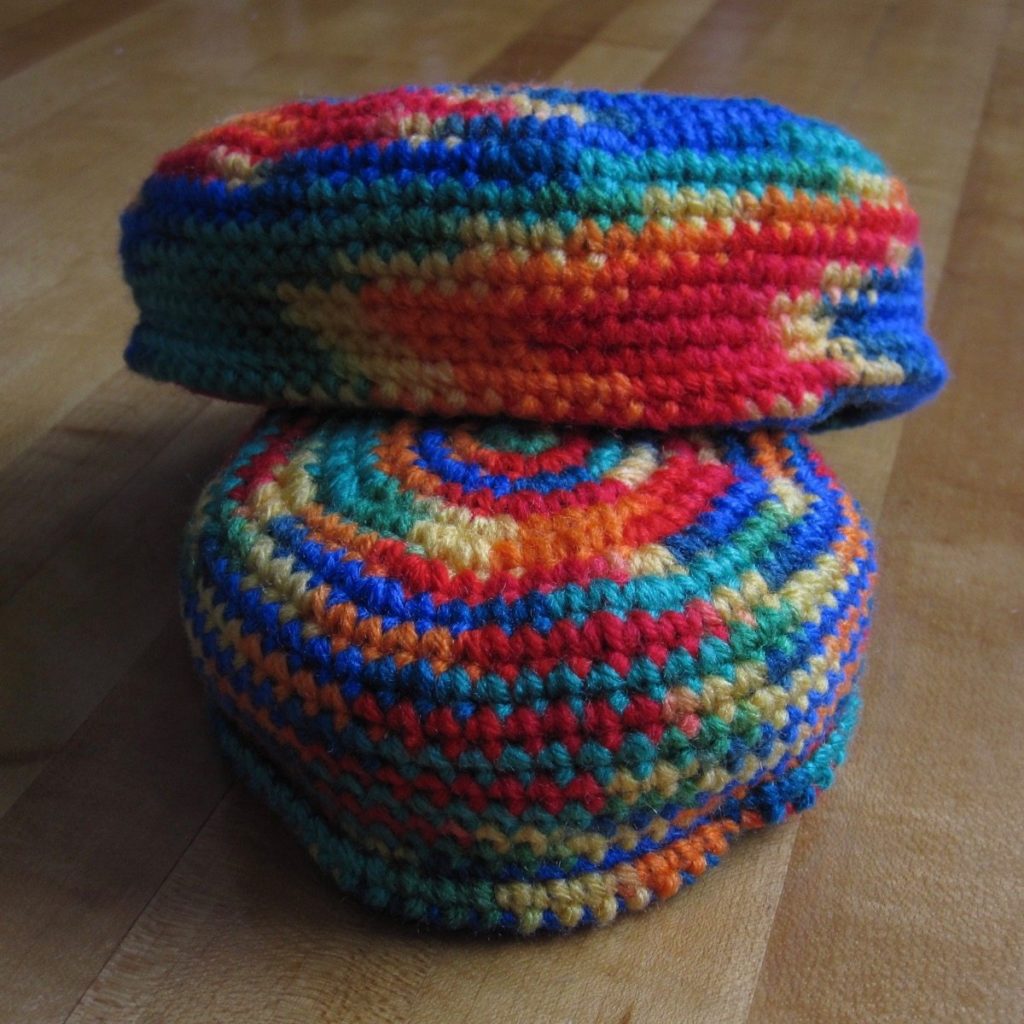
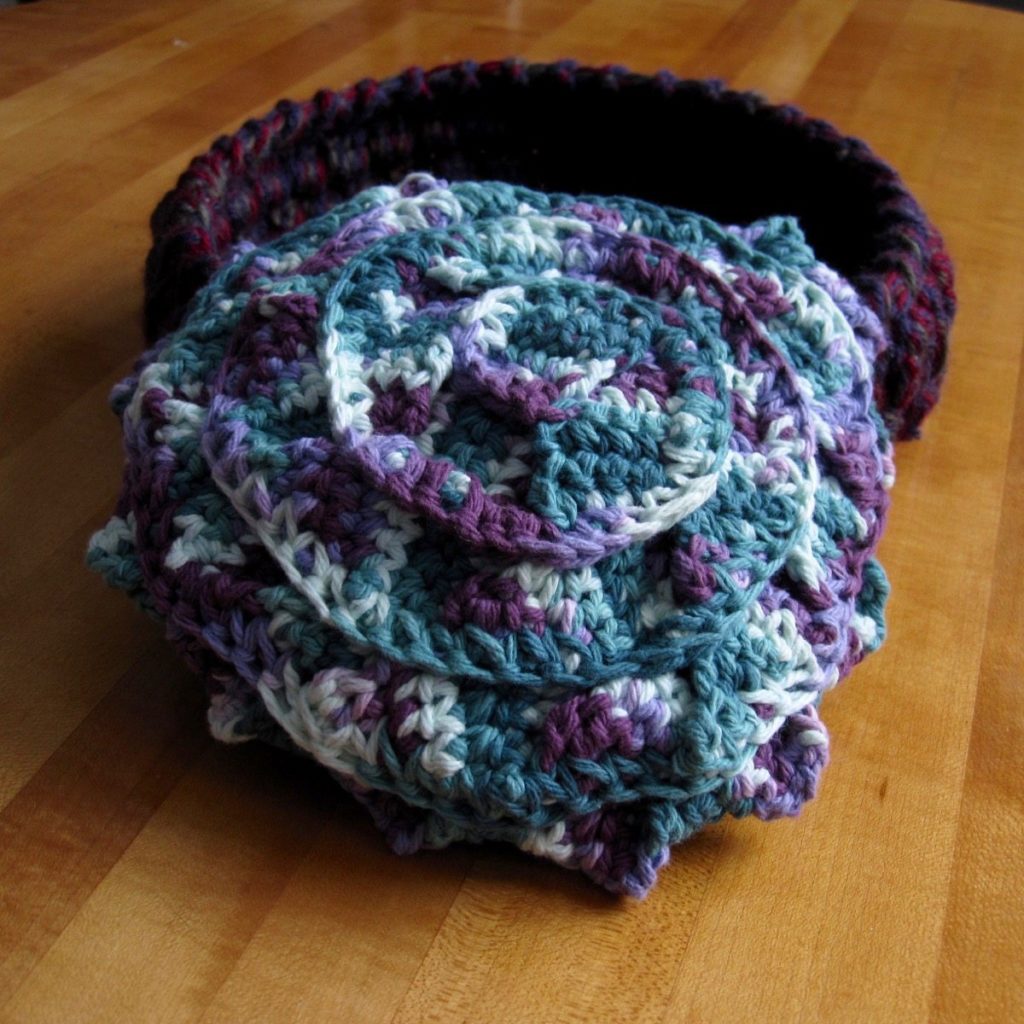
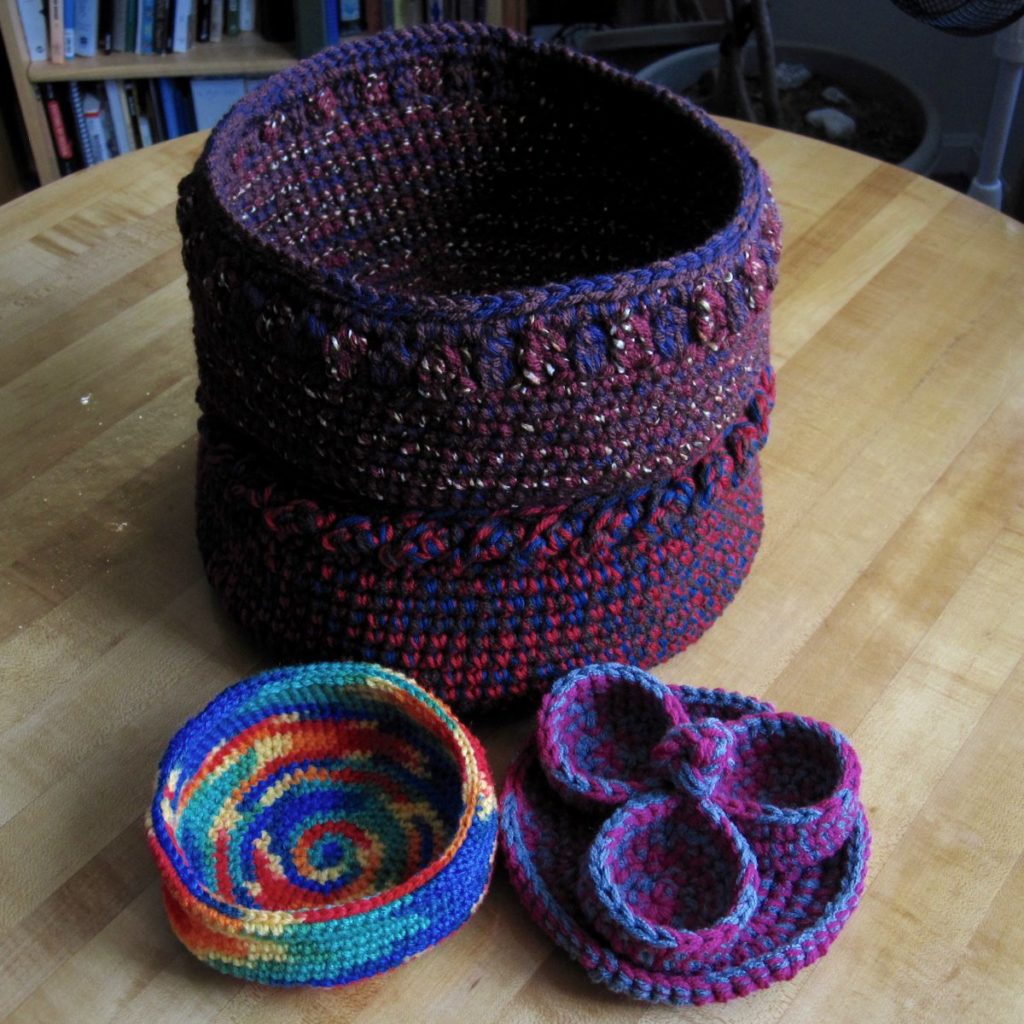
Warty Citrus Sunflower Bowl

sunflower basket from top

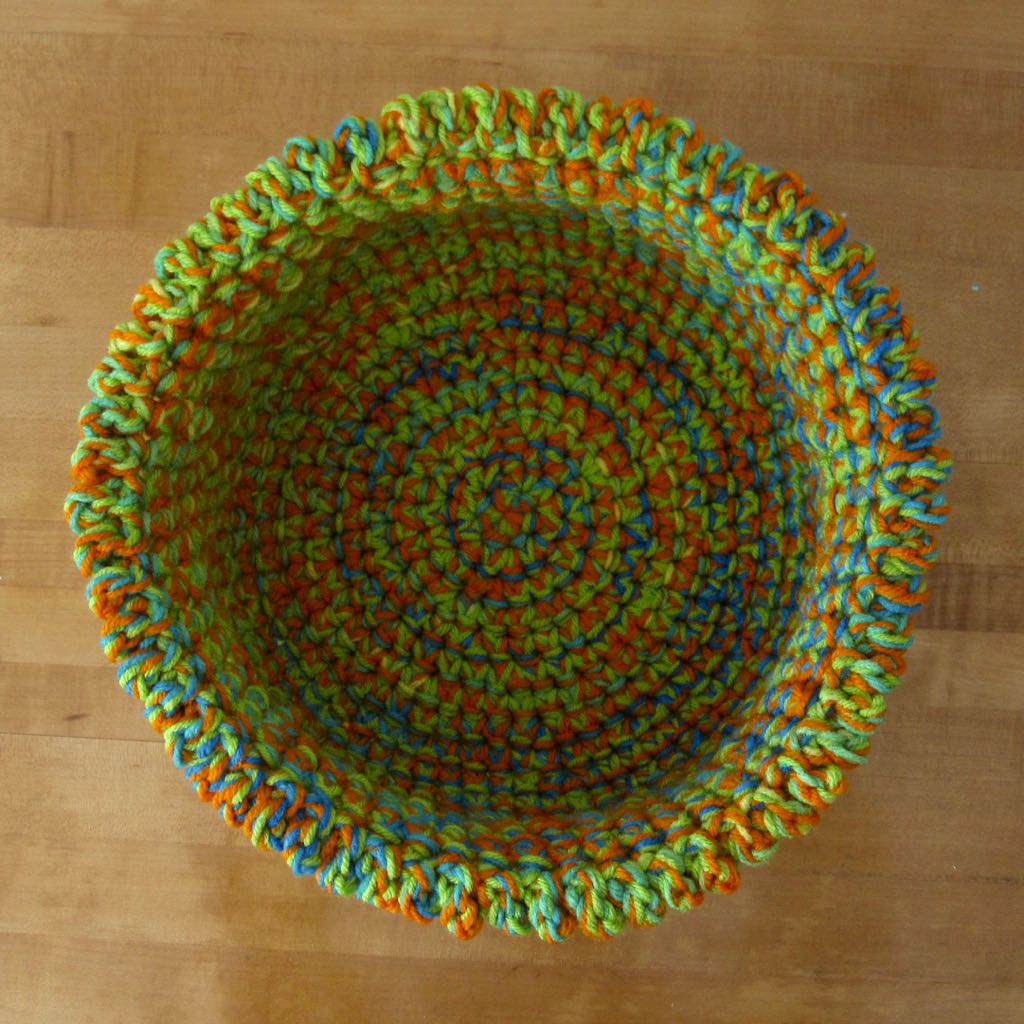
O so bright! I haven’t been able to make the rest of this orange yarn work with any other combinations yet, but this one came out great.

On the sides of the basket in two rounds I made some single crochets in the back loop only and then in the next round decreased a single crochet in that stitch with a double crochet in the unused front loop. Those are the warts. They are… subtle. Might have been more worth the effort in a less busy color scheme.

sunflower basket from the side

The top edge is a round of what I named “compressed picot”: slip stitch in front loop only; chain 2; slip stitch in back bump of first chain; slip stitch in unused back loop of original stitch. Continue, slip stitching into the front loop of the next stitch. This was the point at which it got the “sunflower” part of its name.

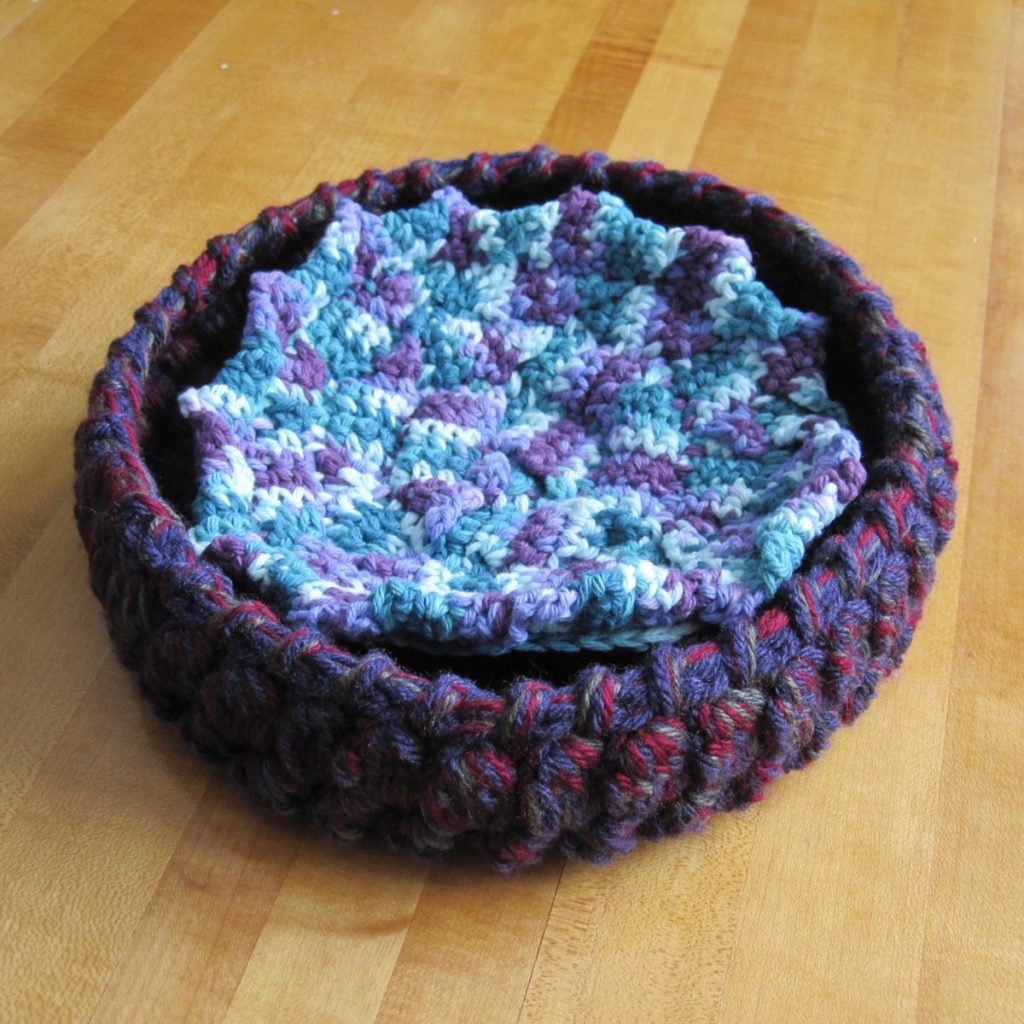
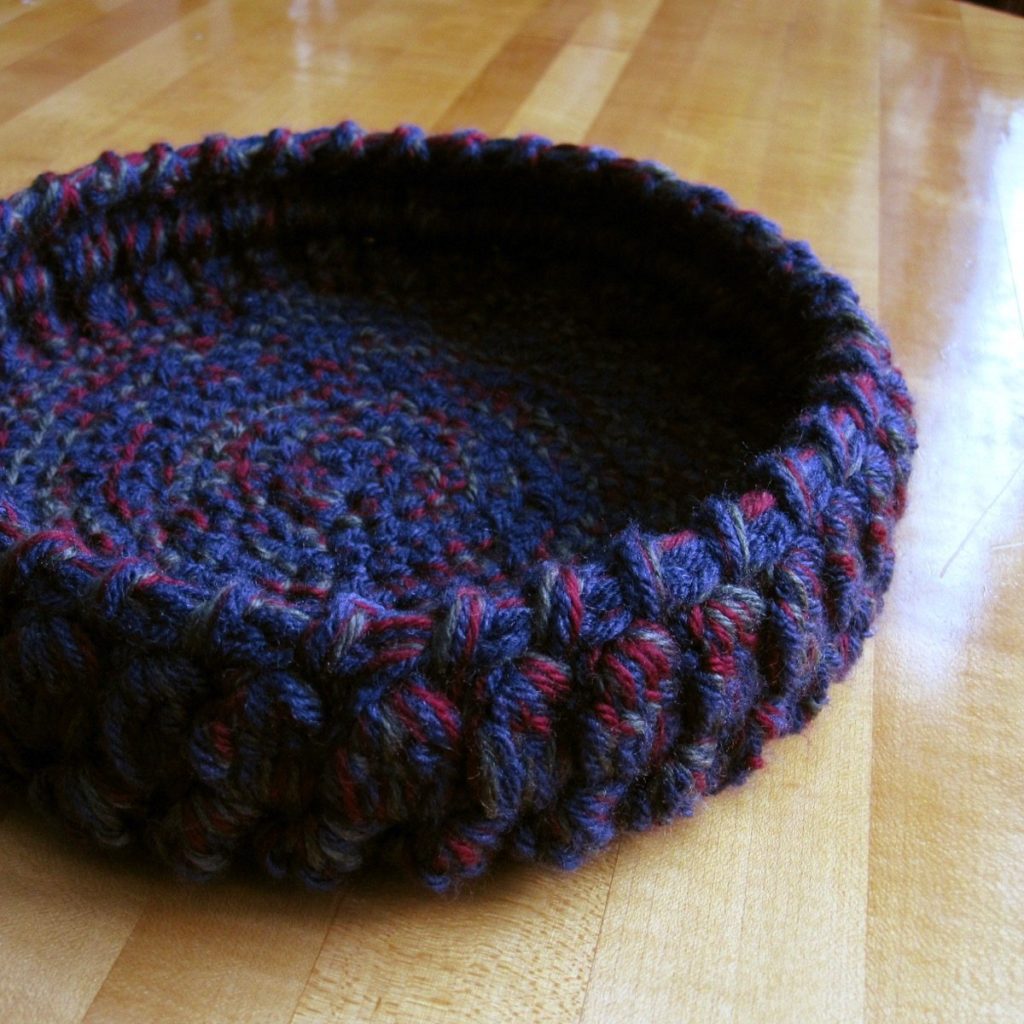
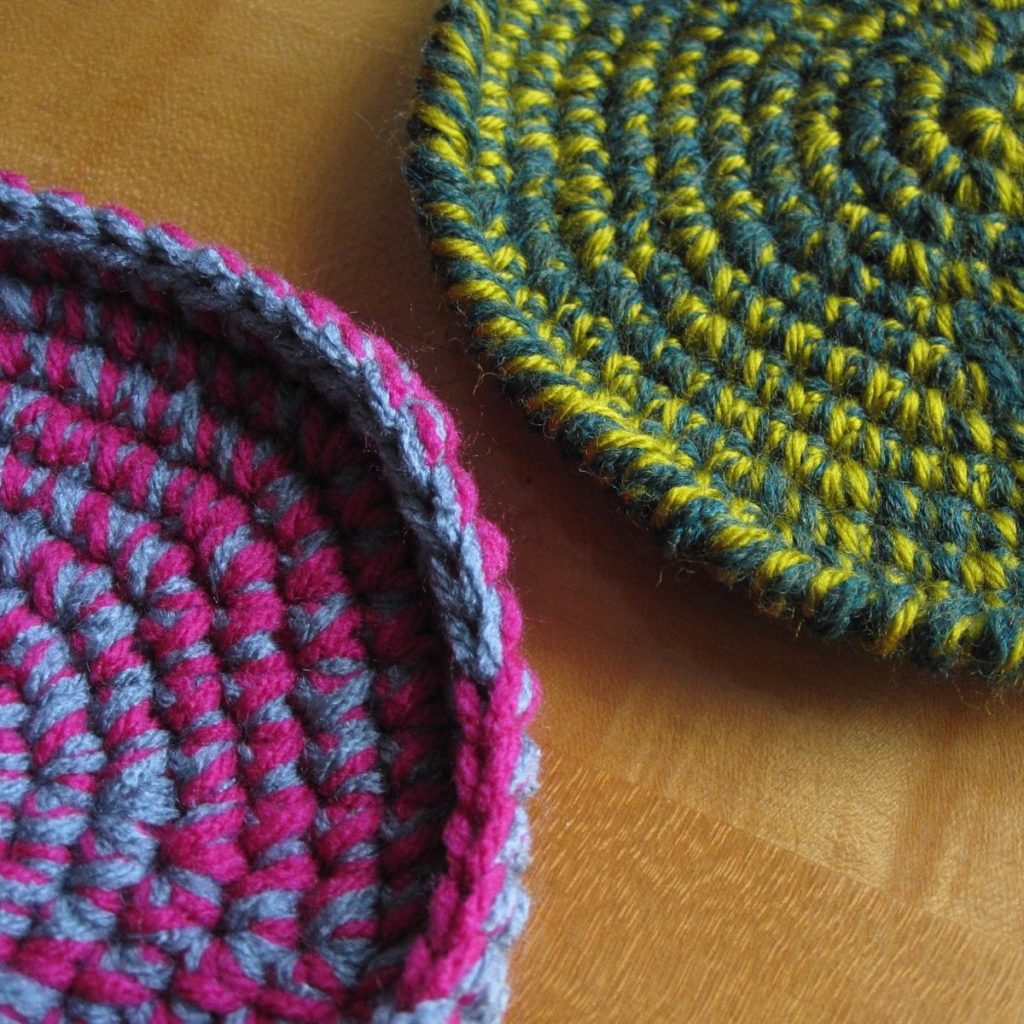
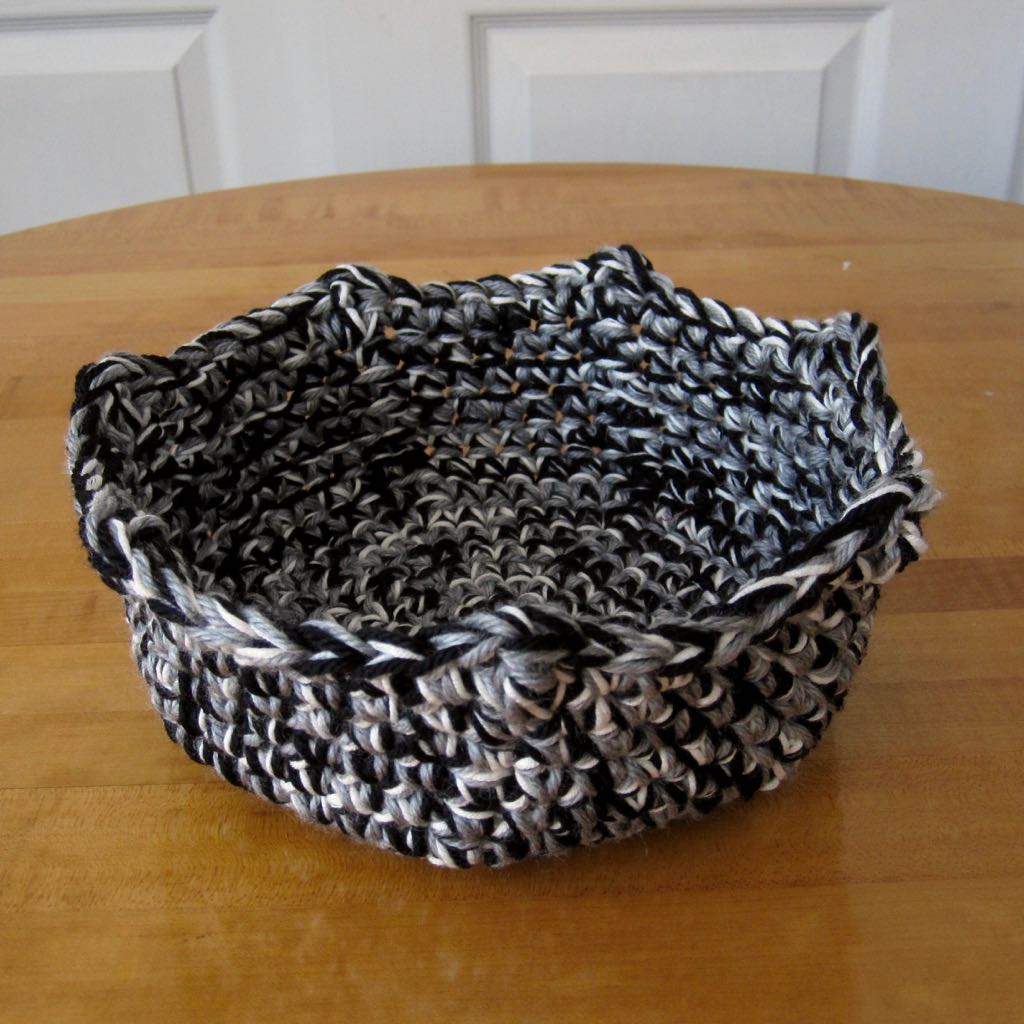
Black and White Heptagon Bowl

heptagonal basket from the top

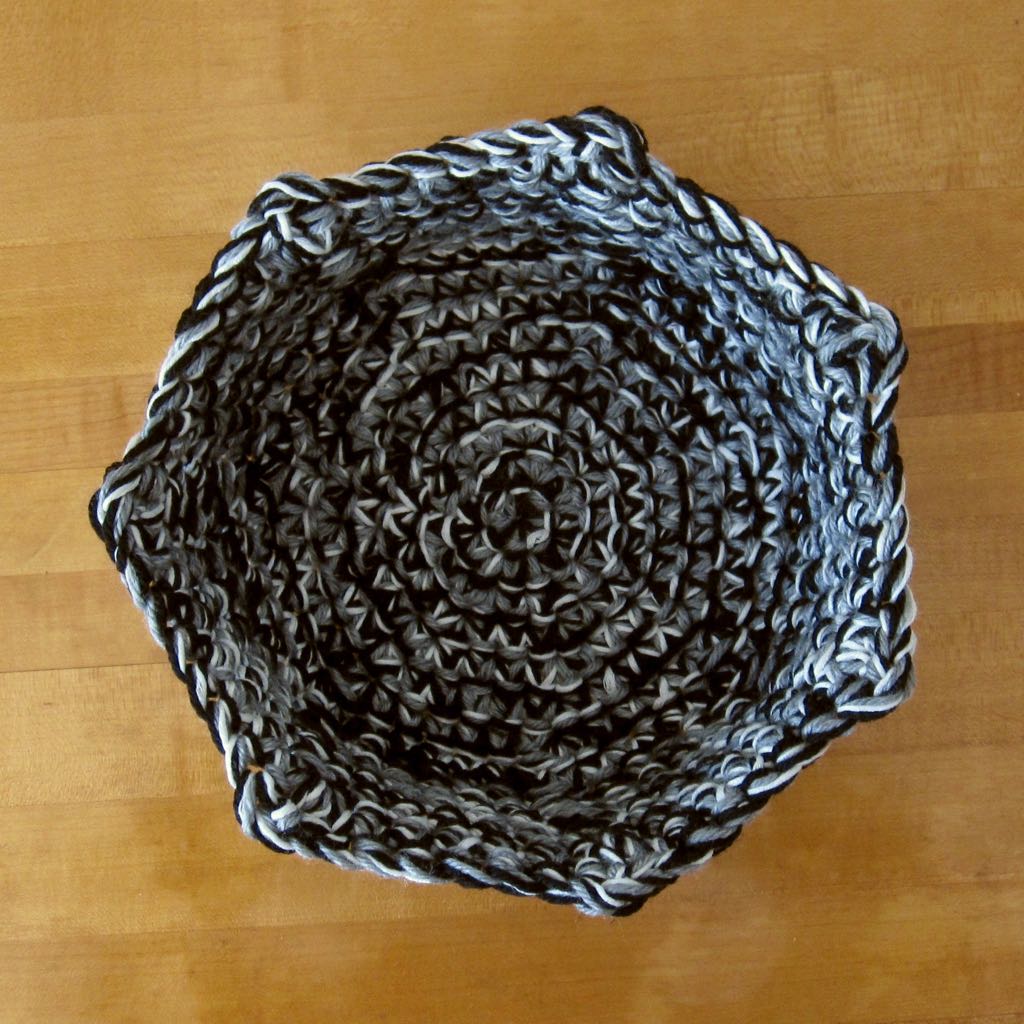
When your natural “flat circle” increase rate is seven stitches, it’s easy to make something heptagonal. Stack the increases in every round! I thought a geometric shape would go well with my black and white yarn color scheme.

Once the base was as big as I wanted, I stopped increasing but made half double crochet in each “corner” to continue distinguishing them. For the final round I used single crochet for the most part, but in each corner I made (hdc, dc, hdc) where the second half double crochet is linked to the first behind the double crochet.

heptagonal basket from the side

“Linked” means instead of yarning over before pulling up a loop, I pulled a loop up through the middle of the previous hdc (i.e. its starting yarn-over). There’s a video and written instructions for linked double crochet on Moogly; half double works the same way but seeing which loop of the previous stitch to insert your hook into might be trickier.

I had to go back and read my stitches to remember how I made this and several other of the baskets… I should really record them more promptly.

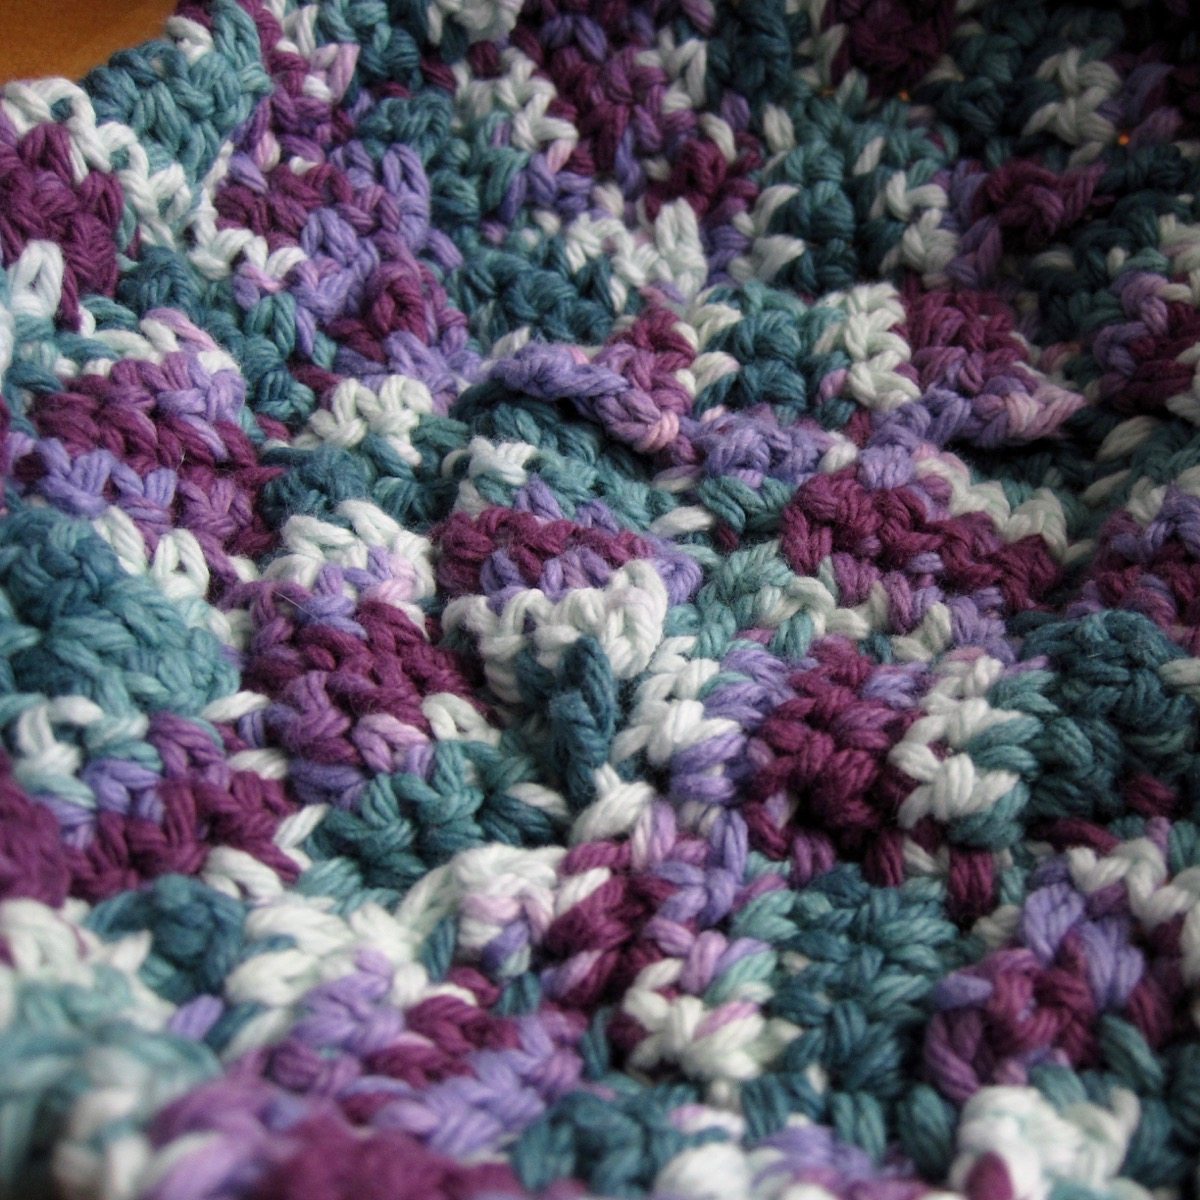
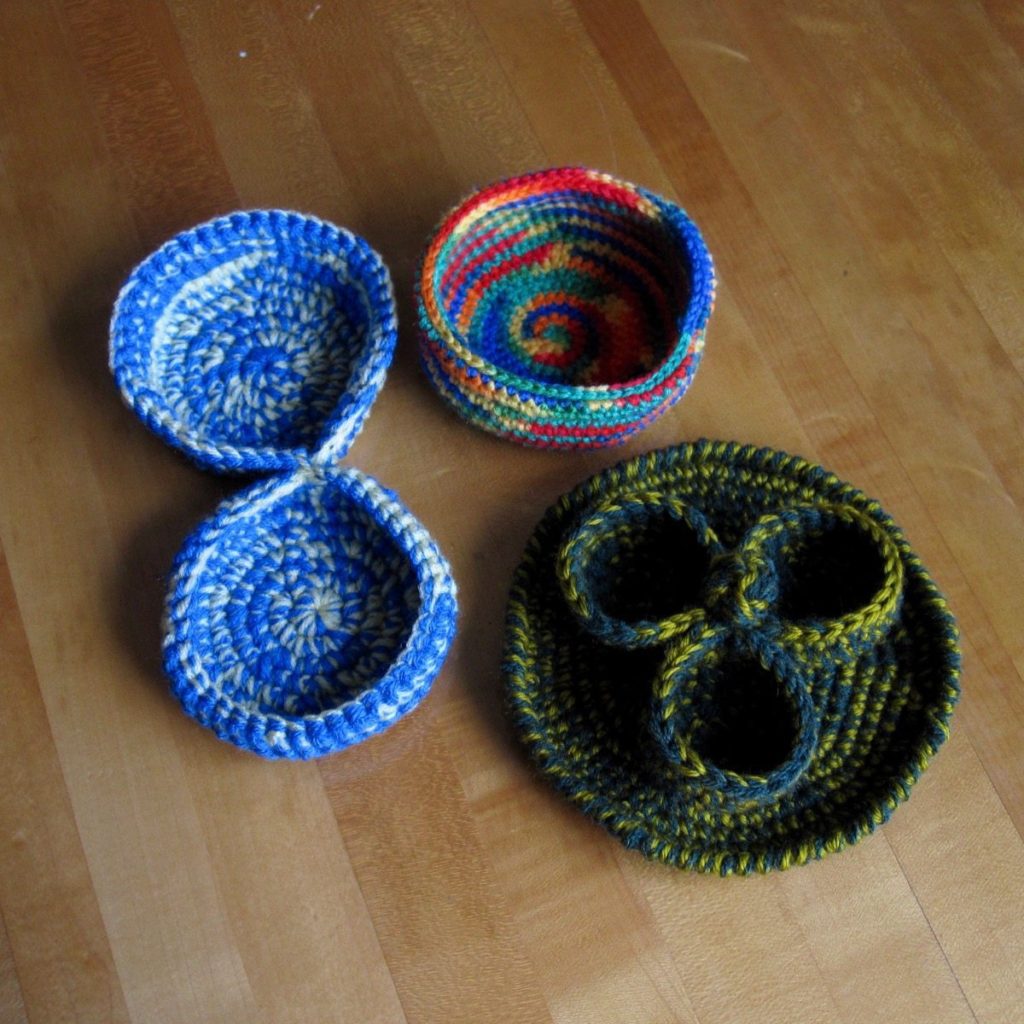
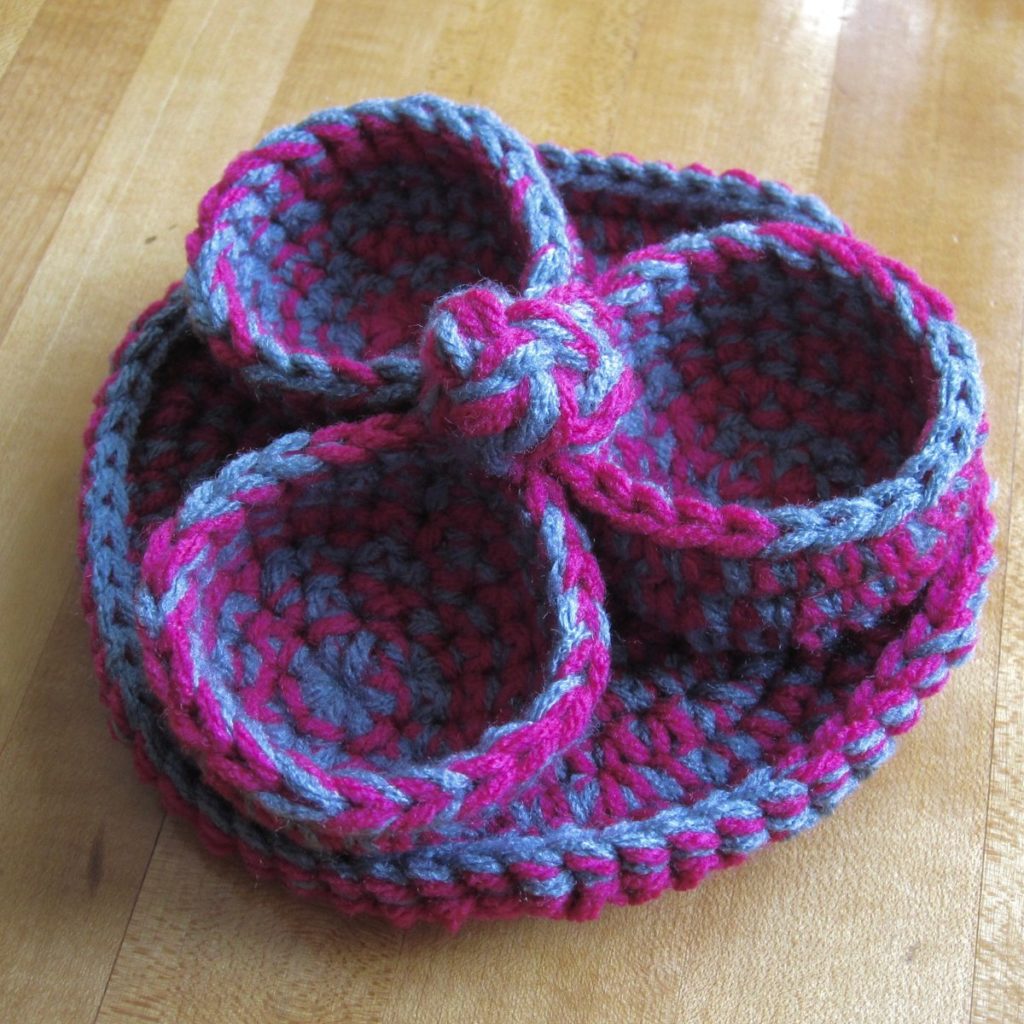
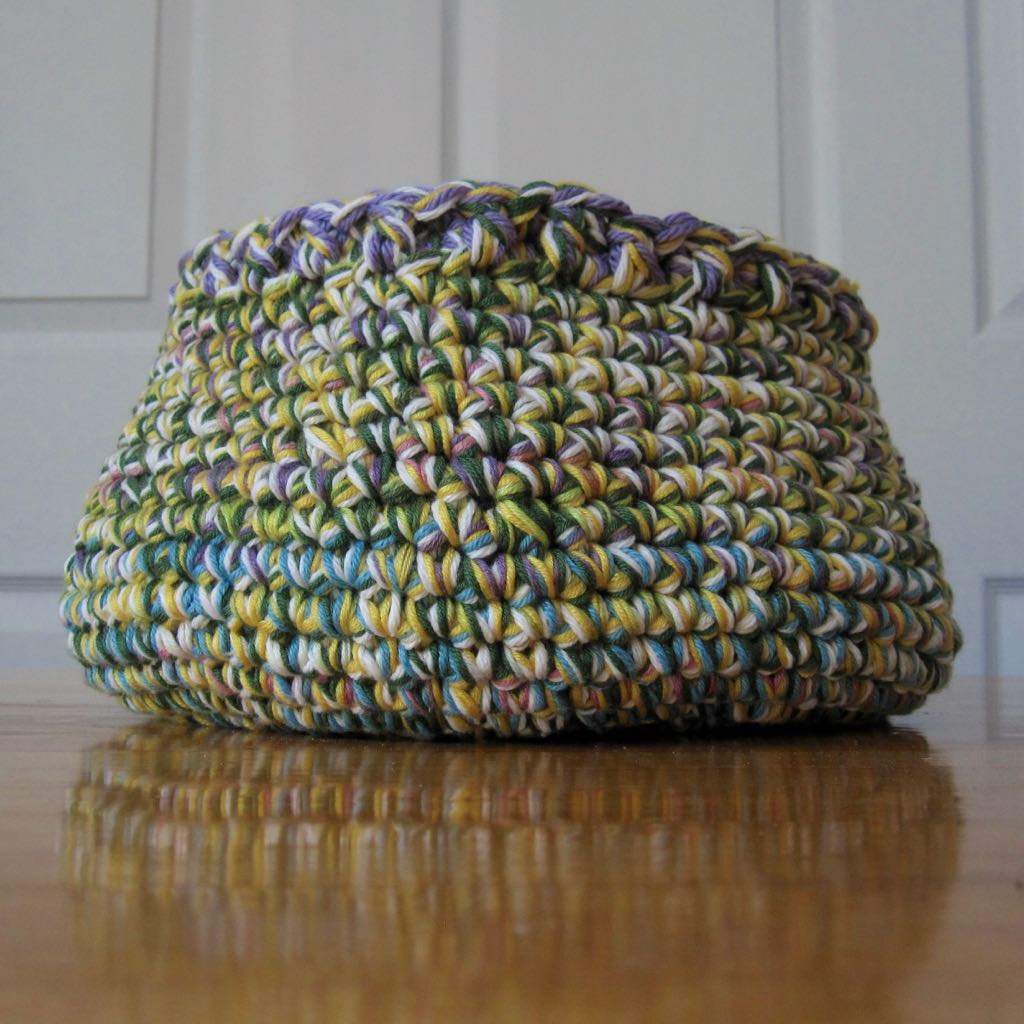
Unicorn-Wool Baskets

sherbet basket from the side

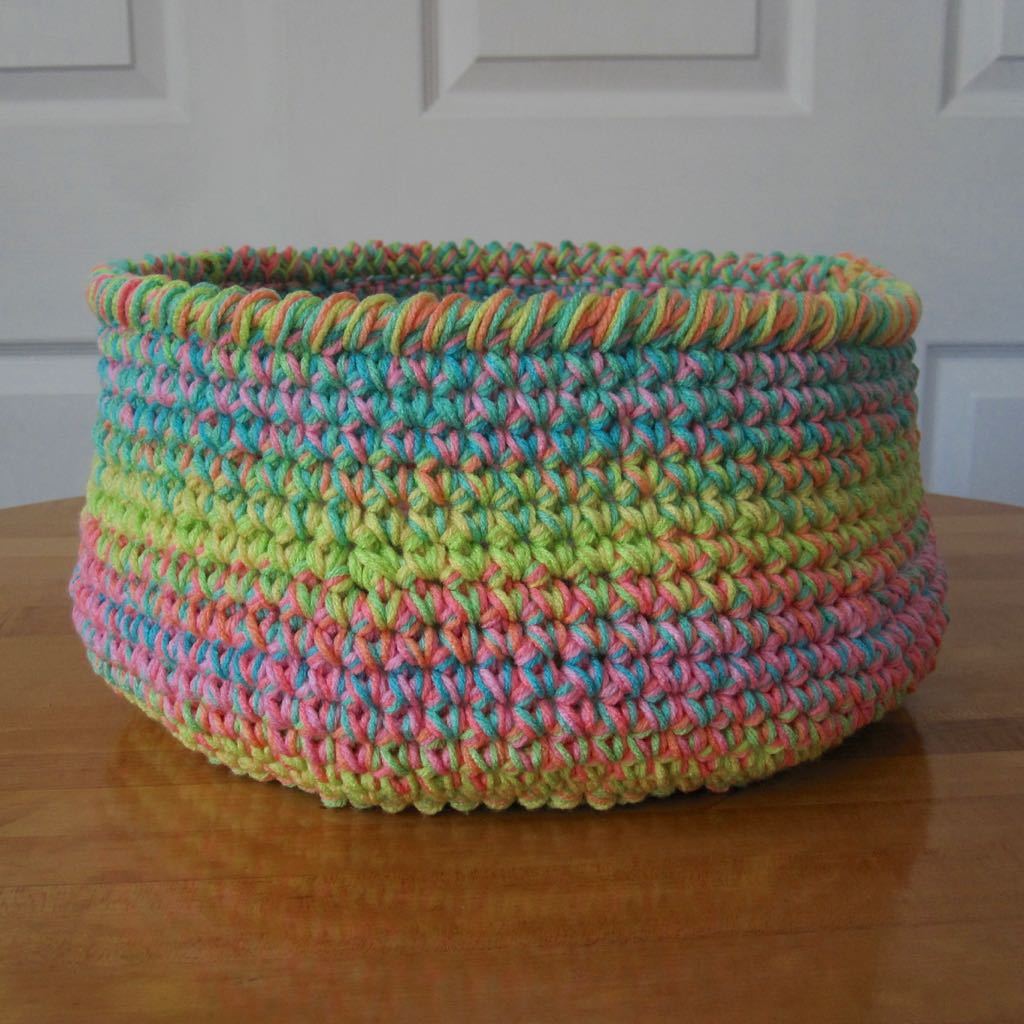
I allowed myself to buy yarn for no reason (well, we know the reason: baskets) and one of the skeins I came home with was variegated and sherbet-colored. The more I looked at it the more I loved it as it was, so I went back for two more skeins and wound them all together. I just want to eat it.


sherbet basket, from top with contents sherbet basket, from top, empty 
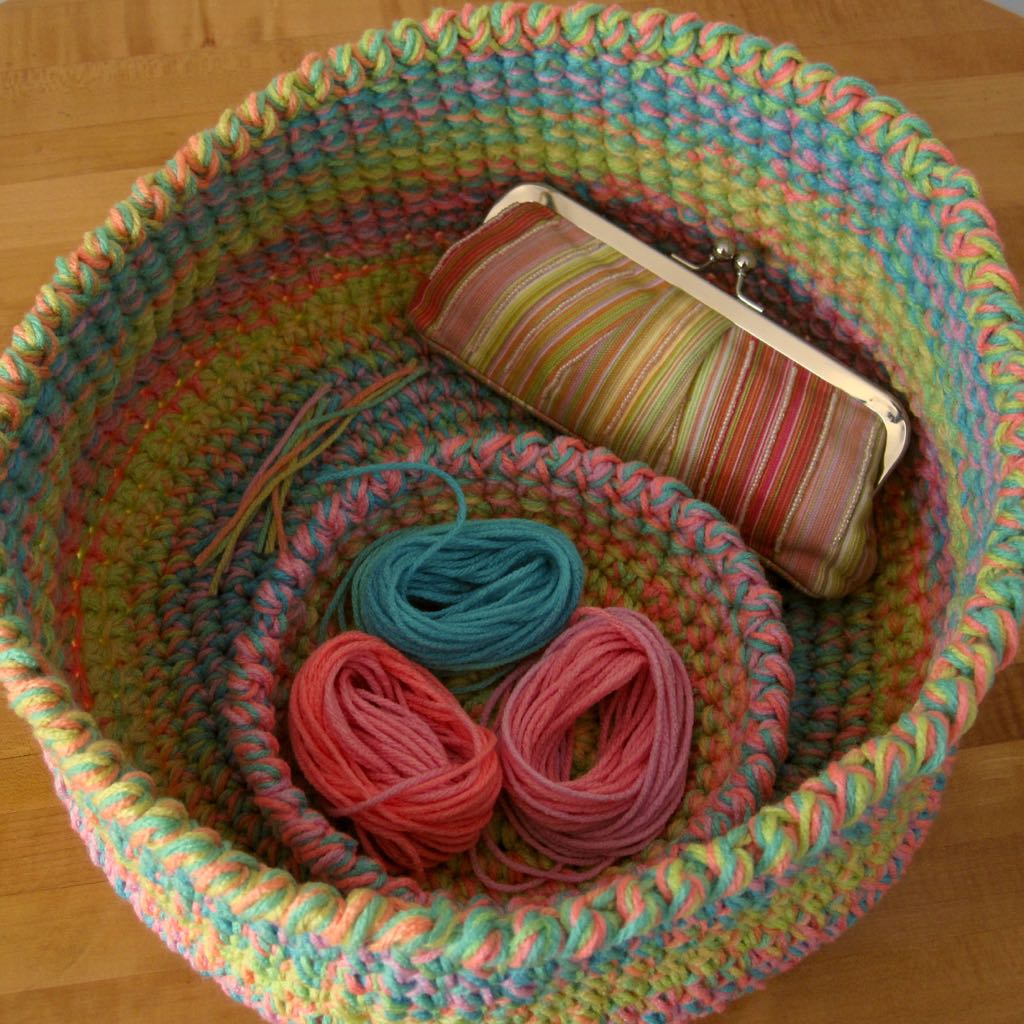
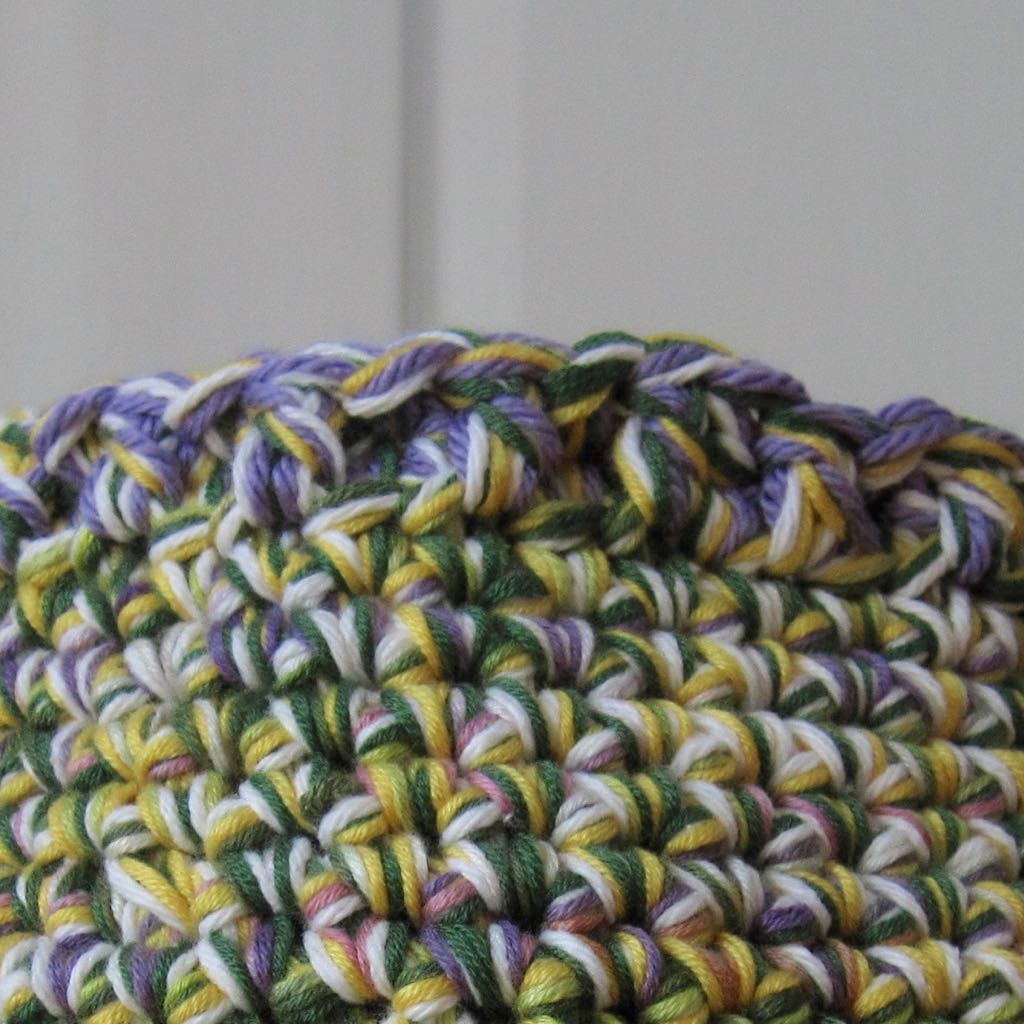
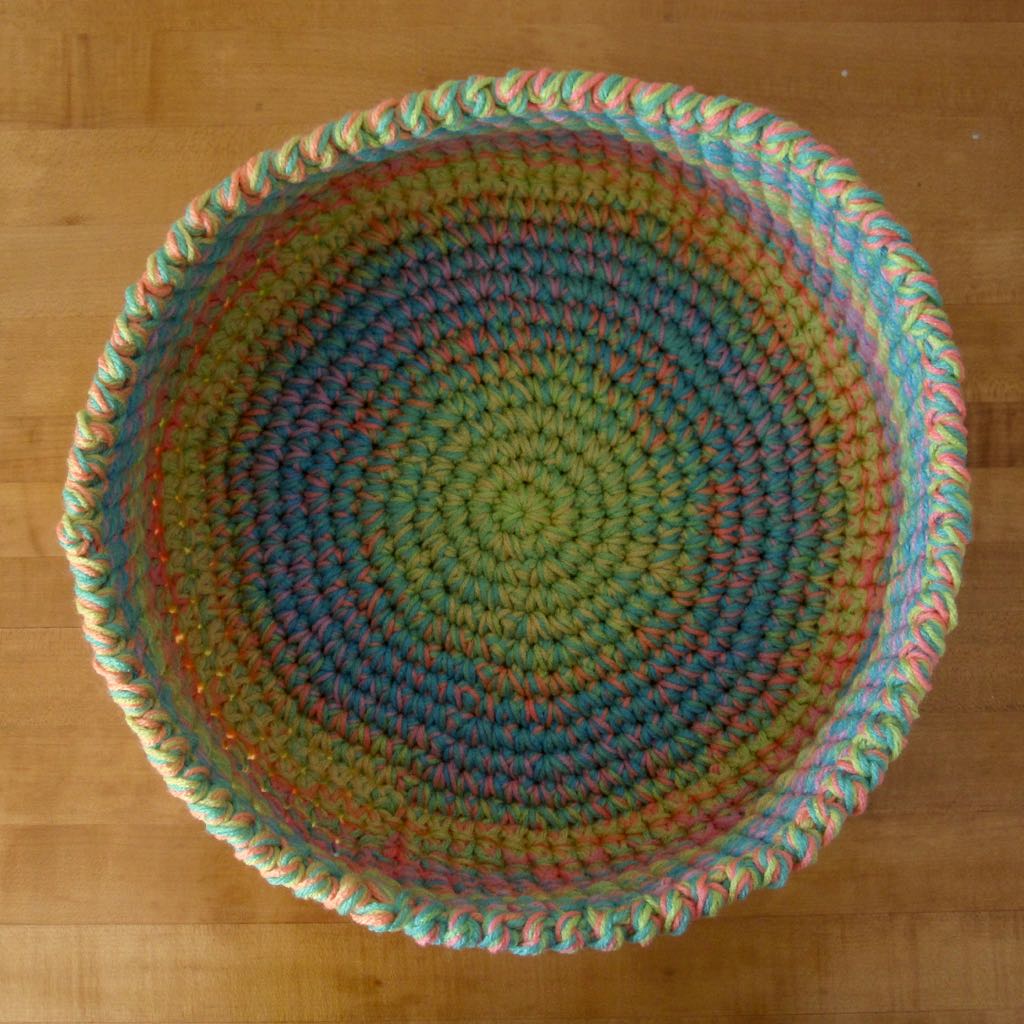
The basket is simply single crochet – why gild the lily? – and the top edge is crab stitch in every previous round’s stitch. When I’d gotten to the point that adding more rows would make the basket disproportionately tall, I still had plenty of yarn left, so I made a mini tray to go along with it.

sherbet mini-basket, from the side

sherbet mini-basket, from the top

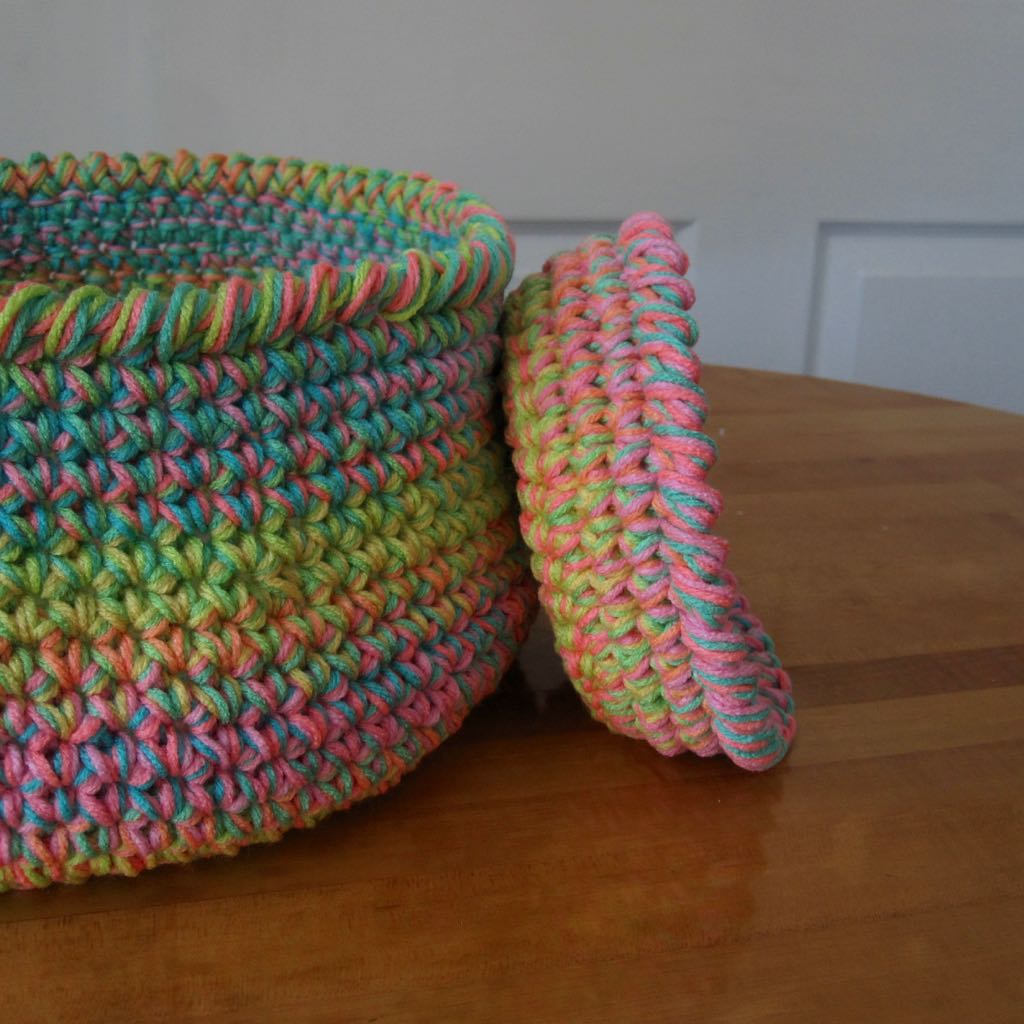
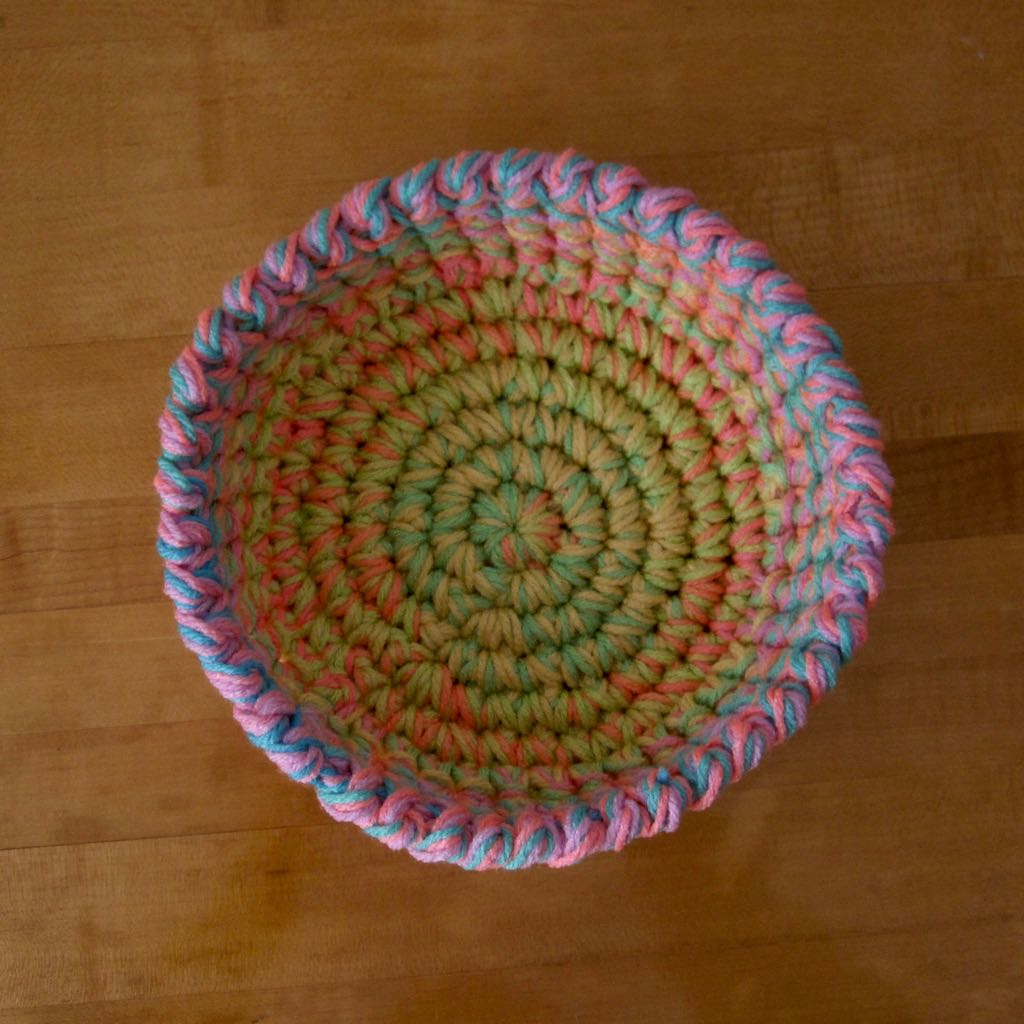
The mini tray is just the same: plain old single crochet, and crab stitch at the top.


sherbet basket in progress 
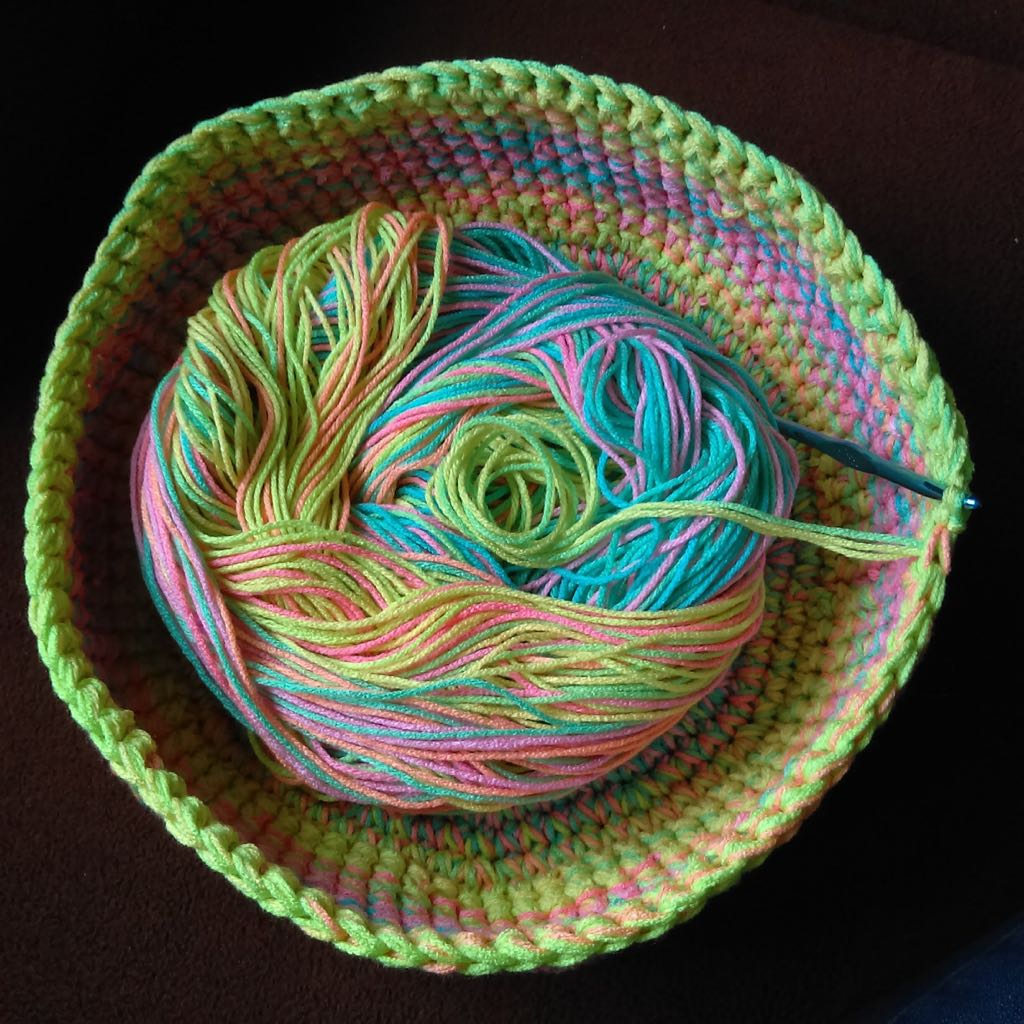
The unicorn-wool basket was also the subject of probably the best in-progress photo I’ve ever taken of anything.

I’m really pleased with this, as simple as it is. I have the ending yarn strands – unicorn haircut sweepings – on a bookshelf in my sewing room, because even they are aesthetically appealing to me.


More in a week!

Bowls and Baskets, Revisited

Since my previous post on crochet baskets, I’ve made a bunch more.

Another Rainbow Basket

nested rainbow baskets stacked rainbow baskets

First up! I made a smaller version of the rainbow basket. It’s the same as the larger one except for size – simply single crochet in a spiral with a sort of rolled edge. I love how its color pattern is completely different from the larger one – striped instead of pooled into a sort of sand art look.

Bobble Stitch Tray

coiled bowl and bobble basket bobble basket close up

Next up, two baskets that lived in my crochet bag for a long time. The one shown twice above is more of a tray since its edges were both time-consuming and yarn-eating. I started with three worsted-weight yarns held together and made a simple single crochet bottom in joined rounds. When that was as large as I wanted, I made a round of 4-dc bobble stitch in every other stitch; I also chained 1 in between each pair of bobbles. In retrospect I may have been better off skipping the chains, because I needed to then go around with slip stitch (one per bobble and one in between each pair of bobbles) to keep it from splaying outward. I did one more bobble round with a slip stitch round afterward, making each bobble between two bobbles of the previous round and enclosing the slip stitch in between. Finally I did a round of crab stitch, making one stitch between each pair of bobbles of the last round, also enclosing the final slip stitch round. This is a very sturdy basket/tray.

Weird Coiled Dish

coiled bowl interior coiled bowl from bottom

The second piece ended up more of a dish than a bowl or basket or tray. I made a long strip of single crochet, four or five stitches across (I’ve already forgotten). I then coiled it into a bowl by folding it over to make turns and single-crocheting from the back to join each new round to the previous. This dish would need stiffening to be used as such; it was very floppy and did not want to hold its shape. It was interesting as an experiment and not terribly time-consuming, though.

Two More Catchalls

trefoil and figure-eight baskets trefoil basket trays

I made another “trefoil catchall” in a color scheme I described as “pine and olive oil” (trefoil catchall pattern). I finished the tray with crab stitch in every stitch, which gave it a sort of wrapped or bound-edge appearance.

The other new item shown above is a double tray, made figure-8 style. You can see that in the way the lip of one dish curves outward and the other inward. I made two disks separately for the bases, and after completing the first round of the side of one dish, I immediately went around the second dish. At the end of the full double round I slip-stitched into the starting stitch. In the next round I ignored the slip stitch, single-crocheting into each sc of the previous round, and so forth. The slip stitches in the middle didn’t seem to add any height to that spot, which was perfect.

Spike Stitch Basket

spike-stitch basket exterior spike-stitch basket interior

Finally, I made a basket using spike stitch. I was interested in a scarf I found on Ravelry where you single crochet with light yarn around super bulky yarn – kind of a crochet couching technique – but I did not have yarn on hand with weights different enough to get the effect. Instead I alternated rounds of single crochet with worsted-weight yarn and rounds of alternating sc and spike stitch with sport weight yarn: worsted, sport color A, worsted, sport color B. At first I wished I’d had a darker and/or more saturated purple to contrast with the gold and dark-but-undersaturated green, but what originally struck me as a washed-out color scheme now makes me think of excavated antiquities.

The base is joined rounds of single crochet with all three yarns held together; I made it with a slightly larger hook than the sides. The first two rounds of spike stitch are made into the last base round, and after that each spike stitch is made into the previous round of the same color. The two colors of spike stitches are offset, so one color yarn begins rounds with sc and the other with spike. I finished with a round of the worsted and then (guess what!) crab stitch, in every other stitch, with all three colors held together.

If I make another one of these I need a better way to carry the yarns up to later rows at the joining spot. In this one I made the joining slip stitch with all three yarns and that was too chunky – there’s a sort of wobble down the outside edge along the join because it’s taller than the rest of the side.

spike-stitch basket exterior

You may or may not recall I was making some of the crochet baskets, plus the coiled fabric bowls, for a craft sale. Our overall sales were significantly down from previous years, but the larger sewn bowls did sell. The smaller bowls and the crochet items (all of which were on the smaller side as well) did not. Perhaps larger crochet baskets would sell, but I’m not sure I have the dedication to make them for sale…

Crochet baskets

For whatever reason recently I went on a spree of crocheting baskets, and got their portraits made. I’ve got some edging ideas/instructions and other information for you along with these photos.

crochet baskets all together

All of the baskets are tight-gauged single crochet other than the top edging; the rainbow basket was worked in a simple spiral, and is the only one made with a single strand of yarn.

joined basket interior view spiral basket interior view

The first picture above is the inside base of the biggest basket, made with 3 strands of worsted acrylic in red, teal, and brown, and worked in joined rounds. I believe I made a few decreases on the sides to give it that pot-like silhouette.

The second photo above is the second-largest basket, made with two pairs of worsted weight yarns: a textured purple/plum paired with a ruddy brown, and a brick red with a dark brown that had a thin shiny strand wound with it to make it tweedy. They are crocheted in a double spiral.

I’m really pleased with how the colors worked together in both cases.

the biggest two baskets together trefoil basket with button knot and tray

The outlier clearly is what I’ve been referring to as the “trefoil catchall,” in hot pink and gray worsted. This one I actually wrote a pattern down for so I could get all three pieces the same:
1. Sc 7 in magic ring. Sl st to join each round; chain up at the beginning of the next.
2. *Sc inc* around (14).
3. *Sc inc, sc* around (21).
4. Sc inc, sc 20 (22).
5. Sc inc, sc 21 (23).
6. Sc inc, sc 22 (24).
I needle joined at the end, though the join spot ends up hidden. Weave in the ends of the first two; use the tail of the third to sew the three together at the increases/joins.

For the “knob” I cut three long pieces of each color of yarn, threaded them through the joining so they ended up doubled, braided the lot (12 strands!) and then tied a Chinese button knot. Tightening it was a process – lots of tugging of loops along the path of the braid. I pulled the whole tail down through the join and wove in the yarn ends individually (phew!).

The tray is just a disk in joined rounds; I would have made it larger but I ran out of yarn.

How about edgings?

crochet basket edgings

On the left, a bobble stitch edging separating out the two doubled yarns. I used 4-dc bobbles; 5-dc bobbles would have looked nicer but I was concerned about running out of yarn. That is also the reason the top round is in only one color set. To note before we make bobbles: I had finished the main-body spiral with the two doubled yarns across the basket from each other.

Except for where I had to fudge it because of the count, I spaced the bobbles 1 stitch apart: in one color set, ch 2 and use as the first dc in a bobble (I can’t remember whether I made the bobble in the same st as the sc the ch comes from, or the next st; same would be better), ch 3/sk 3, bobble, and so forth almost halfway around. Stop short of color set two and sc 1-2 sts with it, if needed, to put it halfway between two of the color set one’s bobbles. Go back to color set one and finish the ch 3/sk 3, bobble round; if you don’t have a multiple of 3 stitches make the last two bobbles 2 or 4 apart from each other instead of 3. Sl st to join; finish off if this is not the color for the final round. Repeat the process with color set two; its bobbles will be in the middle of the 3 skipped stitches from the first set (with fudging as needed).

After the bobbles are done, pick up your final-round yarn, chain 1, and sc into the top of each bobble (enclosing the other color’s chain) and between adjacent bobbles (around both chains). You could also squish the tops of your bobbles a bit more by making 2 sc between bobbles (around the chains) and none into bobbles.

On all the baskets you want to join the final round with a needle join instead of a slip stitch.

On the right, a portion of the border to Julie Yeager’s Deco’Ghan. Fortunately I had a multiple of 3 stitches around so I didn’t have to fudge here. After joining my last round, I did round 3 of the Deco’Ghan border – as with my previous modification I skipped 3 unworked stitches at the beginning, marking the first one, and made the 2 sc in unworked stitches into the unmarked stitches. At the end I joined my chain into the marked stitch, made only 1 sc, and joined to the beginning of the first chain. After chaining up, I sc’d around in just the “sc 2” sts (i.e. the ones at the beginnings of chains and between, but not at the ends of chains). This tightens up the silhouette even more and poofs out the chains.

And finally, front and center, a simple border without concern for spiral-caused jogs: sc around in FL only; sc around in both loops; sl st around in both loops of last round plus unused BL of two rounds prior. Join last sl st to first with a needle join and weave in end. Makes a nice little lip.