Plannerama

I have a crafty new planner. Previously, I’d gotten a hardbound planner that had 2-page months between sets of 2-page weeks. However, it was too large for my purse, and I found myself failing to consult it on a very regular basis. When I get busy I just want to have a piece of paper lying out with my to do list. It occurred to me I might be able to have my cake and eat it too with a planner in a mini binder.

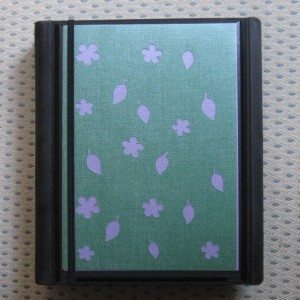
diecut mini binder cover insert

That cover is two sheets of pearly scrapbook paper cut to size, with the diecuts in the top layer made with my Cricut machine. You can see a strip of elastic – my previous pen holder was a pocket that hung onto the front of the planner with two elastic loops. It’s been a while since I switched to the binder and I only just finished my new pen holder. Meanwhile I got used to taking out the current planner page and sliding it under the elastic on the outside of the binder, so when I replaced the pocket I turned one of its elastics into a separate loop.

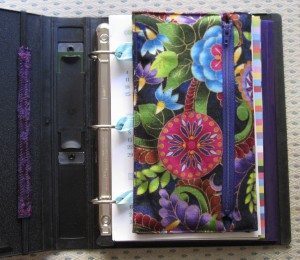
Pen holder for mini binder

Here’s the new pouch! It’s basically two flat pieces, each double-sided, one with a zipper and the other with a layer of heavy interfacing and some ribbon loops. It didn’t come out well enough to be worth sharing a pattern for, but I’m happy with it. The striped dividers are more scrapbook paper, cut to 8.5″x5.75″ so they stick out a bit.

And finally, here’s a highlights reel of my binder’s contents, so I can share the sources of my printables.

Oh, and you may be thinking, “if her previous planner didn’t fit in her purse, there’s no way this one does!” You’re right. I got a little staple-bound two-year monthly planner to use for that. It is full of silly animal pictures.
Lessons from large projects

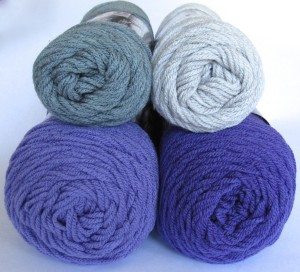
mystery-ghan yarn If you follow the ReveDreams Facebook page you know I’m taking part in a mystery afghan crochet-along (Ravelry account probably required for that last link). I wasn’t sure about it at first; afghans are a big commitment, and when you don’t even know what it will look like? But I decided to trust the designer, whose other work I quite like, and the “art deco” in the afghan description. The hubs and I chose colors, and I ordered 4660 yards of yarn. That’s all in the two shades of purple and gray shown; I don’t yet have the joining yarn, which will be black.

I have clues 1-4 of 8 in my possession and they will continue to come out every Friday through the middle of August. I’ve stitched the first two clues over the past ten days, eating up far more yarn than I normally would in that time. The first lesson I’ve had to learn is how to deal with 16 skeins of yarn, 9 of which are double-size and at least 4 of which are “active” at any given time (I’ve gotten up to 6: one dark purple tied up in a motif whose instructions are spread over multiple clues and two more so I could do a spiral that had two dark purple strands). I also have to do something with the motifs finished so far. I’ve decided that, after photographing, I’m going to close the motifs for each clue in a plastic bag and label it with the clue number. Everything “inactive” is getting stored in the box the yarn was shipped in, which currently is just sitting on the floor in my sewing room (note: that doesn’t make it in any way unique among my craft supplies).

There’s a complication to this afghan that isn’t present in my other long-term project, the blackwork embroidery map: the materials in use at any given time are bulky and in many pieces. Usually I have one project bag with materials for several projects in it simultaneously – the life of an amigurumi designer! For this project I got out a smallish bag for the multi-clue motif and its active yarn, another for small amounts of yarn left at the end of skeins (just in case), and a larger bag that holds those two as well as the full or mostly full skeins of yarn. I’m considering buying a large basket to put them in so all three bags are still together but I have space in the large one for finished motifs of a clue still in progress. If I do, I’ll also keep the embroidery project in the basket.

Such a system not only looks neater, it makes it easier to move the project around if it’s in the way, which is bound to happen multiple times over such a long stretch. The soonest I could finish the afghan is late August, simply because I won’t have all the clues until the 15th. However, this brings us to the other lesson of this project: pacing myself. Each clue so far has taken at least 8 hours of stitching, and I’m two clues behind. My other considerations are that I’d like to finish the blackwork by some time this fall, write every other week for the local fibercraft blog, and keep up with my monthly goals here. I also need a substantial amount of time (30+ hours per week) to dedicate to my web development job. That’s not to mention that I want to continue to have a social life, spend time online, and read books. Something’s got to give in that scenario, and it’s the afghan. I’ve decided to spread out the stitching to a third of a clue per week, plus two towns on the blackwork map. That gets the map finished in mid-October (just in time for making Halloween costumes) and the afghan done by Thanksgiving, unless joining and edging take a very long time (just in time for making Christmas presents). Afghan and map work should run 4-5 hours per week, dropping down to 3ish hours when the map is done — though by then I may have a new long term project.

Delayed gratification and responsible time management are the watchwords. It’s the right thing to do for my goals and priorities. It just feels so slow!

New notebook

I keep my to do list in a 4″x6″ notebook, one page per day. This give me enough space for a detailed list and some changes of plans without being a wastefully large amount. This is also where I keep track of hours worked, scored with points; this is a system based on David Seah’s Printable CEO.

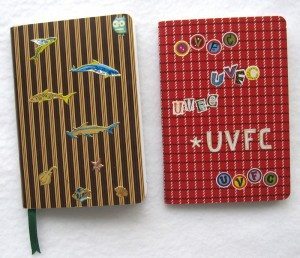
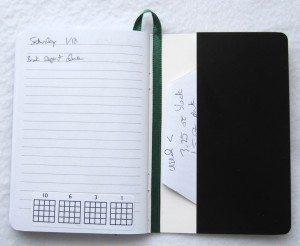
The current notebook is a clearance Staples purchase, college ruled with a classy and non-flashy cover. It came into use in a fit of envy over Carrose Creation’s Filofaux project, but with the knowledge that in November a new calendar is either a waste of money or an exercise in extreme patience. I added some stickers and a ribbon bookmark (also pictured: my “reporter’s notebook” for the Upper Valley Fiber Crafts blog, prior to getting its own ribbon bookmark).

old 4x6 covers old 4x6 ribbon

Obviously this picture was taken a while ago, before tomorrow’s page filled with tasks.

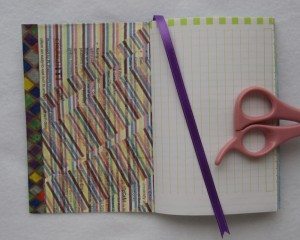
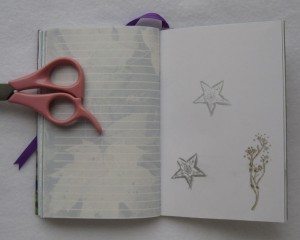
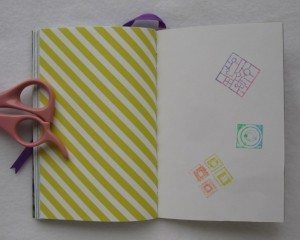
I wanted something prettier for my next one, although time will tell whether that’s what I really want. So I went through my paper collection and asked my sister and mother for any contributions they might have, of paper lightweight and light-colored enough to use in a notebook, at least 6″x8″ in size. I ended with 17 distinct papers and a cover cut from a textbook advertising flyer, and bought 4 more so that I’d have 21*4 = 84 pages, an even 12 weeks. I used stamps on the plain backs that most of the pages had. I’ve been busy so I wasn’t as thoughtful with it as I had hoped, but if I like it I’ll make the next starting more in advance. This notebook got a ribbon bookmark too, added before assembly, and I pasted striped tissue paper over it and the text on the inside of the cover.

After folding each page in half and aligning them, I stapled them with my husband’s booklet stapler and then trimmed the edges, more carefully than with my blog planner. Then I discovered it was really too much for the stapler, so I added two more staples outside in and one inside out. Hopefully it will stay together; otherwise I’ll have to sew it. I made my own washi tape with masking tape and Sharpies as described on DIYSara (whose blog I found while searching out handmade planner resources, fittingly enough) to cover the short edges of the cover, to give it a little protection and also to keep the tissue paper from getting scraped off.

new 4x6 cover new 4x6 inside 1

new 4x6 inside 2 new 4x6 inside 3

My scissors make an appearance because it doesn’t lie flat very well and I didn’t want to manhandle it too much. I’m hoping it breaks in easily.

This isn’t really an FYDP because I deliberately waited until after Christmas, but I did leave it late – I prefer being able to write tasks into the next week’s lists. Now to date all the pages and put in the tasks and dates I already know. Onward!