Baby shower gifts

I went to a baby shower this weekend for a dear friend and tried to give her something cute and something practical, but also cute.

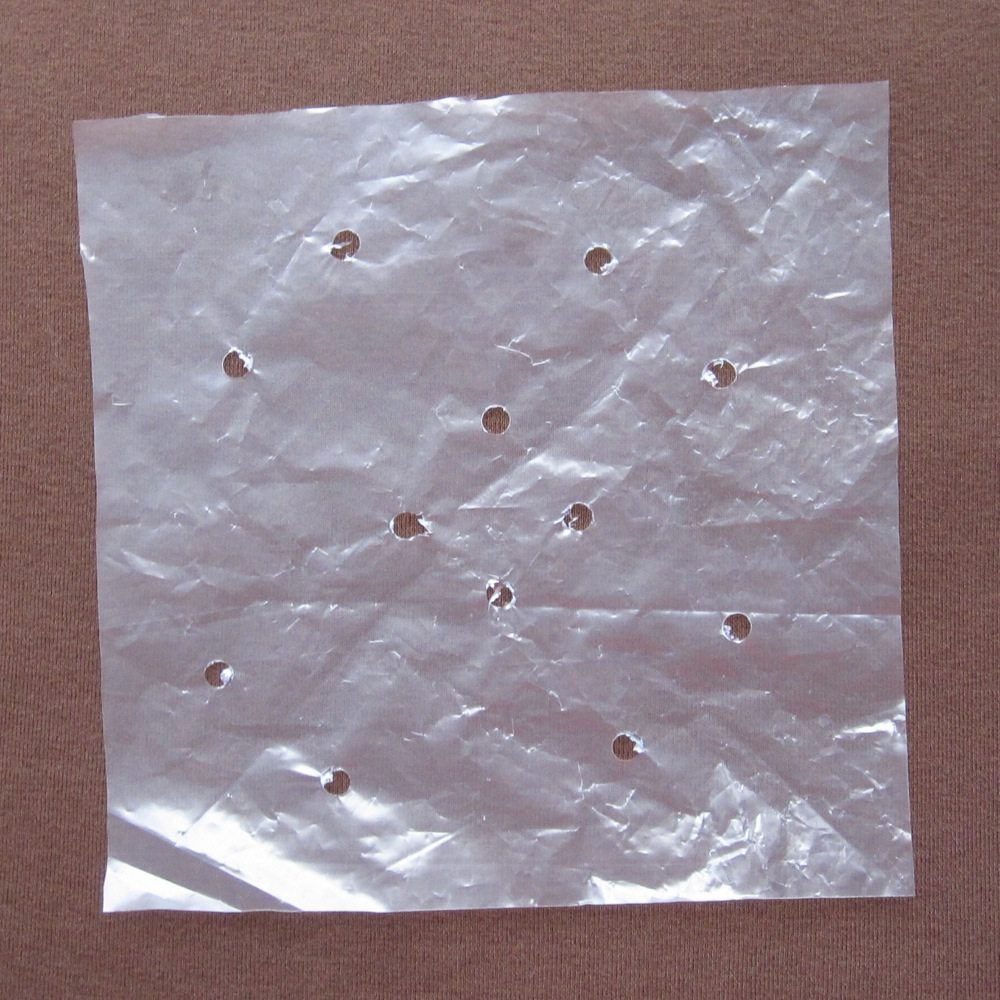
The first was a crinkle square. I don’t actually have a photo. I ruined the one that I made for the occasion, and had to draw on a backup. I do have an innovation to share, though: crinkle squares shouldn’t be a suffocation hazard to begin with, considering their small size and the fabric layer preventing a seal from forming, but for an additional point of reassurance you can hole-punch the plastic.

hole punched plastic for a crinkle square

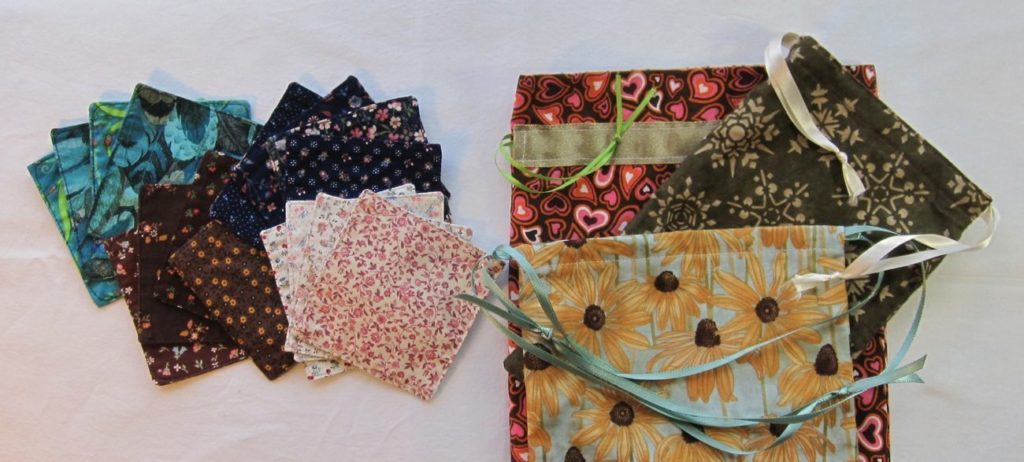
I tried something new for the rest of the gift: burp cloths made by backing cloth diapers with flannel. The diapers are quite absorbent and the flannel clings to your clothes, preventing the burp cloth from slithering down off your shoulder mid-spit-up. This was not my idea originally but apparently I did not bookmark the site I found it on (which was also not the origin of the idea, so I don’t feel too guilty). I got a package of 10 diapers by Gerber and washed them all twice (the first time their edges were quite crumply and I thought that might indicate they were mid-shrink – sure enough a second wash smoothed them out a bit). They seemed rather thin so I doubled them up.

The first three burp cloths were large: fabric cut 16″x18″, sewn face down to a pair of diapers at 3/8″ (i.e., presser foot at the edge of the fabric but needle ticked over to the left) with an opening for turning, then diapers trimmed around the edge and the whole thing turned right-side-out. After a good press I topstitched around the edge and did a little quilting to keep the diapers from sagging on the flannel. For the mushroomy one and the elephants I outlined parts of the design, and for the fruit I made some jagged lines. I had a lot of trouble with catching strands of the diaper cloth and shoving them down into the bobbin housing instead of piercing them, even with a brand new fine needle. Fortunately nothing was ruined.

cloth diaper and flannel burp cloths

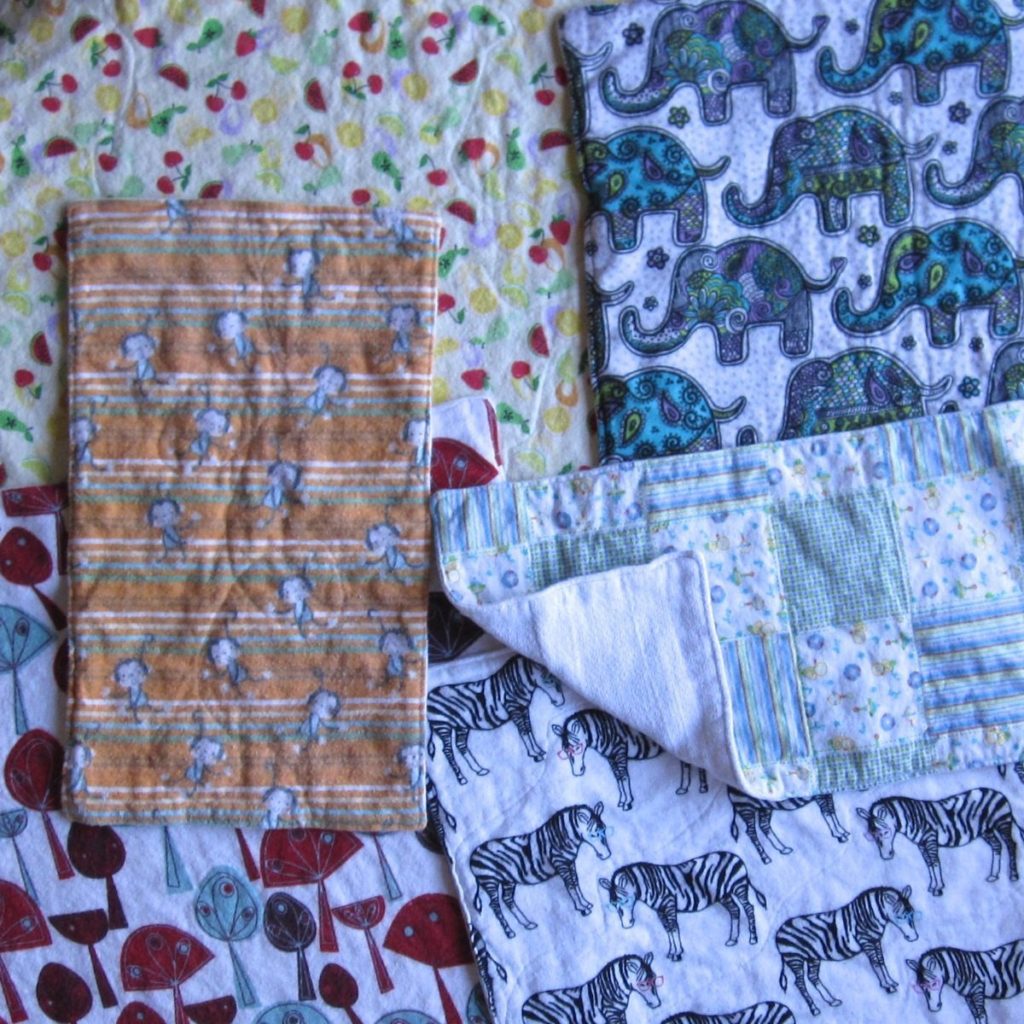
After I made those three I put one on my shoulder and found it was rather large for its use (though the parents to be are both taller than I am and might not find them quite as overlarge), so with the remaining four diapers I made smaller cloths. Two of them had shrunk enough in the wash that they didn’t have a 16″x18″ flat region anyway, so theirs would have had to be reduced. I ended up making two with fabric that was 9.5″x16″ (out of the two diapers that hadn’t shrunk as much) and one with 15″x15″ fabric (out of the smaller pair). Their quilting was simple: for the checkerboard one, a sort of zigzag the long way, outlining the boxes, for the zebras wavy diagonal lines, and for the monkeys a single continuous stitch line from top to bottom that looped around the monkeys nearest its path.

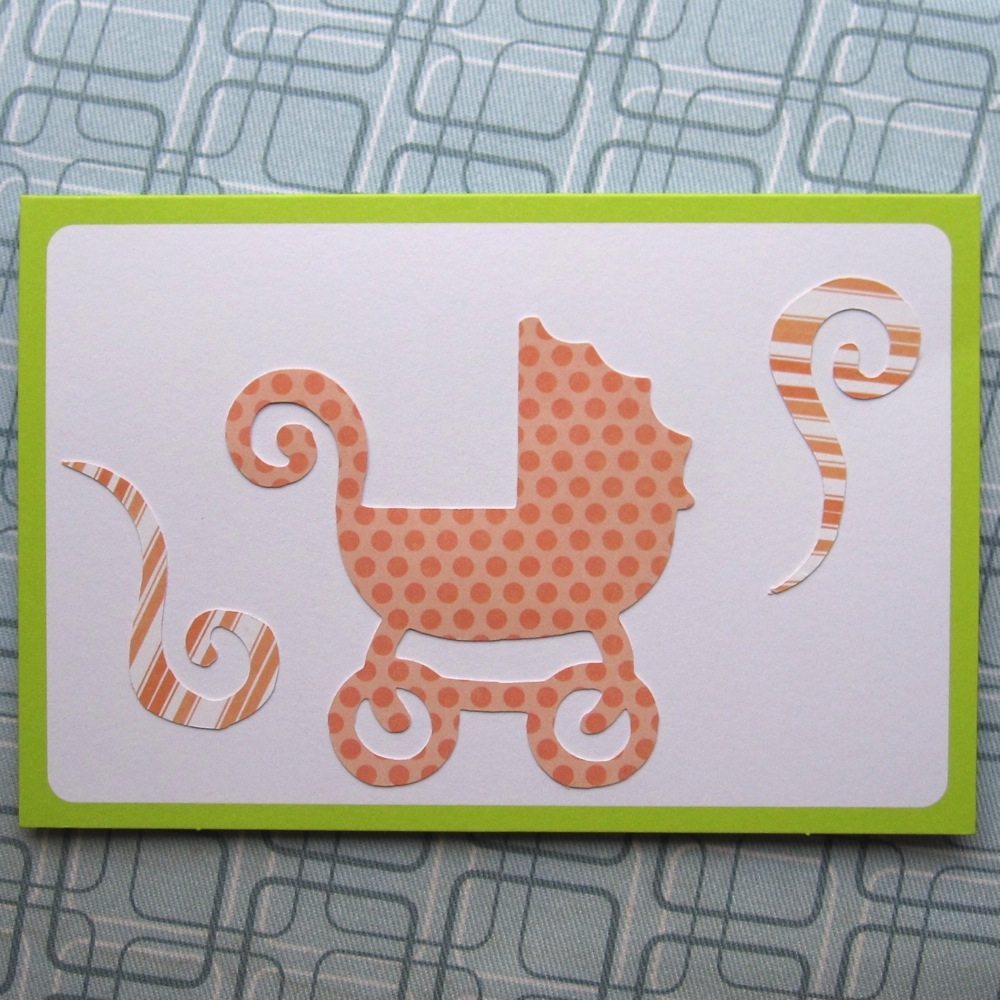
I tried one other new thing as well: making my own card. I have a Cricut die-cutting machine that mostly sits on a shelf, and it was time to start really using it. The card took an unreasonable length of time given its simplicity (three die cuts on a purchased blank card with a colored border), but most of it was set-up. I’m pretty happy with how it came out.

baby shower card

Sewing for sale

It’s been a while since my last blog post, and that mostly had to do with my sewing room (which is also my photography studio) being tied up. I’ve liberated it and am here to show you what was keeping it occupied: stuff.

The Sew-op is having a fundraiser/awareness-raiser sale the Friday before Thanksgiving, and we’re all pitching in to make items to put in it. Most of the fabric for my contributions came from the Sew-op, supplemented with my own stash when I couldn’t find enough that went together or were of the right kind.

coasters and bags

The old standby, fabric coasters, was the first thing I tackled in earnest. I’ve also got a selection of drawstring bags, some reversible, some lined, some with zig-zagged seam allowances inside.

crinkle squares

The new item was what I call “baby crinkle squares.” They are quite easy: cut a 7″x7″ square from each of two differently-textured fabrics, and cut a 7″x7″ piece of a plastic cereal bag. I usually have a flannel and a quilting cotton. Cut 12 lengths of different ribbons, twill tapes, hem tapes, rickracks, and laces, each in the neighborhood of 5″ long and in a variety of colors and widths. Avoid anything that has bits that could come off, and if the square is for a gift or sale, anything that looks like it has bits that could come off, regardless of how well attached they are in reality. I’d also avoid elastic trims.

Iron your fabrics well because this is the last chance you’ll have to do so. Pin the plastic to the wrong side of one fabric; I usually use the lighter-weight one for this. Bend each trim into a U shape, adjust lengths as desired (remembering you will lose 1/2″ off the open end of the U), put ends adjacent or overlapping, and pin 3 Us to each edge of the remaining piece of fabric. Put the trim on the right side of the fabric with the bend of the U toward the center and the cut edges of the trim lined up with the edge of the fabric. Try to space them fairly evenly but leave at least an inch between the outside trims and the corner of the fabric. Stitch all the way around each piece of fabric at 3/8″ to secure plastic and trims. If you have narrow or net trims you may want to backstitch across them at this step, for security.

At this point it’s just like the coasters, with some easier bits and some harder. Choose the edge to leave open for turning based on your trims: solid, flat trims are best for the open edge. Place your two fabric squares right sides together and match and pin corners. Pin the sides next. Stitch at 1/2″ most of the way around, leaving the center of one side open but covering all the corners, and backstitch at both ends of your stitching. Trim the corner seam allowances and turn right side out. Through a combination of tugging the ribbon loops and pushing the corners out from the inside (a chopstick is great for this), get your edges as pushed out as possible. With the open edge turned under 1/2″, pin closed, and topstitch all the way around. I typically start and end by going all the way across the open edge, but don’t backstitch, and I cut the corners with a shallow curve. I also usually tug the ribbons out as I approach and stitch over them on the three closed sides.

The part where these are more difficult than coasters is the bulk of the ribbons making it more difficult to line the fabric pieces up. Sometimes the plastic makes problems under the presser foot, as well. The easier part is when you are topstitching; since it is more substantial and you have ribbon loops you can tug for guidance, turning the corners is much easier.

To my delight, these can be machine washed (cold or warm) and tumble dried, and they stay nice and crinkly. I don’t think my dryer is particularly hot, though, so if yours is, you may want to dry them on a low heat setting. Don’t iron the plastic part, but if the ribbons get crumply in the wash you can iron them as much as you ever could.

Babies and babies

Many moons ago, I wrote a quick tutorial on making baby bibs from a commercial pattern and terrycloth. Recently I had reason to use that tutorial, to make gifts for friends who’d had a baby Christmas Day and another pair of friends who had a baby in early January. Here they are!

First, a stained-glass bib.

stained glass bib

For the same couple, an Irish bib with illuminated initial of the baby’s name, made from a St. Patrick’s Day guest towel.

monogram bib

For the couple with a sailing husband, a sailboat bib.

sailboat bib

The second bib for the same couple, with an Eire-loving wife, a Celtic shield knot.

celtic knot bib

When I went looking for a Celtic knot to applique on a bib, I did not expect to find one that was traditionally placed on children’s clothing to protect them, but that is exactly what I found!

The knot and letter are done in ribbon, hand-sewn in place with matching thread. I formed the knot on a life-size paper printout of a photo of such a knot (in that case engraved on a button), pinning it first to the paper and then pinning each intersection and fold to itself. I unpinned it from the paper, lifted it over to the bib, adjusted it and centered it as best I could, and pinned it down. Periodically I repinned it, trying to minimize the number of pins used so there would be less for the sewing thread to catch on. It took a very long time. The letter T was formed directly on the bib and stitched down with somewhat less care than the knot, and then embroidered over to give it a medieval illuminated look.

The stained-glass bib was made by piecing strips and squares of terrycloth over the paper pattern, zigzagging them together, and then cutting out the bib and zigzagging the edge. After it went through the wash I had to darn one part of it that has started pulling apart. The heart on the T bib and the sailboat were both made by appliqueing terrycloth shapes with a zigzag stitch; the sailboat has additional details (lines and mast) made just with stitching.