Hamburger cake!

I offered to make a little cake for some friends who were getting married, just for the formality of cutting a cake at the reception – they were having a very informal wedding and potluck reception, and didn’t want a big fancy cake. The bride deferred to the groom on type of cake, saying she liked anything and he was more particular, but said he’d probably want a hamburger cake because he’d been quite taken with some at the grocery store. He was not present for that conversation – when I asked him what kind of cake he’d like, he said “hamburger cake.” No hesitation. So hamburger cake it was!

hamburger cake!

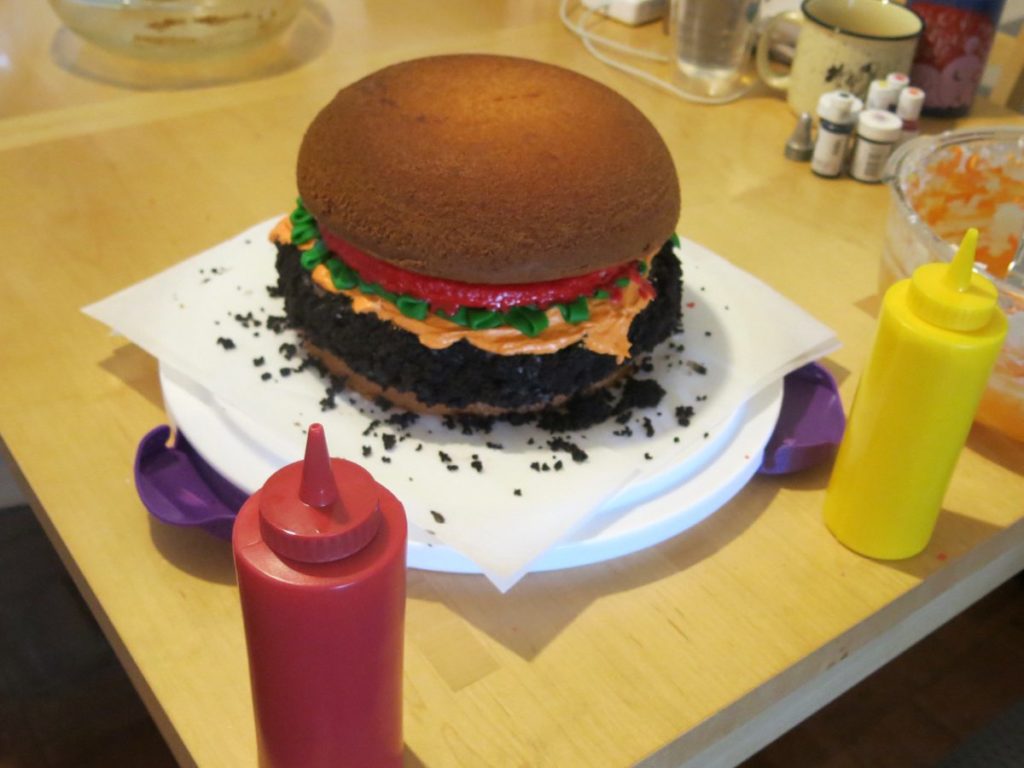
Clearly before the protective strips of parchment were removed. Those bottles contain red and yellow icing for people to add to their slices.

The hubs did at least as much work on this as I did, I should say. I started with a Food Network cheeseburger cake “recipe”, though I couldn’t find a 2.5-quart bowl, only a 2-quart bowl, and we decided to make only the burger patty chocolate.

A couple of weeks ahead I did a dry run. I thought I would make a finished, decorated product, but I ended up only baking the cake. I used half a box of chocolate cake mix (1 layer) and a full box of vanilla cake mix (3 layers, which seemed annoyingly excessive at first but turned out to be the right amount).

"dry run" cake in oven "dry run" cake

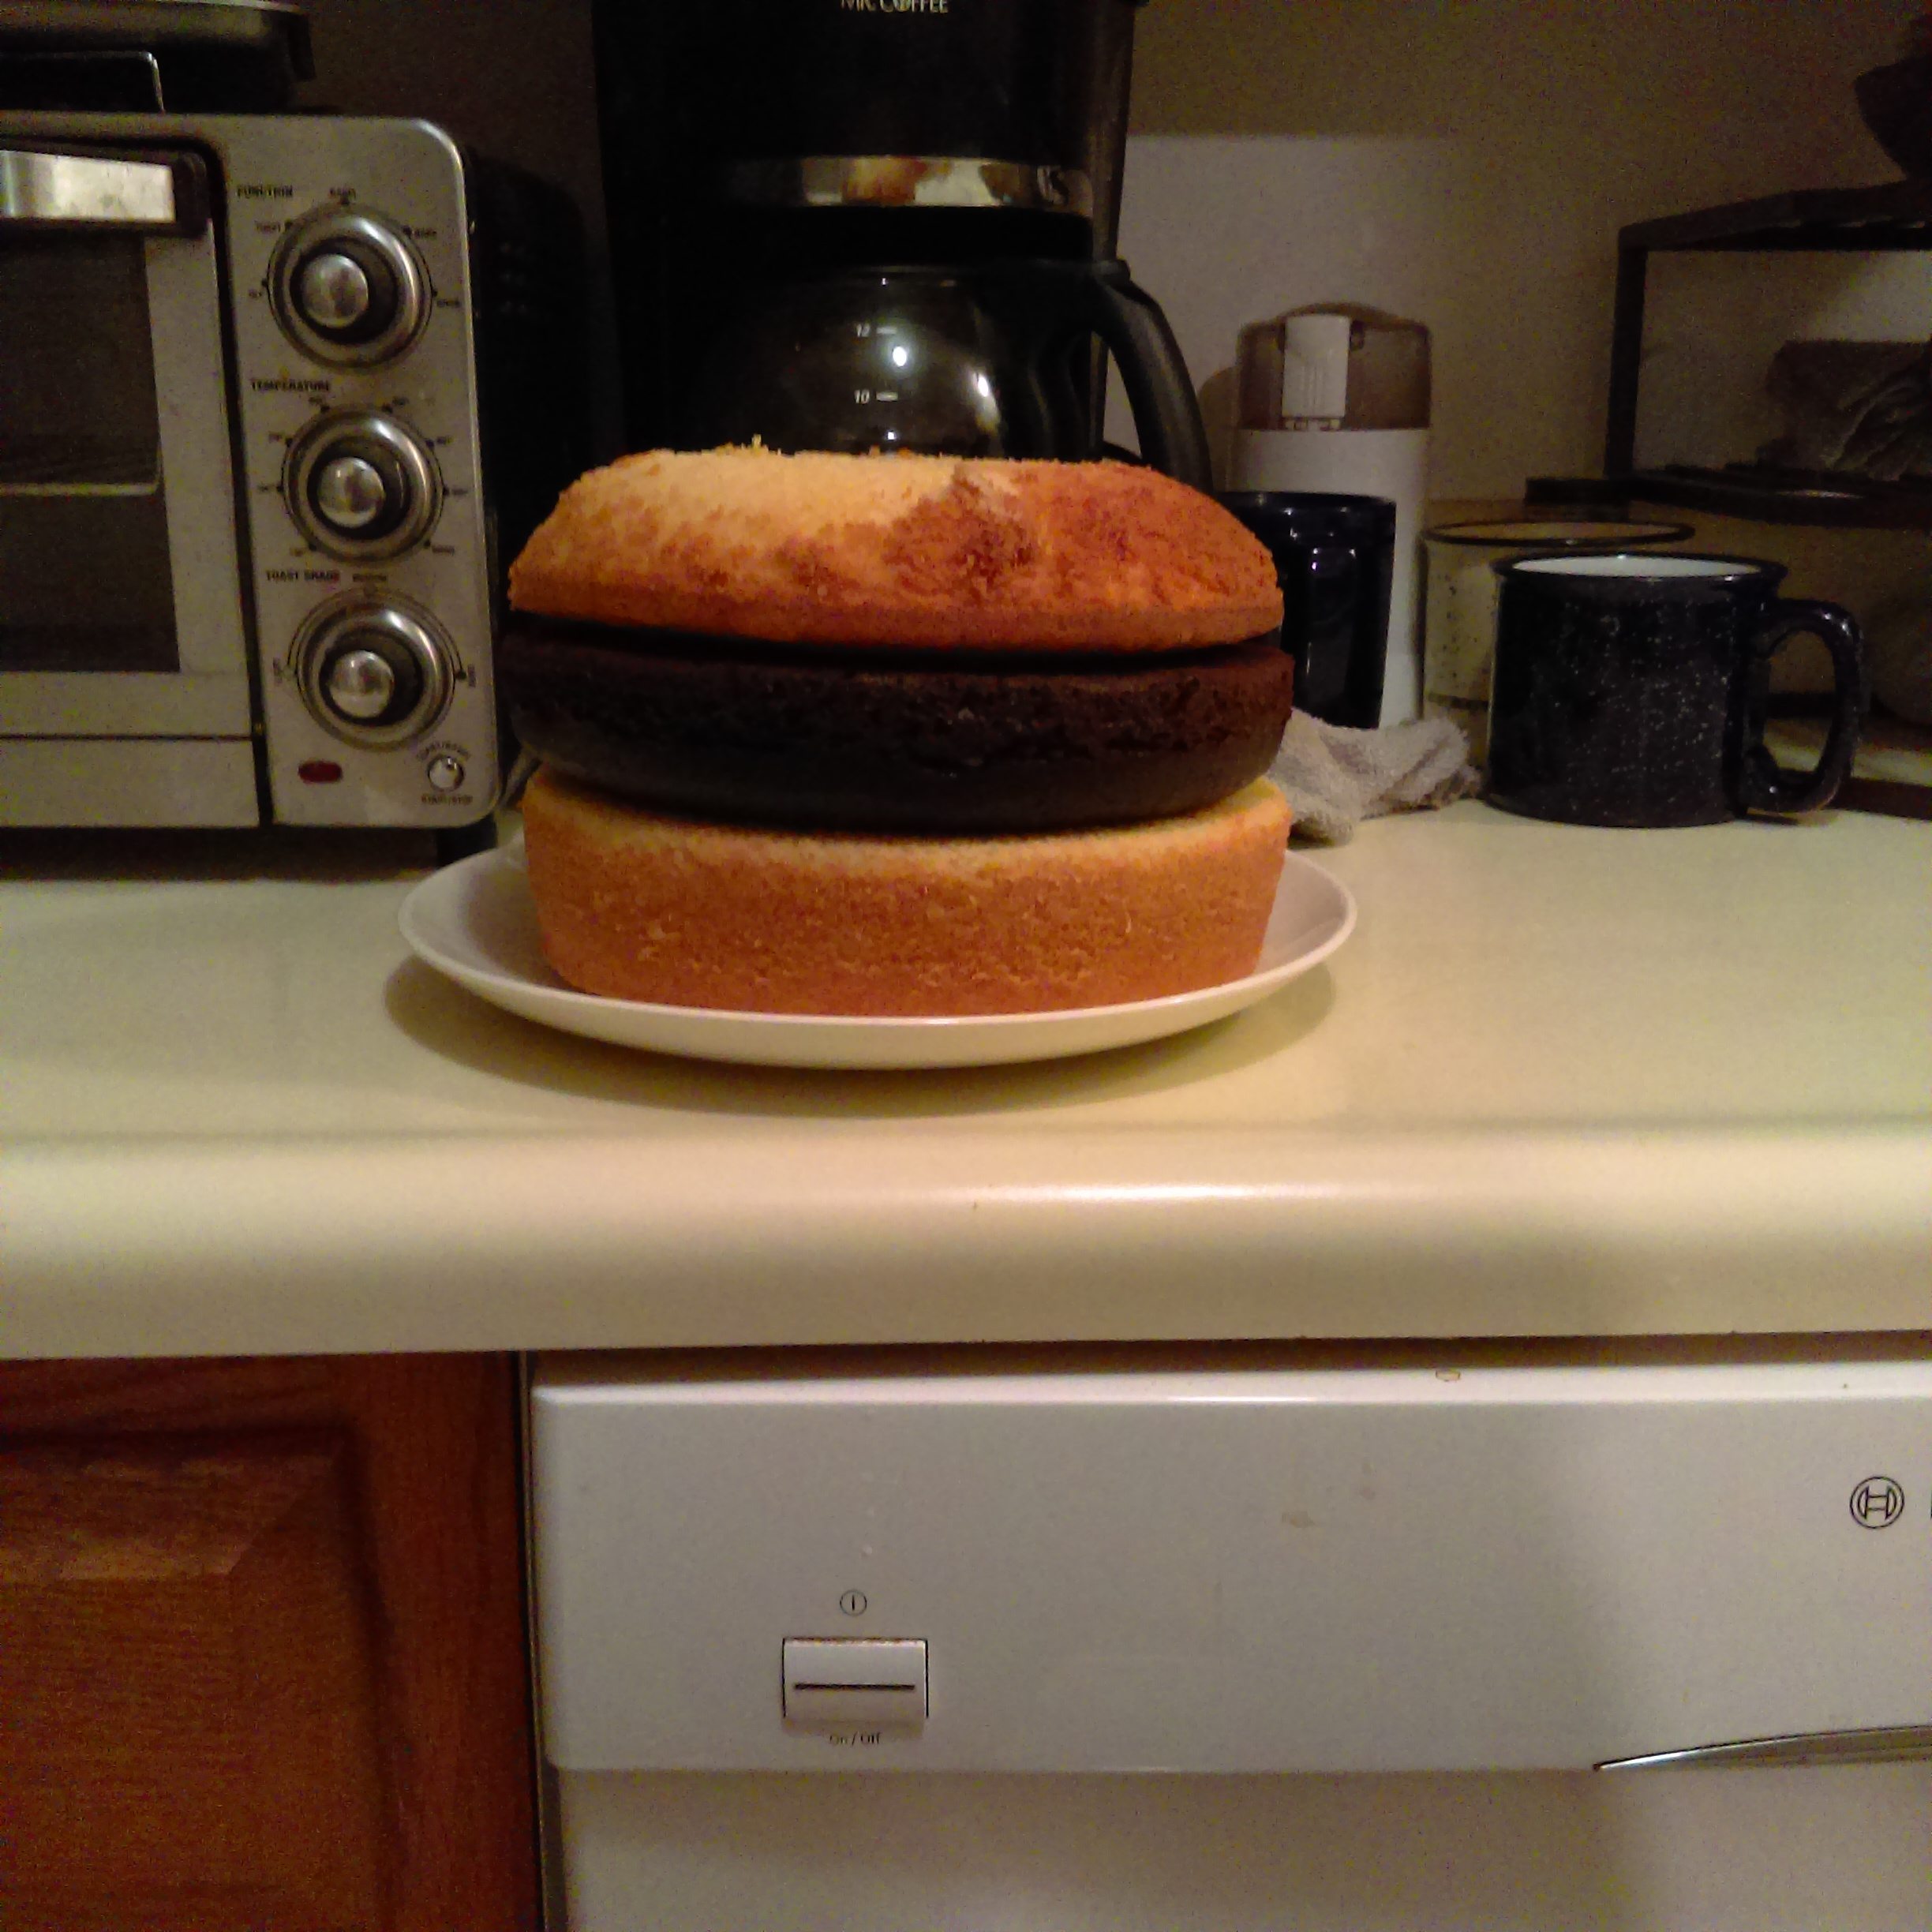
I took photos with my phone for later reference so the next cake wouldn’t be so bottom-heavy – the top “bun” looked silly, like a little hat perched on top, and the bottom bun could lose up to half its thickness and still be fine. However – look! A burger!

At this point we also thought the bare cake for the bun looked nicer than the icing-covered version, though no icing meant no sesame seeds (rice krispies being the universal “hamburger cake sesame seeds” according to my research). That’s actually why we did the “condiments” – the lack of bun icing meant overall a low quantity of icing, and we thought it would be nice for people to be able to add more if they wanted.

The day of the wedding we worked on the cake for SIX HOURS. I did not expect this to be a six-hour cake, but we made a lot of icing and had to go out for more powdered sugar at one point.

preparing the pans with parchment and grease filled pans (and bowl)

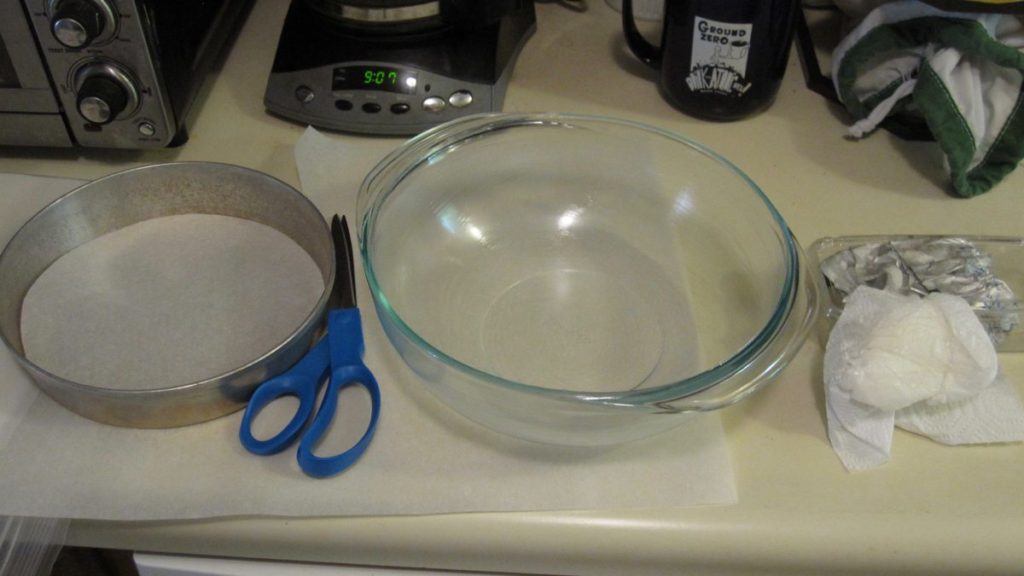
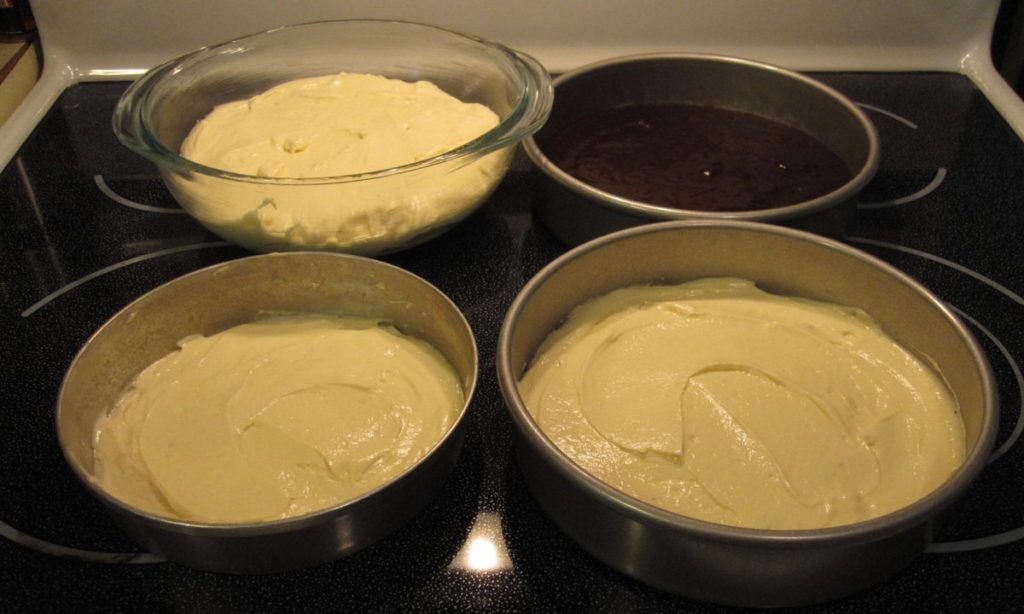
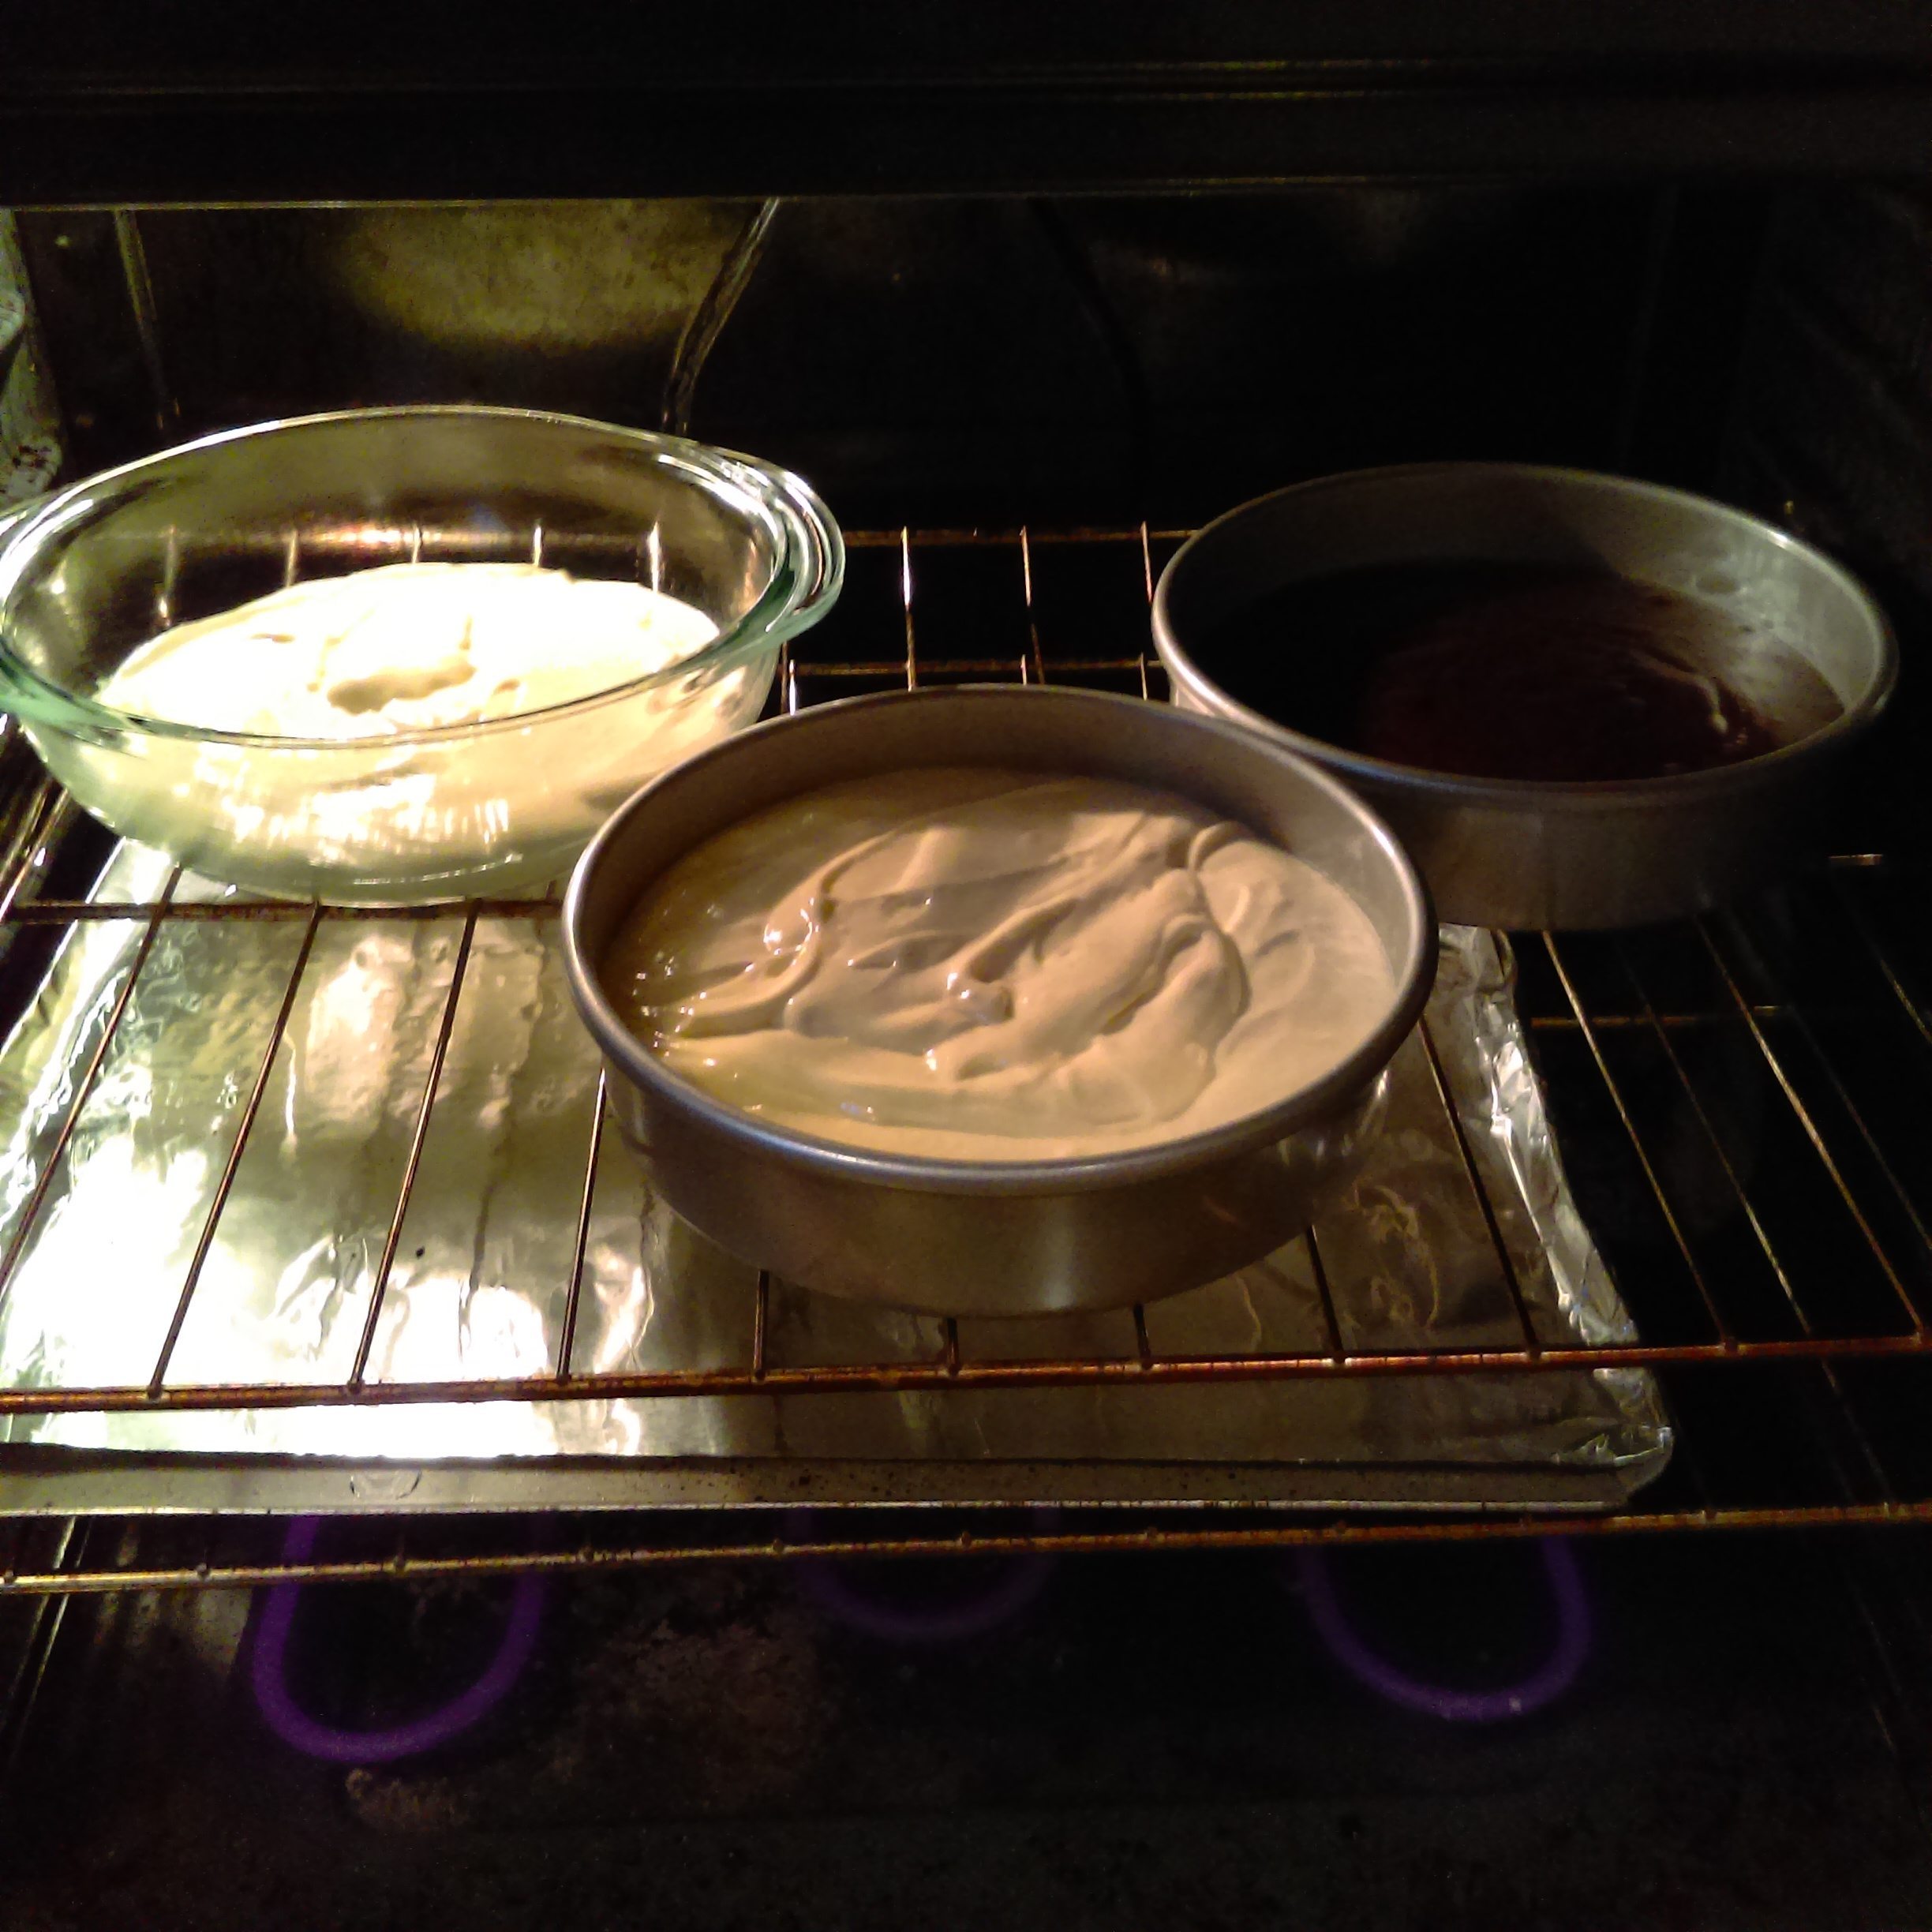
Preparing and filling the pans: cut out circles of parchment paper on the regular pans, thorough vegetable shortening on the bowl (via paper towel). A lot more batter in the bowl this time around – two-thirds full. Note that the bowl will take a long time to bake and even the pans will take longer because of the full oven. The tomato slice will be quicker, but for everything else start with a 30 minute timer.

leveled chocolate cake with crumbs for siding chocolate cake without its center, oops

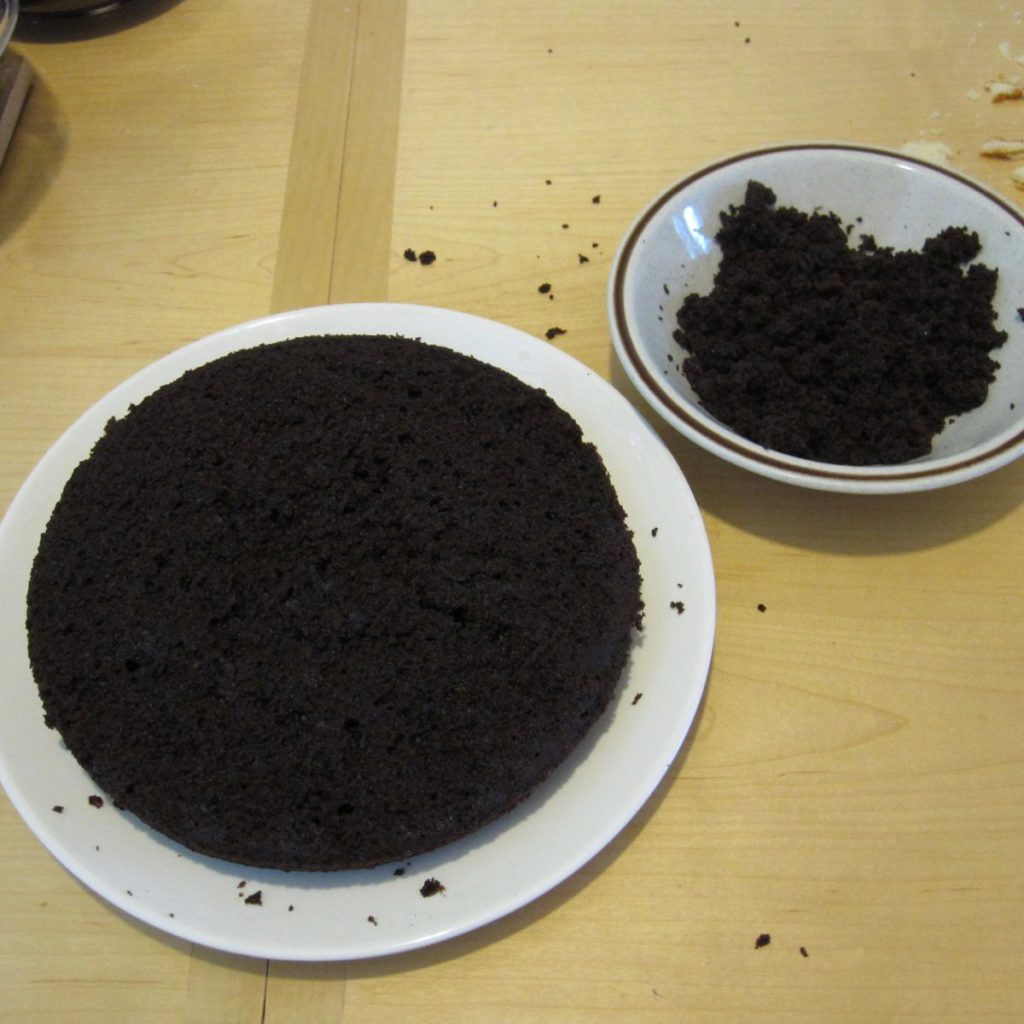
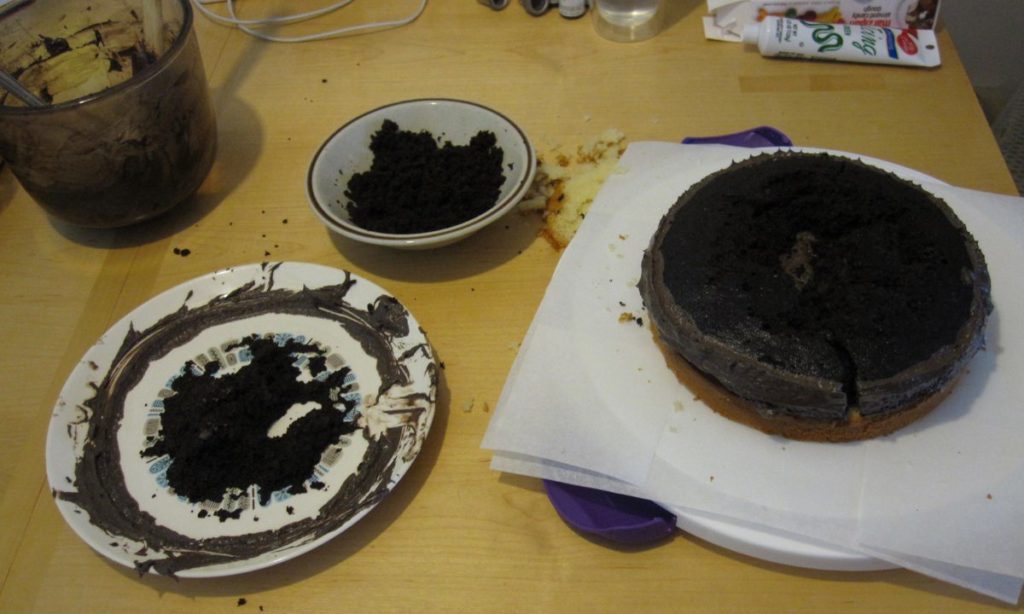
I leveled the chocolate layer on a plate, saving the crumbs so I could put icing around the outside and pat them on (a great idea from the Food Network version). Unfortunately I should have put parchment on the plate beforehand and I lost the middle of the layer when I flipped it onto the bottom bun. A lot of toothpicks and additional icing later and it was okay, but not stable – it kind of disintegrated on the way to the wedding. I was able to make it look all right but there is a reason there aren’t as many photos of the finished cake as there might be…

getting the top bun out of the bowl

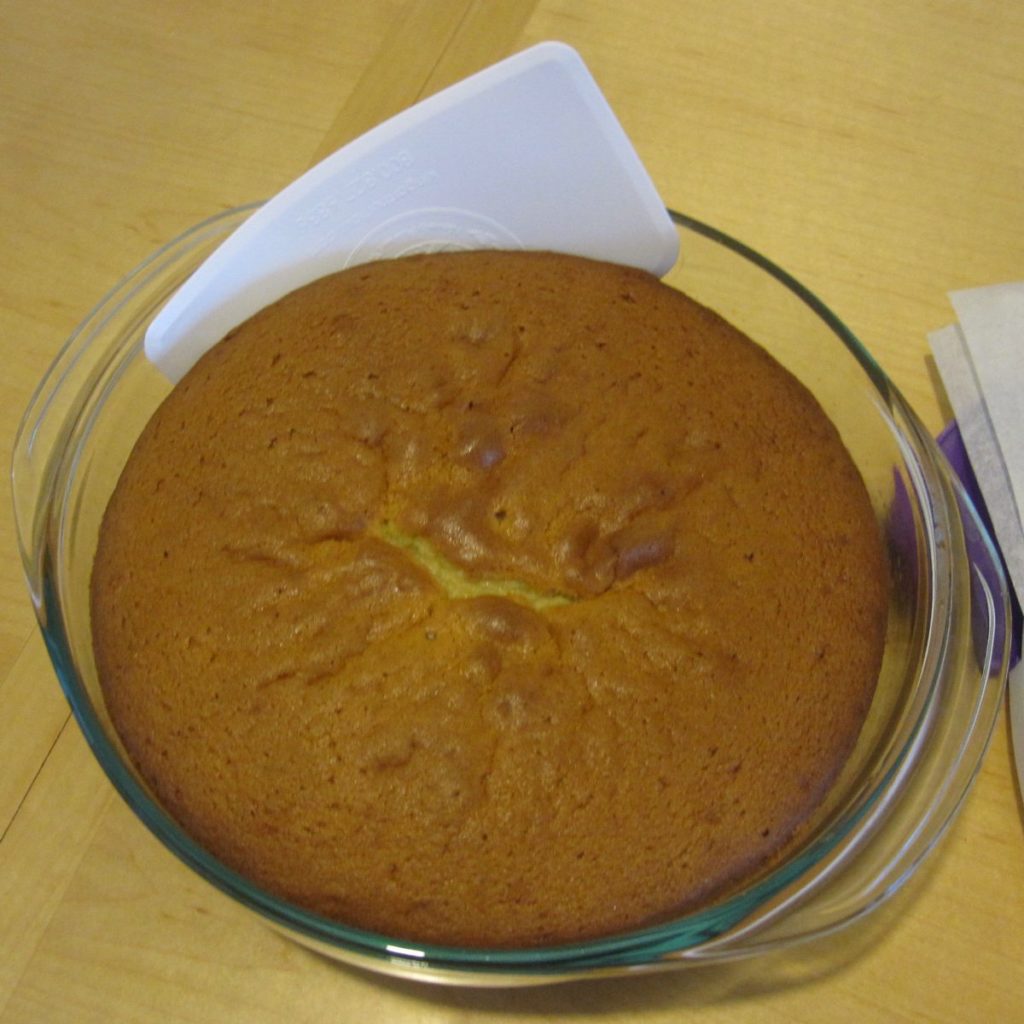
Flexible dough scraper with rounded edge: the perfect tool to get the top layer out of the bowl.

cheese and lettuce icing tomato slice on the cake/burger

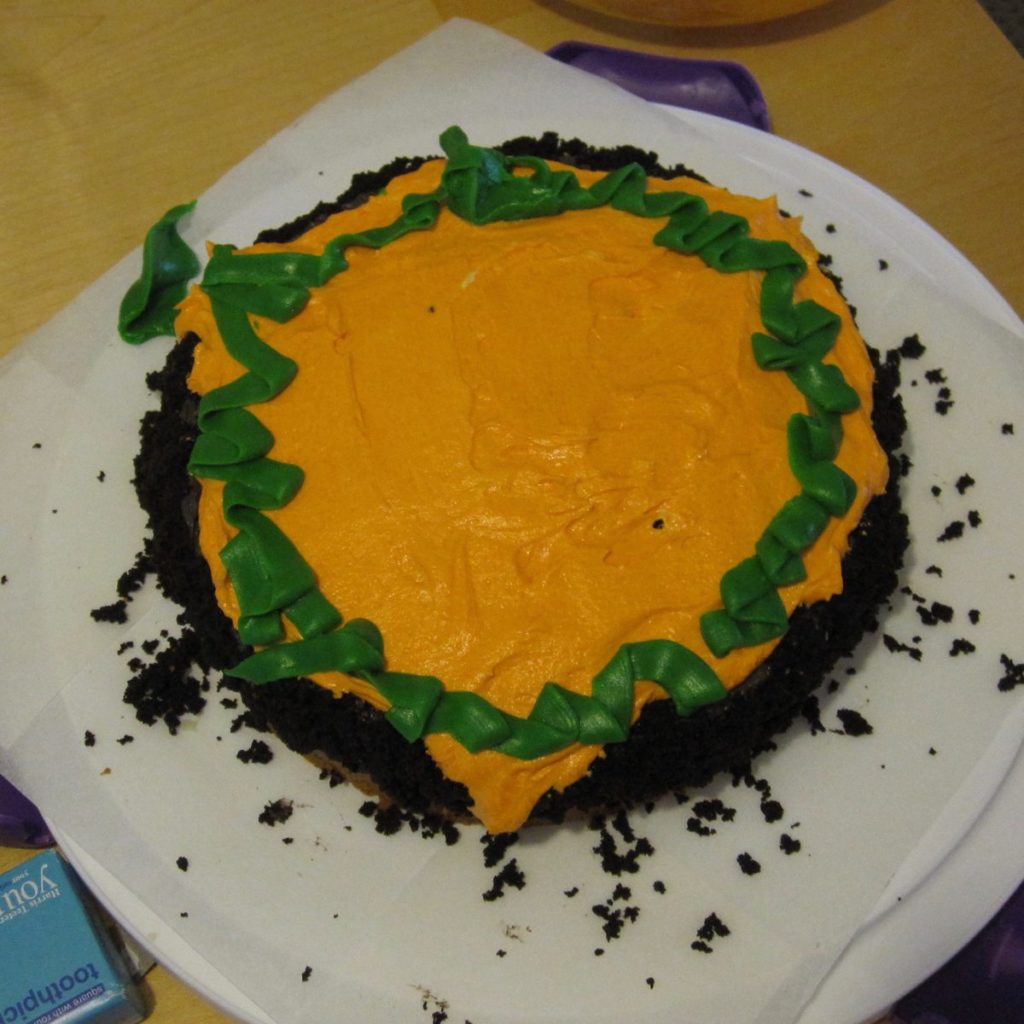
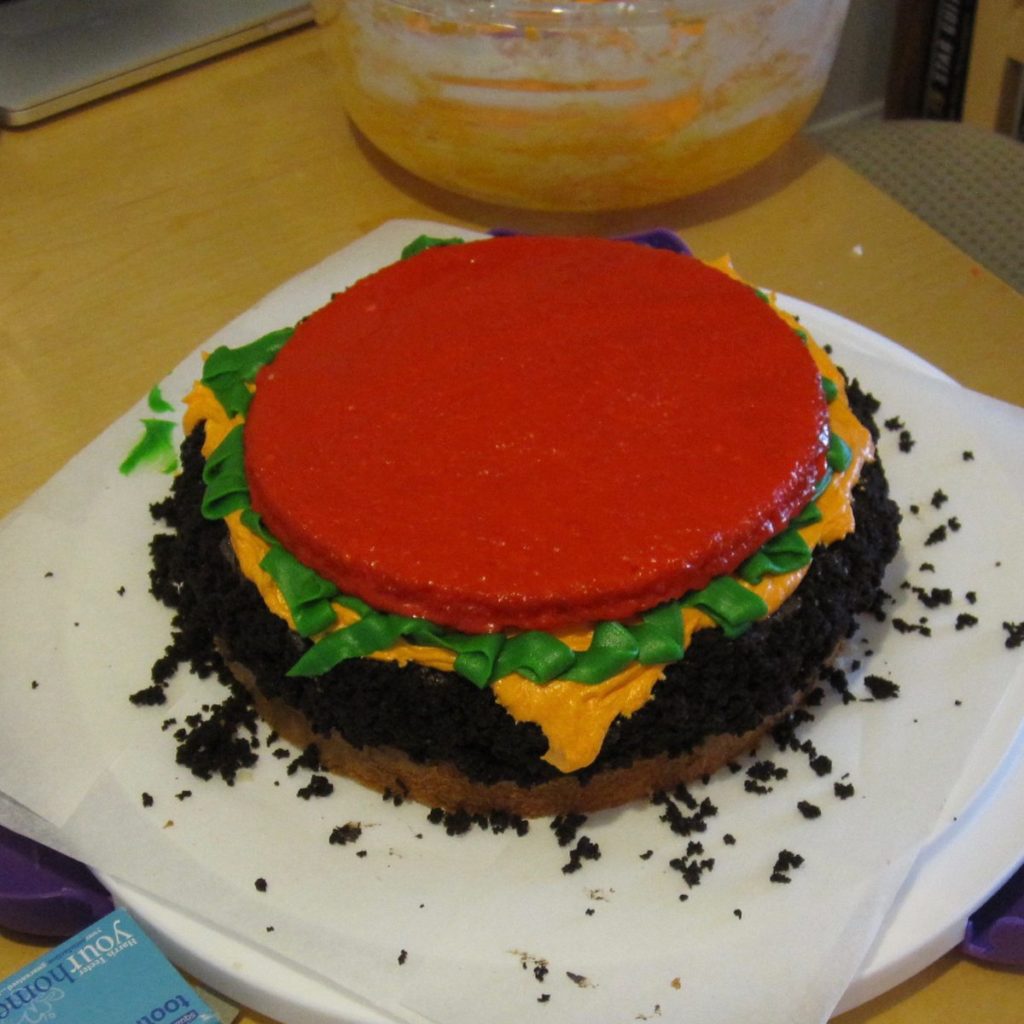
The hubs insisted on cheese, lettuce, and tomato, and fortunately we had a small-scale cake pan (in fact it was retrieved from the to-donate box, so good timing!). I baked a skinny cake layer and he soaked it in glaze-style icing (powdered sugar and milk, as opposed to the easy vanilla buttercream – plus cocoa powder as appropriate – of the rest). He colored all the icing, except the green which was commercial, and iced on the cheese and lettuce. It was a minor miracle when we added the tomato slice; suddenly it all looked right.

an attempt at frilly toothpicks part 1 an attempt at frilly toothpicks part 2

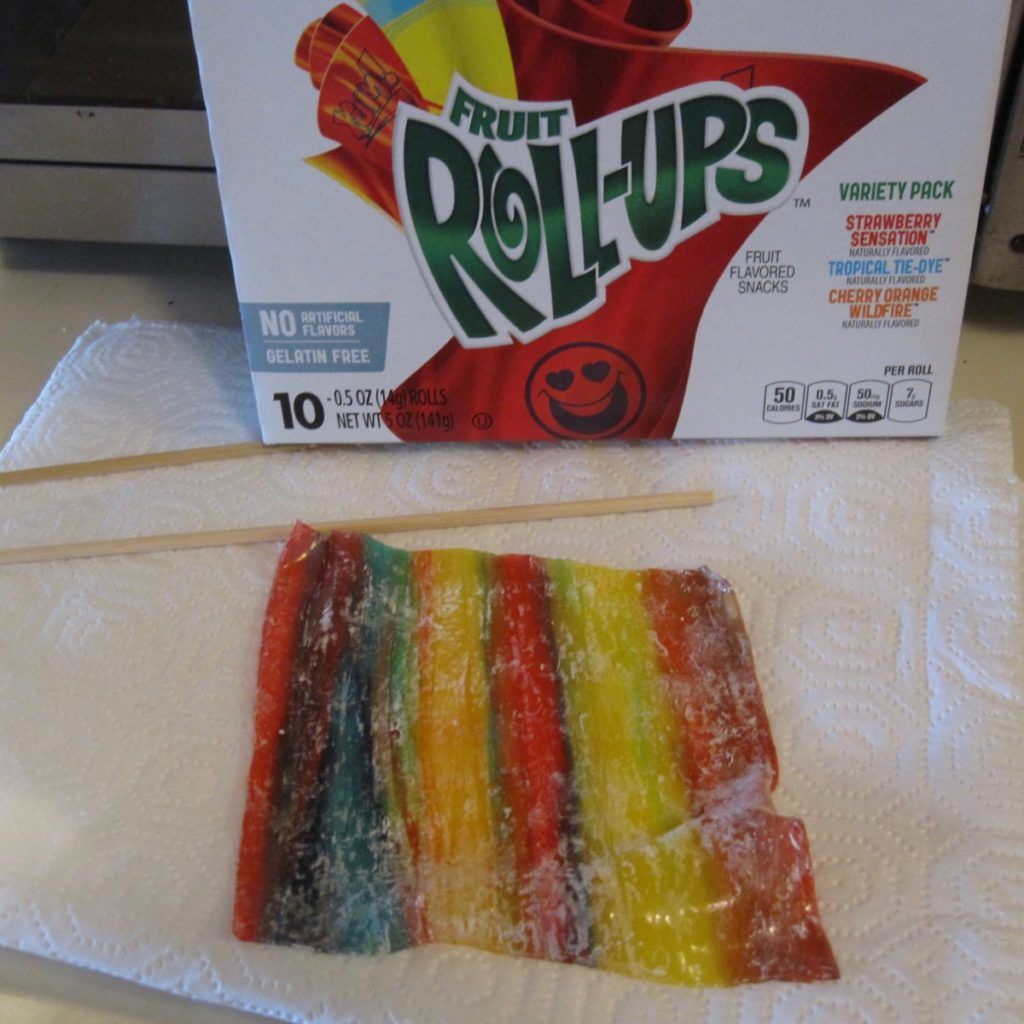
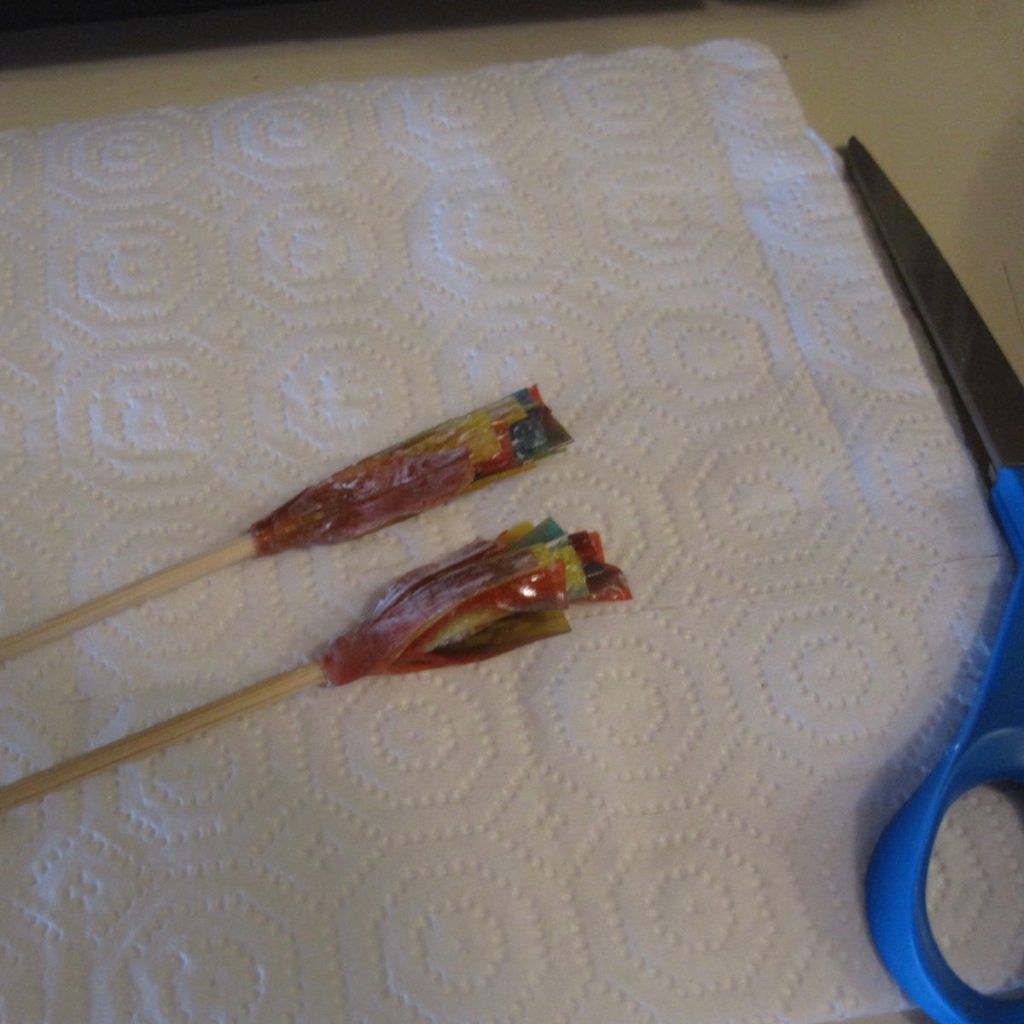
We’ll close with a failed experiment – frilly toothpicks. I cut strips of fruit roll-ups into fringe and rolled them around the ends of bamboo skewers. I corn-starched one side of each strip but probably should have done both… on the way to the wedding they just solidified into a wad of gummy at the end of the skewers.

FF: Candy Crafts

Design Seeds: Swirled Sweet The recent Design Seeds at left inspired me to round up candy crafts for this month’s First Friday. I realized shortly after beginning, though, that the category is far too big for a single post. For example, gingerbread houses (and their Johnny-come-lately relatives for other seasons) could certainly be a post unto themselves, and then you have crafts made with candy, reuse of candy packaging, and non-food items made to look like candy (such as my crochet candy sticks). I like all of these but we have to focus, and for this edition I chose crafts made with candy.

Much of what you’ll find if you look around the Internet for candy crafts is dressing up candy for party favors, teacher gifts, and the like. Wordplay is popular. Although the bright shiny packaging of candies makes them well-suited to crafting, these crafts aren’t terribly candy-specific, so we’ll just make a brief survey of the highlights. Roll candy, such as Rolos or Lifesavers, can be decorated to look like any long cylinder: I saw firecrackers (my favorite version was from 30 Minute Crafts), dynamite, pencils, cigars, candles, rockets, rolled-up diplomas, even a snowman and Santa. You can use candies as the centers of flowers (especially lollipops) or bodies of butterflies or spiders. A variety of candies can be mounted on skewers and made into a bouquet, or attached all over a paper cone or wine bottle to make a Christmas tree. The standout in this category was a Tootsie roll sundae from Cheri’s Creations. Small candies or stick candies can be glued all around a candle or straight-sided vase; this is one way to turn a can or jar into a nice-looking vase. And, of course, there is the traditional sleigh with candy cane runners.

You can use candy in place of any small tiles, beads, buttons, or similar items. That’s Country Living suggests using seasonal candy in a votive holder in place of the glass marbles or pebbles you’d usually find. There are many tutorials for decorating picture frames and similar wallhangings with candy. If you want to hang on to such a project, though, you’ll want to preserve the candy somehow. Woman’s Day recommends drying out candy and then coating it with a Krylon product to preserve it, all prior to the crafting. Another preservation idea is given in this Craftster tutorial for an “art glass” lampshade made with Fruit Roll-Ups and gummy candies. It is worth seeing.

A few candies are or can be converted to aromatic clay-like substances. Marshmallow Peeps are popular for dioramas and art projects, but you can also completely destroy them and make them into play dough. Gumdrops are also a good dough-like craft item; you can easily cut, roll out, or skewer them, but then they will keep their shape. They are a time-honored substitute for Tinker Toys, and you can also make them into people. I also found a tutorial for bracelets braided from AirHeads, which sound really sticky to me, and AirHeads shot glasses, which do also, but at least you’re not wearing them.

I have thought for a while it would be fun to crochet with licorice; a small flat heart with red licorice would be a cute Valentine. However, I have yet to find long enough licorice ropes, and then there’s the whole sanitation issue. Housing a Forest showed me a different use for licorice that doesn’t require length: sticking it on acrylic blocks to make stamps. In that post she also discusses painting with Nerds and Laffy Taffy. Apparently painting with candy is popular; you can also do it with M&Ms and Skittles.

Finally, we melt. Peppermint candies can be melted into platters, as shown on Crafty Home Improvement (Mis)Adventures. While they are warm you can shape them, even going so far as to mold them into bowls. Note that those two links advise wildly different temperatures and correspondingly different times. I suspect peppermints do better with the lower temperature.

backlit stained glass candy Our last candy craft, which is similar to the peppermint trays, is my favorite: hard candy stained glass. By crushing clear hard candies, arranging them on parchment paper on a baking sheet, and melting them in the oven, you can make ornaments, cupcake toppers, or other decorations. They’re basically edible suncatchers. To shape them, you can either let them cool and break them into shards, melt them within cookie cutters, or use greased cookie cutters to score them thoroughly and break them apart on those lines once they’re cool. The recipes generally say 325 to 350 degrees F, but it is forgiving. In fact you can make stained glass cookies: use a sturdy cookie dough, make shapes with cut out regions, and bake them until they have 3-5 minutes left to be done. Take them out of the oven and add crushed candy to the cut-outs, and then put them back in to finish baking. Make sure you let them cool completely before removing them from the paper. The Cooking Channel has a gingerbread version, and Wilton has directions that include adding icing after baking for additional detail. A non-seasonal version of that can be seen at Tasty Morsels Bakery.

The picture above the description is from our attempt earlier this week, which was with Lifesavers. They crushed easily and melted in six minutes (we preheated to 355 but turned it down to 345 before putting them in), but after crushing they clumped back together and everything we melted inside a cookie cutter broke during removal. Now they are sticky and oddly wet, though that could be the weather. I think the ideal material might be those cheap suckers with loop handles: harder than Lifesavers and hence probably less sticky, but thin enough to break easily, unlike Jolly Ranchers. More on this another time; we haven’t finished experimenting.

Did I include your favorite candy craft?

Gifties!

I can only do this because I have some confidence the recipients of these gifts won’t be looking at my blog on Christmas Eve. As usual, I made a few Christmas gifts in crochet.

For Mama (said with the accent on the second syllable, of course), a couple more potholders.

potholders, front potholders, back

The triple-lobed one I freehanded, making the initial shape via stitch height and then continuing it by increasing around the lobes and decreasing (often via skipping a stitch) in the corners. The other is stitch pattern 421 from Linda Schapper’s Complete Book of Crochet Stitch Designs. It alternates double crochet with front post double crochet around a previous row’s double crochet, offset so you get a sort of checkerboard. Here’s a close-up:

stitch texture detail

If I were doing it again I would change the outermost double crochets into half double crochet or even maybe single crochet, because the edges are taller than the middle with the pattern as written. I still like how it came out, though. I should have written down what I did around the edge, because I can’t remember. I think it was single crochet around and then double crochet with a chain in between each, but I wouldn’t swear to it.

For Grandmother, a fluffy white scarf with gold snowflakes, to wear with her stylish white dress coat. Here are a picture before washing and a snowflake close-up after washing:

before washing after washing

The diagonal stitch is just double crochet, increased at one end and decreased at the other. I ended up designing three more snowflakes at the last minute, which I haven’t had the chance to write up formally yet. I think my favorite is the one that looks a bit like antlers. After washing the fluffy white yarn was less fluffy, so I used my pet slicker brush to comb out the mats.

I also made my own chocolates, the easy way: three high quality chocolate chips in a candy cup, microwave in short intervals until soft, press a nut or two on top, add five or six more chocolate chips and repeat. Use the tip of a butter knife to get rid of the chip-shaped bumps once the chocolate is fully soft. You can make peanut butter cups as well, with one or two more chocolate chips on the bottom to give a sturdy layer. The disadvantage to this method is that cocoa butter soaks the candy cup and when it cools it is stuck to whatever it’s sitting on. I also made “mini turtles” with chocolate chips, half a caramel, and a broken-up pecan half, but if I were doing that again I’d cut the caramels (standard Kraft ones) into thirds and be more careful about getting chocolate between them and the cup on all sides – they stick! Those I did in the oven at about 200F, because I was worried enough time in the microwave to melt the caramel would scorch the chocolate.

More gifts will be revealed in later posts…