Calculating your own basket pattern

side view of the fabric basket 
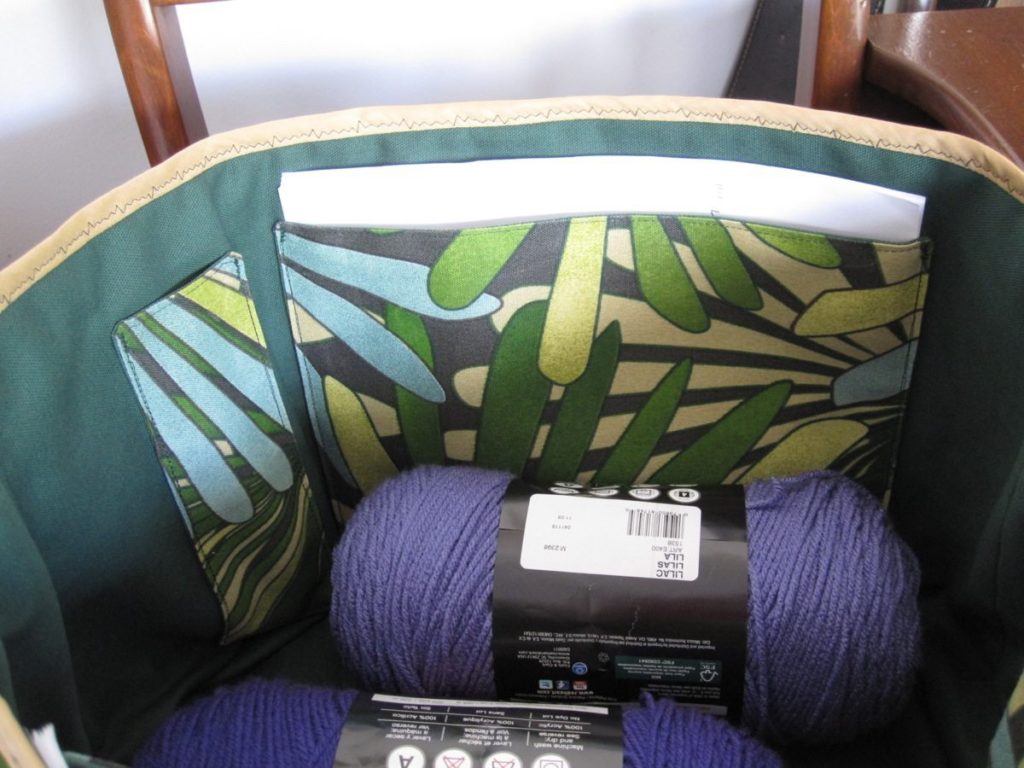
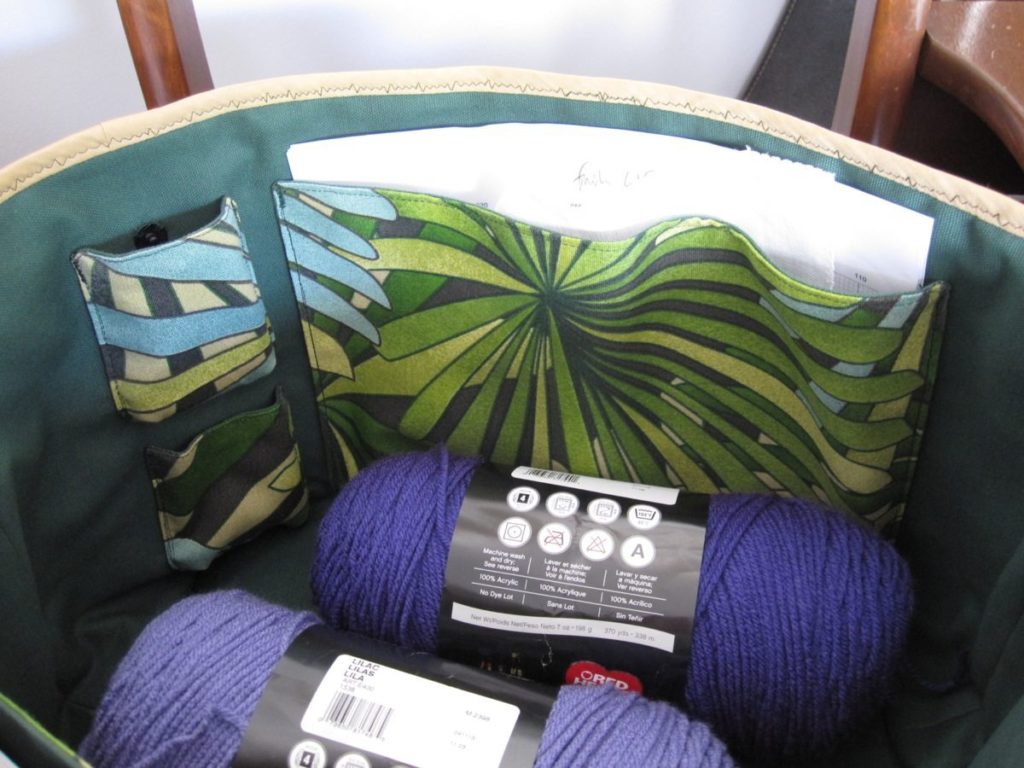
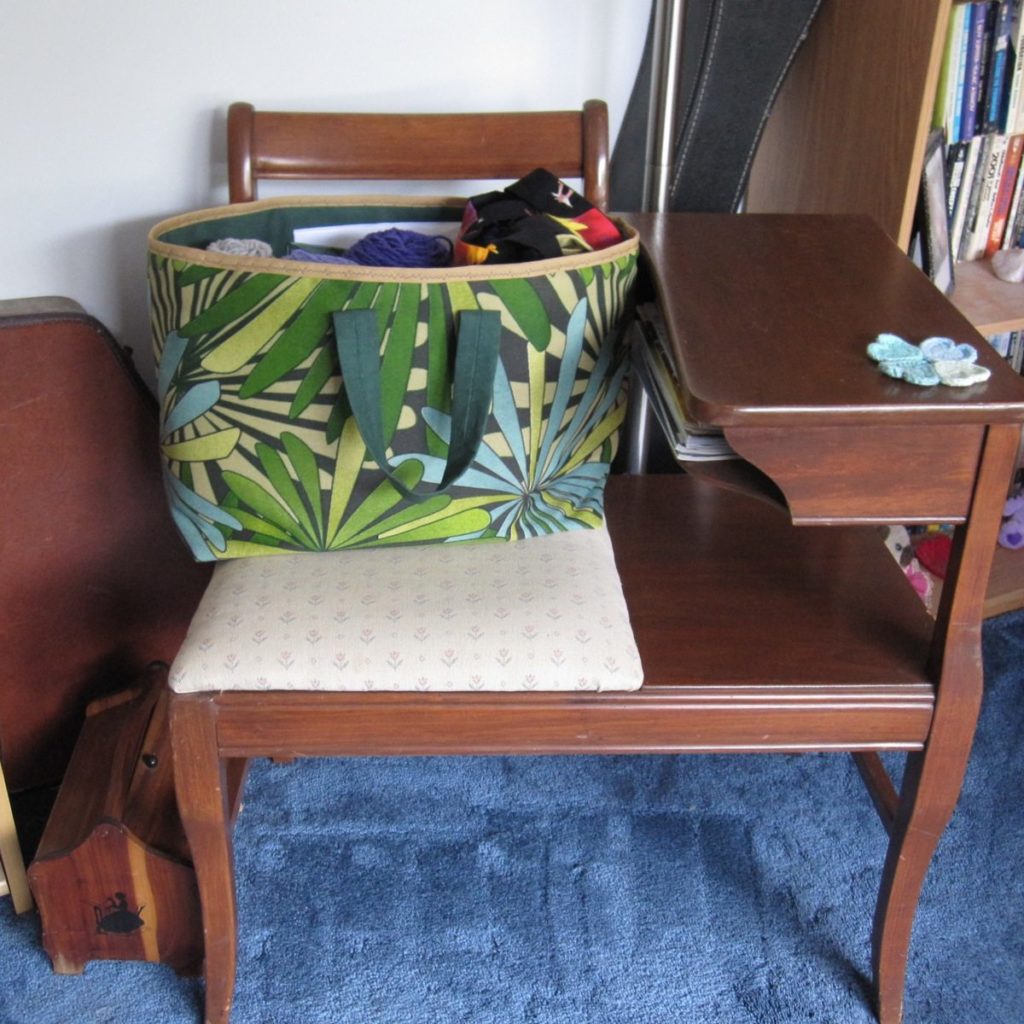
I know I said my fabric basket didn’t come out perfectly. The basic construction is still sound (follow that second link to see the directions), so I thought you might want to know how to use it for a custom size basket.

Here are the measurements you need:
H = height of basket
L = length of long side of basket opening
S = length of short side of basket opening
A = seam allowance for side and base seams
T = top opening turn-down allowance

In the basket I just made, these numbers were 12, 16, 8, 1/2, and 0, all in inches.

There will be vertical seams down the center of each short side. If you want to make a cube, H, L, and S will all be the same number. A and T will often also be the same number; for me, A is almost always 1/2″. If you want to have a lined basket where the outer fabric folds over the inner fabric and then under itself to give a clean edge, you’ll need two different values of T: 0 for the lining pieces and at least 1″ for the outer pieces (that would give a half-inch band around the inside top, with a half-inch turn-under of the raw edge); if I were doing this I would probably want a T of 2″ so a half-inch first fold would leave a 1.5 inch second fold, which is to say an inch and a half wide band of outer fabric around the top of the inside. At least for a large basket I would want a wide band like that.

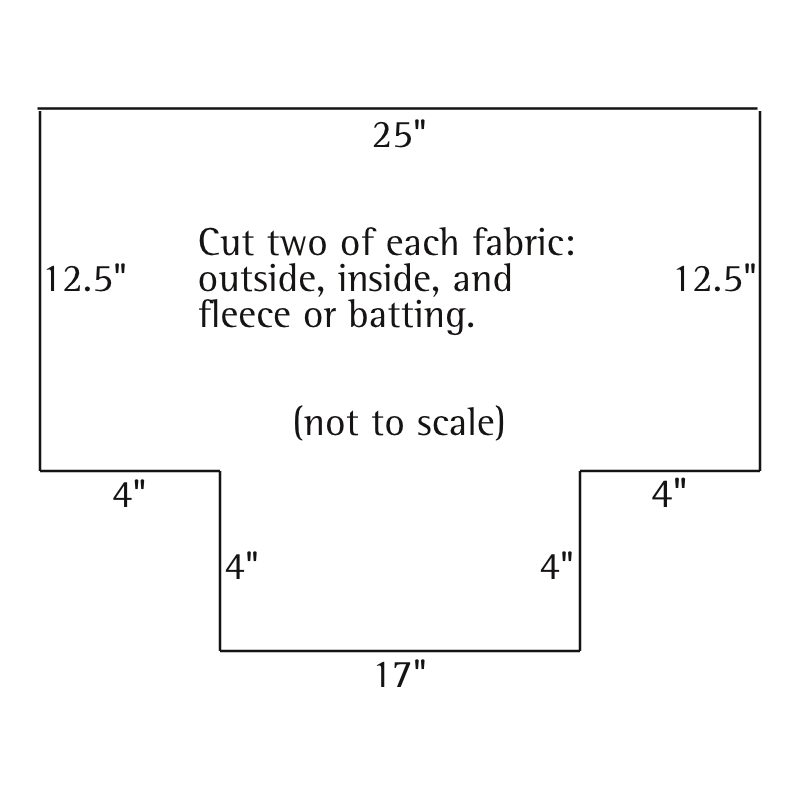
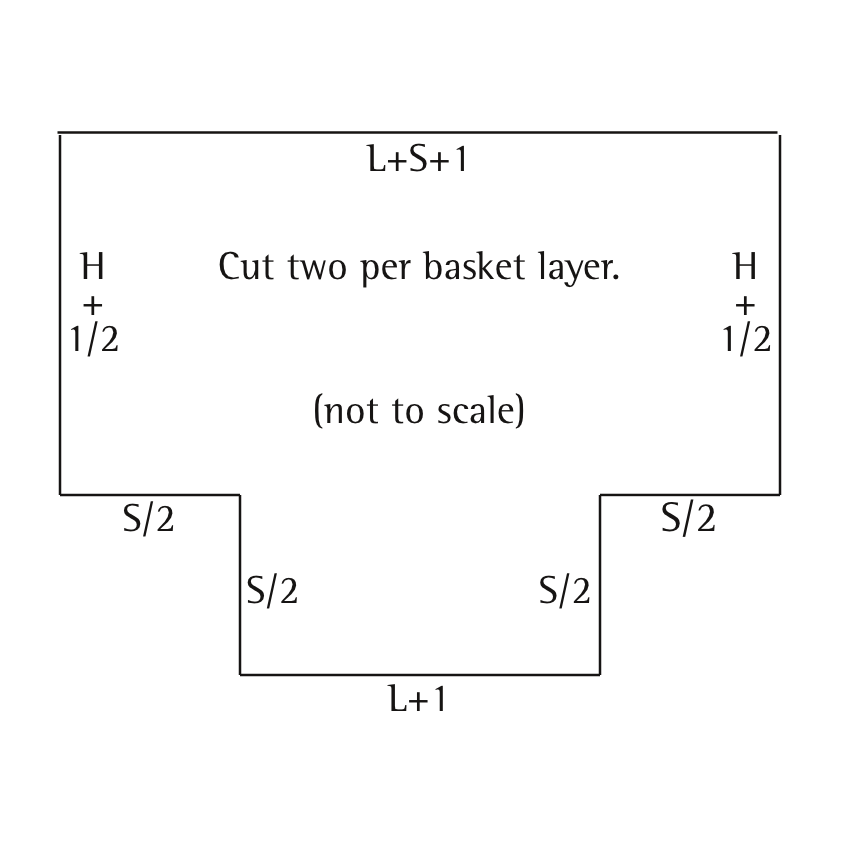
As before, the rectangles below are not to scale. The cut-outs are larger than they would typically be, for ease of placing readable measurements on them.

Diagram: top: L + S + 2A; side: H + A + T; cut-out edges: S/2; base: L + 2A

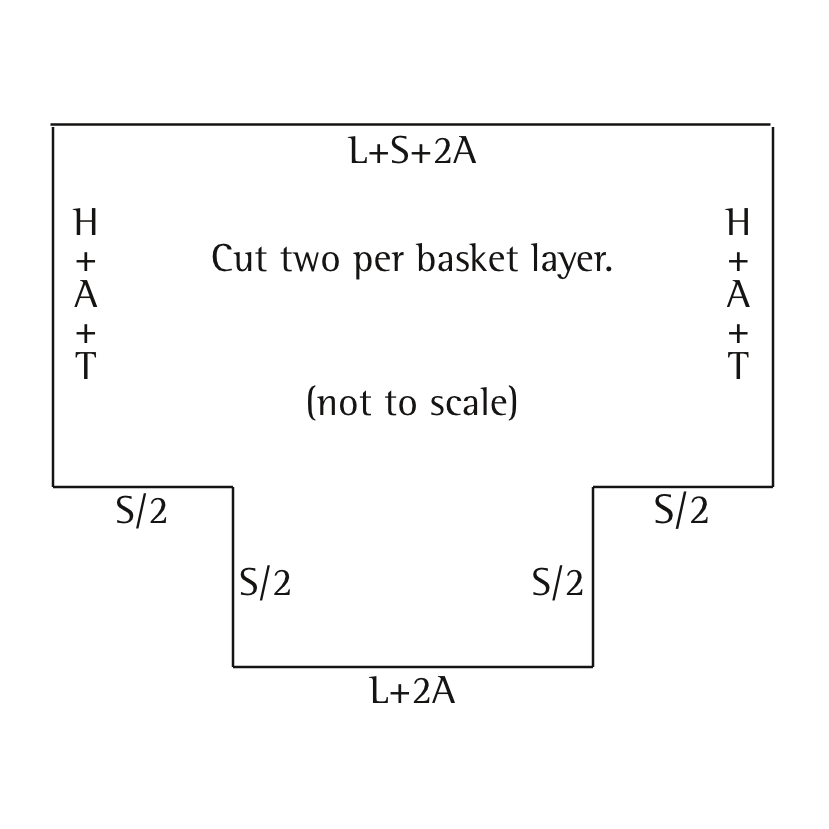
Example: no turn-down at top because basket will be bound around top, seam allowance elsewhere is 1/2″.

Diagram: top: L + S + 1; side: H + 1/2; cut-out edges: S/2; base: L + 1

If this were a file box, L = 15″, S = 12″, H = 10″, we’d have the following.

Diagram: top: 28

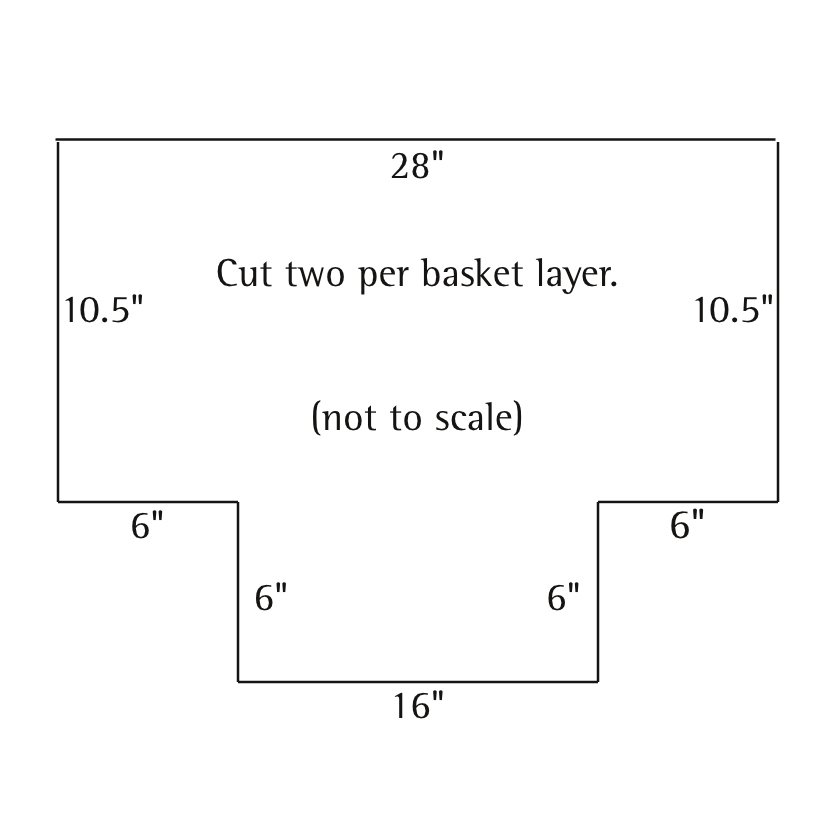
It would be easy to modify this so there is a 1″ band of outside fabric at the top of the lining, with a 1/2″ turn-under at the bottom of the band. The lining would be cut by measurements of Example 1. The outer fabric would be cut almost the same, but the upper part of the side would be H + 2. For the file box, that makes it 12″.

I hope these are useful diagrams. Let me know if you make something with them!

Sewing the basket: what went right and wrong

I was all set to create a tutorial (in two parts, even) for the fabric basket I showed you last time, but when it had a few issues I decided that would be overselling it. Let me tell you basically what I did, and where it went well and poorly.

Body of Basket:

I made a paper pattern for the main basket pieces (diagram below) and cut two of it from each of three fabrics: outer basket fabric (patterned outdoor home dec fabric), basket lining fabric (solid cotton duck), and thin fleece. Later I discovered the pattern was five inches too wide – there was a 17″ measurement, and I thought good, that’s twice as wide as a sheet of paper. Well, you can probably guess what I did, and if not there’s a photo below.

fabric basket pattern diagram fabric basket erroneous paper pattern

The pattern was good but I have to figure out how to make linings fit well inside thick bags. The bottom interior is a bit scrunched to fit, even though I sewed the outer layer with 1/8″ smaller seam allowance than the inner layer. I also ended up trimming about 1/4″ off the top of the lining when I nested the layers and sewed them together. If I were doing it again I would also pony up for fusible batting and attach it to the outer layer (probably stopping 1/2″ in from the non-top edges) to eliminate the possibility that some of my issues are due to the loose fleece lining being in the wrong place.

Continue reading Sewing the basket: what went right and wrong

Fabric craft basket

My mystery afghan and blackwork map have a new home!

side view of the fabric basket

I’ve mentioned that I was thinking I’d buy a large basket for this purpose. The local co-ops stock fair trade woven baskets, and some are quite large. They are lovely but I couldn’t seem to settle on one – none of them had colors or patterns I was in love with. Meanwhile, I realized that sewing a lining for the basket, as I planned to do to prevent snags and add pockets, would be nearly as much work as simply sewing a basket.

I bought fabric before designing the pattern and so ended up with a yard and a half of each of two home dec fabrics: a patterned “outdoor” fabric and a solid cotton duck. I could have gotten by with 3/4 of a yard of each, as it turns out, so I’ll have to find another use for the rest.

top view of full fabric basket top view of mostly empty fabric basket

Staring at the yardstick led me to write down a pattern for a 9″x18″x12″ basket, but I started thinking that was maybe excessive, and calculated out a smaller one as well. To check, I made a paper “basket” that was 8.5″ by 16″ by 11″, with no bottom, and decided that was quite large enough, so I went with the 8″x16″x12″ version of my design (it doesn’t sound like a major change, but the difference is a shoebox plus a kleenex box worth of space). For sturdiness, the basket has an inner layer of thin fleece from my stash – all these sorts of projects seem to use batting for interfacing, so that’s what I was going for.

The basket is twice as big in one direction than the other partially so it will sit alongside pieces of furniture with a lower profile, but also so that it could have some large flat pockets on the inside, for printed-out patterns. I knew I wanted a large flat pocket for the afghan pattern and a large slightly non-flat pocket for the blackwork pattern and hooped map-in-progress. I decided to add a pocket for my crochet hook, and as long as I was at it, some shorter pockets for this and that (embroidery floss, stitch markers, etc). The tall thin hook pocket is flat and the shorter, squarer pockets are not. The shorter pockets also snap to the basket lining at the top, to keep those little odds and ends in place.

flat pockets on the interior of the fabric basket darted pockets on the interior of the fabric basket

So I wouldn’t have to deal with turning down the edges at the top and capturing the fleece and what have you, I bound the top of the basket with bias tape (more extra wide double fold, baby).

The sewing was time consuming (mostly because of pocket construction) and not everything is as flawless as I might hope, but I’ll show you how I made it later in the week. Flaws and all, I am quite pleased with how this came out, and I expect it will come in handy many times in the future. It would be a nice bag for car travel as well as projects.

Now I’m eyeing my threadbare purse…