Now I know where ecru comes from

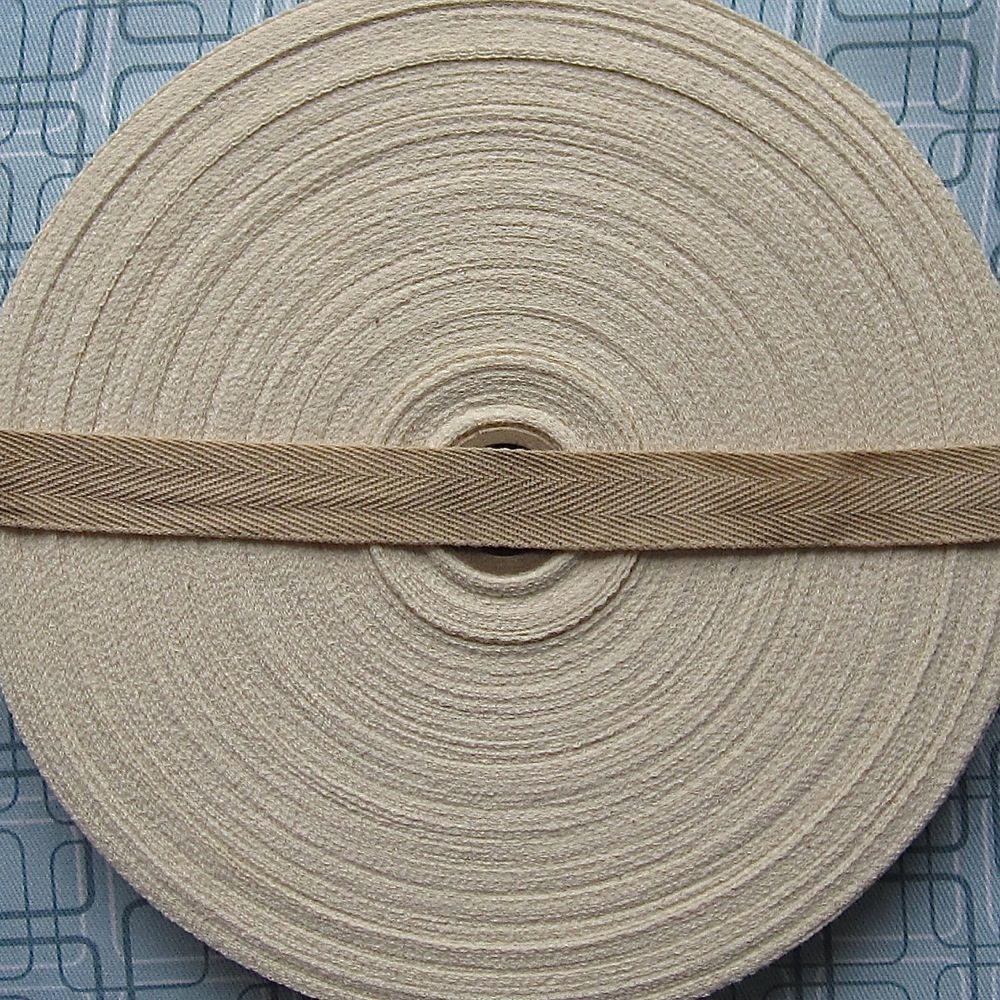
My purse is dying and I want the next one to be hands-free, but I haven’t come up with a practical hip bag yet. That leaves a cross-body bag, but those straps tend to cut into me in unappealing ways. Well, a piece of luggage led me to realize I could mitigate that problem with a really wide strap – two and a half inches or so. But how to have such a wide strap? Webbing that wide is hard to come by, especially in natural fibers, and I wanted to be able to dye it to match some fabric I picked up while shopping for my project bag materials.

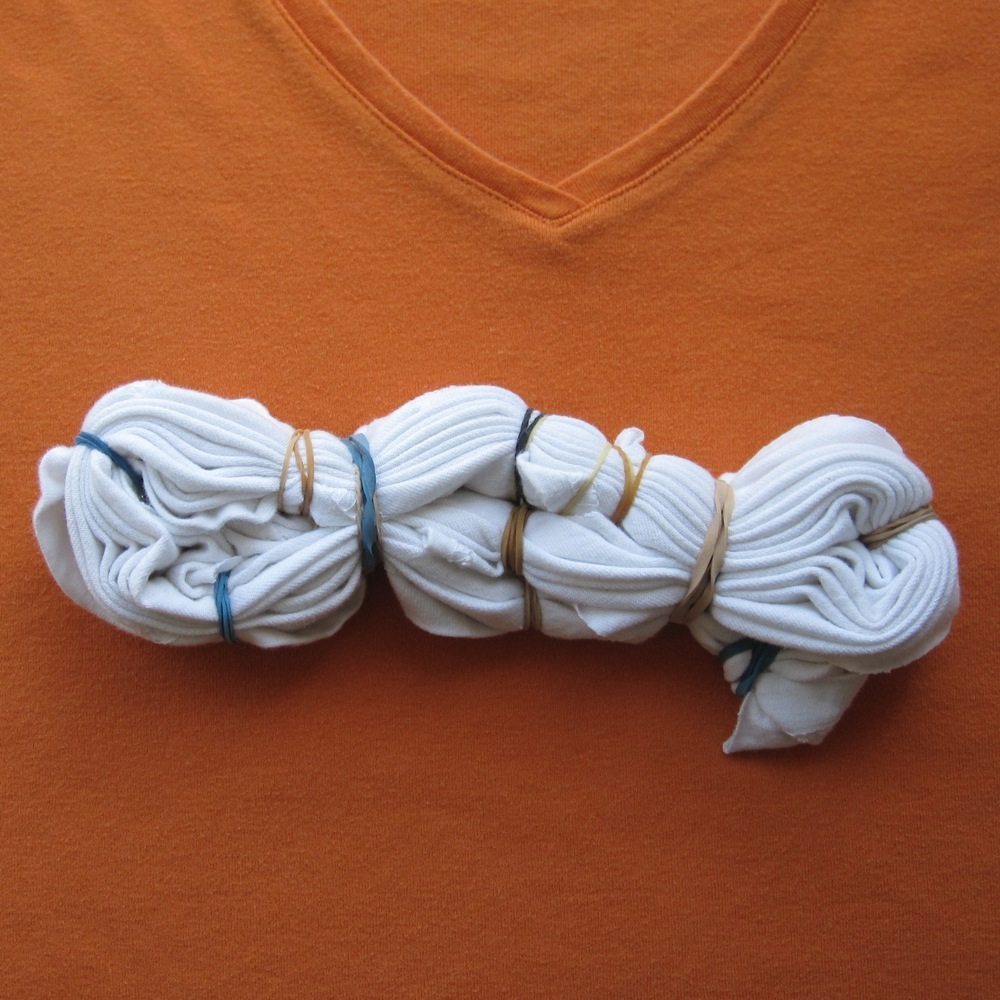
Well, I remembered the wide, flat braids taught on T.J. Potter’s site and found a source for cotton twill tape. I made some test braids with paper strips to check the result of braiding with various widths and ordered some 5/8″ tape. Since the purse probably won’t be laundered, I thought I could stain the strap with tea or coffee. Well, I did that, and here’s the result:

stained twill tape across original natural twill tape stained twill tape against fabric

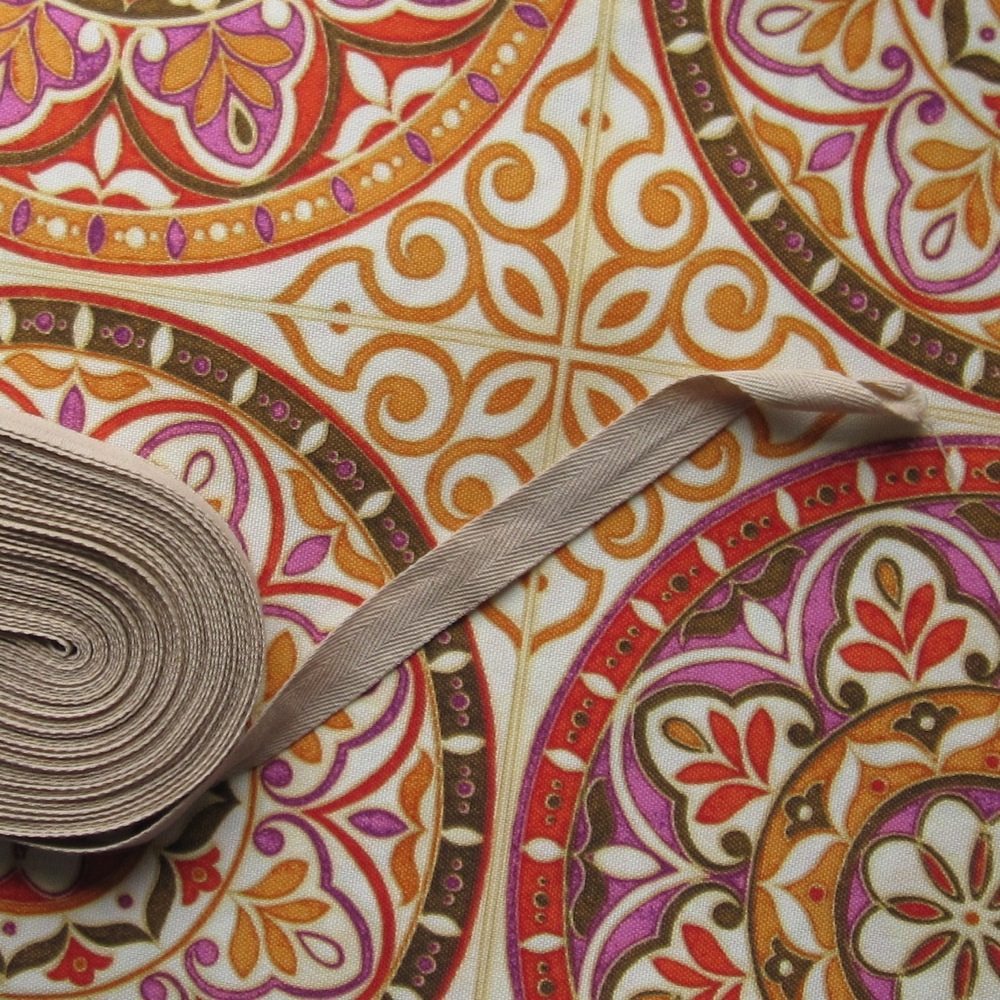
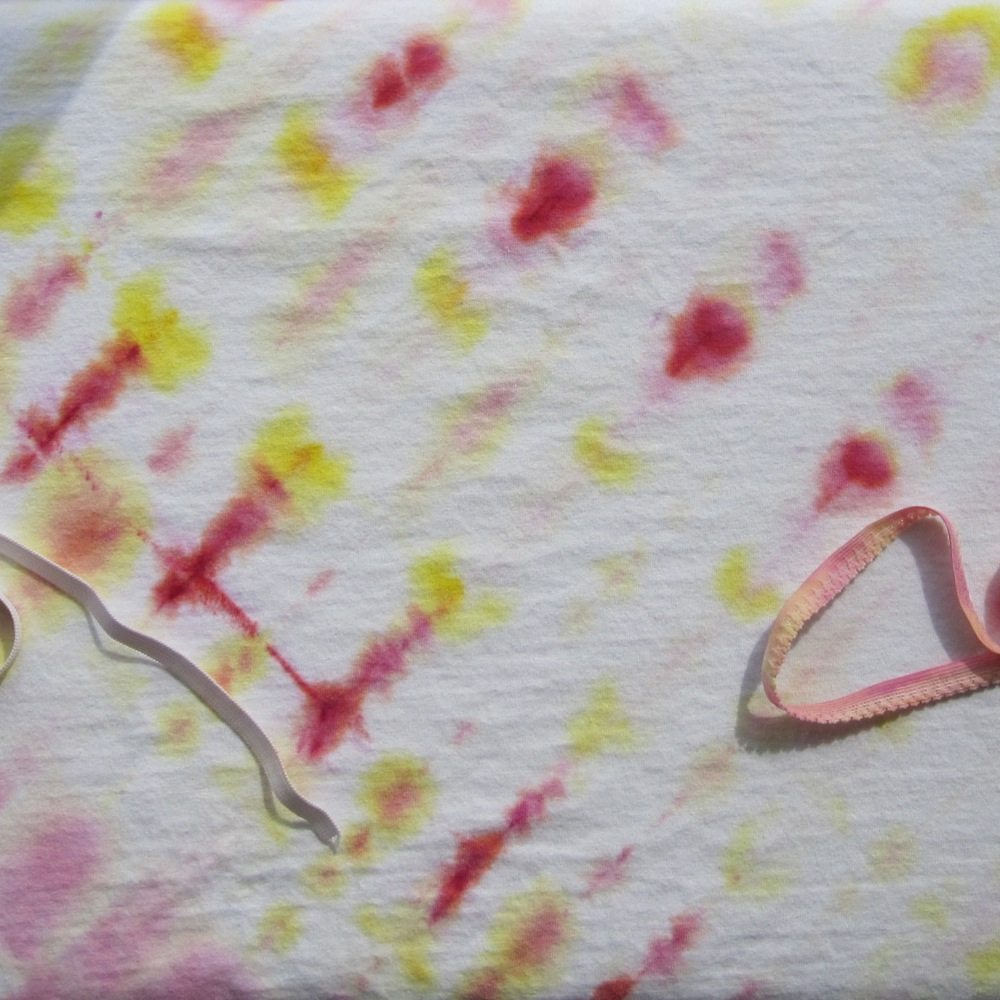
(That is the stained twill tape in both photos – my white balance is clearly not consistent from photo to photo.) A very effective stain, but not at all an appropriate color. And o ecru, thou art perhaps the least flattering color for my skin tone. [Incidentally, I did this by putting the morning’s used coffee grounds and four Lipton tea bags into a big pot of water with the tape, bringing it to a boil on the stove, and then shutting off the heat and letting it sit until it was cool. I may have let it simmer a little while, but not long.]

So then it was time to bring in the RIT. Dark brown and lemon yellow, because that’s what I had. Close, but no banana.

twill tape after one round of dyeing

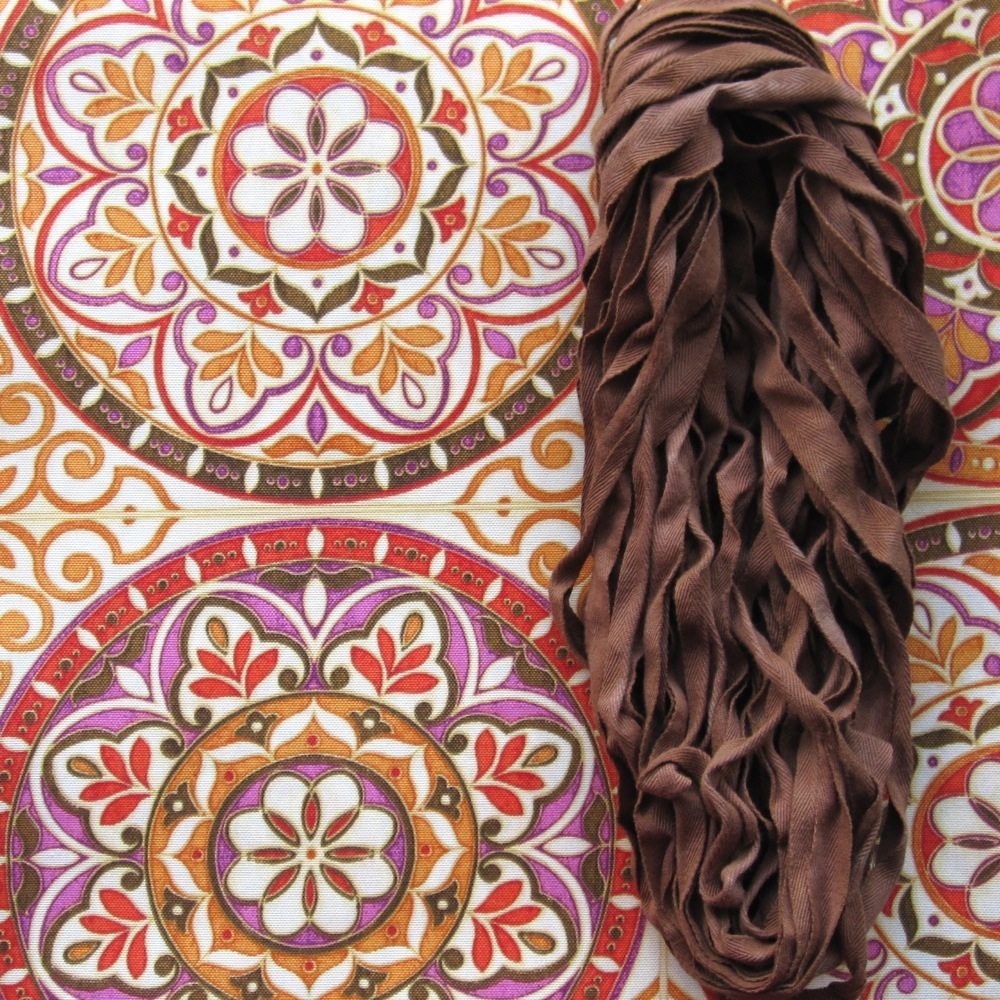
Looking at it I thought I should probably add more yellow, but a little voice kept nagging me that it needed green. I thought that was maybe crazy and called on my artist in residence for a second opinion. He seconded the green idea, provided it was a dark green. Fortunately I had dark green RIT on the shelf already and could do another round of coloring.

twill tape after two rounds of dyeing

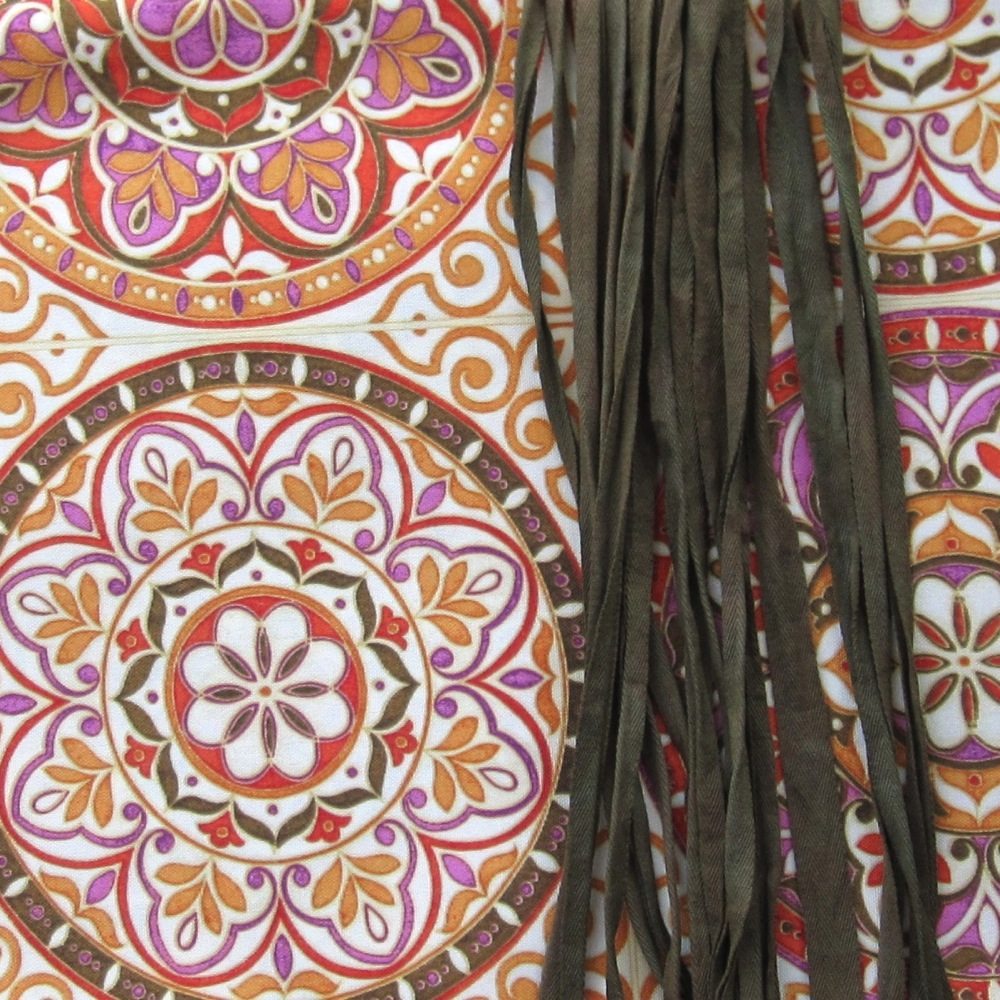
So much better! Now to iron and braid it…

Reviving, part 2

In part 1, I showed you the result of combining two of my three worn shirts into one reverse-appliqued shirt. There was one left, and I planned to combine it with a secondhand white shirt and overdye again, but I didn’t want to completely repeat myself. Ultimately I had this:

front of finished bird shirt back of finished bird shirt

This took longer both because there were more steps and because I didn’t buckle down with it like I did with the green shirt. The white shirt was a men’s XL and huge, so before beginning I cut a panel out of the front so that I would leave a usable amount of the material in its original state. I thought the birds would be more interesting if they weren’t solid red on a red-orange background, so I tried out a Tulip tie-dyeing kit. After accordion folding and rubber-banding the fabric, and then folding it in thirds and rubber-banding again, I put it in a plastic bag, sprinkled dye powder on it, and wet it thoroughly with a spray bottle. This was to preserve the leftover dye powder for later use, as the box warns it loses potency fast, without making the risky maneuver of putting it in a cup and mixing it separately. I could see myself getting dye powder all over the counters. I let it sit for about seven hours and then rinsed it and washed it. Good results! [Incidentally, I tried dyeing elastic as well, and you can see the mixed results there. The one that dyed well was Dritz stretch lace elastic, and the one that barely dyed at all was Stretchrite knit elastic.]

bundled up tie-dyed

I’d wished for a dark red, like RIT’s wine color, but this would have to do. At least it came out well!

After a time I decided to dye it again, bundled it up in a different direction (and with a scrunch rather than accordion folding), folded it in half, rubber banded it three times and threw it in a dilute bath of RIT dark brown. That made it come out even better. I pinned the dyed panel inside the orange shirt, on which I had drawn freehand bird shapes. As with the previous shirt I sewed with higher thread tension and lower presser foot pressure, just outside the drawn lines. Since there was really no obvious color choice for thread, I used yellow, thinking this might help the birds really pop once the whole shirt was overdyed. After stitching, once again, I very carefully cut out the birds.

birds sewn and trimmed

I wanted to do something to the back of the shirt, but decided after trying it on at this point that birds all the way around would be too much. Instead I raised my thread tension a bunch and sewed with a long stitch along a line centered on the back of the shirt at about the level of the tops of the birds’ heads. That gathered the fabric nicely, and then I pinned a length of ribbon along the line on the inside and stitched the fabric to it with a short, narrow zigzag.

Then came a red dye bath, which I did not pay much attention to, and ended up with a very splotchy shirt – almost tie-dyed.

blotchy bird shirt
This is why the RIT bottle says “STIR CONSTANTLY.”

It really wasn’t my cup of tea, especially the strange shade of pink the birds had turned, so I went one more round to get the result at the top of the post. This time it was in the washing machine instead of a bucket, and was a dilute bath of red, orange, and brown that I left the shirt in for a good hour. There was some relief when I pulled it from the wash afterward, though it was unfortunate how much the variegation on the birds had disappeared.

Overdyeing like this, incidentally, is something I learned from reading about graphic design. When choosing a color scheme, for a website for example, one way you can make sure the colors coordinate is to set out your palette and then add a semi-transparent layer of a single color over all of them. The resulting blended colors have more in common with each other. The first time I wore the green shirt a longtime quilter, sensitive to color, commented on how well the colors went together, which told me the technique did indeed translate successfully to dye!

Reviving

I live in t-shirts all year round, the nicer kind, typically with v-necks or scoop necks. They last me a long time, but sometimes I lose the desire to wear them well before they are actually worn out. When that happens I have two choices: give them away, or try to alter them somehow. After talking to an alterations student who happened also to be a Sew-Op teacher, I decided to remake the most recent batch: two shirts that were faded and floppy, and one that was too high in the neck and hem and had a tiny bleach spot. Here’s the first result.

leaves dyed

I combined the high-necked shirt with one of the floppy ones to try out reverse applique a la Hope Studios, though I did not plan to retain both full t-shirts. First I put them both on and lined them up so any parts that have stretched with time to accommodate my shape matched. Then I freehanded some leaf shapes at the neckline and pinned there. I used a narrow zigzag to sew around the outside of the leaves, with the thread tension turned up and the presser foot tension turned down in an effort to avoid stretching out the fabric. I cut away the excess fabric of the inner t-shirt, leaving the leaves connected and a decent amount at the bottom so I could smooth it out and avoid it being obvious from the outside that there was an extra layer ending at a random spot. Only after that did I clip out the insides of the leaves on the top layer, using small pointed-tip scissors. My advice to anyone who wants to do this is: go slowly. If you nick the bottom layer there’s not much you can do about it.

shirts pinned leaves stitched

The top layer had a pinhole just above the hem stitching at center front, and to secure that as well as help with some of the floppy feeling, I turned the hem to the inside and stitched it up with a wider zigzag. All the stitching was in a thread that approximately matched the inner layer, though far from exact. I knew it didn’t matter too much because of the next step: overdying the whole shebang to harmonize the colors (which does not affect the thread). I gave them a 15 minute bath in a somewhat weak solution of royal blue RIT. I think that step might have been enough by itself to save the green shirt, because I love the finished color (which is richer than the photo at top makes it look).

Before I began the blog, referenced in my post about stitching with a twin needle but with mysteriously disappeared photos, I shortened several shirts, and bleached and re-dyed some others. I was using benzoyl peroxide on my face at the time and it was seemingly never possible to avoid damage to my clothing. I was pleased to realize that was almost three years ago and three of the four shortened shirts are still in rotation; the redyed shirts, however, are all retired. I don’t think I would bleach if I were doing that again. It is too hard on the fabric.

I’ll show you the results of the second project soon – it took a lot longer than anticipated!